
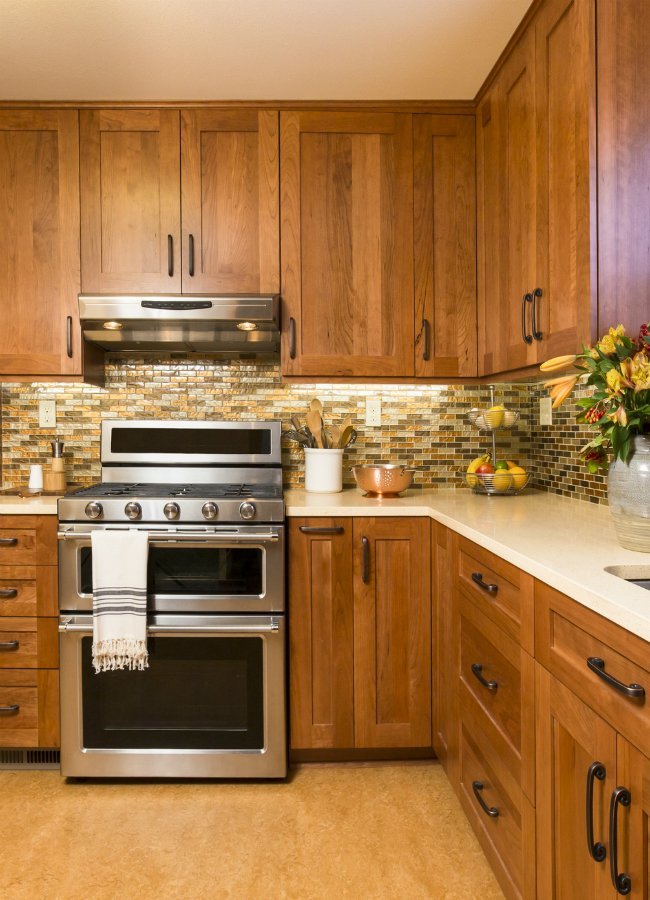
Gel stain occupies the useful middle ground between traditional penetrating stain and paint. It can deepen color, soften mismatched wood tones, and refresh tired furniture without completely hiding the grain. Its pudding-like consistency also stays where it is placed, making it especially convenient for cabinet frames, doors, chair legs, and other vertical surfaces.
That does not make gel stain a magic makeover in a can. Successful results still depend on cleaning, surface preparation, thin application, and enough drying time. Rush any of those steps and your sophisticated walnut finish may resemble a sticky chocolate fingerprint collection. This guide explains what gel stain is, when to use it, and how to apply it correctly.
What Is Gel Stain?
Gel stain is a pigment-rich coloring product thickened so that it flows much less than conventional liquid wood stain. Most familiar versions are oil-based, although formulas vary by manufacturer. The added body helps the stain remain near the surface instead of being absorbed as deeply or as quickly as a thin penetrating stain.
Because absorption is more controlled, gel stain can produce consistent color on pine, birch, cherry, and maplewoods known for becoming blotchy under ordinary stain. It still allows grain and texture to remain visible, but a dark or heavily applied coat can obscure some fine grain. Think of it as a translucent colored layer, not brown paint wearing a fake mustache.
Gel Stain vs. Traditional Stain vs. Paint
| Product | How It Behaves | Best Use | Grain Visibility |
|---|---|---|---|
| Gel stain | Colors mainly at or near the surface | Blotch-prone wood, vertical work, color changes | Moderate to high |
| Penetrating stain | Soaks more deeply into porous wood | Bare wood with attractive, even grain | High |
| Paint | Creates an opaque surface film | Major color changes and concealed imperfections | Low or none |
When Should You Use Gel Stain?
Blotch-Prone Wood
Pine, maple, birch, alder, and cherry can absorb liquid stain unevenly. Dense areas accept little color while softer or more porous areas become dramatically darker. Gel stain’s controlled penetration reduces this contrast and can create a more uniform appearance. A compatible wood conditioner may provide additional control, but test the complete finishing system first because conditioner can lighten the final color.
Vertical Surfaces
Cabinet face frames, installed doors, paneling, stair parts, and furniture legs are excellent gel stain candidates. The thick formula is less likely to run down a vertical surface before it can be spread and wiped. It is not literally drip-proof, but it is much less interested in racing toward the floor.
Previously Finished Furniture and Cabinets
Some gel stains can be applied over an existing finish when that finish is sound, clean, compatible, and lightly sanded. This makes gel stain useful for turning golden-oak cabinets into a deeper espresso or walnut tone without stripping every surface to bare wood.
However, “no stripping” does not mean “no preparation.” Wax, cooking grease, silicone polish, loose finish, and glossy contamination can prevent adhesion. Gel stain generally works best when changing a lighter surface to a darker color. Turning dark mahogany into pale natural oak is a job for stripping, paint, or a different finishing schedule.
Selected Non-Wood Surfaces
Certain products are labeled for fiberglass, metal, veneer, molded fiberboard, and other manufactured surfaces. Gel stain can simulate wood color or emphasize an embossed grain on a fiberglass or metal door. These surfaces do not absorb stain like raw wood, so the product is usually brushed into a thin decorative film rather than flooded on and wiped aggressively. Use only a stain specifically approved for the substrate.
When Gel Stain Is Not the Best Choice
Gel stain is less suitable for intricate carvings, deep cracks, elaborate moldings, and extremely rough live-edge surfaces. Thick pigment can collect in recesses, creating dark patches that are difficult to blend. A small dry brush can remove buildup from ordinary corners, but highly detailed pieces may be easier to finish with a thinner stain, dye, glaze, or spray-applied product.
It also cannot repair peeling veneer, water damage, deep scratches, loose clear coats, or contaminated finishes. Those problems must be corrected first. Avoid using gel stain on floors, cutting boards, food-contact surfaces, or exterior projects unless the label expressly permits that application and specifies a compatible protective finish.
Tools and Materials
- Gel stain approved for the intended surface
- Manufacturer-recommended cleaner or degreaser
- Sandpaper or sanding pads in appropriate grits
- Vacuum and clean lint-free cloths
- Natural-bristle, foam, or synthetic brushes as directed
- Absorbent wiping cloths or staining pads
- Nitrile or other label-recommended chemical-resistant gloves
- Eye protection and suitable respiratory protection when required
- Drop cloths, painter’s tape, and a stirring stick
- A compatible clear protective topcoat
How to Apply Gel Stain Step by Step
1. Read the Product Label
Application times differ substantially among brands and substrates. One product may direct users to wipe the stain after several minutes, while another may require brushing on a thin film. Recoat and topcoat times can range from several hours to several days. The instructions on the can outrank advice from videos, neighbors, and enthusiastic strangers in the hardware-store aisle.
2. Make a Complete Test Sample
Test the stain on scrap from the project or in a hidden area. Include every planned step: cleaning, sanding, conditioner if used, gel stain, a second coat, and the clear finish. A topcoat often makes the color appear richer or darker, so judging the stain before completing the sample can be misleading.
3. Clean Thoroughly
Remove hardware when possible. Wash away dirt, grease, furniture polish, wax, and other residue with a cleaner appropriate for the surface and finish. Kitchen cabinets may require more than one cleaning because airborne grease has a remarkable ability to occupy places nobody invited it. Rinse when the cleaner requires it, and allow the surface to dry completely.
4. Repair and Sand
Repair loose veneer, dents, cracks, and failing finish before staining. Sand bare wood evenly with the grit recommended by the stain manufacturer. Many pigment-based systems call for a final grit around 120 to 180, depending on wood species. Sanding extremely fine can polish dense wood and reduce the stain’s ability to hold color.
On a sound existing finish, lightly scuff-sand until the gloss is uniformly dull. The purpose is to improve adhesion, not excavate the furniture. Sand with the grain where possible, feather damaged edges, and avoid cutting through veneer. Vacuum the surface and remove all sanding residue with a clean, compatible method.
5. StirDo Not Automatically Shake
Pigment settles at the bottom of the container, so stir until the color and consistency are uniform. Continue stirring periodically while working. Shaking may introduce bubbles, and thinning can change coverage and drying performance. Do not thin the product unless its manufacturer specifically allows it.
6. Work in Manageable Sections
Treat a drawer front, cabinet door, table section, or side panel as one working area. Apply the stain with the recommended brush, pad, or cloth, keeping a wet edge. Working across an entire cabinet bank at once is a reliable way to discover that stain has its own schedule and does not care about yours.
7. Apply a Thin, Controlled Coat
For raw wood, spread the gel evenly and work it into the surface. After the label’s specified dwell time, remove excess stain with clean, absorbent cloths, wiping in the direction of the grain. Turn or replace the cloth frequently. A saturated rag moves stain around instead of removing it.
On sealed, fiberglass, or metal surfaces, follow the substrate-specific method. These projects often require a thin brushed coat and long finishing strokes that imitate grain. If using a wood-graining tool, practice first; an overly regular pattern looks less like oak and more like it was printed by an office machine.
8. Watch Corners and Profiles
Inspect edges, joints, moldings, and panel corners before leaving each section. Use a clean, dry brush to pull excess stain from recesses and feather lap marks. Deposits that look slightly dark when wet can become surprisingly dramatic after drying and topcoating.
9. Let the Stain Dry Completely
Gel stain dries by curing and solvent evaporation, not by optimism. Thin coats may be ready for another coat within the time stated on the label, but cold conditions, high humidity, poor airflow, nonporous surfaces, and heavy application can extend drying considerably. The stain should not feel tacky or cool before recoating or sealing.
10. Add Color and Protection
If the color is too light, apply another thin coat after the required interval. Do not sand between stain coats unless the manufacturer instructs you to correct a defect that way; sanding can remove color unevenly. Once the final coat is fully dry, apply a compatible polyurethane, varnish, lacquer, or other approved topcoat. Stain supplies color, while the clear finish supplies most of the resistance to moisture, abrasion, and household wear.
Common Gel Stain Problems and Solutions
The Surface Is Still Sticky
A tacky surface usually indicates excess product, inadequate wiping, cool or humid conditions, poor airflow, incompatibility, or insufficient drying time. Do not trap wet stain beneath a topcoat. Give it more time under label-approved conditions. If it remains wet for days, consult the manufacturer; the surface may need to be cleaned back or stripped.
The Color Looks Streaky
Streaks often come from working too large an area, using a saturated wiping cloth, failing to maintain a wet edge, or leaving different amounts of stain on adjacent sections. Rewetting and blending may work while the stain is still fresh. Once it cures, correction usually requires careful scuffing and another controlled coat.
Corners Are Too Dark
Gel stain collects where flat surfaces meet. Remove buildup immediately with a clean detail brush or cloth wrapped around a suitable tool. During later coats, load the applicator lightly near profiles and work outward from corners.
The Topcoat Pulls Up the Color
The stain may not have dried fully, or the topcoat application may be too aggressive. Allow additional curing time and apply the first clear coat gently with minimal repeated brushing. Confirm compatibility before combining oil- and water-based products, especially when products from different manufacturers are involved.
Safety and Cleanup
Ventilate the work area during application and drying, keep stain away from flames and ignition sources, and wear the protective equipment specified on the label and safety data sheet. Keep children and pets away from both wet finishes and open containers.
Oil-soaked cloths, sanding dust, and applicators can heat up and ignite if piled together. Follow the product label and local fire regulations exactly. A common label instruction is to place contaminated materials immediately in a sealed, water-filled metal container until they can be disposed of properly. Never leave used staining rags crumpled in a trash can, cardboard box, or garage corner.
Conclusion
Gel stain is an excellent choice when a project needs richer, more uniform color without the completely opaque appearance of paint. It performs especially well on vertical surfaces, blotch-prone woods, cabinets, furniture, and certain manufactured doors. Its forgiving reputation, however, still comes with four nonnegotiable rules: clean carefully, test the complete system, apply thin coats, and respect the drying time.
Hands-On Lessons Gel Stain Projects Tend to Teach
The first practical lesson is that preparation takes longer than stainingand that is perfectly normal. On a typical cabinet makeover, most of the labor goes into labeling doors, removing hardware, cleaning greasy edges, sanding profiles, and vacuuming dust. The actual stain application may feel almost suspiciously quick. Skipping the slow preparation phase simply moves that time into the much less enjoyable category called “repairing the finish.”
A representative oak cabinet door offers a useful example. After cleaning and scuff-sanding, one thin walnut-colored coat may soften the original orange tone while leaving the grain highly visible. A second coat can create a deeper, more contemporary brown, but it also reduces grain contrast. This is why a test door or the back of a drawer front matters. Color charts show a general neighborhood; the existing finish, wood tone, lighting, and topcoat determine the actual address.
Another lesson concerns wiping pressure. Two people can use the same gel stain on the same wood and produce noticeably different colors. Firm wiping removes more pigment and creates a transparent result. Light wiping leaves more color at the surface. Consistency matters more than muscle. Using the same applicator, timing each section, and finishing with long strokes in the grain direction helps adjacent doors match.
Large tabletops reveal another challenge: overlap marks. Dividing a tabletop into arbitrary squares can leave visible boundaries. It is better to work from one natural edge to another, moving along the grain and maintaining a wet edge. If the surface is too large to complete comfortably within the product’s working time, an additional helper may be more valuable than another brush.
Detailed furniture teaches restraint. A beginner may load a brush generously to reach every bead, groove, and corner, then discover dark halos after the stain dries. Experienced finishers use less product around profiles and keep a small dry brush nearby to unload crevices. They also inspect the work from several angles under bright side lighting. Looking straight at a wet surface can hide streaks that become obvious when light skims across it.
Drying time provides perhaps the most memorable lesson. A cabinet door may feel dry on a flat panel while remaining soft along an edge where stain accumulated. Closing or stacking doors too soon can cause sticking, imprints, and damaged corners. Leaving pieces separated with airflow around them is safer. If the label provides a range, cool or humid conditions call for the longer endand sometimes more.
Finally, successful gel staining is not about forcing a perfect result in one heavy coat. Thin layers provide more control, cure more reliably, and are easier to adjust. Once the clear topcoat is applied, the color gains depth and the grain becomes more pronounced. That final transformation explains why experienced refinishers judge a sample only after completing the entire finish schedule. Gel stain rewards patience, and unlike some furniture, it rarely needs a motivational speech.













