
Winter has a sneaky way of turning five minutes outdoors into an expedition involving three coats, one missing glove, and immediate regret. Fortunately, cold weather is also an excellent excuse to retreat to the workshop and turn ordinary boards into useful furniture, handmade gifts, and clever storage.
The best indoor woodworking projects are compact enough for a basement, garage, or small shop, yet interesting enough to teach real skills. A serving tray develops accurate measuring. A bookcase introduces square case construction. A side table adds joinery and finishing practice. Even a humble set of coasters can teach you that sanding has more stages than a dramatic television breakup.
The following 31 winter woodworking projects include approachable builds for beginners, practical home upgrades, scrap-wood ideas, and more ambitious furniture for experienced DIYers. Choose one that matches your tools and confidence level, then let the sawdust fallpreferably into a dust collector rather than the laundry room.
Prepare Your Indoor Woodworking Space
“Indoor woodworking” should mean working in a properly arranged shop, not running a circular saw beside the couch while someone watches television. Before cutting, create a stable work surface, provide bright task lighting, inspect every tool, and keep cords away from walking paths.
Wear safety glasses and suitable hearing protection when operating power tools. Sanding and sawing can create fine airborne particles, so connect tools to dust extraction when possible and use respiratory protection appropriate for the task. Woodworking safety guidance consistently emphasizes protecting the eyes, ears, and lungs, while controlling dust at its source rather than merely sweeping it around afterward.
Finishing requires equal attention. Many stains, paints, adhesives, and clear coats release fumes, so read product labels and increase ventilation. When practical, apply strong-smelling finishes in a separate ventilated area and allow the piece to dry before bringing it into a living space. The U.S. Environmental Protection Agency recommends ventilation and careful adherence to label precautions when using products that emit volatile organic compounds.
Beginners do not need a hangar-sized shop or every machine in the catalog. A tape measure, combination square, drill-driver, clamps, sander, and a suitable saw can handle many small builds. Starting with straightforward projects helps develop tool control, an understanding of wood movement, and the wonderfully suspicious habit of checking whether an assembly is square for the fourth time.
Small Woodworking Projects and Handmade Gifts
-
1. Scrap-Wood Coaster Set
Turn hardwood offcuts into matching drink coasters. Cut equal squares, soften the edges with sandpaper or a round-over bit, and add cork beneath each piece. Use contrasting species to create stripes, geometric patterns, or a miniature end-grain design that looks far more expensive than the leftovers from which it was born.
-
2. Wooden Serving Tray
A serving tray is a manageable introduction to building a shallow box. Join four narrow sides around a plywood or solid-wood bottom, then add handles. It can carry breakfast, coffee, snacks, or the collection of remote controls that mysteriously reproduces whenever nobody is watching.
-
3. Cookbook or Tablet Stand
Build an angled stand with a ledge that supports a cookbook, tablet, or sheet music. A hinged rear support makes it foldable, while a fixed triangular brace simplifies construction. Choose a washable finish if the stand will live near sizzling pans and enthusiastic tomato sauce.
-
4. Hardwood Cutting Board
A cutting board teaches accurate glue-ups, flattening, sanding, and edge shaping. Arrange hardwood strips in a pleasing sequence and clamp them on a flat surface. After shaping, apply a finish specifically labeled for food-contact items and follow its curing instructions.
-
5. Tea-Light Candle Holders
Drill shallow recesses into chunky hardwood blocks to hold metal-cupped tea lights. Vary the block heights for a modern centerpiece, but size the recesses carefully and keep flame away from exposed wood. Battery-operated candles provide the same cozy glow with considerably less excitement for the smoke detector.
-
6. Simple Picture Frames
Picture frames are excellent practice for cutting clean 45-degree miters. Build a single frame for a favorite photo or create a coordinated group from reclaimed trim. Reinforce the corners with splines, brads, or biscuits depending on your tools and desired style.
-
7. Wooden Key Rack
Mount hooks or vintage knobs on a finished board to create an entryway key rack. Add a narrow shelf for sunglasses and mail. The project can be completed with basic tools, yet it may finally end the daily household tradition known as “Has anyone seen my keys?”
-
8. Desktop Organizer
Combine small compartments for pens, notebooks, charging cables, and business cards. Use thin plywood dividers or route shallow pockets into a solid block. Designing the organizer around your actual belongings produces a cleaner desk than buying another generic plastic container and hoping for emotional compatibility.
-
9. Passive Smartphone Amplifier
A wooden smartphone amplifier uses a carefully shaped sound channel to direct audio from the phone’s speaker. It requires no wires, batteries, or negotiations with Bluetooth. This compact build is an enjoyable way to practice drilling, routing, laminating, and precise slot sizing.
-
10. Magazine Rack
Make a freestanding rack from two shaped side panels connected by dowels or horizontal rails. A fabric sling can hold magazines, while solid dividers create a more traditional design. Scale it for newspapers, vinyl records, knitting patterns, or the instruction manuals you are emotionally unable to discard.
Indoor Woodworking Projects for Storage and Organization
-
11. Wall-Mounted Mail Organizer
Build a shallow wall box with angled pockets for incoming mail, outgoing envelopes, coupons, and receipts. Add hooks below for keys or dog leashes. Labeling each compartment may not eliminate paper clutter, but it gives the clutter an assigned seat.
-
12. Modular Wall Cubbies
Construct individual plywood cubes that can be mounted separately or grouped into a larger arrangement. Keep every box square and use secure wall fasteners. Modular cubbies work in bedrooms, offices, craft rooms, and entryways because the layout can expand as storage needs change.
-
13. Floating Shelves
Floating shelves deliver storage without visible brackets. A common method uses a wall-mounted cleat concealed inside a hollow shelf. Before building, decide what the shelf must hold; lightweight décor and heavy books have very different opinions about structural engineering.
-
14. Shaker-Style Peg Rail
A peg rail provides tidy storage for coats, hats, baskets, kitchen tools, or craft supplies. Drill evenly spaced holes in a straight board, glue in hardwood pegs, and mount the rail securely to studs or appropriate anchors. Paint it to blend with the wall or finish it naturally for quiet, traditional character.
-
15. Modular Shoe Rack
Create stackable rectangular units sized for the shoes your household actually owns. Open slats improve airflow, while solid shelves are easier to wipe clean. A modular design lets you add another tier when one family member unexpectedly develops a deep artistic commitment to sneakers.
-
16. Rolling Under-Bed Storage Drawers
Low plywood boxes fitted with casters turn unused space beneath a bed into practical storage. Add recessed pulls so nothing catches on bedding. Measure the available heightincluding wheelsbefore construction, because discovering a drawer is one-quarter inch too tall is a remarkably effective character-building exercise.
-
17. Toy Box or Blanket Chest
A sturdy chest can store toys, blankets, games, or seasonal clothing. Use a lid support or soft-close hardware to reduce the risk of the top slamming shut. Interior dividers and a removable tray make the box more useful, while ventilation openings are wise when it will hold children’s belongings.
-
18. Small Bookcase
A compact bookcase develops essential cabinet-building skills: cutting matching sides, spacing shelves, installing a back, and checking for square. Add face trim for a furniture-like appearance. Secure taller units to the wall, particularly in homes with children, pets, or ambitious climbing cats.
-
19. Ladder Bookshelf
A leaning ladder shelf gives a room vertical storage without looking bulky. Shelves generally become deeper toward the floor, creating a balanced profile. Accurate angles are essential, so make a full-size template or test the stance with scrap wood before cutting your final pieces.
-
20. Pegboard Tool Organizer
Frame a pegboard panel with wood strips, leaving space behind it for hooks. Add small shelves and custom holders for drills, clamps, sanding discs, and measuring tools. An organized wall saves workbench space and reduces the time spent searching for the pencil currently located behind your ear.
-
21. Drill and Battery Charging Station
Build a wall-mounted cabinet with hanging slots for cordless drills and shelves for chargers, batteries, and bits. Route power cords neatly and follow charger clearance requirements. Keep the station away from excessive dust, moisture, and flammable finishing supplies.
Furniture Projects for a Productive Winter
-
22. Monitor Riser
A monitor riser elevates a screen while creating storage underneath for a keyboard or notebooks. Build a simple bridge from hardwood or plywood, then add a drawer if you want a challenge. Measure your ideal screen height before cutting rather than asking your neck to adapt afterward.
-
23. Wooden Laptop Stand
Create an angled platform that raises a laptop and leaves space for airflow. A slot-style stand can be cut from two interlocking plywood panels, while a desktop version may include a larger base and cable opening. Sand every contact edge smoothly to avoid scratching the computer.
-
24. Compact Side Table
A small side table is an excellent step from accessories into furniture. Use tapered legs for a midcentury look, square legs for simplicity, or hairpin legs to focus attention on the top. Add a lower shelf for books and make the height compatible with the chair or bed beside it.
-
25. Hairpin-Leg Coffee Table
Pair a solid-wood, laminated, or reclaimed top with metal hairpin legs. Most of the woodworking effort goes into flattening, sanding, and finishing the surface. Position the legs carefully so the table remains stable and so nobody strikes a shin against a fashionable but poorly placed steel rod.
-
26. Indoor Plant Stand
A raised plant stand protects floors and adds height to a favorite houseplant. Build a square frame with crossed supports or a simple platform on tapered legs. Use moisture-resistant glue where appropriate and place a waterproof saucer beneath the pot, because even beautifully joined walnut dislikes surprise irrigation.
-
27. Wooden Planter Box
Construct a decorative outer box sized to hold a removable plant pot rather than filling the wood directly with soil. This makes watering and cleaning easier. Paint the box for a bold accent or use a clear finish to highlight the grain. Indoor-outdoor planter designs are commonly treated as approachable intermediate builds.
-
28. Entryway Bench
An entry bench offers a place to sit while putting on shoes and can provide storage below. Start with a simple rectangular frame and strengthen it with aprons, stretchers, or a plywood box structure. Test the bench carefully before trusting it with enthusiastic guests and winter boots.
-
29. Pet Feeding Station
Build a low platform with circular openings that hold removable food and water bowls. Size the height for the animal rather than for appearance alone, and seal the surface with a durable finish suited to the intended use. Rounded corners make the station friendlier to wagging tails and bare ankles.
-
30. Raised Pet Bed Frame
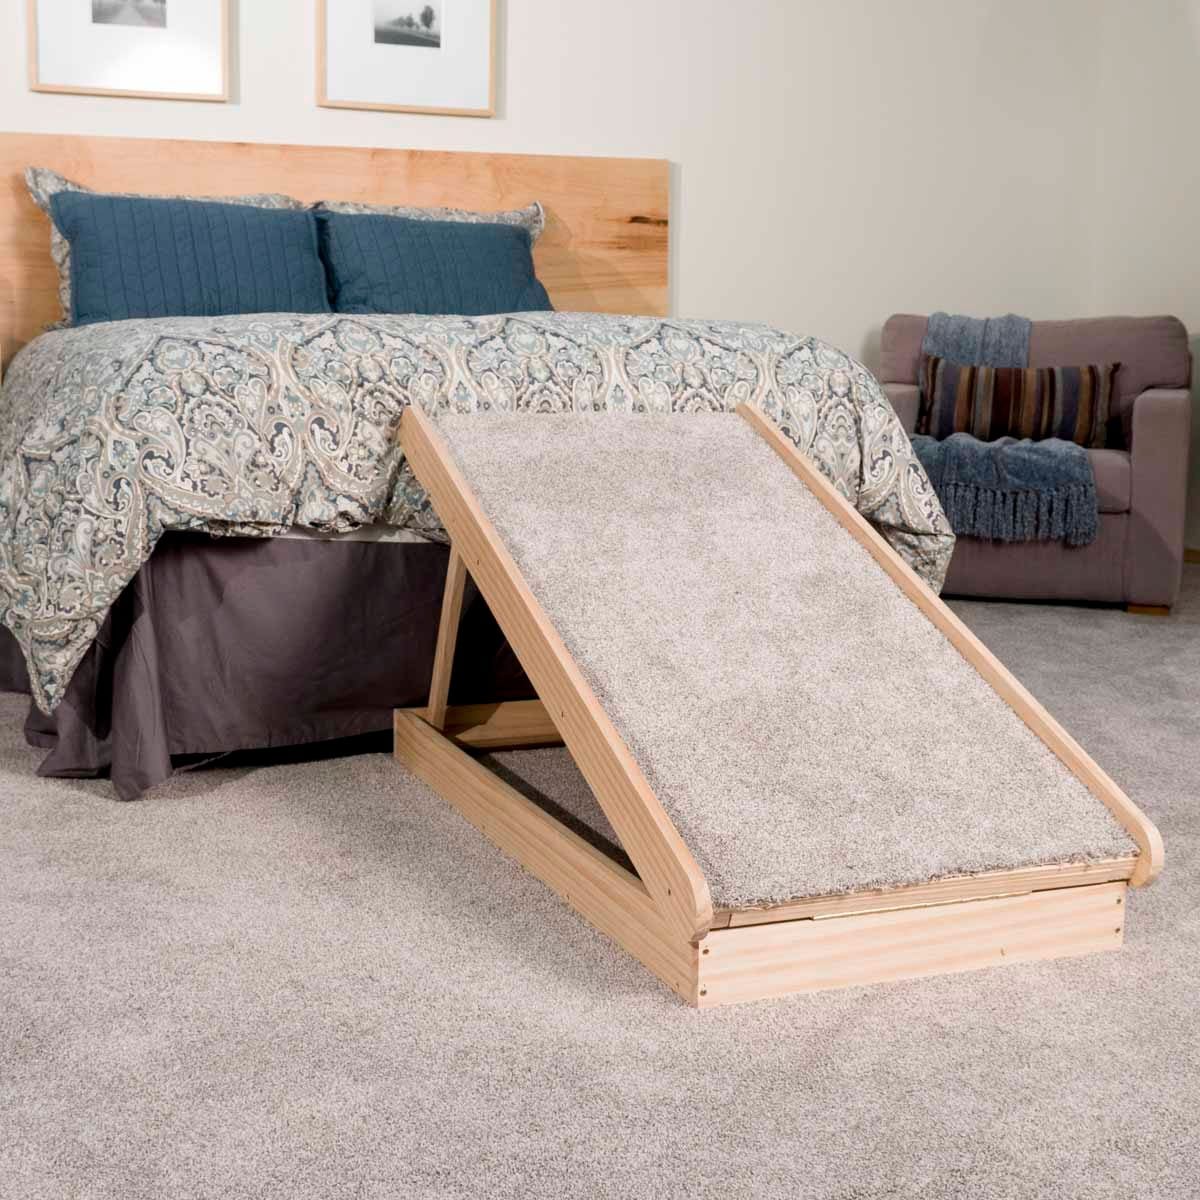
A basic platform frame can elevate a washable pet cushion and coordinate with the room’s furniture. Add short legs, a low surrounding lip, and nonslip pads beneath the feet. Keep the design accessible for the pet’s size, age, and mobility instead of building a tiny four-poster throne that requires mountaineering equipment.
-
31. Sawbench and Shop Stool
Finish the winter list with a project that improves future projects. A stout sawbench can support hand-sawing, assembly, planing, and temporary seating. Build it from affordable lumber or plywood, reinforce the joints, and keep the top flat. Popular Woodworking describes this type of compact shop project as useful for sawing, holding work, organizing tools, and serving as a step.
Choosing the Right Winter Woodworking Project
Match the build to the tools, material, and uninterrupted time you have available. Coasters, candle holders, and key racks are realistic one-session projects. Shelves and small organizers may require a weekend once finishing time is included. Furniture should be approached in stages: preparation, milling, joinery, dry assembly, glue-up, surface preparation, and finishing.
Also consider what you want to practice. Choose picture frames to improve miter cuts, a serving tray to develop box construction, or a side table to learn leg joinery. A bookcase strengthens cabinetmaking fundamentals, while a cutting board rewards careful glue application and patient sanding. Reputable woodworking libraries regularly recommend shelves, cutting boards, shop organizers, gifts, and compact furniture as practical routes into the craft.
Whenever possible, make a cut list before touching the saw. Group identical cuts, label components with painter’s tape, and dry-fit the assembly before adding glue. Wood glue possesses an extraordinary ability to reveal forgotten parts approximately three seconds after it begins setting.
Practical Experiences and Lessons From Winter Woodworking
One of the most noticeable experiences of a winter woodworking season is how quickly a modest project can change the atmosphere of a cold month. A gray Saturday that might otherwise disappear into scrolling and snack acquisition suddenly has structure. First comes the sketch, then the lumber selection, followed by the optimistic declaration that the build will “only take a couple of hours.” That estimate is rarely correct, but the day is still well spent.
Small projects often teach the biggest lessons. A coaster set reveals whether repeated cuts are truly identical. A picture frame exposes every careless miter because four almost-correct corners do not create a correct rectangle. A tray teaches that boards can appear straight until they are asked to cooperate in an assembly. These discoveries are not failures. They are the moment woodworking stops being merely cutting pieces and becomes a process of planning, testing, and adjusting.
Winter also highlights the importance of shop comfort. Cold lumber, poor lighting, and numb fingers do not encourage careful craftsmanship. A practical routine begins by warming the workspace safely, turning on bright lights, and organizing tools before making the first cut. The workbench should be clear enough to support the project rather than functioning as an archaeological site containing screws, glue bottles, old coffee cups, and a measuring tape last seen during the previous administration.
Another familiar experience is learning when to stop for the day. Fatigue encourages rushed measurements and questionable decisions. When a cut feels uncertain, the best move is usually to switch off the tool, inspect the setup, and return with a clear plan. Woodworking rewards patience more reliably than speed. Ten extra minutes spent checking alignment can prevent an hour of repair, creative redesign, or explaining why the new shelf has become “intentionally asymmetrical.”
Finishing provides its own lesson in restraint. Freshly sanded wood creates an irresistible urge to apply stain immediately, but surface preparation determines much of the final appearance. Scratches invisible under shop lighting may become dramatic after color is added. Testing the finish on an offcut shows how the wood will respond and whether the color suits the room. It is a simple step that prevents the entire project from unexpectedly turning orange.
The most satisfying part arrives when the finished item enters daily life. A handmade shoe rack collects snowy boots. A monitor stand makes a workspace more comfortable. A pet bed is inspected, circled three times, and finally approved by its intended customer. Useful projects continue rewarding the builder long after the sawdust is gone. They also make excellent gifts because even a simple object carries evidence of attention: someone selected the wood, shaped the parts, corrected the mistakes, and stayed with the process until it became something worth keeping.
By the end of winter, the workshop usually contains more than completed objects. It holds better habits, sharper judgment, and a growing collection of scraps that are apparently “too good to throw away.” That pile is not clutter. It is next winter’s coaster set waiting patiently for a purpose.
Conclusion
Cold weather does not have to put woodworking on hold. It can provide the quiet, focused season needed to practice new skills and complete useful indoor projects. Begin with a small organizer or handmade gift, then work toward shelves, storage furniture, and tables as your confidence grows.
The best project is not necessarily the largest or most complicated. It is the one that fits your space, develops a useful skill, and solves a real problem in your home. Work carefully, control dust, ventilate finishes, respect every tool, and remember that nearly every accomplished woodworker has produced at least one object whose primary function became “learning experience.”














