
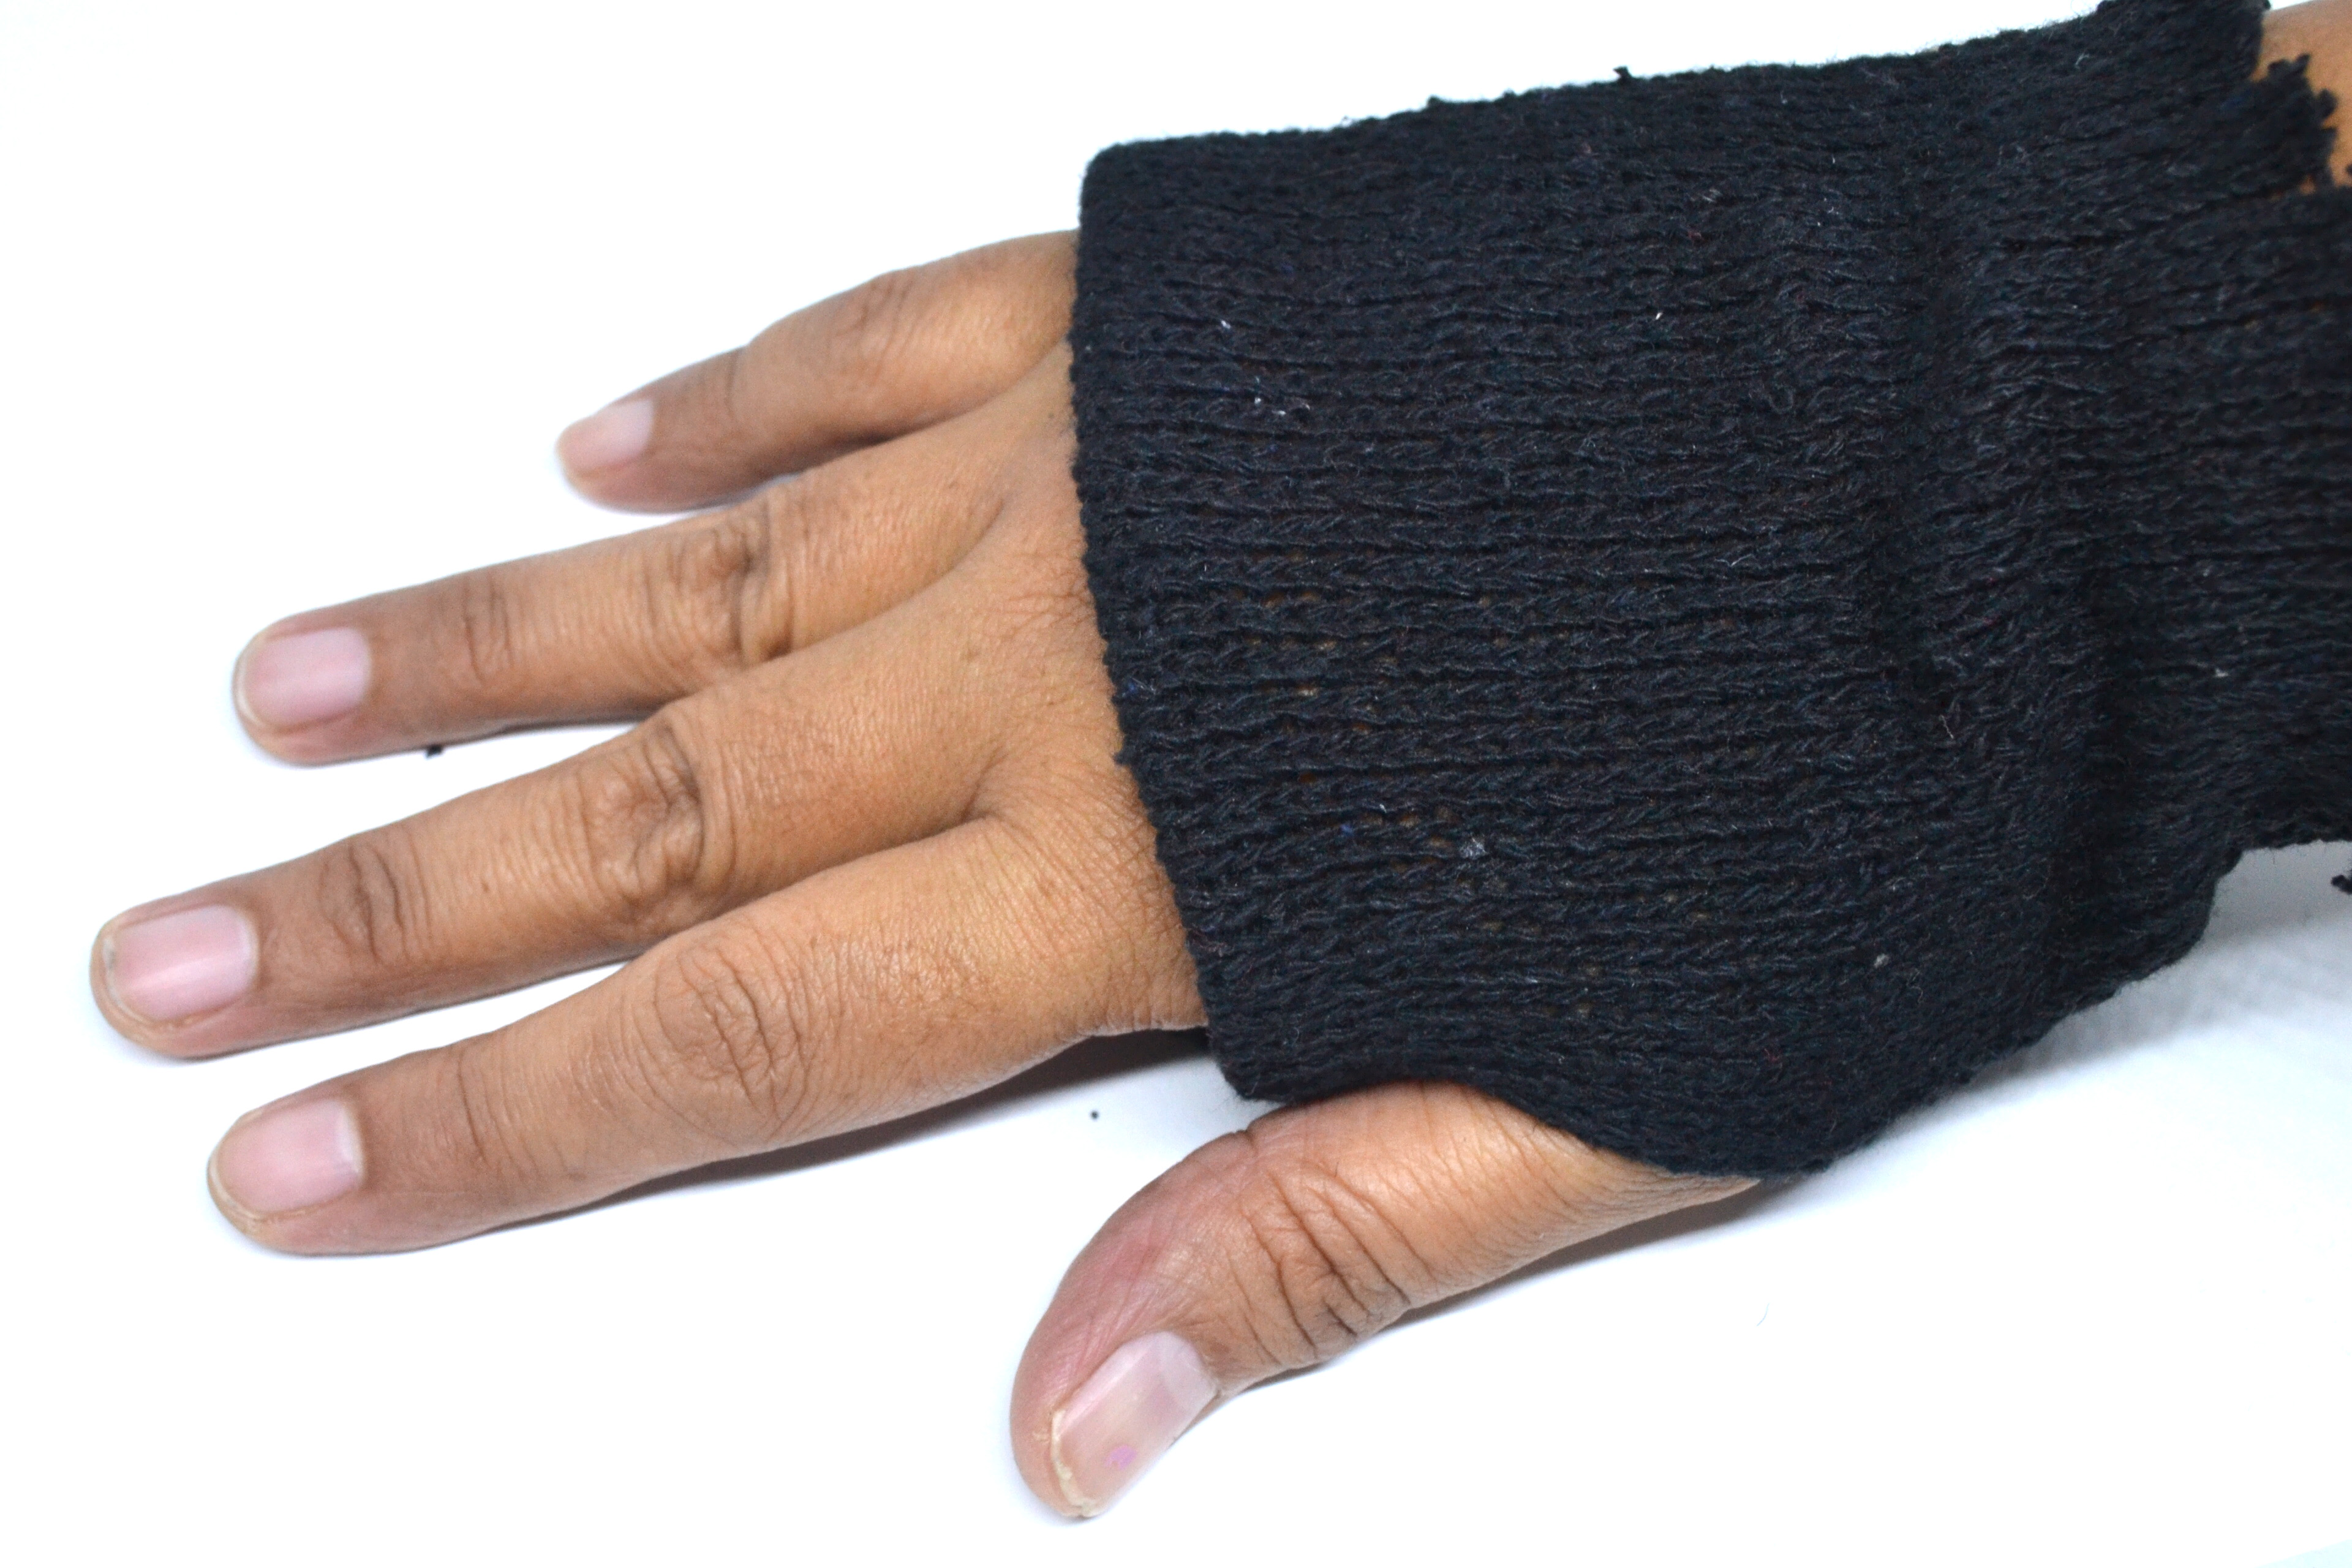
Fingerless gloves occupy a wonderfully practical corner of the wardrobe. They warm your wrists and palms while leaving your fingertips available for typing, texting, drawing, crafting, playing an instrument, or attempting to find your keys at the bottom of an overstuffed bag. Full mittens may be warmer, but they are not especially helpful when your phone demands a password.
The best part is that you do not need to be a professional glove makeror even a particularly patient personto create a useful pair. Depending on the method you choose, you can transform old socks, recycle a sweater, crochet two simple rectangles, or knit fitted mitts from the cuff upward.
This guide explains four ways to make fingerless gloves, starting with a nearly instant no-sew project and progressing to more polished crochet and knitting techniques. Each method can be customized for different hand sizes, colors, materials, and skill levels.
Before You Begin: Measure Your Hands
A flexible measuring tape makes fitting easier, but a piece of string and a ruler will also work. Record the circumference around the widest part of your palm, excluding your thumb. Then measure from your wrist to the point where you want the glove to end on your fingers.
For a close-fitting glove made from stretchy fabric or yarn, the finished circumference should usually be slightly smaller than your actual hand circumference. This is called negative ease. A difference of about 1/4 to 1 inch is often enough, depending on how stretchy the material is.
Do not make the gloves so tight that they restrict movement or leave deep marks. Your hands should feel cozy, not vacuum-sealed.
Useful General Supplies
- Flexible measuring tape
- Sharp fabric scissors
- Yarn needle or hand-sewing needle
- Matching thread or yarn
- Fabric chalk, washable marker, or pins
- Optional buttons, lace, embroidery floss, or patches
Method 1: Make No-Sew Fingerless Gloves From Socks
This is the quickest method and an excellent way to rescue a lonely pair of socks from the mysterious dimension that apparently lives behind every dryer. Knee-high socks, thick crew socks, and stretchy boot socks work especially well because they provide enough length to cover the wrist.
What You Will Need
- One pair of clean, stretchy socks
- Sharp fabric scissors
- Fabric chalk or a washable marker
- Optional fabric glue or anti-fray liquid
Step 1: Choose the Right Part of the Sock
Pull the sock over your hand with the cuff positioned at your wrist or farther up your forearm. The sock’s leg becomes the body of the glove. Unless you want a dramatic elf-shaped hand accessory, the heel and toe sections are usually removed.
Mark where the glove should end across your knuckles. Leave enough material to cover the base of your fingers without interfering with bending or gripping.
Step 2: Cut the Finger Opening
Take the sock off and lay it flat. Cut straight across at the knuckle mark. Begin conservatively because you can always shorten the glove later. You cannot persuade a missing inch of fabric to return through positive thinking.
Step 3: Create the Thumbhole
Put the tube back over your hand and gently pinch the fabric where the base of your thumb meets your palm. Mark that spot, remove the glove, and cut a tiny vertical slit. Start with an opening of approximately 1/2 inch.
Stretch fabrics make small cuts expand considerably, so test the opening before enlarging it. Continue trimming a little at a time until your thumb moves comfortably.
Step 4: Finish or Decorate the Edges
Many modern knit socks will curl slightly rather than unravel immediately. For a casual look, you may leave the raw edges alone. For greater durability, apply a tiny amount of flexible fabric glue around the openings. Allow it to dry completely before wearing the gloves.
Decorate the finished pair with iron-on patches, small bows, fabric paint, or hand embroidery. Keep bulky embellishments away from the palm, where they may interfere with gripping objects.
Best for: Beginners, costumes, quick gifts, children’s crafts, and anyone who needs warm hands before the next commercial break.
Method 2: Sew Fingerless Gloves From an Old Sweater
An old sweater can become a polished pair of DIY fingerless gloves with only a few seams. Sweater sleeves are particularly convenient because their existing cuffs can form the wrist edge. Ribbed cuffs also stretch nicely and help the gloves stay in place.
What You Will Need
- An old sweater with stretchy sleeves
- Paper for making a pattern
- Fabric scissors
- Ballpoint or stretch sewing-machine needle
- Polyester thread
- Sewing machine or hand-sewing needle
Step 1: Prepare the Sweater
Wash and dry the sweater according to its care instructions before cutting it. Prewashing helps reveal how the fabric behaves and prevents an unpleasant surprise after the finished gloves are cleaned.
Inspect the sleeves for stains, holes, or thin sections. Position damaged areas where they will be cut away rather than directly over the palm.
Step 2: Draft a Simple Pattern
Place your hand on a sheet of paper with your fingers together and your thumb extended naturally. Trace around the outside of your wrist, palm, thumb, and knuckles. Simplify the finger area into one gently curved line rather than tracing every finger.
Add a seam allowance of approximately 3/8 inch around the sides and thumb. The pattern should look like a short mitten with the top removed. Make sure the wrist opening will stretch over the widest part of your hand.
Step 3: Cut Four Mirrored Pieces
Turn the sweater inside out and place the pattern near the sleeve cuff. Align the cuff with the wrist line so you can preserve the sweater’s finished edge. Cut two pieces for each glove, creating four pieces in total.
Pay attention to the direction of stretch. The fabric should stretch most generously around your hand, not from the wrist toward the fingertips.
Step 4: Sew the Gloves
Place two matching pieces together with their right sides facing inward. Pin or clip the edges, leaving the finger and wrist openings unsewn. Use a narrow zigzag, lightning stitch, or another stretch-friendly stitch so the seams can move with the fabric.
Sew slowly around the thumb curve. A shorter stitch length and frequent stops with the needle lowered can make the turn easier. Repeat for the second glove.
When sewing by hand, use small backstitches or flexible whipstitches. Do not pull the thread so tightly that the seam loses its stretch.
Step 5: Test the Fit and Finish
Turn the gloves right side out and try them on. If the thumb feels tight, resew the curve with a slightly smaller seam allowance. If the glove is too loose, take in the side seam gradually.
Fold the finger edge inward and secure it with a narrow zigzag stitch for a neat hem. You may also bind the edge with fold-over elastic or add a strip of rib-knit fabric.
Best for: Upcycling, customized gifts, coordinated winter accessories, and using a beloved sweater that has suffered one unfortunate coffee incident too many.
Method 3: Crochet Fingerless Gloves From Rectangles
A beginner-friendly crochet glove does not require complicated shaping. You can crochet a rectangle, wrap it around your hand, and seam it while leaving an opening for your thumb. The finished result is sometimes called a wrist warmer or crochet mitt.
What You Will Need
- Approximately 100 to 180 yards of DK or worsted-weight yarn
- A crochet hook suitable for the yarn
- Yarn needle
- Scissors
- Stitch marker
Step 1: Select Yarn and Make a Swatch
Choose a soft yarn that will not irritate your skin. Wool blends provide warmth and elasticity, acrylic is affordable and easy to wash, and cotton feels breathable but may have less bounce.
Crochet a small test swatch using your chosen stitch. Wash and dry it as you intend to care for the gloves. Measure how many stitches fit into one inch. This step may seem fussy, but it is considerably less annoying than completing two mitts sized for a garden gnome.
Step 2: Crochet the First Rectangle
Chain enough stitches to reach from your wrist to the desired finger edge. For a simple ribbed texture, work single crochet stitches through the back loop only. Turn at the end of each row and continue until the rectangle wraps snugly around your hand.
The rectangle should stretch around the palm without causing the stitches to separate dramatically. Count your rows so the second glove can be made to match.
Step 3: Mark the Thumb Opening
Wrap the rectangle around your hand with the first and last rows meeting along the side of your palm. Mark the points where the thumb begins and ends. A comfortable opening is commonly between 1 1/2 and 2 1/2 inches, but your hand is a better judge than a generic number.
Step 4: Seam the Glove
Thread a yarn needle with a long tail. Sew from the finger edge down to the first thumb marker. Fasten the yarn securely, skip the thumb opening, and resume sewing from the second marker to the wrist.
A mattress stitch creates a discreet join, while a whipstitch produces a visible decorative ridge. Try the glove on before weaving in the ends permanently.
Step 5: Add Optional Edging
Attach the yarn around the thumbhole and work one round of single crochet for reinforcement. You can also add a decorative shell, picot, or contrasting border around the finger opening.
Repeat all measurements and row counts for the second glove. Remember that the seam can face the outer edge of each hand, creating a mirrored pair.
Best for: Beginning crocheters, handmade holiday gifts, scrap-yarn projects, and makers who enjoy useful accessories without advanced shaping.
Method 4: Knit Fitted Fingerless Gloves
Knitted fingerless gloves offer the most tailored fit of the four methods. They may be worked flat and seamed, but knitting in the round produces a smooth tube with no bulky side seam. Double-pointed needles or a long circular needle using the magic-loop technique both work well.
What You Will Need
- Approximately 120 to 220 yards of sport, DK, or worsted-weight yarn
- Double-pointed or circular knitting needles
- Stitch markers
- Scrap yarn or a stitch holder
- Tapestry needle
Step 1: Determine Your Cast-On Number
Knit and wash a gauge swatch. Multiply your stitches per inch by the desired finished palm circumference. Adjust the result so it works with your chosen ribbing pattern. For example, a knit-two, purl-two cuff requires a multiple of four stitches.
Cast on loosely enough for the cuff to pass over your hand. Join for working in the round, taking care not to twist the stitches.
Step 2: Knit the Cuff
Work one to three inches of ribbing. A longer cuff adds warmth and can tuck underneath a coat sleeve. Continue in stockinette stitch, a textured pattern, or another stretchy design until the work reaches the base of your thumb.
Step 3: Form the Thumb Opening
The simplest approach is to bind off several stitches at the thumb position and cast them on again during the following round. This creates a horizontal opening with minimal shaping.
For a more anatomical fit, increase stitches gradually on both sides of a marked thumb section. Once the gusset reaches the base of your thumb, place those stitches on scrap yarn. Cast on a small number of replacement stitches over the gap and continue knitting the hand.
Step 4: Finish the Hand
Knit until the glove reaches the desired point across your fingers. Work several rounds of ribbing to prevent the edge from curling, then bind off loosely. A stretchy bind-off is especially helpful because the opening must expand whenever you make a fist.
Step 5: Complete the Thumb
Return the held thumb stitches to your needles. Pick up additional stitches around the opening to close possible gaps, then knit a short tube. Finish with a few rounds of ribbing and bind off loosely.
Weave in all yarn ends and gently block the gloves to even the stitches. Make the second mitt using the same measurements, reversing decorative placement when necessary.
Best for: Experienced knitters, personalized sizing, textured stitch patterns, cables, colorwork, and gift recipients who notice the difference between “handmade” and “this rectangle has become emotionally attached to my wrist.”
How to Customize Homemade Fingerless Gloves
Once the basic construction is complete, small details can transform plain wrist warmers into distinctive accessories.
Add Color and Texture
Use striped yarn, contrasting cuffs, embroidered motifs, duplicate stitching, surface crochet, or small fabric appliqués. Cables and ribbing create a traditional winter appearance, while lace stitches produce lighter gloves for cool indoor spaces.
Adjust the Length
Short gloves can end just below the wrist, while gauntlet-style gloves may extend halfway to the elbow. Longer versions provide extra warmth but require additional yarn or fabric. Check that the upper edge is not so tight that it becomes uncomfortable.
Improve Grip
For driving, photography, or tool handling, add small dots of flexible fabric paint to the palm. Test the paint on scrap material first and keep the dots low enough that they do not rub against sensitive finger joints.
Create Convertible Gloves
Advanced makers can add a knitted, crocheted, or sewn mitten flap that folds over the fingers. Attach the flap across the back of the hand and secure it when open with a button and loop.
Common Fingerless Glove Mistakes
Cutting the Thumbhole Too Large
A thumb opening can expand rapidly, particularly in socks and sweater knits. Begin with a tiny cut and enlarge it gradually. A loose thumbhole allows cold air inside and may cause the glove to rotate around your hand.
Ignoring Stretch Direction
When sewing fabric gloves, the greatest stretch must travel around the hand. If it runs vertically instead, you may produce an attractive fabric tube that refuses to pass your knuckles.
Using a Rigid Seam
A standard straight stitch may break when highly stretchy fabric is pulled. Use a narrow zigzag, stretch stitch, flexible hand stitch, or serged seam where appropriate.
Skipping the Fit Test
Try the first glove on repeatedly during construction. Hand sizes and thumb positions vary, so adjustments made early can prevent you from completing a beautifully matched pair that fits absolutely nobody.
Practical Experience: Lessons From Making Fingerless Gloves
Making fingerless gloves looks deceptively simple because each glove uses relatively little material. In practice, small accessories reveal every measurement error. A sweater can hide a slightly generous seam; a glove will announce it every time it slides over your knuckles.
The most useful lesson is to begin with the material rather than forcing one method onto everything available. Thin socks are ideal for quick costume gloves, but they may not survive daily winter use. Dense sweater cuffs make warm sewn gloves, while loose decorative knits can stretch out or unravel as soon as they are cut. Crochet creates structure, and knitting usually provides the smoothest, most flexible fit.
Another important discovery is that left and right hands are not always perfect mirror images. The dominant hand may be slightly larger, and thumb placement can vary. For custom gloves, it helps to mark and test each hand separately instead of assuming one pattern piece will behave identically on both sides.
The thumb opening causes the greatest number of problems. A hole that looks ridiculously small on the worktable may become perfect once the material stretches. Enlarging it too quickly often creates a floppy gap that is difficult to repair neatly. Slow trimming and frequent fitting are more reliable than heroic scissor work.
Yarn choice also changes the character of the project. A smooth wool blend makes stitch definition easy to see and gives ribbing a useful spring. Very fuzzy yarn can hide uneven stitches, which sounds convenient until it also hides the opening where the crochet hook is supposed to go. Cotton feels pleasant but may stretch without returning fully to shape. Acrylic is forgiving, affordable, and practical for gloves that need frequent washing.
When crocheting a rectangle-style glove, keeping written notes prevents the second mitt from becoming an accidental design experiment. Record the chain count, number of rows, thumb-opening length, hook size, and any border stitches. Counting by memory works beautifully until the project is interrupted by dinner, a phone call, or a cat who has strong opinions about yarn ownership.
For knitted gloves, a gauge swatch is worth the extra effort. Even a difference of one stitch per inch becomes significant around a hand. Knitting a small sample also reveals whether the fabric is dense enough to block cold air while remaining flexible enough for comfortable movement.
Finishing affects durability as much as construction. Secure yarn ends by weaving them through several stitches in different directions. Reinforce sewn thumb curves, but avoid creating a stiff lump. Raw edges on sock gloves may work for an occasional costume, while everyday gloves benefit from a flexible hem or edge treatment.
Finally, the best first pair does not need elaborate cables, lace, or embroidered constellations. Comfortable proportions and tidy openings matter more than decoration. Once the basic shape works, adding color, buttons, trim, or surface stitching becomes enjoyable rather than an emergency disguise for structural confusion.
Conclusion
Learning how to make fingerless gloves gives you four practical routes to the same cozy destination. Socks offer a fast no-sew solution, old sweater sleeves create polished upcycled gloves, crochet rectangles provide a forgiving beginner yarn project, and knitted mitts deliver customized shaping.
Start with materials you already own, measure before cutting, and test the fit throughout the project. Your first pair may not look like it just stepped out of a luxury winter catalog, but it will be useful, personal, and considerably more impressive than leaving the old sweater in a drawer for another six years.
Note: These projects are intended as general craft instructions. Adjust all dimensions for the wearer’s hand, use scissors and sewing equipment carefully, and supervise children during cutting, stitching, or gluing.











