An old dresser usually faces two possible futures: the curb, or a surprisingly glamorous second carrger buns for a neighborhood reunion. Turning a repurposed dresser into a patio entertaining island is a smart DIY project because the expensive work is already done. You begin with a cabinet, drawers, and a broad top instead of a pile of lumber and several hours of wondering why two boards are suddenly three-eighths of an inch different.
With structural reinforcement, exterior-rated coatings, a durable countertop, and locking casters, a tired bedroom dresser can become an outdoor bar, buffet, grill-side prep cart, or beverage station. The following guide explains how to make the conversion practical, weather-resistant, stable, and attractive.
Why a Dresser Works as a Patio Island
A low, wide dresser already resembles a compact kitchen island. Its top provides serving space, while its drawers organize utensils, towels, bar tools, plates, and party supplies that might otherwise drift around the patio. Reusing one can also cost less than buying a new outdoor cart and gives the finished piece more personality than most factory-made options.
The key is remembering that a dresser was designed for indoor clothing storage, not rain, rolling, or a five-gallon drink dispenser. The makeover must strengthen the frame and protect every surface, including the back, underside, drawer edges, and holes where water can enter.
Choose the Right Dresser
Look for a low, wide dresser made from solid wood or sturdy plywood. Measure its height before buying wheels or countertop material. A dresser around 30 to 34 inches tall can often finish near comfortable counter height once a top and casters are added. If the piece is already tall, chunky wheels may produce a serving station better suited to professional basketball players.
Check the Structure
Open every drawer and inspect the runners, joints, back panel, and drawer bottoms. Avoid furniture with rot, badly swollen particleboard, active insect damage, or a strong musty odor. Minor scratches are harmless, but the cabinet should not twist or wobble when gently rocked. Press on the top as well; guests will lean on it even if you place a tasteful sign asking them not to.
Be Careful With Old Paint
If the finish is old or its history is unknown, test it before sanding. Vintage painted furniture may contain lead-based paint, and dry sanding can create hazardous dust. A valuable antique, deteriorated finish, or questionable coating may be better handled by a qualified professional than turned into a casual weekend experiment.
Tools and Materials
- Drill, driver bits, screwdrivers, clamps, and safety equipment
- Wood glue rated for moisture exposure and exterior-grade screws
- Reinforcement lumber for the base and back
- Wood filler, caulk, medium- and fine-grit sandpaper
- Exterior primer and exterior acrylic paint, or an outdoor stain-and-sealer system
- Four heavy-duty plate casters, preferably locking
- A sealed wood, stainless-steel, tile, or stone countertop
- Optional hooks, towel bar, handle, bottle opener, bins, or shelf
How to Turn the Dresser Into an Outdoor Entertaining Island
1. Disassemble and Clean
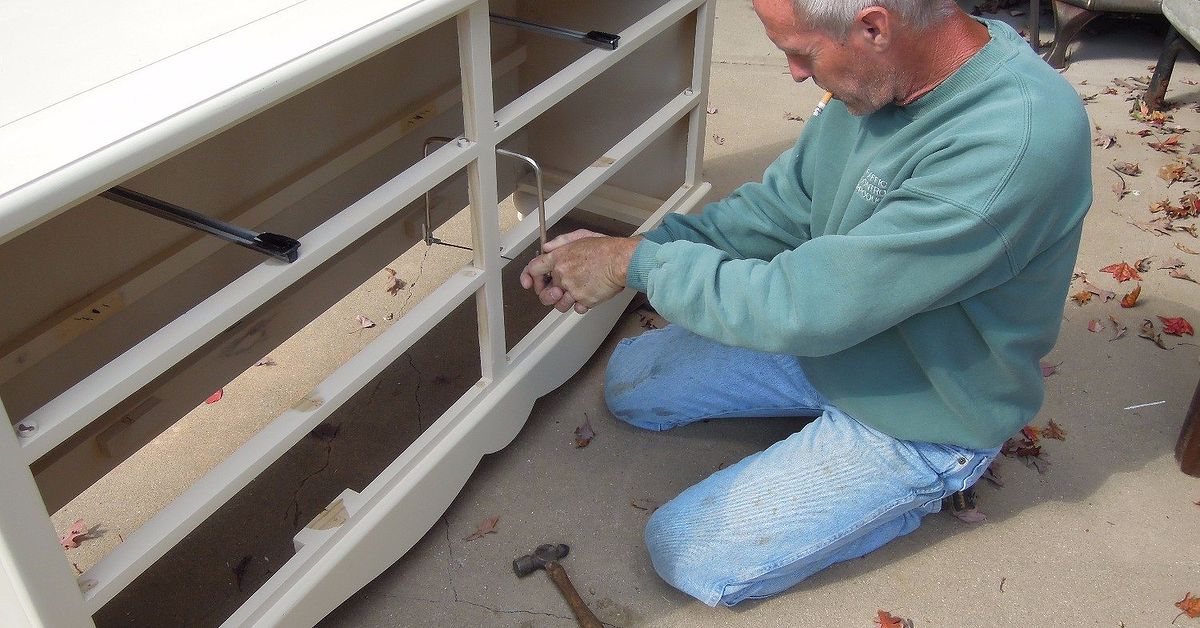
Remove drawers, knobs, pulls, mirrors, and loose trim. Label drawers if each fits only one opening. Vacuum the interior and wash away dirt, grease, wax, and furniture polish. Paint will not bond well to residue, no matter how motivational the playlist is. Let the dresser dry completely.
2. Repair and Reinforce
Tighten screws, reglue loose joints, replace weak drawer bottoms, and strengthen a flimsy back. Add a solid lumber frame beneath or inside the cabinet so the casters attach to structural material rather than thin fiberboard. Corner blocks or diagonal bracing can reduce twisting when the island rolls over patio joints.
Select wheels whose combined load rating comfortably exceeds the dresser, countertop, hardware, supplies, and anything placed on top. Larger wheels travel over rough concrete and pavers more easily than tiny furniture casters. Store heavy items low so the finished island remains stable.
3. Plan the Countertop
A new top is what makes the project look intentional. Sealed wood feels warm and furniture-like but needs maintenance. Stainless steel wipes clean easily and suits a grill station. Tile adds color and handles warm serving dishes, although grout requires care. Stone is durable but heavy, so the cabinet and base must be reinforced accordingly.
Use a removable washable cutting board for direct food preparation rather than chopping on a painted or decorative surface. It protects the finish, simplifies cleanup, and helps keep raw-food tasks separate from ready-to-eat dishes.
4. Sand, Prime, and Finish
After resolving any old-paint concerns, sand enough to remove loose finish and dull glossy areas. Fill dents and unused hardware holes, then vacuum away dust. You usually do not need to strip a sound finish to bare wood.
Apply exterior primer to bare wood and repaired areas, followed by several thin coats of exterior-rated paint. If you prefer visible grain, use an exterior stain or finish designed for moisture and ultraviolet exposure. Coat hidden surfaces too. Moisture does not politely enter through the decorative front; it finds the unsealed bottom edge you hoped nobody would notice.
5. Install the Top and Casters
Center the countertop and fasten it from inside the dresser where possible. Seal exposed edges, seams, cut ends, and penetrations. When attaching a solid-wood top, use a fastening method that allows normal seasonal movement.
Turn the dresser onto a padded surface and bolt plate casters to the reinforced base. Set it upright, roll it over the actual patio, lock the wheels, and press on each corner. Correct any rocking, twisting, or top-heavy feeling before loading the island. It should move when invited and remain still when ignored.
6. Organize the Storage
Keep all drawers, or remove one or two to create open cubbies for baskets or a beverage tub. Add washable liners and drawer stops if needed. Use shallow dividers so bottle openers and serving spoons do not disappear into a wooden Bermuda Triangle.
Put frequently used tools in upper drawers and heavier supplies below. Do not leave food, damp towels, candles, batteries, or pest-attracting items outside between gatherings.
7. Add Useful Entertaining Features
- A towel bar for dish towels or grilling tools
- Hooks for oven mitts, tongs, and a small trash bag
- A bottle opener with a cap catcher
- A side handle for steering the island
- A narrow rack for condiments and drink mixers
- Removable bins for cups, napkins, and bar accessories
Use rust-resistant hardware and balance accessories between both sides. A beautifully decorated island is less charming when one overloaded towel rack makes it lean like a confused flamingo.
Easy Style Directions
For a modern island, use charcoal, deep green, or crisp white with simple metal pulls and a stainless or dark top. A coastal version works well in soft blue or sea-glass green with brushed hardware and a sealed natural-wood surface. For farmhouse style, combine muted exterior paint, black hardware, baskets, and a warm wood top. A party-focused design can carry coral, turquoise, mustard, or patterned tile.
Avoid excessive decorative distressing on outdoor furniture. Exposed edges may look charming in photos but can give moisture a direct route into the wood.
Safety, Cleaning, and Weather Protection
Use the island on a reasonably level surface and lock the casters during service. Keep it away from grills, smokers, fire pits, and other heat sources. A painted wooden dresser is a serving station, not a built-in grill cabinet.
Wash removable cutting boards, utensils, and food-contact surfaces with warm, soapy water and sanitize as appropriate. Wipe up citrus juice, wine, grease, and sugary drinks promptly. Open one drawer at a time, discourage climbing, and keep heavy supplies low.
Even carefully refinished indoor furniture is better described as weather-resistant than permanently waterproof. A covered porch or patio offers the best location. Use a breathable cover when the island is dry, and move it into a garage or shed during severe weather or the off-season. Inspect the finish several times a year, touch up chips, tighten caster bolts, and renew the coating when it begins to wear.
Common Mistakes to Avoid
- Attaching casters to a thin dresser bottom without reinforcement
- Using interior paint or interior-only clear finish outdoors
- Ignoring the back, underside, seams, and drawer edges
- Buying wheels before calculating the finished height
- Choosing small casters for rough pavers or deck gaps
- Cutting food directly on a decorative countertop
- Leaving wet linens, melting ice, or food in the drawers
Conclusion
A repurposed dresser patio entertaining island delivers storage, serving space, and character without requiring a cabinetmaker’s workshop. Begin with a sturdy piece, reinforce the base, protect every surface, add a durable countertop, and install correctly rated locking casters. Then customize the drawers and accessories around the way you actually entertain.
The most successful version is not necessarily the fanciest. It is the one that rolls smoothly, stays stable, cleans easily, and reduces trips between the kitchen and patio. Build those fundamentals well, and yesterday’s sock storage can become tomorrow’s backyard command center.
Real-World Experience: What This Project Teaches You
The first lesson from converting a dresser into an outdoor island is that preparation takes longer than the glamorous parts. Online makeovers jump from dusty furniture to sparkling patio bar in seconds. In reality, cleaning corners, repairing joints, filling old holes, and waiting for coatings to dry are what make the result feel solid instead of improvised.
Planning from the final height backward is especially valuable. It is easy to fall in love with large casters and a thick countertop, then discover that the island is too tall for comfortable serving. Measure the dresser, mounting plates, wheels, and top before purchasing anything. A strip of painter’s tape on a wall can help you visualize the finished height.
Mobility also changes the stresses on furniture. A dresser standing quietly in a bedroom experiences little twisting. Once rolled over concrete joints and turned around corners, every loose connection becomes obvious. Reinforcing the base and back may feel excessive during construction, but it pays off the first time a loaded island crosses the patio without wobbling like a grocery cart with one rebellious wheel.
Storage works best when it reflects real habits. Deep drawers look generous until they become caves filled with random corks, napkins, lighters, and mystery lids. Removable bins, shallow dividers, and simple zones are more useful. One drawer can hold serving tools, another clean linens, and a lower opening can carry a drink tub. The goal is fewer trips indoors, not an outdoor junk drawer on wheels.
Weather exposure teaches humility. Water finds unfinished edges, screw holes, countertop seams, and drawer bottoms. Coating those hidden areas is tedious, yet it often determines whether the island lasts. A covered location and dry furniture cover provide more protection than decorative enthusiasm alone.
The project’s value becomes clear during the first gathering. Guests naturally gather around a dedicated serving surface, while the host spends less time carrying supplies. The top becomes a landing place for platters, the drawers keep bottle openers from vanishing, and the wheels let the setup move into shade. Small detailsan accessible towel bar, a trash hook, a removable cutting board, and brakes that operate easilymatter more than ornate trim.
The final lesson is restraint. It is tempting to add a sink, refrigerator, outlet, ice chest, umbrella, speaker, and perhaps air-traffic control. Every feature adds weight, complexity, and exposure to water or heat. A dependable island with organized storage and a washable top is often more useful than an overloaded outdoor kitchen pretending to be a dresser. Use the simple version for a season, then add only the features you genuinely miss.
Project note: This makeover is best for a covered or semi-covered patio. Exterior coatings improve durability, but an indoor dresser should not be assumed to be permanently waterproof or safe beside open flames.