
That scratched dresser in the garage may look one broken drawer away f structural reinforcement, a cushion, and perhaps a heroic amount of sanding, old furniture can become useful extra seating instead of another bulky item headed for the landfill.
Repurposed furniture seating is especially valuable in entryways, breakfast nooks, bedrooms, apartments, and patios where space is limited. A dresser can become a storage bench, a coffee table can transform into a plush ottoman, and two mismatched nightstands can join forces like an unlikely buddy-comedy duo. Better still, many of these projects preserve drawers, shelves, and hidden compartments, giving you extra seating and storage in one footprint.
The following furniture upcycling ideas range from beginner-friendly makeovers to more involved woodworking projects. Each can be customized with paint, stain, upholstery fabric, trim, casters, or decorative hardware. Before buying anything new, raid the attic, browse a thrift store, or politely ask that abandoned cabinet on the curb whether it is ready for a career change.
Before You Convert Old Furniture Into Seating
A piece designed to hold sweaters, books, or remote controls is not automatically strong enough to hold a person. Inspect the frame before beginning. Look for loose joints, split wood, water damage, soft particleboard, missing fasteners, rusted hardware, and signs of insects. Push gently from different directions. If the piece twists, rocks, or makes noises usually heard in haunted houses, reinforce it before adding a cushion.
Solid wood and quality plywood are generally easier to repair than crumbling fiberboard. Add wood cleats beneath seat panels, secure joints with appropriate screws and glue, and install cross braces when the frame lacks lateral support. For a comfortable bench, the finished seat will commonly fall around standard chair height. One dresser-to-bench guide recommends planning for a base around 15 inches high when a roughly 3-inch cushion will be added. holstery foam intended for seating rather than soft pillow filling, which compresses quickly. Choose durable fabric for indoor projects and outdoor-rated fabric for porches or patios. Never assume that a fresh coat of paint can substitute for structural repairs. Paint is decorative. It is not a tiny construction worker.
Older painted furniture also deserves caution. Disturbing lead-based paint can create hazardous dust, particularly when sanding, cutting, or scraping. The U.S. Environmental Protection Agency recommends determining whether lead paint is present and following lead-safe work practices before renovating older painted surfaces. rn a Short Dresser Into a Mudroom Bench
A low, wide dresser is one of the best candidates for a DIY storage bench. Remove the upper drawers, drawer supports, and any dividers that interfere with the new seating area. Preserve the bottom drawers so shoes, gloves, reusable bags, and other entryway clutter remain hidden.
Reinforce the inside with a plywood platform, corner blocks, and a support rail across the back. Depending on the dresser’s shape, part of the original top may be reused as the seat. Add a fitted cushion and pillows, or create a paneled back from salvaged drawer fronts. That last detail helps the finished bench retain some of the dresser’s original character instead of looking as though it lost a fight with a circular saw.
This conversion works particularly well in a mudroom, child’s bedroom, walk-in closet, or beneath a coat rack. Paint the bench and drawer fronts one color for a built-in appearance, or leave portions of attractive wood exposed for contrast.
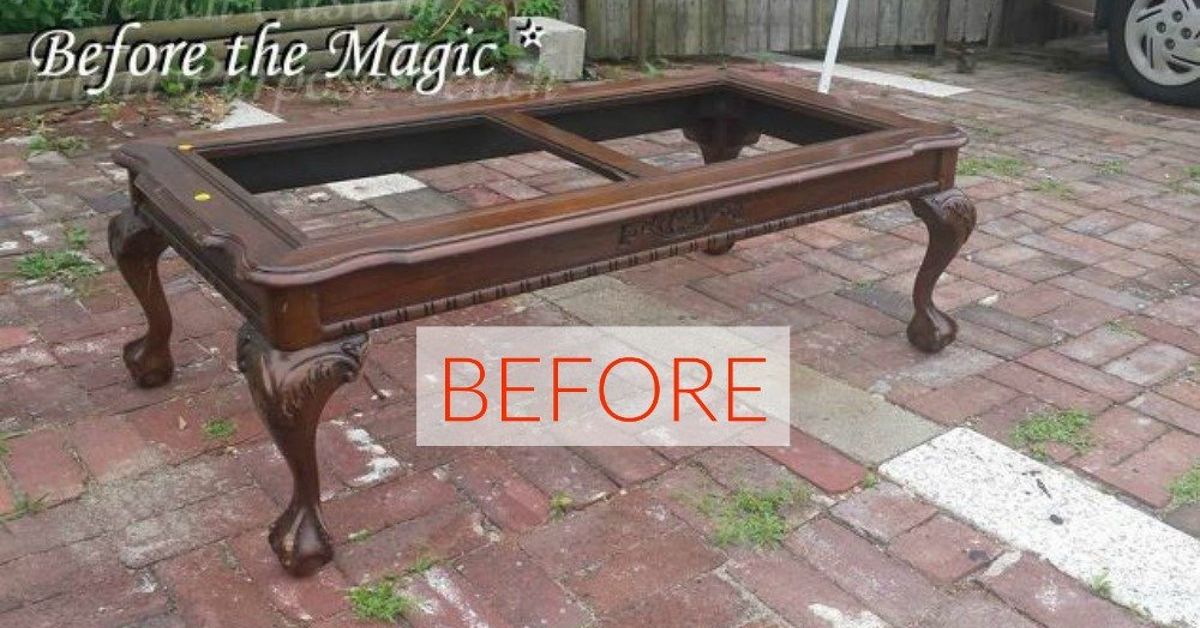
2. Upholster a Coffee Table to Make an Ottoman
A sturdy coffee table can become a comfortable upholstered ottoman with very little structural alteration. Select a table with strong legs, a stable apron, and a top that does not flex when pressure is applied. Repair loose joints before beginning.
Cut high-density upholstery foam to fit the tabletop, attach batting over it, and wrap the entire top with durable fabric. The fabric can be stapled underneath the table or attached to a separate plywood panel that screws onto the existing top. The second method makes future reupholstery easier.
For a polished look, add tufting, decorative nailhead trim, or a tailored slipcover. A large tray placed on top allows the ottoman to continue serving drinks and snacks when it is not being used as extra seating. Rounded corners and washable performance fabric are practical in homes with children or pets. Just remember to test the table’s strength first; “It held three magazines for years” is not a recognized engineering standard.
3. Build a Bench From a Headboard and Footboard
An old wooden bed frame already contains many of the ingredients needed for a high-backed bench. Use the headboard as the bench back, cut the footboard into two sections for the arms, and build a rectangular seat frame between them. Bed rails can often be reused as side supports or stretchers.
This idea is especially effective with spindle beds, farmhouse headboards, and decorative vintage frames. Once assembled, the piece can become a porch bench, garden seat, dining bench, or statement piece in an entryway. A painted finish helps visually unite wood from different sections of the bed.
For indoor use, add a tailored cushion attached with ties or hook-and-loop strips. For outdoor use, seal every cut edge, use exterior-rated fasteners, and protect the bench with an appropriate outdoor finish. Place it in a covered area whenever possible, since furniture designed for bedrooms did not originally sign up for rainstorms.
4. Join Mismatched Dining Chairs Into One Bench
Three old dining chairs may not match, but they can still become a surprisingly cohesive bench. Choose chairs with seats at approximately the same height and backs that work well together visually. Remove the individual seats if necessary, position the chairs side by side, and connect their frames with concealed bolts or sturdy wooden rails.
Install a single plywood seat across all the chairs, then add foam and upholstery fabric. Paint the chair frames one color to disguise differences in wood species, finish, and age. The result can look intentionally eclectic rather than accidentally assembled during a yard-sale emergency.
This bench works well at a long dining table, along an entryway wall, or on a covered porch. For dining use, allow adequate room for each person; a common planning guideline is approximately 24 inches of table or bench width per diner. use chairs with badly cracked legs or loose backs unless they are properly repaired. Joining three weak chairs together merely creates a larger weak chair.
5. Lay a Bookcase on Its Side for a Window Seat
A short, solid bookcase or cube organizer can become a compact window bench when positioned horizontally. The shelving creates ready-made storage for baskets, books, toys, shoes, or blankets, making this one of the most useful small-space furniture transformations.
Begin by checking how the shelves and outer panels are joined. Many inexpensive bookcases are intended to stand vertically and may need substantial reinforcement before they can support weight in another orientation. Add a plywood top, interior blocking, a solid back, and a secure base. Fasten the completed unit to wall studs when tipping or movement is possible.
Finish the bench with a fitted cushion and washable cover. Place it under a window to create a reading nook, beside a dining table as banquette seating, or in a playroom where the open cubbies keep frequently used items accessible. Built-in-style window benches are widely used to combine seating, storage, and otherwise underused wall space. eate a Banquette From Leftover Kitchen Cabinets
Old kitchen wall cabinets can provide an excellent foundation for a breakfast-nook bench. Because wall cabinets are often shallower than base cabinets, they can create seating without consuming too much floor space. Arrange two or more cabinets in a straight line or an L-shaped configuration.
Build a level platform beneath the cabinets, screw the units together through their face frames or side panels, and anchor the assembly securely. Cover the top with thick plywood or a solid wood panel that distributes weight across the entire structure. Finish the front with trim, baseboard molding, or decorative panels so the cabinets look like intentional built-ins.
Cabinet doors provide easy access to board games, table linens, seasonal dishes, or craft supplies. Similar stock-cabinet projects are commonly used to create window seats and corner benches with concealed storage. long cushion and several removable back pillows. Suddenly, the cabinets that once stored expired spices have become the most popular seats at breakfast.
7. Convert a Vintage Trunk Into a Cushioned Bench
A sturdy trunk can double as an end-of-bed bench, entryway seat, or living-room ottoman. The conversion may be as simple as adding a removable cushion, but the trunk must first be inspected carefully. Reinforce a thin lid from underneath, repair damaged corners, and confirm that the base rests evenly on the floor.
Most importantly, examine the latch. Certain older cedar chests were made with locks that automatically latched when the lid closed, creating a serious child-entrapment hazard. The U.S. Consumer Product Safety Commission has warned about older Lane and Virginia Maid cedar chests with this type of lock. Remove hazardous locking hardware, install a nonlocking replacement, and consider adding a lid-support mechanism that prevents the heavy top from slamming shut. loose cushion rather than permanently upholstering the lid if you want regular access to the storage. A nonslip pad beneath the cushion will keep it from wandering across the room every time someone sits down.
8. Turn an Old Desk or Vanity Into an Entryway Seat
A traditional desk or vanity with drawer banks on both sides can become a handsome entry bench. Remove the original desktop and inspect the two drawer pedestals. Repair their joints, level their bases, and connect them with a strong rear stretcher and a new plywood seat deck.
The space between the drawer banks can remain open for shoes or receive a lower shelf for baskets. Preserve the original drawers for keys, pet leashes, hats, and other small items that otherwise migrate mysteriously throughout the house.
This conversion is easiest when the desk is made from solid wood and has substantial side supports. Lightweight writing desks with thin legs may be better candidates for refinishing than structural alteration. Add a narrow upholstered cushion, mount hooks or a mirror above the bench, and finish the entire piece in one color. The result resembles a custom hall tree without the custom hall-tree price.
9. Use an Old Door as the Back of a Bench
A salvaged interior door can create a dramatic bench back for an entryway, dining room, or covered patio. Paneled doors are particularly attractive because their existing details make the finished piece look more elaborate than the construction process actually was.
Cut the door to the desired width if necessary, seal exposed edges, and attach it to a new or repurposed bench base. The base might come from an old table, low cabinet, simple wooden frame, or pair of sturdy chairs. Add rear braces so the back cannot flex when someone leans against it.
Old doors have long been repurposed as bench backs and other furniture components because their broad, rigid surfaces offer both structure and visual interest. door has glass panels, replace them with safety glass, wood, metal mesh, or upholstered inserts before using it as seating. Decorative hooks can turn the upper section into storage for hats and bags, producing a bench and mini mudroom station in one project.
10. Bridge Two Nightstands to Make a Storage Bench
Two matching nightstands or end tables can become the supports for a clever bridge-style bench. Position them several feet apart, connect them with a plywood seat deck, and add a sturdy rear rail to prevent spreading or twisting. The original drawers remain accessible, while the open space beneath the middle of the seat can hold shoes, baskets, or a pet bed.
This idea works best with solid, boxy nightstands of the same height. If the tops have decorative overhangs, remove or trim them so the new seat rests on broad, level surfaces. Secure the seat from inside the cabinets whenever possible to keep screws hidden.
Add a cushion that spans the complete width, then paint or stain all three components to create a unified finish. The completed piece is ideal for the foot of a bed, a hallway, or an entryway. It is also proof that two forgotten nightstands can have a productive relationship after retirement.
Experiences and Lessons From Real Furniture-Upcycling Projects
Furniture makeovers often appear effortless in finished photographs. One image shows a tired dresser; the next shows a flawless bench surrounded by perfectly arranged pillows. The invisible middle usually contains several hours of cleaning, measuring, reconsidering, filling holes, and making a second trip to the hardware store because the first screws were half an inch too short.
One of the most common experiences in successful furniture flips is discovering that preparation takes longer than decoration. Beginners frequently want to reach the painting or upholstery stage immediately because that is where the dramatic transformation happens. In practice, cleaning away grease, tightening joints, removing failing finishes, repairing veneer, and filling unused hardware holes determine whether the makeover lasts. A beautiful cushion cannot compensate for a frame that sways every time someone sits down.
Another recurring lesson is that old furniture is rarely square. Years of humidity, moving, overloaded drawers, and uneven floors can subtly distort a frame. Measuring only once at the beginning may produce a seat panel that fits perfectly on one side and hovers awkwardly over the other. Experienced DIYers make cardboard templates, check both diagonals, and test-fit every component before applying glue or fabric.
Upholstery projects also tend to use more fabric than expected. Patterns must remain centered, corners require extra material, and mistakes happen. Buying a little additional fabric is usually less frustrating than discovering that the final corner is three inches short. Beginners often find benches and footstools easier than armchairs because the shapes are simple and the stapled edges can usually be hidden underneath. Small upholstered pieces are frequently recommended as approachable starting points for learning basic techniques. can create another surprise. Different sections of repurposed furniture may absorb primer at different rates, especially when a project combines finished wood, raw plywood, repaired areas, and old veneer. A stain-blocking or bonding primer can help create a consistent foundation. Even then, patience matters. Recoating too early often causes dragging, fingerprints, or soft paint that sticks to baskets and cushions.
The best furniture conversions are designed around their final location. A bedroom bench can tolerate delicate fabric, while an entryway bench needs a finish that survives wet jackets, dirty shoes, keys, backpacks, and someone dropping a grocery bag on it. Outdoor furniture requires even greater protection. Cut edges, screw holes, joints, and undersides need attention because water usually enters through the places nobody photographs.
There is also a moment in many projects when the furniture looks worse than it did at the beginning. The drawers are removed, the finish is patchy, and the workshop resembles a lumberyard experiencing an identity crisis. That stage is normal. Taking photographs before disassembly, labeling hardware, and storing screws in small marked bags makes the rebuilding process much less confusing.
Finally, successful upcycling depends on knowing when to stop. Some pieces are too damaged, unstable, moldy, or historically valuable to become casual DIY seating. Others require professional woodworking or upholstery skills. Choosing the right candidate is part of the craft. A safe, modest bench made from a strong cabinet is a better result than an ambitious sofa made from wood that should have remained decorative.
Conclusion
Turning old furniture into extra seating is less about forcing a random object to become a chair and more about recognizing useful structure. Dressers offer drawers, coffee tables provide sturdy frames, cabinets create hidden storage, and decorative bed parts or doors add character that would be expensive to reproduce from new materials.
Start with a structurally sound piece, reinforce it for human weight, and match the materials to the room where the finished seat will live. The best transformations look creative without feeling improvised. They are comfortable, stable, practical, and just surprising enough to make guests ask where you bought them.
So before sending that outdated dresser, desk, or pair of nightstands to the curb, give it one more inspection. Your home may not need more furniture. It may simply need the furniture you already own to learn a new trick.














