If your Minecraft base has a glorious set of diamond armor tossed into a random chest beside three stacks of dirt and one suspiciously named potato, it may be time for an upgrade. Learning how to make an armor stand in Minecraft is one of the easiest ways to turn your survival house from “temporary cave with doors” into a real base with style, order, and just a tiny bit of showroom drama.
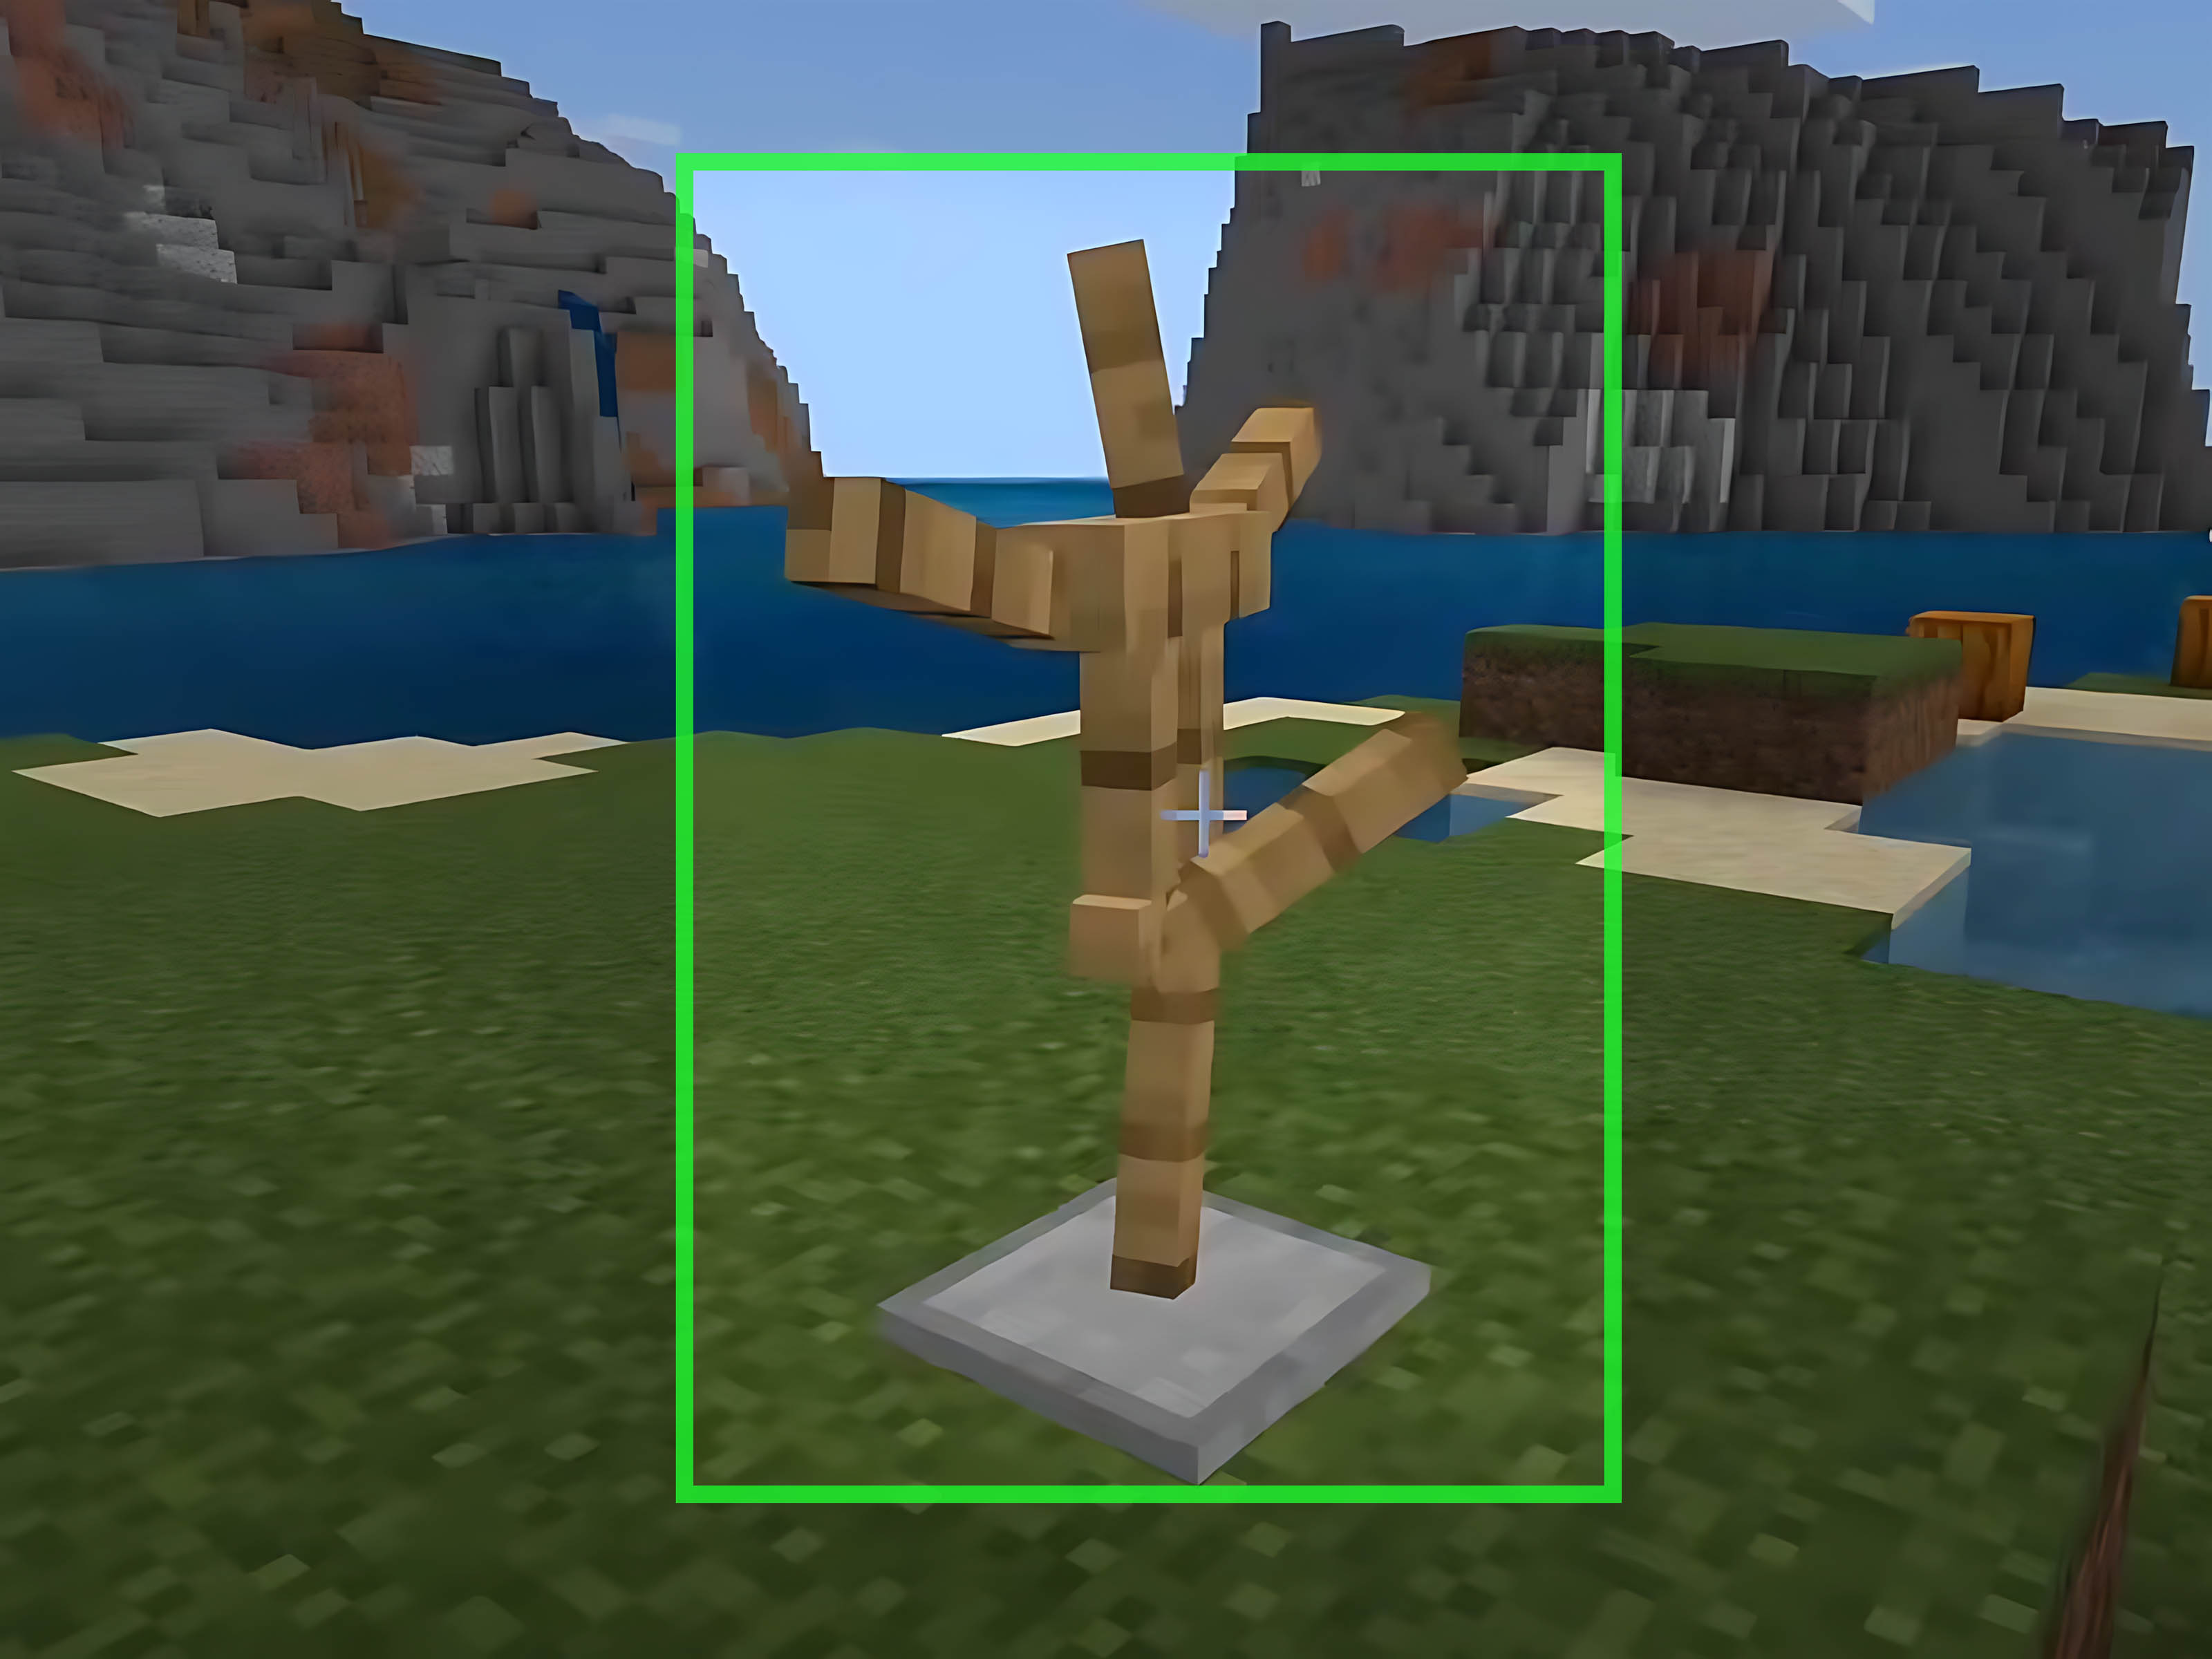
An armor stand is a decorative and practical item used to display armor, mob heads, carved pumpkins, and in some cases other wearable or held items depending on your edition and commands. It is especially useful if you like organizing gear sets, decorating armories, building shops, creating adventure maps, or simply showing off your enchanted netherite armor like it belongs in a museum guarded by wolves.
The best part? The Minecraft armor stand recipe is simple. You only need six sticks and one smooth stone slab. The only slightly tricky part is making sure you use a smooth stone slab, not a regular stone slab. Minecraft is very particular about recipes, like a chef who refuses to serve soup unless the bowl is emotionally prepared.
What Is an Armor Stand in Minecraft?
An armor stand is a placeable entity that acts like a display mannequin. Once placed, you can equip it with armor pieces such as helmets, chestplates, leggings, and boots. You can also use it to hold carved pumpkins, mob heads, and elytra. In Bedrock Edition, armor stands are even more interactive because players can change their poses directly in survival gameplay.
Players use armor stands for several reasons. They keep armor sets organized, make storage rooms look cleaner, and add detail to builds. A medieval castle feels more alive with armor stands lining the hallway. A blacksmith shop looks more convincing when a full iron set is standing near the anvil. A secret base feels cooler when the entrance is guarded by two silent armor stands wearing intimidating helmets.
Materials Needed to Make an Armor Stand
To craft one armor stand in Minecraft, you need the following materials:
| Material | Quantity | How to Get It |
|---|---|---|
| Sticks | 6 | Craft from wooden planks |
| Smooth Stone Slab | 1 | Craft from smooth stone or cut with a stonecutter |
| Crafting Table | 1 | Craft from 4 wooden planks |
You cannot craft an armor stand directly in the small 2×2 inventory crafting grid because the recipe requires a full 3×3 crafting grid. That means you need a crafting table. Fortunately, crafting tables are so basic that most Minecraft players make one before they even remember to build a roof.
How to Make Sticks in Minecraft
Sticks are one of the easiest items to craft in Minecraft. First, punch or chop a tree to collect logs. Turn the logs into wooden planks, then place two planks vertically in a crafting grid. This produces sticks. Any wood type works, including oak, birch, spruce, jungle, acacia, dark oak, mangrove, cherry, bamboo planks, and more.
Simple Stick Recipe
Place one plank above another plank in a crafting grid. Two wooden planks create four sticks. Since you need six sticks for an armor stand, craft at least eight sticks by using four planks. You will have two sticks left over, which is great because Minecraft always finds a way to demand more sticks later.
How to Make a Smooth Stone Slab
The smooth stone slab is the ingredient that causes the most confusion. A regular stone slab will not work for the armor stand recipe. You need a smooth stone slab. This distinction matters, especially in modern versions of Minecraft where smooth stone and regular stone are separate blocks.
Step 1: Get Cobblestone
Mine regular stone with a pickaxe to collect cobblestone. You only need a small amount, but if you are starting from scratch, gather at least three cobblestone blocks. If you already have stone or smooth stone stored somewhere, you can skip ahead.
Step 2: Smelt Cobblestone into Stone
Place cobblestone in a furnace with fuel such as coal, charcoal, wood, or even spare wooden tools. The furnace will smelt cobblestone into regular stone. This is the first cooking stage. Yes, Minecraft makes you bake a rock. We do not question the furnace; we simply obey.
Step 3: Smelt Stone into Smooth Stone
Put the regular stone back into the furnace and smelt it again. This second smelting process turns stone into smooth stone. Smooth stone has a cleaner, lighter texture and is used in recipes such as smooth stone slabs and blast furnaces.
Step 4: Craft the Smooth Stone Slab
Place three smooth stone blocks in a horizontal row on a crafting table to create six smooth stone slabs. You only need one smooth stone slab for one armor stand, so the recipe gives you enough slabs for several attempts or decorative building projects.
You can also use a stonecutter if you have one. A stonecutter is often more efficient because it can turn smooth stone directly into slabs without requiring three blocks at once. This is helpful early in survival mode when every resource feels precious and your storage system is still “one chest full of everything.”
How to Make an Armor Stand in Minecraft: Easy Steps
Once you have six sticks, one smooth stone slab, and a crafting table, you are ready to craft the armor stand.
Step 1: Open the Crafting Table
Right-click the crafting table on Java Edition or use the appropriate interaction button on Bedrock Edition. You should see a 3×3 crafting grid.
Step 2: Place Three Sticks Across the Top Row
Put one stick in each slot of the top row. This creates the upper part of the armor stand recipe.
Step 3: Place One Stick in the Center Slot
Put one stick in the center slot of the middle row. This forms the central post of the armor stand.
Step 4: Complete the Bottom Row
Place one stick in the bottom-left slot, the smooth stone slab in the bottom-center slot, and one stick in the bottom-right slot. The pattern should look like this:
Step 5: Move the Armor Stand to Your Inventory
If the recipe is correct, an armor stand will appear in the result box. Drag it into your inventory, and congratulations: you have officially created a tiny wooden employee whose job is to hold your armor forever.
How to Use an Armor Stand
To place an armor stand, select it in your hotbar and use it on the ground. Once placed, you can equip it by holding armor and interacting with the stand. A helmet goes on the head, a chestplate on the torso, leggings on the legs, and boots on the feet.
To remove armor from the stand, interact with the equipped item again. The armor stand does not open a storage menu like a chest. Instead, you interact directly with the items displayed on it. This makes it fast and visual, especially when you are comparing armor sets.
Best Items to Display on Armor Stands
- Full iron, diamond, or netherite armor sets
- Enchanted armor for combat, mining, or exploration
- Leather armor dyed in team colors
- Mob heads and carved pumpkins
- Elytra for a flight station near your base entrance
- Armor trim combinations for decoration
Java Edition vs. Bedrock Edition Armor Stands
Armor stands work in both Java Edition and Bedrock Edition, but there are differences. In Java Edition, standard survival armor stands are more limited. They usually do not have visible arms by default, and advanced posing often requires commands or data editing.
In Bedrock Edition, armor stands are more flexible for regular players. You can change their poses by sneaking and interacting with them, and Bedrock armor stands can cycle through multiple built-in poses. This makes them especially fun for decorators who want guards, statues, dancers, duelists, or dramatic “I just saw a creeper” poses.
If you play on a server, your options may also depend on server settings, plugins, datapacks, or command permissions. Creative mode players and map makers can do far more with armor stands than survival players because commands allow advanced control over rotation, visibility, arms, names, and equipment.
Where to Find Armor Stands Naturally
Although crafting is the main method, armor stands can also appear naturally in some village structures. In taiga villages, outdoor armory areas may contain armor stands equipped with iron gear. If you find one, you can break it and collect the stand, along with any dropped equipment.
However, relying on village generation is not the fastest method. It is much easier to craft your own armor stand unless you are already exploring villages. Crafting also lets you make as many as you need for a storage room, armory, museum, shop, training hall, or suspiciously dramatic throne room.
Common Mistakes When Crafting an Armor Stand
Using the Wrong Slab
The most common mistake is using a regular stone slab instead of a smooth stone slab. If the recipe does not work, check the slab first. Minecraft recipes can be strict, and this one specifically requires smooth stone.
Using the 2×2 Inventory Grid
You need a crafting table because the armor stand recipe takes up a 3×3 grid. The inventory crafting grid is too small.
Placing the Slab in the Wrong Slot
The smooth stone slab belongs in the bottom-center slot. The bottom-left and bottom-right slots should contain sticks.
Forgetting the Middle Stick
The center slot of the crafting grid must contain a stick. Without it, you are not making an armor stand. You are making Minecraft stare at you silently while refusing to craft anything.
Creative Ways to Use Armor Stands
Armor stands are not just for storing extra gear. Builders use them to add personality and storytelling to builds. A castle hallway can have armored guards. A weapons shop can show off equipment. A wizard tower can display enchanted robes made from dyed leather armor. A PvP arena can use armor stands to mark team loadouts.
Build an Armory
Place armor stands along the walls of a stone or deepslate room. Add item frames with swords, axes, shields, and bows. Use barrels or chests underneath for backup gear. This creates a clean, functional armory that looks much better than a pile of unlabeled chests.
Create a Hall of Heroes
Use armor stands to display armor sets from important milestones: your first iron armor, your first diamond set, your first netherite upgrade, or the gear you wore when you defeated the Ender Dragon. Add signs with dates or funny names. “The Creeper Incident Set” deserves respect.
Decorate Shops and Villages
Armor stands make excellent decorations for blacksmiths, barracks, market stalls, and training yards. Even a simple leather armor stand can make a village feel more alive.
Use Armor Stands in Redstone Builds
Because armor stands behave like entities, they can interact with certain mechanics in interesting ways. They can be pushed by pistons, moved by flowing water, affected by gravity, and used in decorative contraptions. Advanced builders often use them for hidden effects, moving displays, or map-making tricks.
Tips for Organizing Armor with Armor Stands
If you have multiple armor sets, organization matters. Place signs or item frames near each stand to label the purpose of the gear. For example, one stand can hold your mining armor with Protection and Respiration, another can hold Nether gear with Fire Protection, and another can hold your best combat set.
You can also color-code leather armor for teams, events, or roleplay builds. Dyed leather armor looks fantastic on armor stands and helps create visual variety. Put red armor near a nether portal, blue armor near an ocean base, or green armor in a forest outpost.
Can You Make an Armor Stand with Arms?
In standard Java Edition survival crafting, the armor stand usually does not come with visible arms. To create armor stands with arms in Java Edition, players often use commands. Commands can also make armor stands invisible, small, invulnerable, or precisely posed.
In Bedrock Edition, armor stands have more built-in pose functionality available through normal interaction. This makes Bedrock easier for players who want quick decorations without using commands.
Frequently Asked Questions
How many sticks do you need for an armor stand?
You need six sticks to craft one armor stand in Minecraft.
What slab do you need for an armor stand?
You need one smooth stone slab. A regular stone slab will not work in the armor stand recipe.
Can you craft an armor stand without a crafting table?
No. You need a crafting table because the armor stand recipe requires a 3×3 crafting grid.
Can armor stands hold weapons?
This depends on your edition and settings. Bedrock Edition armor stands can hold certain items more easily, while Java Edition often requires commands to show arms and hold items.
Do armor stands fall?
Yes. Armor stands obey gravity. If the block under an armor stand is removed, the stand can fall until it lands on another surface.
Extra Experience: What I Learned While Building with Armor Stands
The first time many players craft an armor stand, they expect it to be a simple storage item. You make it, place armor on it, and move on. But after using armor stands in several builds, it becomes clear that they are one of the most underrated decoration tools in Minecraft. They are small, cheap, flexible, and surprisingly good at making a base feel intentional.
One useful experience is to place armor stands near practical stations. For example, putting a stand beside a mine entrance with a helmet, chestplate, and boots makes the area feel like a real equipment checkpoint. Add a barrel for torches, a furnace for smelting ores, and a grindstone for repairing tools, and suddenly your mining area has personality. It is no longer just a hole in the ground with ambitions.
Another great trick is using armor stands as visual reminders. If you are preparing for the Nether, place a stand near the portal with gold boots, fire-resistant gear, and maybe a carved pumpkin for style. If you are heading to the End, make a special stand with your best armor, bow, sword, water bucket, and slow falling potions nearby. The stand becomes a checklist without needing a written list.
Armor stands also make multiplayer bases more fun. On servers, players often use them to show off armor trim designs, team uniforms, or event rewards. A row of armor stands with different dyed leather armor sets can turn a plain lobby into a colorful display. If your friends like roleplay or themed builds, armor stands help create guards, shopkeepers, knights, adventurers, or training dummies.
The biggest lesson is that placement matters. Armor stands look best when they are framed by the build around them. Put them on polished stone, carpet, or slabs. Add lighting so the armor is visible. Use trapdoors, banners, chains, or item frames to create a display area. Even a simple wooden room can look impressive if the armor stand is centered, labeled, and surrounded by small details.
It is also worth keeping extra smooth stone slabs and sticks in storage. Once you start decorating with armor stands, you may suddenly want more of them. One becomes three. Three become ten. Ten become an entire royal guard formation watching your storage room. At that point, you are not just crafting armor stands; you are managing a silent wooden army.
For survival players, armor stands are especially satisfying because they turn progress into something visible. Instead of hiding your old armor in a chest forever, you can display it as part of your world’s history. Your first iron set, your first diamond armor, your first netherite upgrade, and your favorite armor trim can all become decorations that tell the story of your adventure.
In short, an armor stand is easy to craft, but its value grows with creativity. It organizes gear, improves builds, supports roleplay, and gives your base that polished “yes, I definitely planned this” look. And all it takes is six sticks, one smooth stone slab, and the confidence to stop storing legendary armor next to rotten flesh.
Conclusion
Making an armor stand in Minecraft is simple once you know the exact recipe. Gather six sticks, craft or cut one smooth stone slab, open a crafting table, and place the ingredients in the correct pattern. The top row gets three sticks, the center slot gets one stick, and the bottom row gets stick, smooth stone slab, stick.
Armor stands are useful for storage, decoration, storytelling, shops, armories, and advanced creative builds. Whether you are organizing enchanted gear or designing a castle hallway full of silent guards, armor stands add both function and style to your world. They are cheap, practical, and much more elegant than throwing your armor into a chest labeled “stuff.”
Note: This article is based on verified Minecraft crafting mechanics for current Java and Bedrock gameplay, with special attention to the correct armor stand recipe: six sticks and one smooth stone slab.