A whitewashed brick chimney can change the mood of a roomor an entire housewithout erasing the character that made the brick appealing in the first place. Instead of hiding every bump, mortar line, and color variation beneath an opaque coat, whitewashing softens the brick and lets its texture stay visible. The result can feel coastal, farmhouse-inspired, historic, minimalist, or quietly modern, depending on the color, coverage, and surrounding decor.
The catch is that brick is not drywall wearing a rugged costume. It is porous masonry, often exposed to moisture, heat, soot, and seasonal temperature changes. A successful whitewashed brick chimney begins with choosing the right finish and correcting the chimney’s condition before opening a paint can. Skip those steps, and the makeover may eventually feature peeling paint, powdery residue, or stains that return like an unwanted sequel.
What Does “Whitewashed Brick Chimney” Mean?
The phrase can describe several different finishes. Traditional whitewash is generally associated with a lime-and-water coating. Modern DIY tutorials often use “whitewash” for diluted water-based paint. Homeowners may also use mineral paint, masonry stain, or a thin mortar treatment to create a pale, aged appearance.
True Limewash
Limewash is a mineral finish made primarily from slaked lime, water, and sometimes mineral pigments. It penetrates and bonds with suitable porous masonry rather than forming a thick, plastic-like film. Its matte, softly mottled appearance is one reason it looks at home on old brick. Limewash is also breathable, allowing water vapor to move through the masonry more readily than many conventional coatings.
Diluted Latex-Paint Whitewash
This popular DIY method combines white or off-white water-based paint with water. A 1-to-1 ratio is a common starting point, but the mixture can be adjusted. More water reveals more brick; more paint creates fuller coverage. The method is easy to control and uses widely available materials, but it behaves more like paint than authentic limewash and may require future maintenance, especially outdoors.
German Schmear or Mortar Wash
A German schmear uses mortar to partially cover the brick faces and emphasize the joints. It creates a heavier, more dimensional finish than whitewash. Think old European cottage rather than lightly fogged brick. It can be beautiful, but it is more labor-intensive and considerably harder to reverse.
Is Whitewashing the Right Choice?
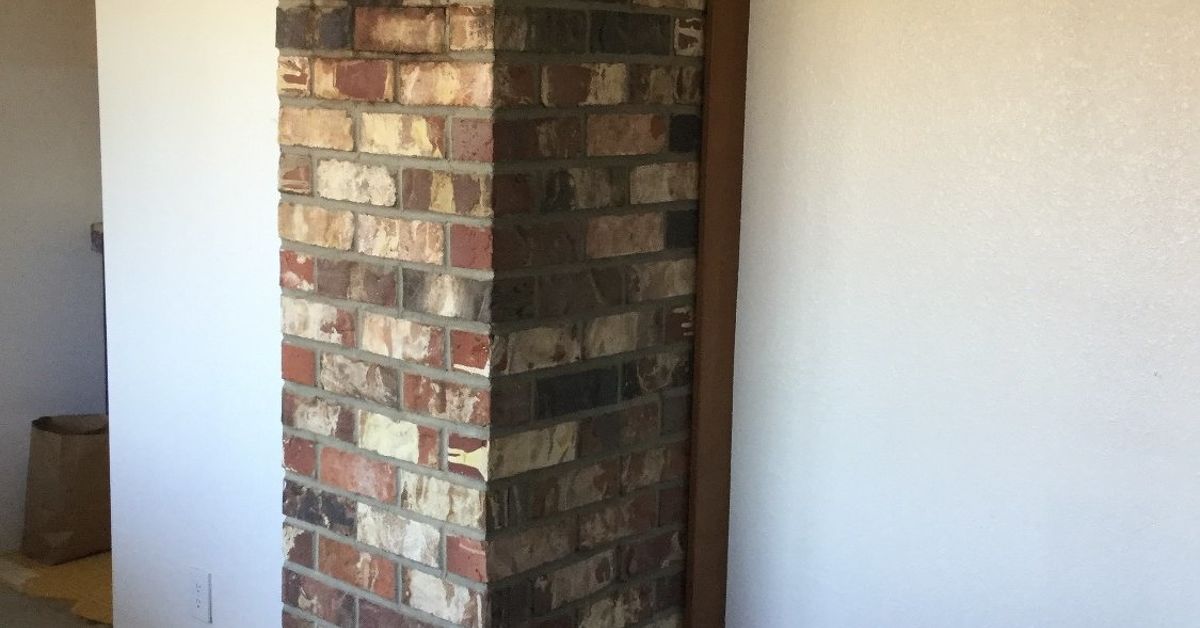
Whitewashing works best when the brick is structurally sound, reasonably clean, and compatible with the chosen product. It is especially effective when dark red, orange, or brown brick visually overwhelms a room, clashes with new flooring, or makes a low-light space feel smaller. A translucent finish brightens the surface while preserving enough variation to avoid the flat “brick-shaped wall” effect.
However, a cosmetic coating should never be used to disguise a masonry problem. Before starting, look for cracked or missing mortar, loose bricks, spalling faces, persistent dampness, white crystalline deposits, rust stains, and dark water streaks. Exterior chimneys also need sound flashing, a proper cap or crown, intact joints, and functional drainage details. If moisture is entering from above, whitewash will not negotiate a peace treaty with it.
For a working fireplace or stove, the chimney and venting system should be inspected and cleaned as needed by a qualified professional. Do not apply ordinary wall paint inside the firebox, smoke chamber, flue, or any surface exposed to direct flame or extreme heat. The visible chimney breast or fireplace surround is a decorative surface; the firebox is a combustion zone. Those are not interchangeable job descriptions.
Choosing Between Limewash and Paint Whitewash
Choose Limewash When:
- You want a chalky, mineral, naturally varied finish.
- The brick is unpainted, porous, and suitable for mineral coatings.
- Breathability is especially important, such as on exterior or older masonry.
- You appreciate a finish that weathers and develops character over time.
Choose Diluted Water-Based Paint When:
- You are updating an interior chimney breast or fireplace surround.
- You want precise control over opacity and color.
- The brick has already been painted or is not absorbent enough for limewash.
- You prefer familiar painting tools and easily available materials.
Always check the coating manufacturer’s instructions for masonry compatibility. Some glossy, glazed, sealed, or previously coated bricks will not absorb limewash properly. A quick water test can be revealing: sprinkle clean water on the surface. If it darkens and absorbs, the brick is porous. If the water beads and sits there looking smug, an existing sealer or dense surface may be blocking absorption.
Tools and Materials
- Drop cloths, plastic sheeting, and painter’s tape
- Safety glasses, gloves, and suitable respiratory protection
- Vacuum with a brush attachment
- Stiff nylon or natural-bristle cleaning brush
- Mild masonry-safe cleaner and clean water
- Bucket, measuring container, and mixing stick
- Masonry brush or large block brush
- Smaller angled brush for joints and edges
- Clean lint-free rags or natural sponges
- Spray bottle or pump sprayer for limewash
- Chosen limewash, mineral coating, or water-based paint
For an exterior chimney, safe access is not an optional accessory. Roof pitch, height, wind, power lines, and unstable ladders can turn a pleasant Saturday project into a very expensive story. Professional scaffolding or a qualified contractor is often the sensible choice.
How to Whitewash a Brick Chimney Step by Step
1. Inspect Before Decorating
Examine the brick and mortar carefully. Repair active leaks, failed flashing, damaged chimney crowns, deteriorated mortar, and loose masonry first. Fresh mortar or masonry repairs may need to cure fully before coating, according to the repair and coating manufacturers.
If the chimney is historic, consult a preservation-minded mason before repointing. Older, softer bricks often require a compatible lime-rich mortar. An overly hard modern mortar may force moisture and stress into the surrounding brick, causing the brick faces to deteriorate.
2. Protect the Surrounding Area
Cover floors, walls, the hearth, mantel, furniture, roofing, siding, and landscaping as appropriate. Mask metal fireplace doors, trim, and adjacent surfaces. Whitewash is charming on brick and less charming on walnut flooring, television screens, and the family dog.
3. Remove Dust, Soot, and Loose Material
Vacuum interior brick and brush away loose debris. Clean soot using a method approved for both the brick and the selected coating. Start gently with clean water and a mild masonry-safe cleaner rather than immediately reaching for the most aggressive chemical on the shelf.
Rinse away cleaning residue and allow the surface to dry as directed for the selected finish. Do not coat over efflorescence, damp masonry, grease, or recurring soot. Identify and correct the source first. A coating applied over contamination is merely renting the surface until it decides to leave.
4. Make a Sample Panel
Test the finish in an inconspicuous area or on spare brick. Evaluate it only after it dries because wet whitewash can look dramatically different. Test several dilution ratios and application methods. Label the samples so you do not later stand in front of three pale rectangles wondering which one was “two cups plus the mystery splash.”
5. Prepare the Mixture
For a paint whitewash, begin with equal parts water and quality water-based paint, then adjust. More water produces a transparent finish, while more paint increases coverage. Mix enough to maintain a consistent ratio, and stir regularly because diluted coatings can separate.
For commercial limewash, follow the manufacturer’s dilution and mixing instructions exactly. Do not assume every limewash product uses the same formula. Wear gloves and eye protection because lime-based products are highly alkaline and can irritate skin and eyes.
6. Dampen the Brick When Using Limewash
Porous brick is commonly dampened before limewash application so the coating does not dry too quickly. The surface should be evenly damp but not dripping. Work in manageable sections and maintain a wet edge. For diluted latex paint, follow the paint manufacturer’s preparation guidance rather than automatically wetting the masonry.
7. Apply With Natural Variation
Load a masonry brush lightly and work the mixture into the brick faces and mortar joints. Apply it in sections, stepping back frequently to judge the overall balance. For a softly aged result, vary the pressure and leave occasional areas more transparent.
A sponge or lint-free rag can lift excess material while it is still workable. Avoid creating identical white rectangles. Natural-looking variation is the entire point; otherwise, you could save time by painting a smooth wall and drawing little brick lines on it.
8. Build Coverage Gradually
It is easier to add another thin coat than to remove a thick one. Let the first application dry enough to reveal the true color before deciding whether to continue. Dark brick may need a second pass, but full opacity is not automatically better.
When every brick disappears beneath solid white, you have crossed from whitewash into painted-brick territory. That may be the desired result, but it should be a deliberate decision rather than an accident involving an overexcited roller.
9. Remove Masking and Allow Proper Curing
Pull painter’s tape before the coating becomes hard enough to tear along the edge. Follow the product’s drying and curing instructions before cleaning, decorating, exposing the surface to rain, or using the fireplace. Ventilate interior spaces throughout application and drying.
Whitewashed Brick Chimney Color Ideas
Pure bright white can create a crisp contemporary look, but it may appear blue or stark beside warm wood, cream walls, or traditional furnishings. Off-white, ivory, greige, pale taupe, and soft gray often produce a more natural whitewashed brick chimney. Match the undertone to nearby flooring, stone, wall paint, cabinetry, and trim.
Modern Farmhouse
Use a warm off-white wash with medium coverage, a chunky natural-wood mantel, black metal accents, and simple ceramics. Keep enough red or brown brick visible to prevent the finish from looking overly manufactured.
Clean Contemporary
Choose a cooler white or light gray, increase the opacity slightly, and pair the chimney with slim shelving and restrained decor. A charcoal hearth or black fireplace screen can ground the pale brick and keep the fireplace from visually floating away.
Historic or Cottage Style
A mineral limewash with irregular transparency often looks more believable than a perfectly uniform coating. Preserve softened edges, varied brick tones, and evidence of age. Old houses rarely ask to be airbrushed; they generally prefer flattering lighting.
Warm Transitional Style
Try a creamy greige wash that reduces the intensity of red brick without turning it completely white. Pair it with medium-toned oak, linen upholstery, antique brass, and understated mantel decor. This approach works well when a room combines traditional architecture with newer furniture.
Common Mistakes to Avoid
- Coating damp or damaged masonry: Repair the cause, not just the appearance.
- Skipping the test patch: Brick color, porosity, and mortar absorbency vary dramatically.
- Using oil-based paint in a diluted mixture: It does not combine with water as required for this technique.
- Making the first coat too opaque: Heavy coverage is difficult to undo.
- Ignoring previous sealers: A nonporous surface can cause poor bonding and uneven absorption.
- Painting direct-flame areas: Use only products specifically approved for the location and temperature.
- Using harsh cleaning methods without testing: Aggressive pressure, acids, or abrasive tools may damage brick and mortar.
- Forgetting future maintenance: Exterior finishes weather, and painted masonry may require periodic recoating.
Maintenance After Whitewashing
Dust interior whitewashed brick with a soft brush or vacuum attachment. For small marks, use a barely damp cloth and test the method in a hidden area first. Heavily distressed limewash can change when scrubbed, so aggressive cleaning may create a surprisingly clean patch surrounded by carefully cultivated rustic charm.
Keep soot under control by maintaining the fireplace, using properly seasoned fuel when applicable, and addressing smoke spillage rather than repeatedly cleaning the symptom. Recurring black staining above the opening may indicate operational, drafting, or fireplace-design issues that deserve professional attention.
Inspect an exterior chimney after severe weather and during normal home-maintenance checks. Watch for open mortar joints, cracked crowns, failed flashing, biological growth, water staining, spalling, and coating loss. Limewash may weather in a way that looks intentional, while paint-based whitewash tends to announce failure more dramatically through peeling or blistering.
Experience Notes: What the Project Is Really Like
The most common surprise during a whitewashed brick chimney project is how quickly the appearance changesand how slowly the decision-making feels. One brushstroke can turn a dark brick wall noticeably brighter, yet homeowners often spend twenty minutes debating whether that stroke is “warm historic character” or “somebody spilled milk on the fireplace.” This is why a sample area and frequent breaks are invaluable. Your eyes adapt to the new brightness, and what seemed too white at noon may look perfectly balanced by evening.
Preparation usually takes longer than application. Vacuuming mortar joints, protecting the hearth, wiping soot, and waiting for the surface to reach the correct moisture condition can consume most of the schedule. That is normal. The glamorous part of the projectthe part that appears in before-and-after photographsis often the shortest part. A rushed cleaning stage, however, can leave dark flecks, greasy spots, and weak adhesion that remain visible long after the social-media excitement has wandered elsewhere.
Another practical lesson is to mix more carefully than you think necessary. A diluted paint formula that changes from batch to batch produces bands of different opacity. Measure the water and paint, record the ratio, and use the same tools throughout. When working across a large chimney breast, blend a new mixture into the remaining batch rather than finishing one section with “Batch A” and starting the next with “Whatever Looked Close.” Brick is wonderfully forgiving about texture and astonishingly honest about inconsistent color.
Applying less product is usually the safer emotional choice. The first wet coat may appear patchy and underwhelming. Resist the urge to attack it immediately with another heavy layer. Let it dry. Whitewash becomes lighter as water evaporates, and limewash in particular can change significantly during curing. Many successful projects are built with two restrained passes rather than one enthusiastic avalanche.
Working the mortar joints can also alter the final style. Covering the joints more heavily creates a softer, more unified surface. Leaving portions of darker mortar visible gives the chimney stronger geometry and a more rustic look. Neither approach is universally correct. The room decides: smooth white walls and modern furniture may benefit from calmer, more consistent joints, while reclaimed wood and traditional trim can support greater variation.
Lighting deserves a test of its own. Natural daylight, warm evening lamps, and firelight can make the same whitewash appear gray, cream, or almost bright white. View your sample panel in every common lighting condition before committing. This simple pause prevents choosing a cold white that looks elegant at breakfast and vaguely refrigerated after sunset.
Finally, expect the finished chimney to influence everything around it. A brighter brick surface may make an old mantel look darker, expose a yellow undertone in nearby wall paint, or suddenly make the hearth tile seem busy. Do not assume the entire room needs replacing. Live with the chimney for several days first.
Often, a smaller adjustmenta simplified mantel display, a new wall color, or a darker fireplace screenbrings the composition together. A good whitewash does not erase the chimney’s history. It edits the volume so the brick can participate in the room without shouting over everyone.
Conclusion
A whitewashed brick chimney can be a high-impact, approachable update, but the best results come from treating it as a masonry project first and a decorating project second. Inspect the chimney, solve moisture and mortar problems, select a breathable and compatible finish, test the color, and build coverage slowly.
Whether you choose true limewash or diluted water-based paint, the goal is not sterile perfection. It is controlled variationa brighter chimney that still looks unmistakably like brick. Done carefully, the finish can modernize the room while preserving the texture, age, and architectural presence that made the chimney worth keeping.