
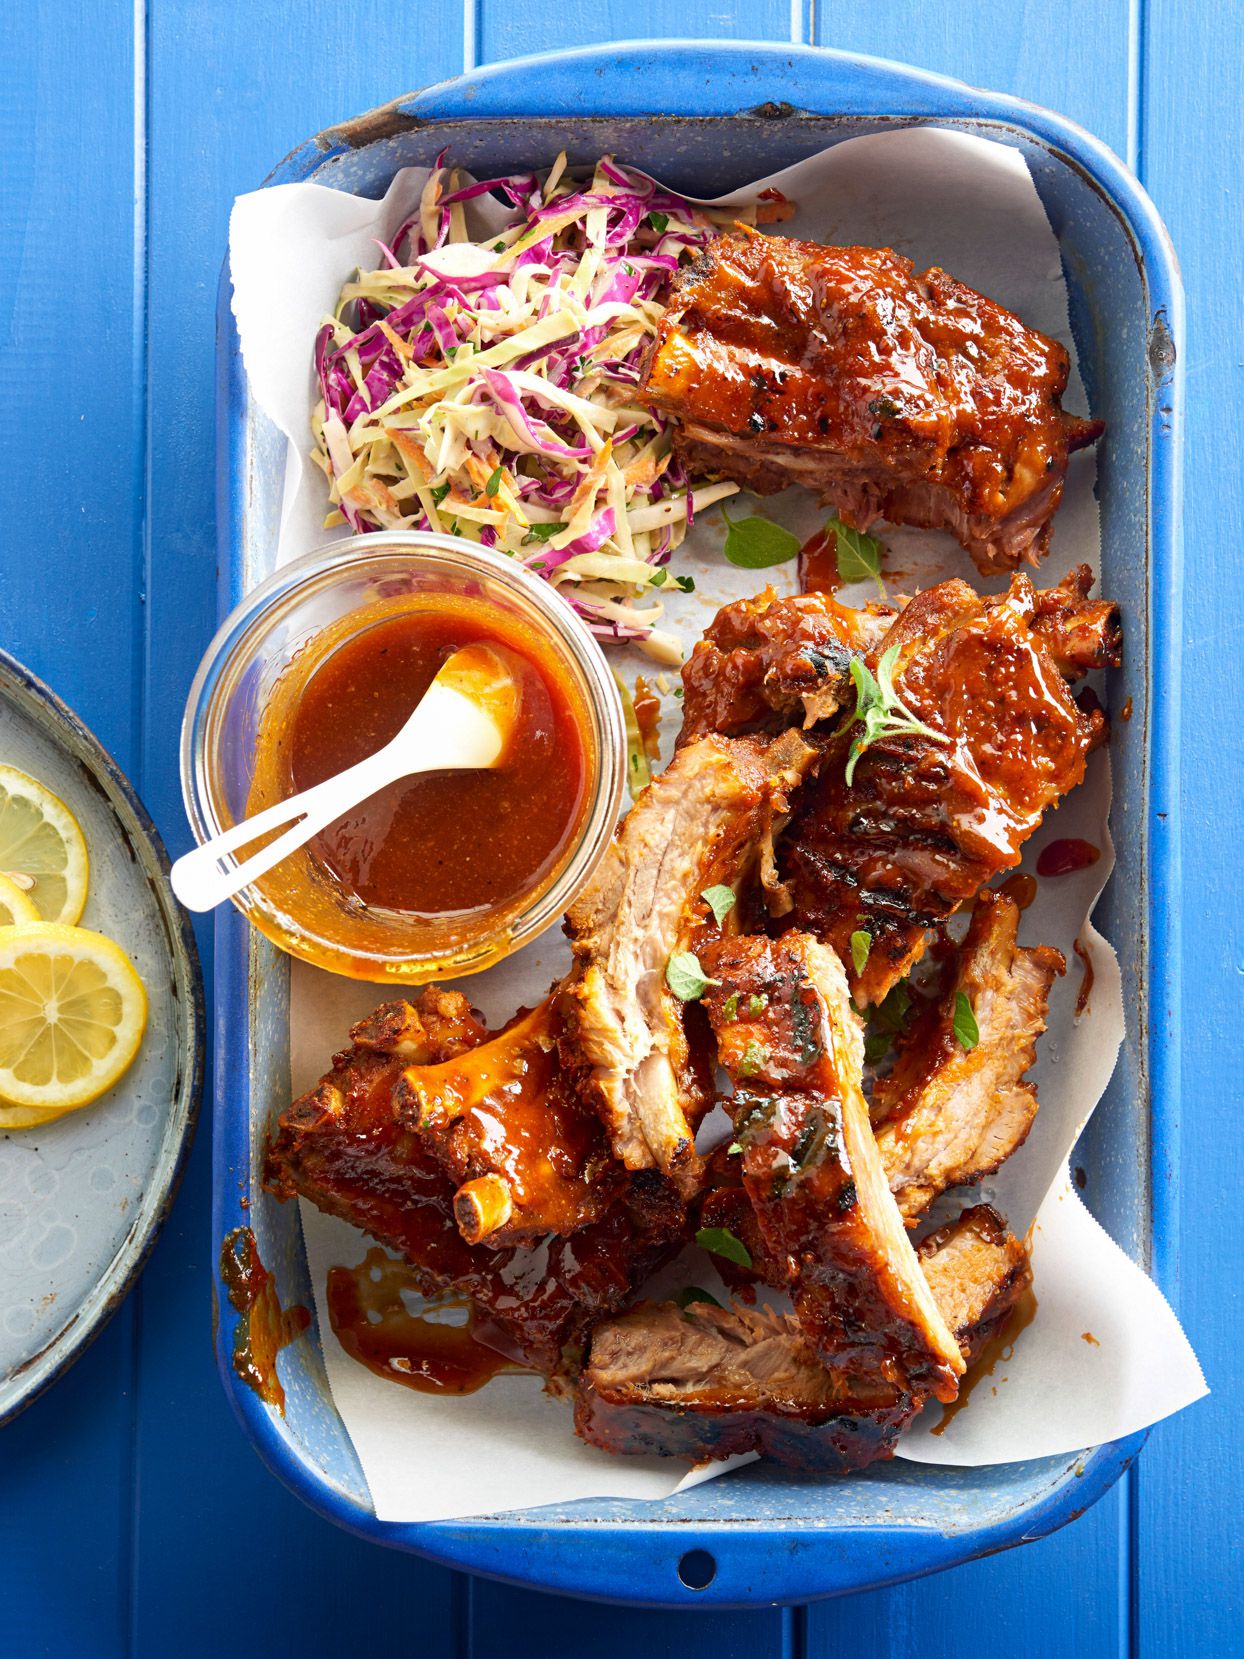
Some foods politely ask for attention. Baby back ribs kick open the backyard gate, announce themselves with barbecue sauce on their shirt, and somehow become the main character of dinner before anyone has even found the napkins. The only problem? Traditional ribs can feel intimidating. Smoking them low and slow sounds wonderful until you remember you have errands, a family, a weather forecast with opinions, and a grill that sometimes behaves like a moody dragon.
That is where oven-to-grill baby back ribs come in. This method gives you the best of both worlds: the steady, controlled tenderness of oven-baked ribs and the smoky, caramelized finish of grilled ribs. You bake the ribs low and covered until the meat becomes tender, then move them to the grill for that glossy barbecue crust, light char, and unmistakable cookout flavor. In other words, the oven does the patient work, and the grill gets the applause.
This guide walks you through everything you need to know: how to choose baby back ribs, remove the membrane, season them properly, bake them until tender, finish them on a gas or charcoal grill, and avoid common mistakes. Whether you are cooking for a summer party, a game-day feast, a family dinner, or one glorious plate you absolutely do not plan to share, this recipe is practical, flavorful, and very napkin-friendly.
What Are Baby Back Ribs?
Baby back ribs come from the upper portion of the pig’s rib cage, near the backbone. They are shorter, curved, and usually leaner than spare ribs or St. Louis-style ribs. Despite the name, “baby” does not mean they come from tiny pigs; it simply refers to their smaller size compared with spare ribs. A typical rack weighs about 1.5 to 2.5 pounds and feeds two to three people, depending on appetites and whether your guests treat ribs as dinner or a competitive sport.
Baby backs are popular because they cook relatively quickly, have a naturally tender texture, and fit beautifully on sheet pans and grills. They also love dry rubs, barbecue sauce, smoke, honey, brown sugar, garlic, paprika, and basically anything else that makes your kitchen smell like happiness.
Why the Oven-to-Grill Method Works So Well
Cooking ribs entirely on the grill can be amazing, but it requires careful temperature control. If the heat runs too high, the outside can burn before the inside becomes tender. If the heat drops too low, dinner may arrive sometime next Tuesday. The oven-to-grill method solves that problem by splitting the job into two smart stages.
Stage 1: The Oven Builds Tenderness
The oven provides steady, even heat. When the ribs are wrapped tightly in foil or covered in a pan, they gently steam and braise in their own juices. This helps the meat soften without drying out. A low oven temperature, usually around 275°F to 300°F, gives the ribs time to become tender while keeping the process predictable.
Stage 2: The Grill Builds Flavor
The grill adds what the oven cannot: char, smoke, caramelization, and that unmistakable backyard barbecue personality. Once the ribs are tender, they only need a short stay on the grill. Brush them with sauce, turn them carefully, and let the heat tighten the glaze until it becomes sticky, shiny, and slightly smoky.
Ingredients for Oven-to-Grill Baby Back Ribs
This recipe keeps the ingredient list simple but flavorful. You can use your favorite store-bought barbecue sauce or make your own. The real secret is balancing sweetness, smoke, salt, and a gentle kick of spice.
Main Ingredients
- 2 racks baby back ribs, about 4 to 5 pounds total
- 2 tablespoons yellow mustard or olive oil
- 1/2 cup barbecue sauce, plus more for serving
- 1/4 cup apple juice, apple cider, or water
- 1 tablespoon apple cider vinegar
Dry Rub Ingredients
- 2 tablespoons brown sugar
- 1 tablespoon smoked paprika
- 2 teaspoons kosher salt
- 2 teaspoons garlic powder
- 2 teaspoons onion powder
- 1 teaspoon black pepper
- 1 teaspoon chili powder
- 1/2 teaspoon ground cumin
- 1/4 teaspoon cayenne pepper, optional
The brown sugar helps create a beautiful crust, while smoked paprika adds barbecue depth even before the ribs hit the grill. Garlic powder and onion powder bring savory backbone, and chili powder gives the rub a warm, rounded flavor. Cayenne is optional, but if your dinner guests enjoy a little heat, it brings just enough sass to keep things interesting.
How to Prepare Baby Back Ribs
Step 1: Remove the Membrane
Turn each rack bone-side up. You will usually see a thin, shiny membrane stretched across the back. Slide a butter knife under one corner, loosen it, then grip it with a paper towel and pull it away. Removing the membrane helps the seasoning reach the meat and makes the ribs easier to bite. If it comes off in one glorious sheet, congratulations, you have just experienced one of cooking’s small but deeply satisfying victories.
Step 2: Pat the Ribs Dry
Use paper towels to dry both sides of the ribs. Moisture on the surface can prevent the rub from sticking well. Dry ribs are not the goal at the dinner table, but they are helpful at the seasoning stage.
Step 3: Add a Binder
Rub the ribs lightly with yellow mustard or olive oil. Mustard is a classic choice because it helps the spices cling and leaves very little mustard flavor after cooking. It is not there to make the ribs taste like a hot dog; it is there to act like edible glue with benefits.
Step 4: Season Generously
Mix the dry rub ingredients in a bowl, then sprinkle the blend over both sides of the ribs. Press the seasoning into the meat instead of aggressively rubbing it around. Too much rubbing can clump the spices and make uneven patches. For deeper flavor, season the ribs several hours ahead or refrigerate them overnight. If you are short on time, even 30 minutes at room temperature helps the rub settle in.
Oven-to-Grill Baby Back Ribs Recipe
Prep Time
20 minutes, plus optional resting time with the dry rub
Cook Time
2 1/2 to 3 hours in the oven, plus 10 to 15 minutes on the grill
Servings
4 to 6 servings
Instructions
- Preheat the oven. Heat your oven to 275°F. Line a large rimmed baking sheet with heavy-duty foil for easier cleanup.
- Season the ribs. Remove the membrane, pat the racks dry, coat lightly with mustard or oil, and apply the dry rub on all sides.
- Wrap the ribs. Place each rack meat-side up on foil. Mix apple juice and apple cider vinegar, then drizzle a little around each rack. Wrap tightly so steam stays inside.
- Bake until tender. Place the wrapped ribs on the baking sheet and bake for 2 1/2 to 3 hours. The ribs are ready for the grill when the meat has pulled back slightly from the bones and a toothpick or skewer slides into the meat with little resistance.
- Preheat the grill. Heat a gas grill to medium or prepare a charcoal grill for indirect heat. Clean and oil the grates.
- Unwrap carefully. Open the foil away from your face because hot steam is not the facial treatment anyone requested. Transfer the ribs to a plate or tray.
- Sauce and grill. Brush the ribs with barbecue sauce. Grill meat-side down for 3 to 5 minutes, then turn and brush with more sauce. Continue grilling for another 5 to 10 minutes, turning as needed, until the sauce is glossy and lightly caramelized.
- Rest and slice. Let the ribs rest for 5 to 10 minutes. Slice between the bones and serve with extra sauce.
How to Know When Baby Back Ribs Are Done
Ribs can be tricky because safe does not always mean tender. Pork is considered safely cooked at a lower internal temperature than many people assume, but ribs taste best when cooked longer so the connective tissue softens. For tender barbecue-style ribs, many cooks look for a final texture rather than relying only on a thermometer.
Use the Bend Test
Pick up a rack with tongs from one end. If the ribs bend easily and the surface begins to crack slightly, they are tender. If the rack stays stiff like a wooden board, it needs more time.
Look for Meat Pullback
As ribs cook, the meat shrinks slightly and exposes the ends of the bones. This is a helpful visual clue, although it should not be the only sign you trust.
Check With a Toothpick
Slide a toothpick or thin skewer into the meat between the bones. It should go in smoothly, almost like sliding into softened butter. If it feels tight or rubbery, keep cooking.
Gas Grill vs. Charcoal Grill: Which Is Better?
Both work beautifully for oven-to-grill ribs. A gas grill is convenient and easier to control, which makes it great for weeknight cooking or anyone who prefers fewer dramatic flame moments. A charcoal grill brings more smoky character and a deeper grilled flavor, especially if you add a small chunk of hardwood such as apple, cherry, or hickory.
For a gas grill, preheat to medium, then lower the burners if the sauce begins to darken too quickly. For a charcoal grill, arrange the coals on one side and place the ribs on the cooler side first. Move them briefly over direct heat only when you want extra caramelization. Remember, the ribs are already tender from the oven. The grill finish is about flavor and texture, not long cooking.
Best Barbecue Sauce for Oven-to-Grill Ribs
The best barbecue sauce depends on your mood. A Kansas City-style sauce is thick, sweet, and tomato-based, which makes it perfect for sticky glazed baby back ribs. A Carolina-style vinegar sauce is tangier and lighter, cutting through the richness of the pork. A mustard-based sauce adds sharpness and color, while a spicy chipotle sauce brings smoke and heat.
Whatever sauce you choose, apply it near the end of cooking. Most barbecue sauces contain sugar, and sugar can burn if exposed to high heat for too long. Thin layers work better than one heavy coat. Brush, grill, turn, brush again, and let the sauce build gradually. This creates a lacquered finish instead of a scorched sugar jacket.
Flavor Variations to Try
Honey Garlic Ribs
Add 1 tablespoon honey and 1 teaspoon grated garlic to your barbecue sauce. Brush it on during the final minutes of grilling for a sweet-savory glaze.
Spicy Chipotle Ribs
Mix chopped chipotle peppers in adobo into your sauce. This version is smoky, bold, and excellent with creamy coleslaw.
Maple Bourbon Ribs
Stir a splash of bourbon and a tablespoon of maple syrup into the sauce. Simmer it briefly before using if you want a smoother, more mellow flavor.
Dry-Style Ribs
Skip the sauce and finish the ribs on the grill with an extra sprinkle of dry rub. Serve sauce on the side. This keeps the bark more textured and lets the pork flavor shine.
What to Serve With Oven-to-Grill Baby Back Ribs
Ribs deserve side dishes that can hold their own without stealing the whole show. Classic coleslaw is always a smart choice because its cool crunch balances the richness of the meat. Baked beans bring sweetness and smoke. Cornbread adds comfort. Grilled corn on the cob is practically required by backyard law. Potato salad, macaroni and cheese, pickles, cucumber salad, and roasted vegetables also fit right in.
For a lighter plate, serve ribs with a crisp green salad, vinegar slaw, or grilled zucchini. For a full barbecue spread, add beans, rolls, watermelon, and enough napkins to make your paper towel roll nervous.
Make-Ahead Tips
One of the biggest advantages of oven-to-grill baby back ribs is that they are easy to make ahead. Bake the ribs until tender, let them cool, and refrigerate them while still wrapped. When you are ready to serve, bring them close to room temperature for about 20 to 30 minutes, brush with sauce, and finish on the grill.
This is especially useful for parties. Instead of hovering over the grill for hours while guests ask when dinner will be ready, you can do the slow cooking earlier and finish the ribs in minutes. You get relaxed-host energy without sacrificing barbecue flavor.
How to Store and Reheat Leftover Ribs
Store leftover ribs in an airtight container in the refrigerator for up to 3 to 4 days. To reheat, wrap them in foil with a splash of water, apple juice, or extra sauce. Warm in a 300°F oven until heated through. You can also reheat them on a covered grill over low indirect heat. Avoid blasting them over high heat, or the sauce may burn before the meat warms properly.
Leftover rib meat is fantastic in sandwiches, tacos, baked potatoes, nachos, fried rice, or scrambled eggs. Yes, ribs for breakfast. We are adults, and adults sometimes make excellent decisions.
Common Mistakes to Avoid
Skipping the Membrane
Leaving the membrane on can make ribs chewy on the bone side and prevent seasoning from penetrating evenly.
Cooking Too Hot
High oven heat may cook the outside quickly but leave the ribs tough. Low and steady heat is the safer path to tenderness.
Saucing Too Early on the Grill
Barbecue sauce can burn because of its sugar content. Add it near the end and build the glaze in thin coats.
Not Letting the Ribs Rest
A short rest helps juices settle and makes slicing easier. It also gives everyone time to admire the ribs, which is important for morale.
Experience Notes: What Cooking Oven-to-Grill Baby Back Ribs Teaches You
The first time you make oven-to-grill baby back ribs, you may feel like you are cheating. The oven does so much of the heavy lifting that the process seems too calm to produce anything dramatic. There is no frantic flipping, no three-hour wrestling match with grill vents, and no need to stand outside pretending the smoke in your eyes is part of the authentic experience. Then you unwrap the foil, see the ribs bending gently under their own tenderness, and realize this method is not cheating. It is simply cooking with a plan.
One of the biggest lessons is that ribs reward patience more than constant attention. Many beginners want to poke, flip, peek, and adjust every few minutes. But once the ribs are wrapped and in the oven, the best thing you can do is leave them alone. The steady heat slowly relaxes the meat, the dry rub melts into the surface, and the enclosed steam keeps everything moist. When you finally open the foil, the aroma is rich, savory, and slightly sweet, like the kitchen has been keeping a delicious secret.
Another practical experience is learning how personal rib texture can be. Some people want ribs that fall completely off the bone. Others prefer a gentle bite, where the meat pulls away cleanly but still has structure. The oven-to-grill method lets you control that. Bake closer to 2 1/2 hours for ribs with a little chew. Push toward 3 hours or slightly longer for softer, more fall-apart results. After one or two tries, you will know exactly where your household lands on the tenderness scale.
The grill finish is also a confidence builder. Because the ribs are already cooked through and tender, you are not trying to finish raw meat over unpredictable heat. You are simply adding character. A little char on the edges, a glossy sauce layer, and a faint smoky aroma can make the ribs taste like they came from a serious barbecue setup. Even a basic gas grill can deliver great results when the ribs arrive ready for their final glow-up.
Perhaps the most useful lesson is that ribs are forgiving if you respect the basics. Keep the oven heat moderate, wrap the ribs well, avoid burning the sauce, and rest the meat before slicing. Everything else can be adjusted. Want more spice? Add cayenne. Prefer sweeter ribs? Use honey or brown sugar. Cooking for sauce lovers? Serve extra on the side. Cooking for dry-rub fans? Grill them without sauce and let the spice crust speak for itself.
Oven-to-grill baby back ribs are also a great reminder that impressive food does not have to be complicated. When guests see a platter of shiny, smoky ribs, they assume you spent the entire day performing advanced barbecue wizardry. You can simply smile, pass the napkins, and let the ribs take credit. They are very good at it.
Conclusion
Oven-to-grill baby back ribs are the perfect solution for anyone who wants tender, flavorful ribs without babysitting a smoker all day. The oven creates reliable tenderness, while the grill adds smoky flavor, caramelized sauce, and those irresistible charred edges. With a simple dry rub, a careful foil wrap, and a short barbecue finish, you can turn a few racks of baby back ribs into a meal that feels festive, generous, and just messy enough to be fun.
This method is flexible enough for beginners and satisfying enough for experienced home cooks. Make the ribs ahead for a party, customize the sauce, try different rubs, and serve them with classic sides like coleslaw, baked beans, corn, or potato salad. Once you master the oven-to-grill rhythm, you may never go back to stressful rib cooking again. Your grill still gets to look heroic, but your oven will know who did the real work.












