
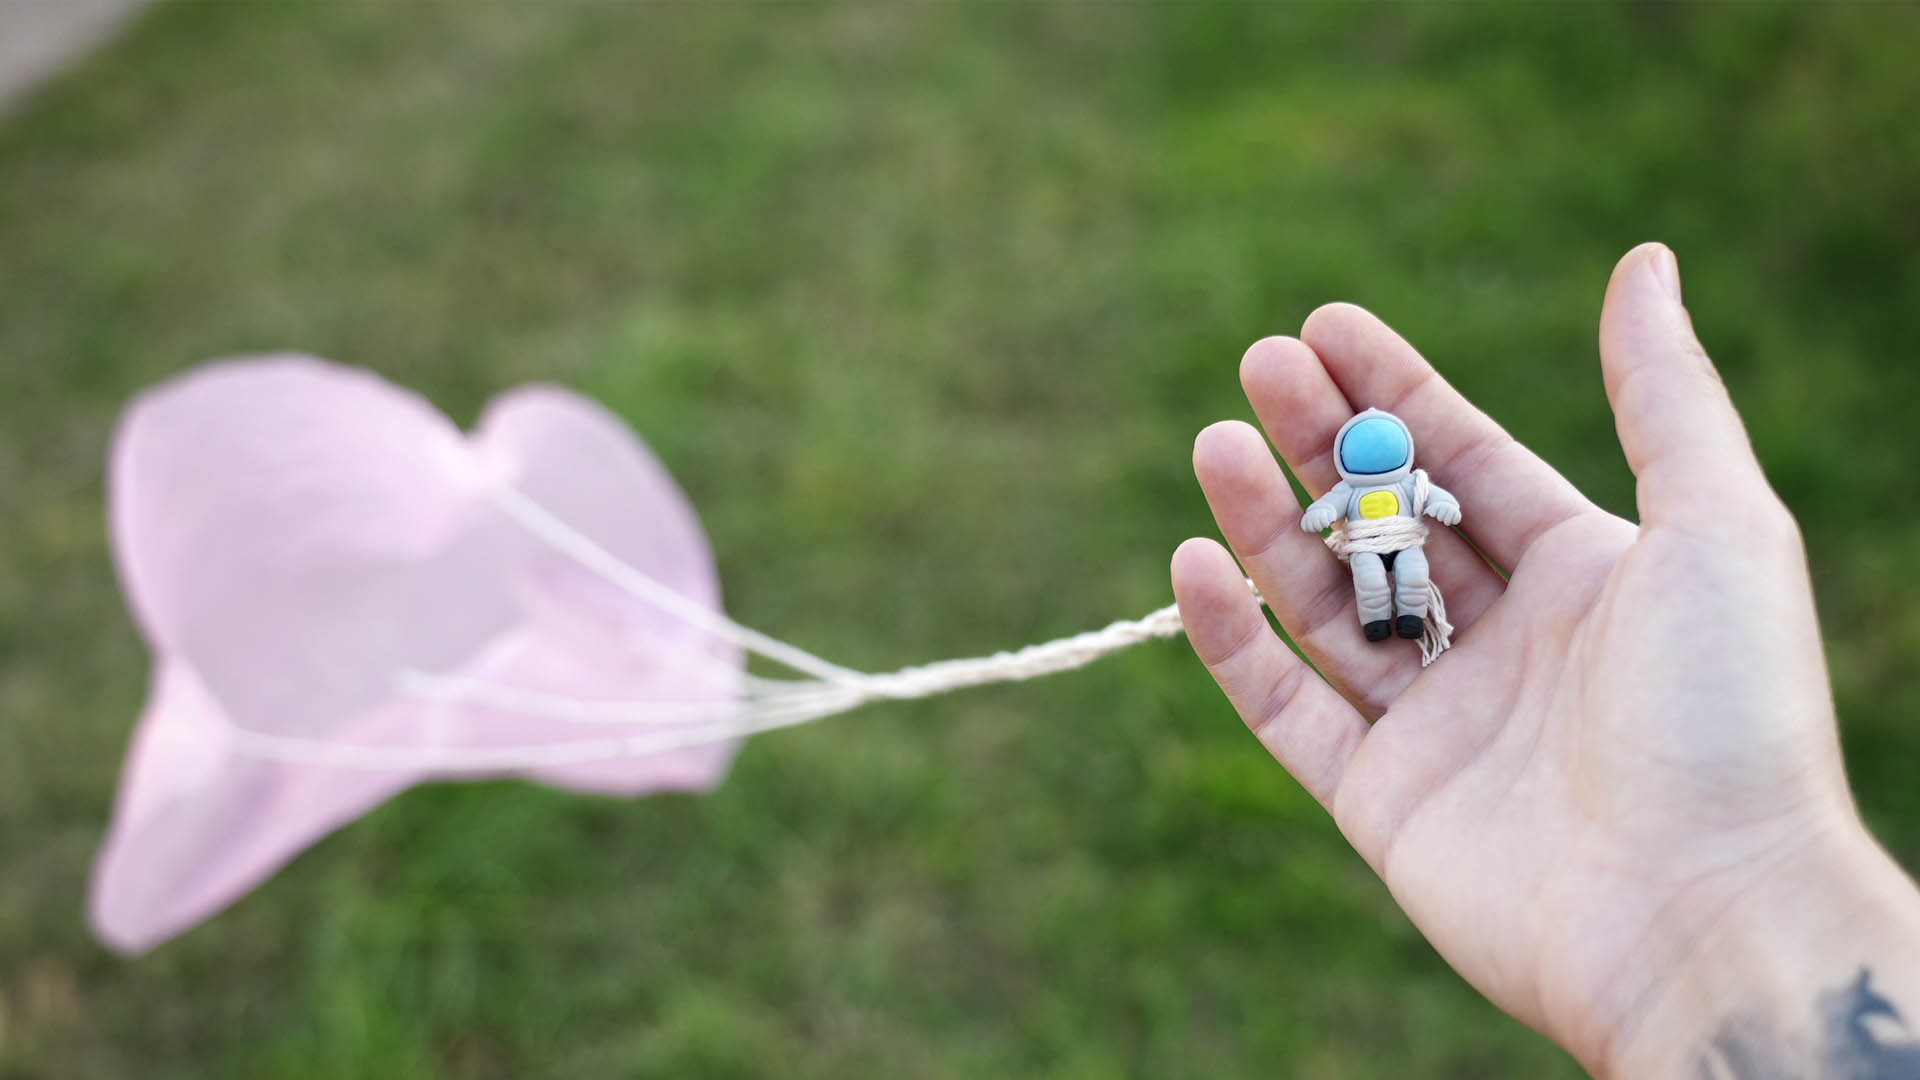
Making a paper parachute is one of those wonderfully sneaky activities that looks like a five-minute craft but quietly teaches physics, engineering, patience, measurement, and the ancient life skill of not putting tape on the wrong side of everything. With a sheet of paper, some string, a paper clip, and a little curiosity, you can build a mini parachute that floats, wobbles, spins, glides, or dramatically belly-flops onto the carpet like it has accepted its destiny.
This guide covers four practical ways to make a paper parachute, from the classic square parachute to a coffee-filter version, a circular paper design, and a stronger folded parachute for heavier payloads. Along the way, you will learn why parachutes work, how air resistance slows falling objects, and how tiny changes in size, shape, weight, and string length can turn your homemade parachute from “falling napkin” into “tiny engineering triumph.”
Before starting, choose a safe testing area. A hallway, stair landing, classroom, porch step, or open room works well. Avoid dropping parachutes from windows, balconies, rooftops, or anywhere that could be unsafe. The goal is science, not a neighborhood news segment.
How Does a Paper Parachute Work?
A parachute works by increasing air resistance, also called drag. When an object falls, gravity pulls it downward. A parachute spreads out above the object and catches air underneath it. That trapped air pushes upward against the parachute, slowing the fall. In simple terms, gravity says, “Down we go!” and the parachute replies, “Not so fast, buddy.”
The larger the parachute surface, the more air it can catch. That usually means a slower descent. But size is not the only factor. A parachute also needs balance. If one string is shorter than the others, the parachute tilts. If the payload is too heavy, it falls quickly. If the paper is too stiff or folded unevenly, it may not open properly. Good parachute design is a cheerful little negotiation between gravity, drag, weight, and common sense.
Materials You Can Use
You do not need fancy supplies to make a paper parachute. In fact, half the charm of this project is that it can be built with the kind of items already hiding in a drawer, backpack, or craft box.
Basic Supplies
- Printer paper, notebook paper, tissue paper, coffee filters, or lightweight construction paper
- String, yarn, thread, dental floss, or thin ribbon
- Tape
- Scissors
- A hole punch or sharpened pencil for making small holes
- Paper clips, small erasers, toy figures, or lightweight objects for payloads
- A ruler for measuring parachute size and string length
- A timer or phone stopwatch for experiments
For younger makers, adult help is useful when using scissors or punching holes. The rest is mostly measuring, taping, testing, and trying not to laugh when the first version drops like a pancake in a hurry.
Way 1: Make a Classic Square Paper Parachute
The square paper parachute is the best starting point because it is simple, reliable, and easy to modify. It is perfect for a classroom STEM project, a rainy-day craft, or a quick demonstration of gravity and air resistance.
Step-by-Step Instructions
- Cut a square from lightweight paper. A good starting size is 8 inches by 8 inches.
- Reinforce each corner with a small piece of tape. This helps prevent tearing.
- Punch or poke one small hole in each corner.
- Cut four equal pieces of string, each about 10 to 12 inches long.
- Tie or tape one string to each corner.
- Gather the loose ends of the strings together and tie them to a paper clip or small payload.
- Hold the parachute from the center, lift it above shoulder height, and release it gently.
If the parachute tips sideways, check the strings. They should be equal in length and attached near the corners. If the parachute falls too fast, try a larger square or a lighter payload. If it refuses to open, gently curve the paper before dropping it, or try thinner paper.
Why This Design Works
A square parachute catches air across a broad surface. The corners spread the strings apart, helping the payload hang below the center. This balance matters because a centered payload keeps the parachute from flipping over or diving. Think of it like walking while holding four grocery bags: if one bag is much heavier, you immediately become a leaning tower of snacks.
Way 2: Make a Coffee Filter Parachute
A coffee filter parachute is light, easy to shape, and naturally dome-like. It is one of the simplest ways to make a paper parachute that opens nicely without much fuss. Coffee filters are also forgiving, which is useful if your taping style can best be described as “enthusiastic.”
Step-by-Step Instructions
- Flatten one basket-style coffee filter on the table.
- Mark four evenly spaced points around the edge.
- Place a small piece of tape over each marked point for reinforcement.
- Punch or poke a tiny hole through each taped point.
- Cut four equal strings, each around 10 inches long.
- Attach one string to each hole.
- Tie the strings together at the bottom and attach a paper clip or tiny toy.
- Drop the parachute from a safe height and observe how it falls.
The coffee filter parachute often falls more slowly than a regular sheet of printer paper because it is lighter and more flexible. It can puff up slightly as air collects underneath it. If you want to run a quick experiment, compare a coffee filter parachute with a square paper parachute of a similar width. Time each drop three times and calculate the average. Congratulations: you are now doing science with office supplies.
Best Uses for This Design
This version is great for younger kids, fast demonstrations, and experiments about material choice. Try using one coffee filter, two stacked coffee filters, and a coffee filter with a small vent hole in the center. The results can be surprisingly different. A small center vent may reduce wobbling by letting some air pass through, although too large a vent can make the parachute fall faster.
Way 3: Make a Circular Paper Parachute
A circular parachute looks more like a real parachute canopy. It has no corners, which can help distribute air pressure more evenly. It may take a little more careful cutting, but the finished result is neat, attractive, and excellent for experiments.
Step-by-Step Instructions
- Place a bowl, plate, or compass on a sheet of paper and trace a circle.
- Cut out the circle carefully.
- Fold the circle gently in half, then in half again, just enough to mark four equal sections.
- Open the circle and mark four or six evenly spaced points near the edge.
- Reinforce each point with tape.
- Punch small holes at the reinforced points.
- Attach equal lengths of string to each hole.
- Tie the strings together below the center and attach a lightweight payload.
For a smoother descent, use six strings instead of four. More strings can help the canopy stay open and balanced, but they also add a little weight and more opportunities for tangles. This is the classic engineering trade-off: solve one problem, politely invite two smaller problems to dinner.
Testing Ideas
Try making three circular parachutes with different diameters: 6 inches, 8 inches, and 10 inches. Use the same payload for each one. Drop them from the same height and record how long each takes to reach the floor. In most cases, the larger parachute will fall more slowly because it creates more drag. However, if the paper is too heavy or the canopy folds during the fall, the result may change. That is why engineers test instead of just guessing confidently while holding scissors.
Way 4: Make a Folded Reinforced Paper Parachute
The folded reinforced parachute is useful when you want to carry a slightly heavier payload, such as a larger eraser, a few paper clips, or a small cardboard “astronaut.” This design uses folds and tape to strengthen the canopy so it does not tear easily.
Step-by-Step Instructions
- Start with a square sheet of lightweight construction paper or printer paper.
- Fold each edge inward about half an inch to create a stronger border.
- Tape the folded edges down smoothly.
- Reinforce the four corners with extra tape.
- Punch one hole in each reinforced corner.
- Cut four equal pieces of string, about 12 to 14 inches long.
- Attach the strings and tie them to the payload.
- Drop the parachute and watch whether it opens fully.
This design is sturdier, but it may fall faster than a lighter version because the folded edges add weight. That is not a failure. It is data wearing a tiny lab coat. If your reinforced parachute drops too quickly, increase the canopy size or switch to a lighter payload.
When to Use This Version
Use the reinforced design for egg-drop-style practice without using an actual egg, classroom engineering challenges, or experiments where durability matters. It is also a good choice when multiple students will test the same parachute several times. A delicate tissue-paper parachute can be lovely, but after ten drops it may look like it survived a thunderstorm and a family argument.
How to Improve Your Paper Parachute
Once you build a basic parachute, the real fun begins. Small design changes can produce big differences in performance. The best paper parachute is not always the prettiest one. Sometimes the winning design is wrinkled, taped twice, and named “Bob” for reasons no one remembers.
Change the Canopy Size
A larger canopy usually creates more drag and slows the fall. Start with an 8-inch square, then test a 10-inch square and a 12-inch square. Keep the payload the same so you are only changing one variable at a time.
Change the Shape
Compare square, circle, rectangle, and hexagon shapes. A circular parachute may descend more steadily, while a square parachute is easier to build. Rectangles can drift more, which may be useful if you want to study sideways motion.
Change the Material
Printer paper, tissue paper, coffee filters, parchment paper, and lightweight construction paper all behave differently. Tissue paper is light but tears easily. Printer paper is stronger but heavier. Coffee filters are flexible and often open well.
Change the Payload
Try one paper clip, then two, then three. As weight increases, the parachute falls faster unless the canopy also increases in size. This is a simple way to explore the relationship between mass, gravity, and drag.
Add a Vent Hole
Some parachutes wobble because air gets trapped unevenly underneath the canopy. A small hole in the center can let air escape more smoothly. Start with a tiny hole and test carefully. If the hole is too big, your parachute may fall like it suddenly remembered an appointment downstairs.
Paper Parachute Science Experiment
To turn this craft into a real experiment, choose one question to test. For example: “Does canopy size affect how slowly a paper parachute falls?” Then make three parachutes that are identical except for canopy size. Use the same paper, same string length, same payload, and same drop height.
Simple Experiment Plan
- Build three square parachutes: 6 inches, 8 inches, and 10 inches wide.
- Attach the same type of paper clip payload to each parachute.
- Drop each parachute from the same safe height.
- Time how long each parachute takes to reach the floor.
- Repeat each test three times.
- Find the average drop time for each parachute.
- Compare the results and write a conclusion.
A good science conclusion does not have to be fancy. It can say something like, “The 10-inch parachute fell the slowest because it had the largest surface area and created the most air resistance.” That sentence may not win a poetry contest, but it does explain the result clearly, and science appreciates clear thinking more than dramatic adjectives.
Common Paper Parachute Problems and Fixes
The Parachute Falls Too Fast
Use a larger canopy, lighter payload, or thinner paper. Make sure the parachute opens fully before release. A parachute that starts crumpled may stay crumpled, which is also how many Monday mornings begin.
The Parachute Spins Wildly
Check that all strings are the same length. Make sure the payload hangs from the center. Try adding a small vent hole to reduce wobbling.
The Paper Tears at the Corners
Reinforce the corners with tape before attaching strings. You can also fold the edges or use hole reinforcements if you have them.
The Strings Tangle
Use slightly thicker string or yarn. Keep all strings straight before each drop. Store the parachute flat instead of stuffing it into a pocket like a forgotten receipt.
The Payload Swings Too Much
Shorten the strings slightly or use a lighter payload. A swinging payload can pull the parachute off balance and make it drift or tip.
Real-World Connections: Why This Activity Matters
Paper parachutes may be small, but the ideas behind them are big. Engineers use similar thinking when designing parachutes for skydivers, spacecraft, emergency equipment, and cargo drops. The materials are different, of course. Nobody is landing a spacecraft with notebook paper and optimism. But the basic question is the same: how can we slow something down safely as it moves through air?
This project also introduces the engineering design process. You imagine a design, build it, test it, notice what went wrong, improve it, and test again. That cycle is valuable because real inventions rarely work perfectly the first time. A failed parachute is not the end of the project. It is the project politely handing you a clue.
Experiences and Lessons Learned from Making Paper Parachutes
One of the best things about making a paper parachute is that it quickly teaches you to respect tiny details. At first, the project seems almost too easy. Cut paper, tie string, attach paper clip, drop. Done, right? Then the parachute tips sideways, the strings twist into a spaghetti situation, and the payload lands with the confidence of a falling potato. Suddenly, you are not just crafting. You are troubleshooting.
In many paper parachute experiments, the first big lesson is that symmetry matters. When the strings are uneven, even by a small amount, the parachute can lean to one side. That lean changes how air flows under the canopy. Instead of catching air evenly, the parachute spills air from one side and drops faster. The fix is simple: measure the strings before attaching them. It feels like a boring step until you skip it and your parachute performs an interpretive dance on the way down.
Another useful experience is learning that bigger is not always automatically better. A larger parachute usually creates more drag, but it can also fold, buckle, or become hard to balance if the paper is too stiff. A giant paper canopy with weak corners may tear after a few tests. A smaller, well-balanced parachute can sometimes outperform a larger messy one. This is an excellent reminder that design is not about making one feature extreme. It is about making all parts work together.
Material choice also creates memorable surprises. Tissue paper may float beautifully, but it can rip if the string holes are not reinforced. Printer paper is easy to find and sturdy, but it may fall faster because it is heavier. Coffee filters often perform well because they are light and naturally curved. Construction paper can look bold and colorful, but it is often better for reinforced designs than slow-floating ones. Testing different materials turns the project into a mini design lab, minus the white coats and dramatic movie music.
Payload weight is another lesson that shows up fast. A single paper clip may float gently under a wide canopy, while three paper clips can make the same parachute drop much faster. This helps explain why engineers must match parachute size to the object being carried. A parachute that works for a tiny toy may not work for a heavier object. The canopy, strings, and payload must be designed as a system.
The most satisfying part of the experience is improvement. After a few tests, you begin to notice patterns. You stop guessing randomly and start making smarter changes: longer strings for stability, reinforced corners for strength, a slightly larger canopy for slower drops, or a center vent to reduce wobble. The project becomes less about making a perfect parachute and more about learning how to improve one. That is the heart of hands-on science.
Paper parachutes are also surprisingly fun in groups. Each person or team can build a different design, then compare drop times. Some designs will float slowly. Others will spin. A few will fail in spectacular but harmless ways. The room usually fills with laughter, cheering, and at least one person saying, “Wait, let me try one more thing.” That sentence is the sound of curiosity waking up.
In the end, the experience of making paper parachutes is about more than paper and string. It teaches observation, patience, problem-solving, and the value of testing ideas. It also proves that science does not always need expensive equipment. Sometimes all it needs is a sheet of paper, a safe place to drop it, and someone willing to ask, “What happens if we change this?”
Conclusion
Learning how to make a paper parachute is a simple, affordable, and genuinely useful STEM activity. The four designs in this guidethe classic square parachute, coffee filter parachute, circular parachute, and folded reinforced parachutegive you different ways to explore drag, gravity, balance, surface area, and engineering design. Whether you are building at home, teaching in a classroom, or setting up a science fair experiment, each version offers a chance to test, improve, and understand why parachutes slow falling objects.
Start with the basic square parachute, then experiment with size, shape, material, string length, vent holes, and payload weight. The best design will depend on your goal. Do you want the slowest fall? The straightest drop? The strongest parachute? The funniest crash? Every test gives you more information. And in science, information is the good stuffeven when it arrives attached to a paper clip that just face-planted into the carpet.











