Old grout and caulking have a special talent for making an otherwise decent bathroom look like it survived a pirate shipwreck. One day your shower looks clean enough. The next day, the grout lines are cracked, the caulk is peeling like a sunburn, and that suspicious gray-black stain in the corner is giving “tiny haunted swamp.” The good news? You do not need to tear out the entire bathroom just because the seams look tired. In many cases, learning how to get rid of old grout and caulking is a very manageable DIY project.
The trick is knowing what you are removing, why it failed, and where each material belongs. Grout is the hard material between tiles. Caulk is the flexible sealant used where surfaces meet, such as the joint between a tub and tile wall, inside shower corners, backsplashes, countertops, and around sinks. Treating them the same is where many DIY projects go from “weekend refresh” to “why is there water under the wall?”
This guide walks you through the tools, safety steps, removal process, cleaning methods, and real-world lessons that help you remove old grout and caulk cleanly without damaging your tile, porcelain, fiberglass, stone, or your sanity.
Why Old Grout and Caulking Need to Be Removed
Grout and caulk fail for different reasons. Grout can crack when tiles shift, when the original mixture was too wet, when the surface moves, or when years of moisture and cleaning products slowly wear it down. Caulk fails when it loses flexibility, separates from the surface, traps moisture, or gets mold growth beneath the bead. Once old caulk pulls away, water can sneak behind it. At that point, simply smearing a new line over the top is like putting a Band-Aid on a leaky roof and calling it architecture.
Removing old material gives the new grout or caulk a clean, dry, solid surface to bond to. This matters because fresh caulk will not properly stick to dusty residue, soap scum, silicone film, wet surfaces, or loose old sealant. New grout also needs adequate depth in the joint; otherwise, it may sit on top like cosmetic frosting and pop out later.
Grout vs. Caulk: Know What You Are Working With
What Grout Does
Grout fills the spaces between tiles. It helps stabilize the tile surface, keeps debris out of the joints, and gives the installation a finished look. Sanded grout is often used for wider joints, while unsanded grout is common for narrower joints and delicate surfaces. There are also epoxy and premixed grouts, which may behave differently during removal.
What Caulk Does
Caulk is flexible. It belongs in joints where movement is expected: tub-to-tile seams, shower corners, wall-to-floor transitions, countertop edges, sink backsplashes, and around fixtures. In wet areas, 100% silicone or mold-resistant kitchen-and-bath sealant is often the better long-term choice. The caulk bead moves slightly as surfaces expand, contract, settle, or vibrate. Grout, being rigid, is not happy in those joints. It cracks, complains, and eventually lets water through.
The Big Rule
Use grout between flat tile joints on the same plane. Use caulk at changes of plane and transitions between different materials. If the joint is where a wall meets another wall, a tub, a floor, or a countertop, think flexible sealant, not hard grout.
Tools and Supplies You Will Need
You do not need a contractor’s van full of equipment, but the right tools make this job much easier. For caulk removal, gather a utility knife, plastic scraper, caulk removal tool, needle-nose pliers, painter’s tape, rags, rubbing alcohol or mineral spirits if appropriate for the surface, and a commercial caulk remover for stubborn silicone or latex caulk. For grout removal, use a manual grout saw, carbide grout removal tool, oscillating multi-tool with a grout blade, shop vacuum, stiff nylon brush, safety glasses, gloves, dust mask, and knee pads if you are working on a floor.
A manual grout saw is slower but easier to control, especially around fragile tile. An oscillating tool is faster for long grout lines, but it demands a steady hand. It can save hours, or, if handled like a lightsaber during a garage sale duel, it can chip tile edges. Work slowly. Let the tool do the cutting.
Safety First: Dust, Mold, Blades, and Ventilation
Removing grout creates dust. Removing old caulk can expose mildew or mold. Cutting with sharp blades near slippery bathroom surfaces is not the moment to discover your inner daredevil. Wear safety glasses, gloves, and a dust mask or respirator when scraping grout. Run the bathroom exhaust fan, open a window if possible, and keep the work area dry.
If you find a small amount of surface mold on caulk or grout, cleaning and replacement may be enough. If you see widespread mold, soft drywall, a spongy wall, loose tiles, or a persistent musty smell, pause the project and investigate further. Old caulk can hide water damage. New caulk should seal a sound joint, not cover an active leak.
How to Remove Old Caulking Step by Step
Step 1: Clean the Area First
Before cutting anything, clean the area with a mild bathroom cleaner or dish soap and warm water. Remove soap scum, body oils, shampoo residue, and loose dirt. Dry the surface thoroughly. This helps you see the actual caulk line and prevents grime from being pushed deeper into the joint while you work.
Step 2: Score Both Edges of the Caulk
Use a sharp utility knife or razor scraper to gently score along both edges of the caulk bead. One cut should follow the tile side; the other should follow the tub, sink, countertop, or wall side. Keep the blade angle shallow. You are trying to break the bond, not carve your initials into the porcelain.
Step 3: Pull Out the Main Bead
Once the edges are cut, use a caulk removal tool, plastic scraper, or needle-nose pliers to lift and pull the caulk away. If luck is smiling, the old bead will come out in long satisfying strips. If not, it will come out in tiny stubborn bits, because apparently old silicone has a dramatic personality.
Step 4: Soften Stubborn Caulk
If the caulk refuses to move, apply a commercial caulk remover according to the label directions. Some products soften latex caulk quickly, while silicone may take longer or require repeat applications. A hair dryer can also make some caulk more pliable, but avoid overheating plastic, fiberglass, painted surfaces, or nearby finishes.
Step 5: Scrape Away Residue
After the main bead is gone, remove the leftover film. A plastic scraper is safer for fiberglass, acrylic, and porcelain. A razor scraper can work on glass or ceramic tile, but use extreme care and keep the blade flat. Residue is one of the most common reasons new caulk fails. If the joint still feels slick or rubbery, keep cleaning.
Step 6: Clean, Disinfect, and Dry
Wipe the joint with rubbing alcohol if it is compatible with your surface, or use the cleaner recommended by your sealant manufacturer. If mold was present, clean the area thoroughly and improve ventilation before recaulking. The joint must be completely dry before new caulk goes in. Give it several hours, or overnight if the area was wet. Caulking over moisture is basically inviting mold to a housewarming party.
How to Remove Old Grout Step by Step
Step 1: Decide How Much Grout Must Go
If only a small area is cracked or missing, you may not need to remove every grout line in the room. Remove loose, damaged, powdery, stained, or moldy grout until you reach solid material. For a durable repair, the new grout needs enough depth to grip. Many grout manufacturers recommend removing a significant portion of the joint depth rather than just scratching the surface.
Step 2: Protect the Tile
Put painter’s tape along delicate tile edges if you are worried about scratches. This is especially helpful with glossy ceramic, handmade tile, glass tile, marble, or natural stone. Natural stone can scratch, stain, or react badly to acidic cleaners, so check product labels carefully.
Step 3: Start with a Manual Grout Saw
For small repairs, a manual grout saw is often enough. Hold it in the grout line and pull it back and forth with controlled pressure. Start in the center of the joint and work toward the tile edges. Do not pry sideways. The goal is to grind out grout, not loosen the tile.
Step 4: Use an Oscillating Tool for Larger Areas
For long grout lines or full shower regrouting, an oscillating tool with a grout removal blade can save serious time. Choose a blade that fits the joint width. Move slowly and keep the blade centered. Stop often to check depth and tile edges. A shop vacuum held nearby can help capture dust as you work.
Step 5: Vacuum and Brush the Joints
Once the grout is removed, vacuum the joints thoroughly. Then brush them with a stiff nylon brush and vacuum again. Dust left in the joint can weaken the bond of new grout. If you are replacing grout in a shower, make sure the joints are clean and dry before regrouting.
Step 6: Inspect for Bigger Problems
Before applying new grout, look for loose tile, hollow-sounding tile, soft wallboard, crumbling mortar, or signs of water behind the surface. If tiles move when pressed, grout replacement will not solve the real problem. Fix the substrate first, then regrout.
Cleaning After Removal
After old grout and caulk are removed, cleaning becomes more important than speed. Use a vacuum, brush, and damp cloth to remove dust and debris. For general grime, mild dish soap and warm water work well. For grout haze or mineral buildup, use products designed for tile and grout, but avoid harsh cleaners on stone unless the label says they are safe.
Vinegar is popular for cleaning ceramic tile and some grout, but it should not be used on natural stone such as marble, limestone, or travertine because acid can etch the surface. Bleach may lighten stains and help with mold on nonporous surfaces, but it must be used with ventilation and should never be mixed with vinegar, ammonia, or other cleaners. That combination is not “extra strength.” It is “call poison control” strength.
When to Regrout and When to Recaulk
Regrout when grout lines are cracked, missing, powdery, deeply stained, or no longer protecting the tile joints. Recaulk when the sealant is peeling, shrinking, moldy, cracked, or pulling away from the surface. In showers and tubs, caulk failure often appears first along the bottom seam or inside corners. These are high-moisture, high-movement areas, so flexible sealant is essential.
Do not grout the corner where two shower walls meet. Do not grout the seam where the tub meets tile. Do not grout around a sink where movement and water exposure are constant. Use the correct kitchen-and-bath caulk or silicone sealant for those areas.
How to Prepare for New Caulk
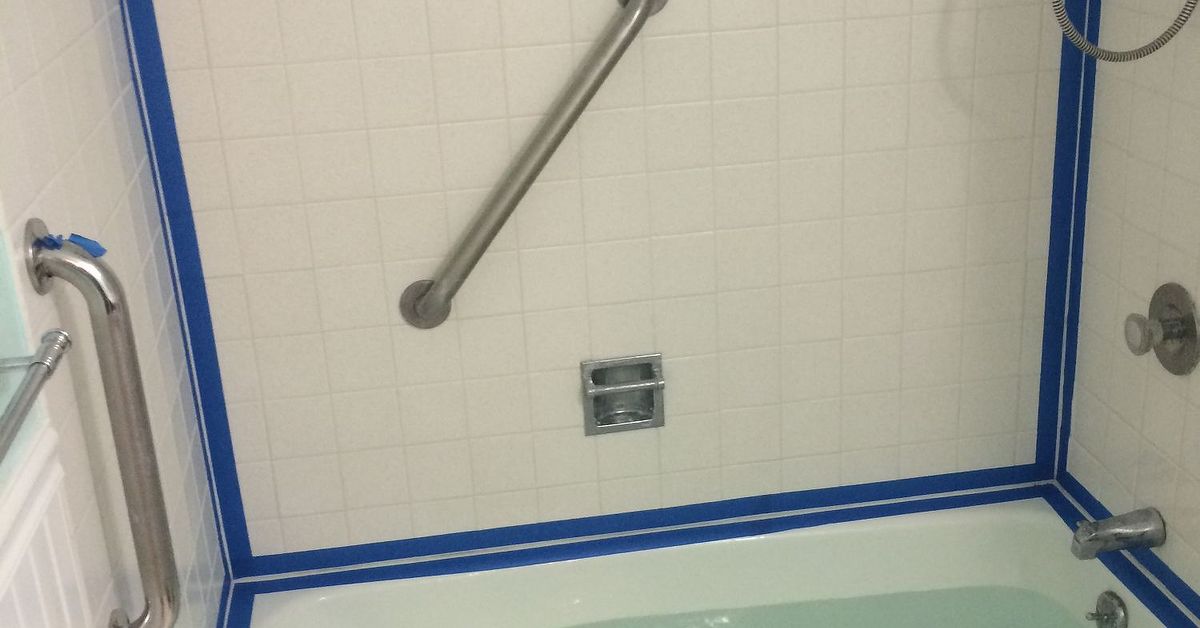
Once the old caulk is removed and the joint is clean, dry, and residue-free, apply painter’s tape on both sides of the joint for a crisp line. Cut the caulk tube nozzle at a 45-degree angle, making the opening slightly smaller than the joint. Apply a steady bead, then smooth it with a caulk tool or a gloved finger lightly dampened according to the product instructions. Remove tape before the caulk skins over.
Give the caulk the full cure time listed on the tube before exposing it to water. Some products are shower-ready in a few hours, while others need 24 to 48 hours. The label wins every argument. Your impatience may be powerful, but chemistry is undefeated.
How to Prepare for New Grout
Before regrouting, confirm that the joints are clean, evenly cut, and free of dust. Mix cement-based grout according to the package directions, using the right water ratio. Too much water can weaken grout and cause color inconsistency. Apply grout with a rubber float, pushing diagonally across the joints. Remove excess with the float, then wipe with a damp grout sponge after the grout begins to firm up.
Do not flood the surface with water while cleaning. Too much water can wash pigment and cement out of the grout. After curing, apply grout sealer if the grout type requires it. Epoxy and some premixed grouts may not need sealing, but many cement-based grouts benefit from it.
Common Mistakes to Avoid
Caulking Over Old Caulk
This is the classic shortcut that looks fine for about eleven minutes. New caulk needs a clean surface. If you apply it over old caulk, the bottom layer continues to fail and the new bead peels away with it.
Removing Too Little Grout
Scratching the surface and rubbing new grout over the top may improve color temporarily, but it rarely lasts. Remove enough old grout so the new material has depth and grip.
Using Metal Scrapers on Soft Surfaces
Metal blades can scratch acrylic, fiberglass, porcelain, and some tile finishes. Use plastic scrapers whenever possible, and test in an inconspicuous area.
Ignoring Moisture Problems
If mold keeps returning, the room may need better ventilation, more frequent drying, or leak repair. New caulk cannot fix a bathroom that stays damp around the clock.
Real-World Experience: What Actually Happens During This Project
The first time you remove old caulk, you may expect one neat strip to peel away like a satisfying internet video. Sometimes that happens. More often, the bead breaks every three inches, sticks to the tile like it has legal ownership, and leaves behind a shiny film that laughs at your scraper. This is normal. The job is less about brute force and more about patience.
In real bathrooms, the bottom tub seam is usually the worst area. It collects shampoo, soap scum, hard-water minerals, and standing moisture. If the caulk is black at the edge but still white on the surface, the stain may be underneath or behind the bead. Cleaning the outside will not solve that. Removing the bead, cleaning the joint, drying it fully, and applying fresh mold-resistant sealant gives a much better result.
Grout removal has its own personality. Manual tools feel slow at first, but they give excellent control around small repairs. An oscillating tool feels magical until you get too close to a tile edge. The smartest approach is to start manually in tricky corners and use the power tool only where the grout lines are straight and accessible. Keep a vacuum nearby. Grout dust travels. It will appear on the sink, the floor, your shirt, and somehow in the hallway, even if the hallway was not invited.
One practical trick is to work in small sections. Do not remove every bit of grout in a shower and then realize you are too tired to clean it properly. Finish one wall or one repair area, vacuum it, inspect it, and then move on. For caulk, remove one continuous seam at a time. This helps you maintain a cleaner joint and avoid mixing damp cleaning residue with dust.
Another experience-based lesson: drying time matters more than most people think. A joint can look dry on the surface while moisture remains behind the tile lip or tub edge. If the old caulk failed because water was trapped, give the joint extra drying time before sealing it again. A small fan outside the wet area can help move air, but avoid blowing dust directly into freshly cleaned joints.
Finally, expect the finished look to depend heavily on prep. A perfect caulk bead over dirty residue will fail. A slightly imperfect caulk bead over a clean, dry joint will usually perform much better. With grout, color matching can be tricky, especially if the existing grout has aged or absorbed stains. Bring a sample or photo to the store, but understand that new grout may look brighter until the rest of the surface is cleaned.
Conclusion
Getting rid of old grout and caulking is not glamorous, but it is one of the most effective ways to refresh a bathroom, kitchen, laundry room, or tiled floor without a full renovation. The basic formula is simple: identify whether the joint needs grout or caulk, remove the failed material thoroughly, clean away residue and dust, let the area dry, and replace it with the correct product.
Take your time with the prep work. Use a manual grout saw for precision, an oscillating tool for larger grout removal, plastic scrapers for delicate surfaces, and commercial caulk remover when old sealant refuses to cooperate. Most importantly, do not hide problems under new material. Loose tile, recurring mold, soft walls, and active leaks need real repairs before cosmetic finishing.
Done right, fresh grout makes tile look crisp again, and clean caulk seals vulnerable corners against water. Done wrong, it becomes a short-lived cover-up with a front-row seat to future mildew. Choose the patient route. Your shower, your tile, and your future weekend self will thank you.