
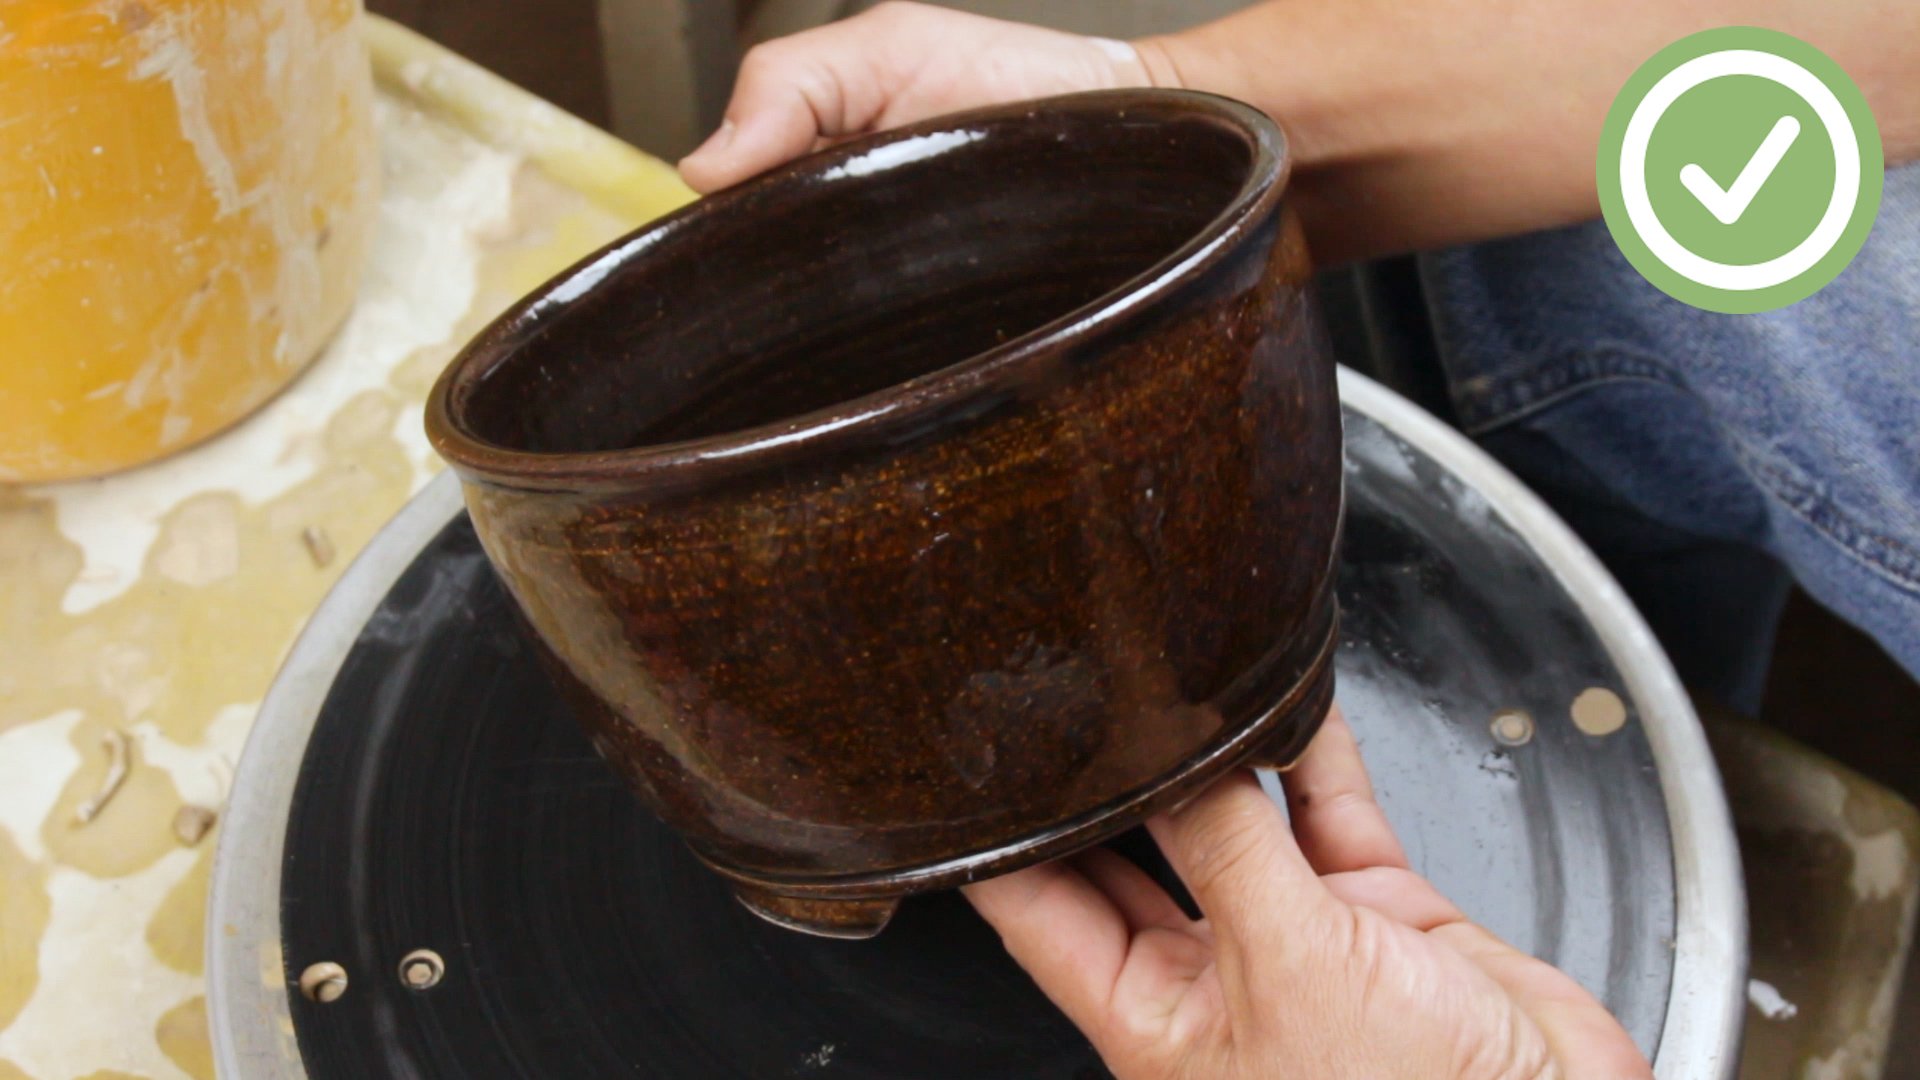
Making a clay pot on a pottery wheel looks calm from across the studio. A potter sits down, touches a spinning lump of clay, and somehow a graceful vessel rises like it has been waiting inside the mud all along. Then a beginner tries it, the clay wiggles like a confused pudding, the wheel pan fills with slip, and everyone suddenly understands why centering clay is considered both a skill and a personality test.
The good news is that wheel throwing is not magic. It is a repeatable process built on preparation, pressure, moisture control, timing, and patience. Once you understand the stageswedging, centering, opening, pulling, shaping, trimming, drying, bisque firing, glazing, and glaze firingyou can make a simple clay pot with confidence. It may not look like a museum piece on your first try, but it can become a real, functional ceramic object. That is the tiny miracle of pottery: you start with earth, add water, spin it around, survive the wobble, and end with something you can hold.
This guide breaks down how to make a clay pot by wheel in 14 practical steps. It is written for beginners who want clear instructions without being buried in studio jargon. You will also find common mistakes, practical examples, and experience-based tips at the end to help your first pottery wheel session feel less like wrestling a swamp creature and more like learning a beautiful craft.
What You Need Before You Start
Before you sit at the wheel, gather your tools. You do not need a luxury studio, but you do need the basics: prepared pottery clay, a potter’s wheel, a sponge, a water bucket, a needle tool, a wooden rib or metal rib, a wire cutter, trimming tools, a bat or wheel head, towels, and access to a kiln. A basic stoneware clay body is often a friendly choice for beginners because it is usually more forgiving than porcelain, which can be wonderfully elegant but emotionally dramatic.
Studio safety matters, too. Keep clay wet while working and clean with a sponge, wet mop, or proper vacuum rather than sweeping dry clay dust into the air. Clay dust can contain silica, and breathing airborne dust is not something to treat casually. Pottery is fun, but lungs are also fun, so protect them.
How to Make a Clay Pot by Wheel: 14 Steps
1. Choose the Right Clay for Wheel Throwing
Start with clay that is suitable for wheel throwing. For a beginner pot, a smooth stoneware clay is usually easier to control than groggy sculpture clay or delicate porcelain. The clay should feel plastic and workable, not crumbly, stiff, or sticky like peanut butter left in a hot car. If your studio fires to cone 5 or cone 6, choose a clay body that matches that firing range. If the studio fires low-fire work, use a low-fire clay and compatible glaze.
A good beginner amount is around one to two pounds of clay. That is enough to make a small cup, planter, or simple bowl-shaped pot without overwhelming your hands. Starting too large is a classic beginner mistake. A five-pound lump may look ambitious, but ambition has a way of flying off the wheel and onto your shoes.
2. Wedge the Clay to Remove Air Pockets
Wedging is the process of kneading clay to even out moisture and remove trapped air. Think of it as preparing dough, except this dough becomes pottery and should absolutely not become pizza. Use a spiral wedge or ram’s head wedge on a clean wedging surface. Press forward, fold, rotate, and repeat until the clay feels consistent.
Air pockets can cause weak spots during throwing and may create problems during firing. Wedging also aligns the clay particles, making the clay easier to center. For a beginner, 30 to 60 firm wedging motions can make a noticeable difference.
3. Shape the Clay Into a Rounded Ball or Cone
After wedging, pat the clay into a smooth ball or rounded cone. Avoid cracks, folds, and dry edges. A smooth starting shape helps the clay attach to the wheel head or bat. If the base is ragged, it may wobble before you even begin.
Place the clay firmly in the center of the wheel head. Do not politely set it down as if you are placing a cupcake on a plate. Give it a confident slap. The goal is to make the clay stick securely so it does not slide away during centering.
4. Set Up Your Wheel and Body Position
Sit close to the wheel with your feet stable and your elbows anchored against your body or thighs. Your hands should not float around like they are conducting an orchestra. Stable arms create steady pressure. Steady pressure creates centered clay. Centered clay creates happier potters.
Keep a water bucket and sponge nearby. Wet your hands, but do not drown the clay. Water reduces friction, but too much water weakens the clay and creates sloppy walls. Your goal is controlled moisture, not a tiny ceramic swimming pool.
5. Center the Clay
Centering is the foundation of wheel throwing. Turn the wheel to a medium-fast speed. With wet hands, press the clay inward from the side while your other hand controls the top. The clay should stop wobbling and begin spinning smoothly under your palms.
Many potters use a “coning up and down” motion. Push the clay upward into a cone, then press it downward into a low dome. Repeat this a few times. This helps align the clay and bring it into balance. You will know the clay is centered when your hands can rest on it without being bumped side to side. If the clay is still arguing with you, keep breathing and keep your elbows anchored.
6. Flatten the Top and Compress the Clay
Once centered, flatten the top slightly with one hand while supporting the side with the other. The clay should look like a smooth hockey puck or rounded dome. Compressing the top helps remove unevenness and prepares the clay for opening.
This step may seem small, but it matters. If the top is uneven, your opening may drift off-center. A crooked opening leads to uneven walls, and uneven walls lead to a pot that looks like it has strong opinions about gravity.
7. Open the Center
Slow the wheel slightly. Place both thumbs or two fingers in the center of the clay and press downward. Keep your pressure vertical and steady. Do not push all the way through the bottom. For a small pot, leave about one-third to one-half inch of clay at the base.
You can check the depth with a needle tool. Insert it into the floor of the pot until it touches the wheel head, then pinch the tool at the clay surface and pull it out to see the thickness. Too thin, and the bottom may tear or crack. Too thick, and the pot will feel heavy and clunky.
8. Create the Floor of the Pot
After opening downward, pull the opening outward to create the floor. Use your fingers to widen the base from the center toward the side. Keep one hand inside and one hand outside so the clay remains supported. Compress the floor with your fingertips or a sponge to reduce the risk of cracking during drying.
The width of the floor determines the shape of your pot. A narrow floor creates a cup-like form. A wider floor can become a bowl, planter, or low vessel. For your first clay pot, aim for a simple cylinder or gently curved planter shape. Save the dramatic vase with the swan neck for later, when the clay has stopped laughing at your confidence.
9. Pull Up the Walls
Now comes the part that looks most magical: raising the walls. Slow the wheel to a medium speed. Place one hand inside the pot and one hand outside. Starting near the base, apply gentle pressure and move both hands upward together. The outside hand usually presses inward slightly below the inside hand, lifting clay upward as the wheel spins.
Make each pull slow and steady. Do not rush from bottom to top. If your hands move too fast, the wall will thin unevenly. If you squeeze too hard, the pot may collapse. The goal is to move clay upward, not strangle it. Two to four careful pulls are usually enough for a beginner pot.
10. Compress and Refine the Rim
The rim is the lip of the pot, and it needs attention. After pulling the walls, gently compress the rim between your fingers or with a damp sponge. This strengthens the edge and keeps it from becoming sharp, uneven, or wavy.
A clean rim can make even a simple pot look intentional. A messy rim says, “I survived,” which is admirable, but perhaps not the design statement you wanted. Compress the rim after each major pull to keep it strong and controlled.
11. Shape the Pot
Once the walls are tall enough, shape the pot. For a straight-sided pot, keep the inside and outside pressure even. For a rounded pot, gently push outward from the inside while supporting the outside. For a narrower neck, carefully collar the clay inward with both hands.
Use a rib to smooth the outside wall and remove throwing lines if you want a cleaner surface. Throwing lines can also be left visible for a handmade look. The right choice depends on your style. Rustic, modern, earthy, minimalistclay can do all of it, as long as the wall thickness is reasonably even.
12. Remove Extra Water and Cut the Pot Off the Wheel
Use a sponge to remove standing water from the inside. Leaving water in the bottom can weaken the floor and make the pot harder to trim later. Clean the base area with a wooden tool if needed.
When the pot is finished, slow or stop the wheel. Hold a wire cutter tight between both hands and pull it under the pot, keeping the wire flat against the wheel head or bat. If the pot is on a removable bat, you can leave it there to firm up. If not, carefully lift it using dry hands or let it stiffen slightly before moving it.
13. Let the Pot Dry to Leather-Hard, Then Trim
Do not trim immediately. Let the pot dry until it is leather-hard, meaning it is firm enough to handle but still damp enough to carve. At this stage, turn the pot upside down on the wheel, center it, and secure it with small clay lugs if needed.
Use a trimming tool to remove extra clay from the base and create a foot ring. Follow the inside shape of the pot so the form stays balanced. Trimming removes weight, sharpens the silhouette, and makes the pot feel finished. This is where a chunky beginner cylinder can transform into something that looks surprisingly elegant.
14. Dry, Bisque Fire, Glaze, and Fire Again
After trimming, let the pot dry slowly and evenly until it is bone dry. Drying too fast can cause cracks, especially at the base or rim. Cover the pot loosely with plastic if your studio is dry or breezy.
Once bone dry, the pot is ready for bisque firing. Bisque firing turns fragile dry clay into porous ceramic material that can accept glaze. After bisque firing, apply a compatible glaze by dipping, brushing, or pouring. Then the pot goes through a glaze firing, where the glaze melts and bonds to the ceramic surface. Always match clay, glaze, and firing temperature. Pottery is forgiving in many ways, but kilns are not interested in your excuses.
Common Beginner Mistakes When Throwing a Clay Pot
Using Too Much Water
Water is helpful, but too much water weakens clay. Beginners often keep adding water whenever the clay feels difficult. Instead, use a damp sponge and controlled hand pressure. If the clay becomes mushy, it may collapse before the pot is finished.
Forgetting to Anchor the Elbows
Floating arms create shaky hands. Shaky hands create wobbly pots. Keep your elbows connected to your body or thighs so your whole body supports the movement.
Opening Off-Center
If your opening begins off-center, the walls will be uneven from the start. Take extra time to center the clay before pressing down. The wheel rewards patience more than speed.
Pulling the Walls Too Thin
Thin walls may look impressive, but beginners should aim for even walls before lightweight walls. A slightly sturdy pot that survives is better than a delicate masterpiece that folds like a tired pancake.
Rushing the Drying Stage
Clay shrinks as it dries. If one part dries faster than another, stress builds and cracks appear. Slow, even drying is one of the quiet secrets behind successful pottery.
Practical Tips for Better Wheel-Thrown Pots
Start with small forms. A one-pound cylinder teaches more than a giant vase that collapses after ten stressful minutes. Practice cylinders before bowls because cylinders reveal your centering, opening, pulling, and rim-control skills clearly.
Use your sponge wisely. A sponge can smooth surfaces, remove water, compress the floor, and clean the rim. It is one of the simplest tools in pottery and one of the most useful.
Watch the silhouette, not just your hands. Step back visually and ask: Is the pot balanced? Is the wall leaning? Is the rim level? Good pottery is a conversation between touch and sight.
Keep your first pieces. Even the wobbly ones. Especially the wobbly ones. They show your progress. After ten or twenty pots, your first attempt becomes a charming little artifact from the era known as “Before I Understood Centering.”
Experience Notes: What Making a Clay Pot by Wheel Really Teaches You
The first experience most people have with wheel throwing is surprise. Clay looks soft, but on the wheel it has a strange strength. It resists, slides, stretches, and occasionally stages a full rebellion. A beginner may expect the wheel to do most of the work, but the wheel only spins. The potter must provide direction, timing, and calm pressure. That is why learning how to make a clay pot by wheel feels less like operating a machine and more like learning a dance with a partner who has no bones.
One of the biggest lessons is that centering is not just a technical step. It teaches patience immediately. When the clay is off-center, every later step becomes harder. The opening wobbles, the wall thickens on one side, and the rim starts to wave. Many beginners try to rescue the form later, but the real solution is usually to slow down at the beginning. In pottery, the early steps quietly control the final result. That lesson applies suspiciously well to many areas of life, but we will let the clay be the philosopher for now.
Another experience beginners notice is how important body position is. At first, people try to center clay with hand strength alone. That gets tiring quickly. The better approach is to use the whole body: elbows anchored, shoulders relaxed, spine leaning in, hands steady. When the body becomes stable, the clay becomes easier to control. You do not defeat the clay by force. You guide it with structure.
Pulling the walls teaches sensitivity. Too little pressure and nothing happens. Too much pressure and the wall becomes thin, twisty, or suddenly shorter than your confidence. The best pulls feel smooth and gradual. You learn to feel the thickness between your fingers, to notice when the clay needs moisture, and to stop before the form is overworked. This is where pottery becomes addictive. The moment a wall rises evenly from the wheel, even just a little, you understand why people build entire studios in their garages.
Trimming offers another kind of satisfaction. A freshly thrown beginner pot often has extra clay at the bottom. It may look heavy, like it is wearing boots. Once it reaches leather-hard condition, trimming lets you refine the base, carve a foot ring, and create lift. The pot suddenly looks more professional. This stage teaches that making pottery is not one dramatic moment; it is a sequence of small improvements.
Drying and firing teach humility. A pot can look perfect on the wheel and still crack if dried too quickly. A glaze can look dull before firing and beautiful afterward. Another glaze can look promising and come out looking like it made a questionable life choice. Keeping notes helps. Write down the clay body, glaze name, application method, firing temperature, and results. Pottery rewards curious record-keepers.
The best experience tip is simple: make several pots, not one precious pot. If you make one pot, you become nervous. If you make ten, you become a student. Repetition helps your hands understand what your brain is still trying to explain. Each pot teaches something different: one about centering, one about rim compression, one about trimming, one about patience. Eventually, your hands begin to remember.
Finally, enjoy the mess. Wheel throwing is not a clean hobby. Clay lands on your apron, your wrists, your shoes, and sometimes your face in ways no one can explain. But that mess is part of the pleasure. You are not just buying a pot; you are learning how form emerges from motion. A handmade clay pot carries the evidence of that processthe pressure of your fingers, the rhythm of the wheel, the tiny choices that shaped it. That is what makes it worth doing, even when the first few pots look like they had a difficult morning.
Conclusion
Learning how to make a clay pot by wheel is a step-by-step process that combines preparation, control, and practice. Start with the right clay, wedge it well, center it patiently, open it carefully, pull the walls evenly, refine the rim, trim the base, and finish with proper drying, firing, and glazing. The process may feel awkward at first, but every pot improves your hands, your eye, and your understanding of clay.
The most important beginner advice is to stay patient and make more than one piece. Wheel throwing is a skill built through repetition. Your first pot does not need to be perfect. It only needs to teach you something. And if it holds a plant, pencils, or spare buttons after firing, congratulationsyou have officially turned mud into a useful object. That is a pretty excellent day in the studio.











