
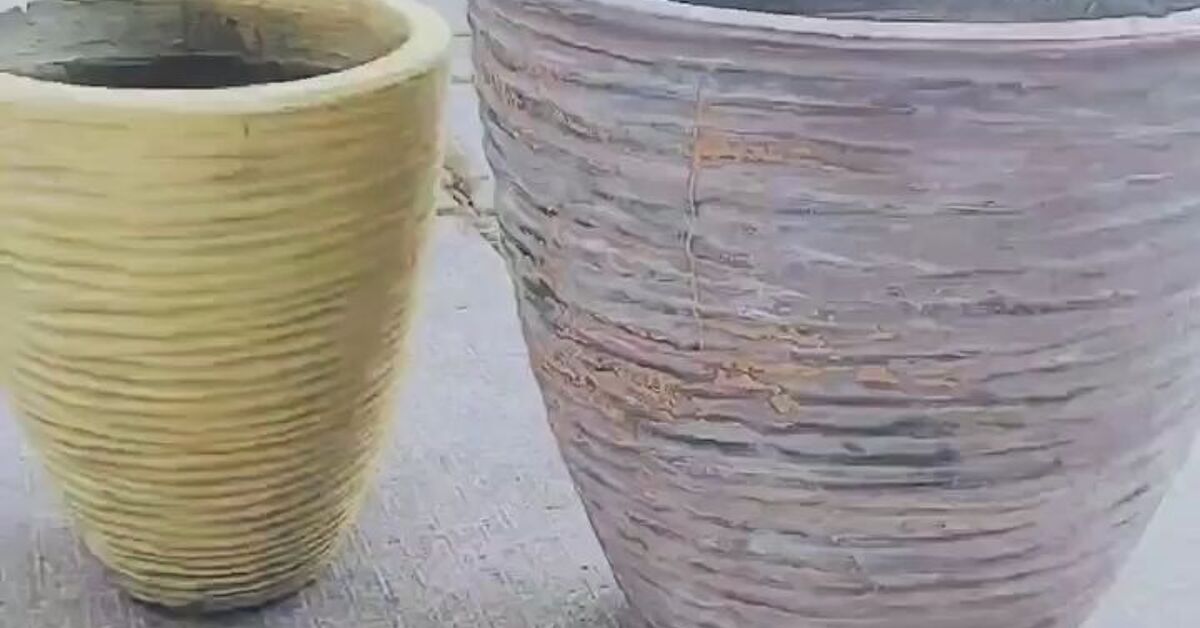
Some home projects begin with a grand vision. Others begin with a sad plastic planter sitting in the corner, quietly begging for a glow-up. If you have ever looked at a plain pot and thought, “You could be charming if you tried,” this textured plaster planter project is for you.
Learning how to easily create a textured planter using plaster is one of the simplest ways to turn an ordinary container into something that looks handmade, sculptural, and far more expensive than it actually is. The best part? You do not need a pottery wheel, a kiln, or the patience of a medieval artisan. With Plaster of Paris, a basic planter, paint, sealant, and a few common tools, you can create a custom pot with a stone-like, rustic, or modern Mediterranean finish in an afternoon.
This DIY textured planter works especially well for indoor houseplants, succulents, herbs, faux plants, and covered porch decor. With the right sealing approach, it can also handle light outdoor use. The technique is flexible, forgiving, and pleasantly messythe good kind of messy, not the “why is there plaster on the dog?” kind.
In this guide, you will learn what materials to use, how to prep your planter, how to mix and apply plaster, how to create texture, how to paint and seal the finished pot, and how to avoid the most common mistakes. At the end, you will also find real-world experience tips to help your planter look less like a school art project and more like something from a boutique home store.
Why Use Plaster for a DIY Textured Planter?
Plaster is popular in craft and home decor projects because it creates a smooth yet buildable surface. Plaster of Paris, in particular, hardens quickly and can be shaped, scraped, brushed, layered, and painted. That makes it ideal for a DIY planter makeover where texture is the whole point.
Unlike cement, plaster is not designed for structural outdoor construction. That matters. A plaster-coated planter should be treated as a decorative finish, not as a heavy-duty concrete pot. Think of it as giving your planter a beautiful handmade jacket rather than turning it into a bunker.
The magic of plaster is its ability to create dimension. A thin coat can soften the hard shine of a plastic pot. A thicker, uneven coat can mimic aged stone, limestone, limewash, or hand-thrown pottery. Add paint or powdered pigment, and you can create anything from warm terracotta to chalky white, charcoal gray, sandy beige, or muted sage green.
Best Planters to Use for This Project
You can use several types of base containers for a textured plaster planter. Plastic nursery pots, thrifted ceramic pots, dollar-store planters, old vases, metal buckets, and lightweight resin pots can all work. The easiest option is a rigid plastic or resin planter because it is affordable, easy to handle, and often already has drainage holes.
If your planter will hold a real plant, drainage matters. A container without drainage can trap water around the roots, which may lead to root rot and other plant problems. If your decorative pot does not have a hole, use it as a cachepot instead. That means your plant stays in a separate nursery pot with drainage, and the plaster planter simply acts as the pretty outer shell.
Good Base Options
Choose a planter that feels sturdy in your hands. Thin plastic pots that bend easily may crack the plaster layer over time. A pot with a slightly rough surface is helpful because the plaster grips better. If your pot is glossy, a quick sanding session will make a big difference.
Planters to Avoid
Avoid flexible silicone containers, very flimsy plastic, unsealed cardboard, and anything that will be constantly soaked with water. Plaster does not love long-term moisture, so the goal is to create a decorative exterior and then protect it with paint and sealant.
Materials You Will Need
Before you start, gather everything. Plaster sets quickly, and once it starts firming up, it will not politely wait while you search for a missing brush. Plaster has no respect for your schedule.
- One plastic, ceramic, resin, or thrifted planter
- Plaster of Paris or patching plaster
- Disposable mixing container
- Stir stick, plastic spoon, or putty knife
- Disposable gloves
- Fine-grit sandpaper or sanding sponge
- Painter’s tape, if you want clean edges
- Acrylic paint, chalk-style paint, or milk paint
- Paintbrushes or foam brushes
- Clear water-resistant sealer suitable for your finish
- Drop cloth, cardboard, or newspaper
- Dust mask for sanding or working with dry powder
Optional materials include powdered tempera, paint pigment, joint compound for a softer texture, a sponge, a dry brush, a palette knife, a plastic comb, a chip brush, or a crumpled paper towel. These tools help create different textures.
Safety and Setup Before You Start
Plaster is beginner-friendly, but it still deserves respect. Work in a well-ventilated area, protect your table, and wear gloves. Avoid breathing plaster dust when pouring or sanding. A simple dust mask is a smart choice, especially if you are making several planters.
Never rinse large amounts of plaster slurry down the sink. Plaster can harden in pipes, and “DIY planter” is a much more fun phrase than “emergency plumbing bill.” Let leftover plaster harden in the container, then throw it away according to your local waste rules.
Also, do not mix a giant batch. Plaster of Paris sets fast. Small batches give you more control and reduce waste. For most planter makeovers, begin with a few tablespoons of plaster powder and mix more as needed.
Step-by-Step Guide: How to Easily Create a Textured Planter using Plaster
Step 1: Clean the Planter
Start with a clean, dry planter. Remove stickers, dust, soil, grease, and any loose paint. If the pot has been used outdoors, wash it with mild soap and water, then let it dry completely. Plaster sticks best to a clean surface.
If you are using a glossy plastic planter, lightly sand the outside. You do not need to destroy the surface. Just scuff it enough so it no longer feels slippery. Wipe away dust with a damp cloth and allow the pot to dry.
Step 2: Protect the Rim and Drainage Hole
If you want a clean rim, apply painter’s tape around the top edge. If the pot has drainage holes, make sure plaster does not clog them. You can temporarily cover the hole from the inside with tape while working, then remove the tape before the plaster fully hardens.
For a cachepot, drainage is less important because the plant will sit in a separate inner pot. Still, avoid creating a thick plaster lump at the base that makes the container wobble.
Step 3: Mix a Small Batch of Plaster
Add cool water to your disposable container first, then sprinkle plaster into the water gradually. Stir until the mixture reaches a thick yogurt or peanut butter consistency. For a smoother, thinner finish, use slightly more water. For bold texture, keep it thicker.
Do not overmix. Stir just until the dry pockets disappear. If the plaster becomes too runny, add a little more powder. If it becomes too thick too quickly, resist the urge to keep rescuing it with water forever. Once plaster starts setting, it is better to mix a fresh batch.
Step 4: Apply the First Coat
Use a plastic knife, gloved fingers, putty knife, or stiff brush to spread plaster over the planter. Start with a thin base coat. This first layer does not have to be gorgeous. Its job is to cover the surface and help later texture layers grip.
Work from bottom to top in uneven strokes. Do not aim for perfect smoothness unless you want a refined plaster look. For a handmade planter, small ridges, dips, and imperfect edges are part of the charm. This is one of the few times in life when “slightly lumpy” is a compliment.
Step 5: Add Texture While the Plaster Is Damp
Texture is where the project becomes fun. While the plaster is still damp, use your tool of choice to create movement. A chip brush creates vertical striations. A sponge creates a pitted stone effect. A putty knife creates smooth trowel marks. A crumpled paper towel creates an earthy, aged surface.
For a modern fluted look, drag a plastic comb or notched spreader vertically around the pot. For a rustic stone look, dab the surface with a sponge, then lightly smooth the high points with your fingers. For a Mediterranean-style plaster pot, use a putty knife in sweeping arcs and leave visible trowel marks.
Step 6: Let the Planter Dry
Allow the plaster to dry fully before sanding, painting, or sealing. Drying time depends on the thickness of the coat, humidity, and the specific product you use. Thin decorative coats may feel firm quickly, but deeper moisture can remain inside the plaster. When in doubt, let it sit overnight or longer.
The planter should feel dry, hard, and cool rather than damp or chalky. If you paint too soon, moisture may get trapped under the finish, which can cause peeling or bubbling later.
Step 7: Sand Lightly
Once dry, lightly sand any sharp edges or crumbly spots. Do not sand away all the character. The goal is to remove rough peaks that could flake off, not erase the texture you just worked to create.
Wear a dust mask while sanding and wipe the planter with a dry or slightly damp cloth afterward. Let it dry again before painting.
Step 8: Paint the Planter
Acrylic paint, chalk-style paint, and milk paint can all create beautiful finishes on plaster. For a natural stone look, choose warm white, limestone beige, mushroom gray, taupe, or soft clay. For a modern look, try matte black, charcoal, olive, or creamy off-white.
You can also tint plaster before applying it. Some crafters mix powdered pigment or powdered tempera into dry plaster before adding water. Use a light hand. Too much colorant can affect how the plaster sets, so begin with a small amount and test before committing to a full planter.
Step 9: Create Depth with a Second Color
A single paint color can look nice, but layered color makes the planter look more realistic. Try dry brushing a lighter shade across the raised texture. Or wipe a darker glaze into the crevices, then remove the excess with a cloth.
For an aged stone effect, paint the planter a medium beige or gray first. Once dry, lightly dry brush off-white across the high points. For a terracotta effect, start with a burnt orange base and sponge on small amounts of cream, brown, and muted pink.
Step 10: Seal the Finish
Sealing is not optional if the planter will be exposed to moisture. Plaster is porous, so it can absorb water. Use a clear water-resistant sealer that works with your paint type. For indoor decorative planters, a matte acrylic sealer may be enough. For covered outdoor use, choose an exterior-rated clear sealer and apply multiple thin coats.
Seal the outside, rim, and any exposed interior areas. Let each coat dry according to the product directions. If the planter will hold a nursery pot inside, sealing the inner wall is still helpful because occasional watering spills happen. Plants are lovely, but they are not known for their respect of craft finishes.
Design Ideas for a Textured Plaster Planter
Minimal White Plaster Planter
Use a thin coat of plaster, smooth it with a putty knife, and paint it warm white. Finish with a matte sealer. This style looks beautiful with olive trees, snake plants, pothos, and sculptural succulents.
Aged Stone Planter
Apply a thick, uneven plaster coat and dab it with a sponge. Paint with gray-beige acrylic, then dry brush with ivory. Add a little watered-down brown paint in crevices for an antique garden look.
Modern Fluted Planter
Use a notched spreader or plastic comb to drag vertical grooves through the plaster. Keep the color simple: matte black, cream, or clay. This design looks especially good on cylindrical pots.
Terracotta-Inspired Plaster Pot
Paint the plaster in a muted clay tone, then sponge on lighter peach and cream highlights. The result gives you the warmth of terracotta with a softer, chalkier texture.
Coastal Limestone Planter
Use off-white, sand, and pale gray paint. Keep the texture irregular and soft. This finish pairs well with airy interiors, rattan furniture, linen curtains, and the kind of room that makes you want to drink iced tea slowly.
Common Mistakes to Avoid
Using Too Much Water
Watery plaster can slide down the planter and dry weakly. Aim for a spreadable paste. If it slowly holds a ridge when you drag a knife through it, you are in the right zone.
Making the Coat Too Thick
A dramatic texture is great, but a heavy plaster layer can crack or chip, especially on flexible plastic. Build texture in layers rather than globbing on one mountain of plaster.
Skipping Surface Prep
Glossy plastic and dust are enemies of adhesion. Clean and lightly sand the planter before applying plaster. This small step can make the difference between a durable finish and a flaky disappointment.
Forgetting to Seal
Paint alone is not always enough. A clear sealer helps protect the plaster from moisture, fingerprints, dirt, and everyday wear. Use a finish that suits your location: indoor, covered patio, or outdoor exposure.
Planting Directly Without Drainage
If the pot has no drainage, do not plant directly in it unless you are using a careful drainage system and a plant that tolerates controlled moisture. The safer option is to keep the plant in a nursery pot and place it inside the decorative plaster planter.
Best Plants for a DIY Textured Plaster Planter
Textured plaster planters pair beautifully with plants that have strong shapes. Succulents, snake plants, ZZ plants, pothos, philodendrons, peperomia, herbs, and small ferns all look great in these pots. For a clean modern look, choose one bold plant. For a cottage feel, combine trailing greenery with soft foliage.
If the planter is small, use succulents or a single herb. If it is medium-sized, try a pothos or a compact snake plant. For a large planter, use a nursery pot inside the plaster shell and add a lightweight plant such as a ficus, olive tree, or monstera.
Always match the plant to the light in your space. A planter can be gorgeous, but it cannot magically make a low-light corner behave like a sunny greenhouse. Sadly, decor has limits.
How to Care for Your Finished Planter
Dust the planter with a soft cloth. Avoid scrubbing the surface with harsh cleaners. If the planter gets wet, wipe it dry instead of letting water sit on the finish. For outdoor planters, inspect the sealer every season and reapply if the surface looks dull, chalky, or water no longer beads on it.
If a small chip appears, repair it with a dab of fresh plaster or spackling compound. Let it dry, sand lightly, repaint the spot, and reseal. The repair may even add to the handmade look. Call it “character” and proceed with confidence.
Experience-Based Tips for Making a Better Textured Plaster Planter
After making a few textured plaster planters, you quickly learn that the project is less about perfection and more about timing, restraint, and knowing when to stop poking the plaster. The first experience many DIYers have is mixing too much plaster. It looks harmless in the bowl for about three minutes, and then suddenly it becomes a stubborn rock with a spoon fossilized inside. The better method is to mix small batches. Start with enough to cover one side of the planter. When that section is textured, mix another small batch and continue.
Another helpful lesson is that the base planter matters more than it seems. A flexible plastic pot may look like a bargain, but if it bends every time you pick it up, the plaster finish may crack. A slightly thicker nursery pot, resin container, or thrifted ceramic pot gives the plaster a more stable foundation. If you only have a flexible pot, keep the plaster layer thin and use it indoors as a decorative cachepot.
Texture also looks better when it has variety. A pot covered in identical brush marks can look too planned. Nature is not that organized. Try combining techniques: swipe plaster upward with a putty knife, dab a few areas with a sponge, then lightly smooth the tallest peaks with your fingers. The result feels organic instead of overly patterned. Step back from the planter every few minutes. What looks chaotic up close often looks beautifully balanced from a few feet away.
Color is another area where subtlety wins. Bright white can look fresh, but warm white usually looks more expensive. Gray can look modern, but gray with a hint of beige looks more like stone. Terracotta is lovely, but adding a small amount of cream or dusty brown makes it feel aged and natural. If the first paint coat looks flat, do not panic. Dry brushing and glazing can transform it. A nearly dry brush with a lighter paint color will catch the raised texture and make the surface come alive.
Sealing is where patience pays off. It is tempting to plant something immediately after painting, especially when the pot looks adorable and your plant is sitting nearby like it has an appointment. Wait. Let the paint dry fully, apply thin coats of sealer, and give the finish time to cure. A rushed planter is more likely to peel, stain, or soften when watered. For real plants, the cachepot method is often the smartest option. Keep the plant in a nursery pot with drainage, remove it for watering, let it drain in the sink, and then place it back inside the decorative plaster planter.
One final experience tip: make more than one planter. The first pot teaches you the process. The second pot usually looks better. By the third, you will start eyeing every container in the house and wondering whether it would look better with plaster on it. This is normal. Slightly dangerous for your free time, but normal.
Conclusion
Creating a textured planter using plaster is an easy, affordable, and satisfying way to upgrade plain pots into custom home decor. With a simple base planter, Plaster of Paris, paint, and sealer, you can create a handmade finish that looks like stone, ceramic, limewash, or aged terracotta. The process is beginner-friendly, and the imperfections are part of the beauty.
The most important steps are simple: clean and sand the planter, apply plaster in small batches, build texture while it is damp, let it dry completely, paint in layered tones, and seal the surface well. Use drainage holes or the cachepot method to keep your plants healthy, and choose a finish that matches your space.
Whether you are refreshing a dollar-store pot, rescuing an old plastic planter, or making a stylish gift, this project proves that great decor does not have to be expensive. Sometimes it just needs plaster, paint, and a little willingness to get your hands messy.













