
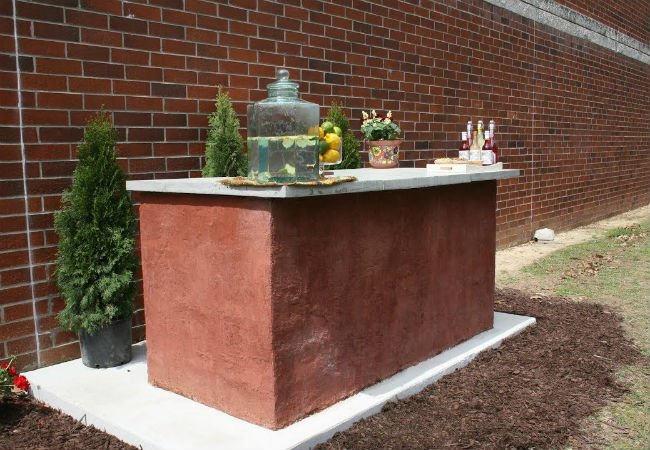
Some backyard projects begin with noble ambition and end with three half-used bags of screws, a sunburn, and a suspicious wobble. Building an outdoor bar does not have to be one of them. In fact, the easiest way to build an outdoor bar is to choose a simple, sturdy design that does not require advanced masonry, complicated plumbing, or the kind of woodworking precision normally reserved for violin makers.
The idea behind an easy DIY outdoor bar is wonderfully practical: create a flat serving surface, a solid base, and enough storage for drinks, glasses, napkins, and the mysterious bottle opener that always disappears exactly when guests arrive. Inspired by the approachable backyard project style often associated with Bob Vila, this guide focuses on a low-stress build that uses common materials, avoids overengineering, and still looks like something you planned on purpose.
Whether you want a patio bar for weekend cookouts, a backyard beverage station for summer parties, or a small outdoor entertaining zone near the grill, this guide walks through the easiest route from “we should build something out here” to “why is everyone suddenly hanging out at my house?”
Why an Outdoor Bar Is One of the Smartest Backyard Upgrades
An outdoor bar turns unused patio space into a destination. Instead of guests crowding around the kitchen island while the backyard sits there looking betrayed, a bar pulls the party outside. It creates a natural serving station, gives people a place to gather, and helps separate food prep from conversation. That means fewer elbows near the grill, fewer drink spills on the dining table, and fewer people asking where the cups are when the cups are directly in front of them.
Outdoor bars also scale beautifully. A tiny balcony can handle a fold-down wall bar or rolling cart. A larger patio can support a cinder block bar with a wood or concrete top. A full outdoor kitchen can include a built-in wet bar, refrigerator, seating, lighting, and storage. But for most homeowners, the easiest and most budget-friendly option is a freestanding bar that sits on a level patio, deck, or concrete slab.
The Easiest Outdoor Bar Design: Simple Base, Strong Top
The easiest outdoor bar design is built around two parts: a stable base and a durable countertop. You can make the base from concrete blocks, pressure-treated lumber, cedar, decking boards, pallets, or a prefabricated cabinet. For the top, common choices include sealed wood, concrete pavers, butcher-block-style boards, composite decking, tile, or a ready-made countertop panel.
If simplicity is the goal, concrete blocks are hard to beat. They are inexpensive, weather-resistant, heavy enough to stay put, and forgiving for beginners. You do not need to mix mortar if you build on a level surface and stack the blocks in a staggered pattern. The weight of the blocks creates stability, and a wood or stone top transforms the structure from “pile of blocks” into “yes, I absolutely meant to do this.”
Choose the Right Location Before You Build
The best outdoor bar location is close enough to the house to make refills easy, but far enough from doorways and foot traffic that it does not become an obstacle course. A patio, deck edge, poolside area, or grill zone can all work well. Think about shade, wind, lighting, seating, and how people naturally move through the space.
Look for a Level Surface
A level surface is the secret ingredient in an easy outdoor bar build. A concrete patio, paver area, or sturdy deck can work, but the surface must be flat and stable. If the base rocks, the bar will rock. And once a bar starts rocking, every glass of lemonade becomes a suspense film.
For a concrete slab, patch dips, cracks, or flaking areas before construction. For pavers, make sure they are compacted and even. For decks, confirm the structure can support the weight of the bar, especially if you are using concrete blocks or stone. When in doubt, keep the design lighter or consult a professional before adding a heavy built-in feature.
Plan for Shade and Comfort
A backyard bar is more enjoyable when guests are not slowly becoming toast. If your patio gets strong afternoon sun, consider placing the bar under a pergola, umbrella, shade sail, covered porch, or mature tree. Add outdoor stools, weather-resistant cushions, and lighting so the bar works during the day and after sunset.
Materials for the Easiest DIY Outdoor Bar
You can build a simple outdoor bar with surprisingly few materials. The exact list depends on the design, but a beginner-friendly concrete block bar may require concrete blocks, construction adhesive rated for masonry and outdoor use, a level, work gloves, a countertop board or slab, exterior screws or brackets if needed, sealer, and optional trim or decorative panels.
For a wood-based bar, use exterior-rated materials. Cedar, redwood, pressure-treated lumber, and composite decking are popular because they hold up better outdoors than untreated interior lumber. Any wood countertop should be sealed on all sides, not just the pretty top. Moisture is sneaky. It will find the unfinished underside like a raccoon finds an unsecured trash can.
Step-by-Step: Build an Outdoor Bar the Easy Way
Step 1: Measure Your Space
Start by deciding how wide, deep, and tall your bar should be. A typical standing bar height is around 42 inches, while counter-height seating is usually closer to 36 inches. For a simple backyard serving bar, a width of 48 to 72 inches gives you enough room for drinks, snacks, and a small prep area without taking over the entire patio.
Leave space behind the bar for the person serving and space in front for stools or standing guests. If you plan to add bar stools, allow comfortable knee room and walking space. Nobody wants to enjoy a drink while folded into the posture of a lawn flamingo.
Step 2: Create a Level Foundation
Sweep the area clean and check it with a level. For a block bar, this step matters more than almost anything else. Even a small slope can make the top uneven. If you are building on concrete, patch low spots and let repairs cure according to the product instructions. If you are working on pavers, lift and reset uneven pavers before stacking the base.
Step 3: Dry-Fit the Base
Before using adhesive or fasteners, dry-fit the entire bar base. Arrange the blocks or lumber pieces exactly where they will go. For concrete blocks, use a staggered pattern so vertical joints do not line up from one row to the next. This running-bond layout improves stability and gives the bar a more finished appearance.
Do not build only the outside walls and leave the middle hollow unless your design has been engineered for that. A solid or well-supported base helps prevent shifting and sagging. The goal is a bar that can handle ice buckets, pitchers, elbows, and the occasional guest who leans like they are testing a bridge.
Step 4: Secure the Structure
If using concrete blocks, apply exterior-rated construction adhesive between courses once you are happy with the layout. Work carefully and check level as you go. If using lumber, assemble the frame with exterior screws, galvanized hardware, and proper bracing. Outdoor furniture takes more abuse than indoor furniture because it deals with sun, rain, temperature changes, and people who suddenly become carpenters after two sparkling waters.
Step 5: Add the Countertop
The countertop should be durable, easy to clean, and slightly larger than the base. A modest overhang makes the bar look intentional and gives guests a comfortable place to stand or sit. Sealed cedar, composite decking, concrete pavers, tile over backer board, and stone slabs can all work.
For the easiest installation, use a single sealed wood slab or several exterior boards joined together. Sand the edges smooth, apply outdoor-rated sealer, and attach the top securely to the base. If the bar will be exposed to rain, a slight slope or good drainage around the area helps prevent water from pooling.
Step 6: Add Storage and Finishing Touches
Storage is what separates a useful outdoor bar from a decorative shelf with confidence issues. Add shelves, hooks, bins, a cooler bay, or a cabinet for nonbreakable cups, cocktail napkins, grilling tools, and serving trays. If your bar is near a cooking area, reserve a section for condiments, cutting boards, or utensils.
Finish the look with outdoor lighting, a small herb planter, bar stools, a mounted bottle opener, and weather-resistant decor. String lights can make even a simple block-and-board bar feel charming. It is backyard magic, and it costs less than a therapy session for your neglected patio.
Outdoor Bar Ideas for Different Spaces
For Small Patios
Choose a narrow standing bar, fold-down wall bar, or rolling cart. A compact design can still hold a drink station, ice bucket, and a few snacks. Use vertical storage such as hooks, rails, and wall shelves to save floor space.
For Decks
Use lighter materials such as cedar, treated lumber, or composite boards instead of heavy masonry. A railing-height bar can double as a serving ledge and take advantage of the view. Always consider deck load limits before adding heavy features.
For Grill Zones
Build the bar close enough to the grill for convenience but not so close that guests crowd the cook. Leave clear space around hot surfaces and follow grilling safety guidance. A bar near the grill works best when it includes prep space, serving trays, and storage for utensils.
For Pool Areas
Use slip-resistant flooring, shatter-resistant drinkware, and materials that tolerate moisture. Avoid placing electrical features where splashing is likely. A poolside bar should feel relaxed, not like a science experiment involving water and extension cords.
Safety Tips That Make the Bar Better
Outdoor bars are fun, but the best ones are also safe and practical. If you add electricity for a blender, mini fridge, lights, or sound system, use outdoor-rated equipment and GFCI-protected outlets. Wet-location covers and weather-resistant fixtures are essential for outdoor electrical setups. For permanent wiring, hire a licensed electrician.
If your outdoor bar includes food service, remember the basic food safety rule: keep cold foods cold and hot foods hot. Perishable foods should stay at or below 40 degrees Fahrenheit, while hot foods should stay at or above 140 degrees Fahrenheit. Use coolers, ice packs, covered containers, and thermometers when entertaining outside in warm weather.
For bars near grills, fire pits, or outdoor heaters, maintain safe spacing from combustible materials. Keep paper towels, decorations, curtains, and dry leaves away from flames and heat. Outdoor entertaining is better when the only thing getting lit is the string lighting.
Common Mistakes to Avoid
The first mistake is building too big. A huge bar may sound exciting until it eats half the patio and leaves guests squeezing past it like they are boarding a budget airline. Match the size to your actual space and entertaining style.
The second mistake is skipping weather protection. Untreated wood, indoor paint, and regular screws can fail quickly outdoors. Use exterior-rated finishes, corrosion-resistant fasteners, and materials designed for sun and moisture.
The third mistake is ignoring storage. A bar without storage looks clean for exactly six minutes. Then cups, mixers, towels, and tools migrate across the countertop. Plan shelves or bins from the beginning.
The fourth mistake is forgetting cleanup. Choose surfaces that wipe down easily, avoid deep cracks where crumbs can hide, and place a trash or recycling bin nearby. The easier cleanup is, the more often you will use the bar.
Budget-Friendly Upgrades That Look Expensive
You do not need a luxury outdoor kitchen budget to create a polished backyard bar. Add a stained wood countertop to a concrete block base. Use peel-and-stick outdoor-rated tile on a protected backsplash area. Install a simple rail for towels and tools. Add solar lanterns or battery-powered LED lights. Use matching bins for storage. Place potted herbs nearby for garnish and fragrance.
A coat of exterior paint can also transform a simple bar. Matte black, warm white, charcoal, sage green, and natural wood tones all pair well with outdoor spaces. For a rustic look, use cedar boards and metal accents. For a modern look, combine concrete blocks with a smooth wood or stone top.
Maintenance: Keep Your Outdoor Bar Looking Good
Outdoor bars need seasonal care. Wipe the surface regularly, reseal wood when water stops beading, tighten screws, inspect adhesive joints, and cover the bar during harsh weather. If you live in a freeze-thaw climate, avoid designs that trap water inside cracks or gaps. Water expands when frozen, and it is surprisingly committed to destroying things.
At the start of each season, clean the countertop, check for loose parts, refresh stain or sealer if needed, and restock supplies. At the end of the season, remove cushions, clean storage bins, and cover or move portable accessories indoors.
Experience-Based Notes: What Actually Makes an Outdoor Bar Easy
The easiest outdoor bar is not always the cheapest one or the fastest one. It is the one that matches how you actually live. If you mostly host casual cookouts, you probably need a sturdy serving counter, a cooler, and a place for condiments more than you need a sink, refrigerator, and custom stonework. If you enjoy mixing drinks, you may want a prep zone, garnish tray, ice storage, and a small shelf for bottles. If your family uses the patio every day, the bar should be durable enough to become part of normal life, not a fragile showpiece that everyone is afraid to touch.
One practical lesson is to build the bar where people already gather. A beautiful bar in the lonely far corner of the yard may look great in photos, but guests tend to follow food, shade, and conversation. Place it near seating, the grill, or the main patio path. That way, it becomes useful immediately.
Another lesson is to test the height before committing. Stack boxes, use a folding table, or mark the height on a wall. Stand there with a glass, plate, or cutting board. If the height feels awkward now, it will feel awkward later, only with more screws involved.
Storage matters more than beginners expect. At first, a simple countertop seems like enough. Then you realize you need a place for paper towels, trash bags, bottle openers, bug covers, sunscreen, lighters, skewers, and the backup bag of chips that absolutely counts as emergency preparedness. Even one lower shelf can make the bar much more useful.
Durability also comes from small decisions. Sealing the underside of a wood top, using stainless or galvanized fasteners, lifting stored items off wet ground, and covering the bar during storms can add years to the project. Outdoor furniture fails fastest where moisture sits unnoticed, so design with drainage and airflow in mind.
Finally, do not wait for perfection to enjoy the bar. Start with the simple build. Use it for a few weekends. Notice where guests set their drinks, where the sun hits, whether you need another shelf, and whether stools are necessary. The best outdoor bars evolve. First comes the counter. Then come the hooks, lights, plants, cooler, and possibly the neighbor who appears every Saturday holding limes.
Conclusion
Building an outdoor bar the easiest way possible is about making smart choices before making sawdust. Start with a level surface, choose weather-friendly materials, keep the design simple, and focus on the features that make entertaining easier: a strong countertop, stable base, practical storage, safe placement, and comfortable access for guests.
You do not need a contractor-grade outdoor kitchen to create a backyard hangout people love. A concrete block base and sealed wood top can be enough. A compact deck bar can be enough. A rolling beverage cart with good lighting can be enough. The secret is building something useful, durable, and inviting. Once the bar is finished, your patio stops being “the place where the chairs live” and becomes the best seat in the house.














