
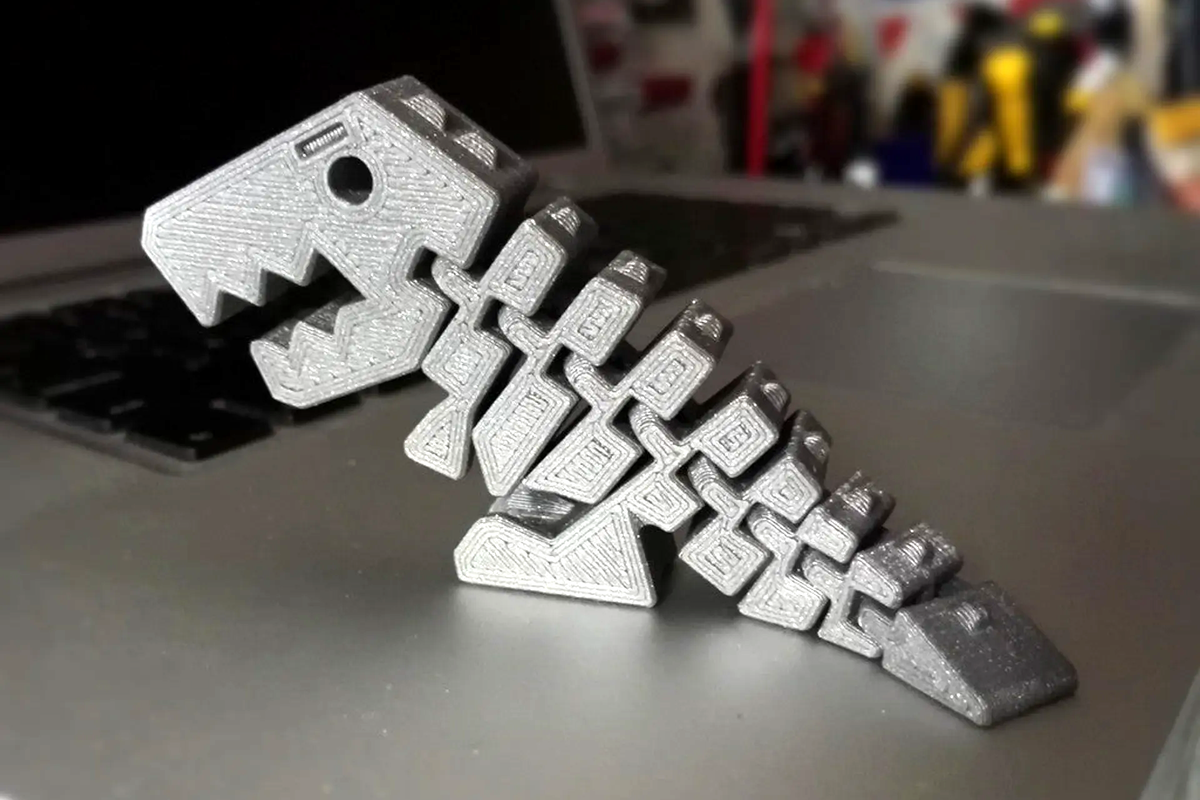
There are few sentences more dangerous in a classroom makerspace than, “That looks easy.” Right behind it comes, “Can we 3D print one?” And somewhere in the glorious chaos of eighth-grade curiosity, a simple hinge becomes a full engineering lesson disguised as a plastic wiggly dinosaur, a folding heart, or a desk toy that suddenly consumes the attention of everyone within a ten-foot radius.
Hinged parts for the 8th grade set may sound like a niche topic, but it captures something bigger: how students learn mechanical design by building objects that move. A hinge is not just a door part. In 3D printing, robotics, product design, cardboard engineering, and middle-school STEM projects, a hinge is a tiny mechanical promise: two rigid pieces can stay connected while rotating around one controlled axis. That is simple enough for beginners to understand, yet deep enough to introduce tolerances, constraints, prototyping, material behavior, and the engineering design process.
For eighth graders, that combination is perfect. They are old enough to think in systems, young enough to be fearless, and energetic enough to ask questions adults stopped asking because we got too busy paying electricity bills. Give them a 3D printer, Tinkercad, and a print-in-place hinge, and suddenly they are not just “making a thing.” They are learning why tiny gaps matter, why alignment matters, why plastic sometimes fuses when it should move, and why every engineer eventually becomes fluent in the ancient language of “undo, adjust, reprint.”
What Are Hinged Parts?
Hinged parts are connected components that rotate relative to each other. The common household example is a door hinge: two leaves joined by a pin, allowing the door to swing open and closed. In mechanical design, the same idea appears in laptop screens, eyeglasses, folding rulers, toolboxes, toy animals, cabinet doors, robotics arms, adjustable stands, medical devices, and countless objects that need controlled movement without falling apart like a group project on presentation day.
In a classroom or beginner 3D printing setting, hinged parts usually fall into two categories. The first is the assembled hinge, where separate pieces are printed and then connected with a pin, wire, screw, filament segment, or small rod. The second is the print-in-place hinge, where the hinge is printed as one object with carefully designed gaps between moving surfaces. When the print finishes, the student gently flexes the part, frees the hinge, and enjoys the small miracle of movement coming straight off the build plate.
That second type is especially exciting for students because it feels like magic. No screwdriver. No extra hardware. No tiny parts rolling under the table, where they will remain until the school is renovated in 2047. The hinge is built into the print itself.
Why Hinges Are Perfect for Eighth-Grade STEM
Eighth grade is a sweet spot for hands-on engineering. Students can understand abstract concepts like force, rotation, friction, measurement, and design constraints, but they still respond strongly to projects that are playful and visible. A hinged model gives them immediate feedback: it either moves, sticks, snaps, droops, or makes a noise that suggests the printer has been personally insulted.
Hinged parts also line up naturally with middle-school engineering goals. Students can define a problem, set criteria, consider constraints, create a prototype, test it, analyze results, and improve the design. That is the engineering design process in action, except with more PLA strings and at least one student asking whether the hinge can be added to a dragon.
They Teach Motion in a Simple Way
A hinge usually has one main job: allow rotation around an axis. That makes it easier to explain than more complex mechanisms like gears, cams, or linkages. Students can see the axis. They can feel the movement. They can compare a working hinge with a frozen hinge and immediately understand that design is not just about shape. It is about relationships between parts.
They Make Measurement Matter
Middle-school students sometimes treat millimeters like decorative suggestions. Hinges fix that. A gap that is too small may fuse shut. A gap that is too large may wobble like a cafeteria table with one bad leg. Suddenly, 0.1 mm is not a boring number on a ruler; it is the difference between “cool project” and “plastic paperweight.”
They Encourage Iteration
Iteration is the polite engineering word for “it did not work, but we learned something.” Hinged parts are excellent for this because failure is visible and useful. If the hinge sticks, students can increase clearance. If it breaks, they can thicken the barrel or change print orientation. If it swings too loosely, they can tighten the design. The hinge becomes a tiny laboratory.
The Basic Anatomy of a Hinge
Before students design hinged parts, they should understand the basic vocabulary. A traditional hinge has leaves, which are the flat plates attached to each side of the object. It has a knuckle or barrel, the curled section that wraps around the pin. It has a pin, the rod that forms the rotation axis. In a print-in-place hinge, the pin may be captured inside the barrel during printing, with a small clearance gap preventing the parts from bonding together.
In student-friendly language, one part holds, one part turns, and the empty space between them is not a mistake. In fact, the empty space is the hero. Without clearance, the hinge becomes one solid lump. With too much clearance, it becomes floppy. The art is in designing just enough space for motion.
Using Tinkercad for Hinged Parts
Tinkercad is popular in schools because it is browser-based, beginner-friendly, and built around simple shape operations. Students can combine solids, turn shapes into holes, align objects, group parts, and import STL files. Those tools are enough to build surprisingly useful hinged models.
A practical classroom workflow starts with a simple object, such as a heart, rectangle, animal body, name tag, or small folding sign. The student then splits the object where movement should happen. A narrow rectangular hole can act as a slice, separating the model into two halves. Next, a hinge element is placed across the gap. Finally, a punch or hole shape removes material where the hinge barrel needs room to rotate.
This method is powerful because it allows beginners to use prebuilt hinge geometry instead of modeling every tiny curved surface from scratch. That is not cheating. That is engineering. Engineers reuse proven components all the time. Nobody redesigns the screw every Tuesday just to feel productive.
A Simple Classroom Example: The Folding Heart
Imagine an eighth-grade student starts with a basic 8 mm thick heart shape. The goal is to make the heart fold in the middle. First, the student places a 1 mm wide cutting shape through the heart and groups it as a hole. The heart becomes two separate halves. Then the student places a small hinge across the center gap, making sure the rotating part lines up cleanly with the split. A second hole shape, used as a punch, clears the area under the hinge barrel. Once grouped correctly, the model can be exported for 3D printing.
When the print succeeds, the heart bends. When it fails, the lesson begins. Maybe the hinge was misaligned. Maybe the gap was too tight. Maybe the printer settings were too aggressive. Maybe someone scaled only one axis and turned the hinge into a tiny architectural tragedy. Each result teaches more than a worksheet ever could.
Print-in-Place Hinges: The Cool Part and the Hard Part
Print-in-place hinges are attractive because they produce moving assemblies directly from the printer. They also introduce students to one of the most important ideas in fabrication: the digital model and physical object are not identical experiences. A model on the screen may show perfect gaps. The printer, however, has nozzle width, filament behavior, layer height, cooling limits, and slight dimensional variation. Plastic is cooperative, but only up to a point.
For classroom prints, generous clearance is usually better than heroic precision. Many beginner-friendly print-in-place designs use gaps around a few tenths of a millimeter or more, depending on the printer, filament, and slicer settings. Students should be encouraged to run small test prints before committing to a large articulated creature that takes four hours and then emerges as a single stiff fossil.
Important Design Tips
Keep the hinge simple. Eighth graders can absolutely handle engineering complexity, but the first hinge should not require a PhD in tiny cylinders. Start with one hinge, one axis, and one clear movement.
Use enough clearance. Moving surfaces need space. If the hinge is supposed to rotate, the pin and barrel cannot touch perfectly in the model. They need a designed gap.
Watch print orientation. A hinge printed in one orientation may be stronger or freer than the same hinge printed another way. Orientation changes how layers carry stress.
Avoid scaling the hinge randomly. Scaling a hinge down may also shrink the clearance, which can make it fuse. Scaling up may make it sloppy. Students love scaling. Hinges do not always love being scaled.
Test before decorating. Print a plain hinge first. Once it works, add ears, spikes, initials, stars, fins, flames, or whatever eighth-grade creativity demands.
Common Problems and How Students Can Fix Them
The Hinge Is Fused Shut
This is the classic print-in-place problem. The moving parts printed too close together, or the printer over-extruded slightly, bonding the gap. The fix is to increase clearance, reduce over-extrusion, check slicer settings, or print a small tolerance test. Students should also learn to free the hinge gently. If they attack it like they are opening a jar of pickles, the hinge may snap.
The Hinge Is Too Loose
A loose hinge usually means too much clearance or weak geometry. The part may still work, but it will not feel controlled. Students can reduce the gap slightly, enlarge the pin, add more hinge barrels, or make the leaves thicker. This is a good moment to discuss trade-offs: easy movement versus stability.
The Hinge Breaks
Breakage often comes from thin hinge walls, poor layer orientation, rough handling, or brittle filament. Students can thicken the hinge, round sharp corners, avoid tiny unsupported features, and choose stronger print settings. This is also where teachers can introduce safety and patience, two classroom resources that are often rarer than spare glue sticks.
The Parts Do Not Line Up
Alignment errors happen when the hinge is not centered on the gap or when the punch shape removes the wrong material. In Tinkercad, students can use the align tool, smaller grid steps, and multiple camera angles to check placement. A hinge that looks right from the top may be floating, buried, or slightly off from the side.
How Hinged Parts Connect to Real-World Engineering
Once students understand a classroom hinge, they begin noticing hinges everywhere. Laptop screens, folding phones, kitchen cabinets, vehicle doors, airplane control surfaces, eyeglasses, medical braces, tool cases, toys, and packaging all depend on controlled rotation. The classroom project becomes a doorway into mechanical engineering, industrial design, product testing, and manufacturing.
Hinges also introduce the idea of design constraints. A hinge for a toy does not need the same strength as a hinge for a heavy door. A hinge for a medical brace must consider comfort, repeat motion, and reliability. A hinge for a folding phone must survive thousands of cycles while protecting delicate electronics. The eighth-grade model may be plastic and playful, but the thinking behind it is serious.
Classroom Management: The Hidden Engineering Challenge
Designing the hinge is only half the battle. Managing a room full of students who all want to print hinged creatures at once is its own systems-engineering problem. A teacher may have three printers, twenty-five students, and a queue long enough to qualify as a local landmark.
The solution is to keep early prints small. Students should first design hinge samples, not full dragons with seventeen moving segments and a personalized saddle. A five-minute test print teaches faster than a three-hour failure. Teachers can also create a shared parts library with hinge components, slice tools, punch tools, and example models. This reduces confusion and keeps the project focused on design decisions rather than file hunting.
Suggested Class Flow
Start with a short demonstration of a working hinged print. Let students handle it so they understand the goal. Next, show the digital model and point out the gap, pin, and hinge barrel. Then guide the class through a simple split-and-hinge activity using one basic shape. After that, students can customize their own designs while staying within size limits. Finally, each student should document what worked, what failed, and what they would change.
That last reflection matters. Without it, the project becomes “I made a thing.” With it, the project becomes “I designed, tested, analyzed, and improved a mechanical system.” Same plastic. Much better learning.
Best Project Ideas for Hinged Parts in Eighth Grade
A folding nameplate is a good starter project because it is simple, useful, and easy to personalize. A hinged animal introduces segmented movement without becoming too complex. A small box with a hinged lid teaches functional design. A foldable phone stand connects the project to everyday technology. A mini robotic claw can introduce linkages after students understand basic hinges. A folding bookmark or keychain keeps print times short while still teaching motion.
The best project is not always the fanciest one. It is the one that creates a clear design challenge with visible results. If the object moves, students care. If it fails in an understandable way, they learn. If it also looks cool enough to show a friend, the project wins.
Safety and Practical Printing Notes
Even beginner 3D printing requires clear classroom rules. Students should not touch hot nozzles, heated beds, or moving printer parts. Finished prints may need gentle cleanup, but cutting tools should be handled only with proper supervision. PLA is common in classrooms because it is relatively easy to print, but ventilation and printer placement still matter. Good makerspace habits are part of the lesson.
Teachers should also remind students that not every file found online is classroom-ready. Some models are too large, too fragile, too long to print, or poorly designed. Students should learn to evaluate a model before printing: How big is it? How long will it take? Are the hinges thick enough? Is the clearance visible? Does the design need supports? Will it survive being passed around by thirteen-year-olds, the unofficial stress test for all objects?
Why This Topic Works So Well
The beauty of hinged parts for eighth graders is that the lesson feels like play but behaves like engineering. Students learn computer-aided design, measurement, mechanical movement, fabrication limits, troubleshooting, and iteration. They also learn humility, because nothing teaches humility like a hinge that looked perfect on screen and then refused to move in real life.
But that is exactly the point. Engineering is not about getting everything right the first time. It is about learning from the physical world. Hinged parts make that lesson immediate, visible, and memorable. A stuck hinge is not a disaster; it is data. A broken hinge is not the end; it is a redesign request from reality.
Experience Notes: Teaching Hinged Parts to the 8th Grade Set
The best experience with hinged parts in an eighth-grade setting usually starts with restraint. That sounds boring, but it is true. The moment students see a flexible dinosaur, an articulated shark, or a print-in-place dragon, their ambitions sprint ahead of the printer. Suddenly everyone wants wings, tails, jaws, armor plates, initials, and possibly a snack compartment. The teacher’s job is not to crush that enthusiasm. It is to channel it into something printable before the class period expires and the printer queue becomes a historical document.
A useful approach is to begin with a single shared challenge: make one shape fold. A heart, rectangle, star, or simple animal body works well. Students first learn to split the shape cleanly. This alone creates discussion. Where should the object bend? Should both halves be equal? Does the hinge belong in the middle or offset to one side? Students quickly discover that movement is a design choice, not an afterthought.
Next comes the hinge placement. This is where many students have their first serious encounter with precision. They learn that “close enough” may look fine on a Chromebook screen but fail on the print bed. Using the align tool, zooming in, rotating the view, and setting smaller grid increments become practical skills rather than random software buttons. The class also begins to understand that CAD is not drawing; it is planning for physical behavior.
The first prints should be small and plain. A tiny test hinge may not win a beauty contest, but it gives fast feedback. Students can compare results: one hinge rotates smoothly, another sticks, another feels loose, and another breaks because its walls were too thin. Instead of treating these as failures, turn them into a gallery walk. Let students inspect each result and explain what likely happened. This builds engineering vocabulary naturally: clearance, friction, tolerance, layer lines, pin, barrel, rotation, alignment, and stress.
One of the most valuable classroom moments happens when students realize that changing one detail affects everything else. Increase the gap and the hinge moves more freely, but it may wobble. Make the pin thicker and it may become stronger, but it may also bind. Add decorative details and the model becomes more personal, but print time increases. This is real design thinking. It is also a gentle introduction to trade-offs, which is basically adulthood with better vocabulary.
Another helpful experience is creating a “hinge library” before students begin independent projects. Save a working hinge, a cutting slice, and a punch shape as reusable components. Give them clear names. Demonstrate how to import, duplicate, align, and group them. This reduces frustration and lets students focus on the creative part: deciding what their object should do. Once the basic hinge works, encourage variations. Can a box lid open? Can an animal tail swing? Can a sign fold flat? Can two hinges create three moving sections?
The final reflection should be short but specific. Ask students what moved, what did not, what measurement mattered most, and what they would change in version two. These answers are often more impressive than the prints themselves. A student who says, “I need a wider clearance because the barrel fused to the pin,” has learned something real. The object may be small, but the thinking is big.
That is why hinged parts belong in eighth-grade STEM. They are simple enough to start, challenging enough to respect, and fun enough to keep students invested. They turn plastic into motion and motion into understanding. Also, they give teachers the rare pleasure of hearing students argue passionately about millimeters. That alone is worth the filament.
Conclusion
Hinged Parts For The 8th Grade Set is more than a clever 3D printing activity. It is a compact engineering lesson that teaches movement, measurement, tolerance, problem-solving, and persistence. Hinges give students a reason to care about precision because the results are immediate: the part either moves or it does not. Through simple tools like Tinkercad, reusable hinge components, and carefully planned classroom projects, eighth graders can experience the full engineering cycle from idea to prototype to redesign.
The magic is not just in the moving plastic. It is in the moment students realize they can design motion themselves. That realization can turn a class project into a lasting interest in engineering, design, robotics, architecture, manufacturing, or simply making better things. And if the first hinge sticks? Excellent. The second version is already calling.
Note: This article is based on real information about 3D printing, Tinkercad classroom use, print-in-place hinges, middle-school engineering design, and practical maker education. It is rewritten as original web content for publication.














