
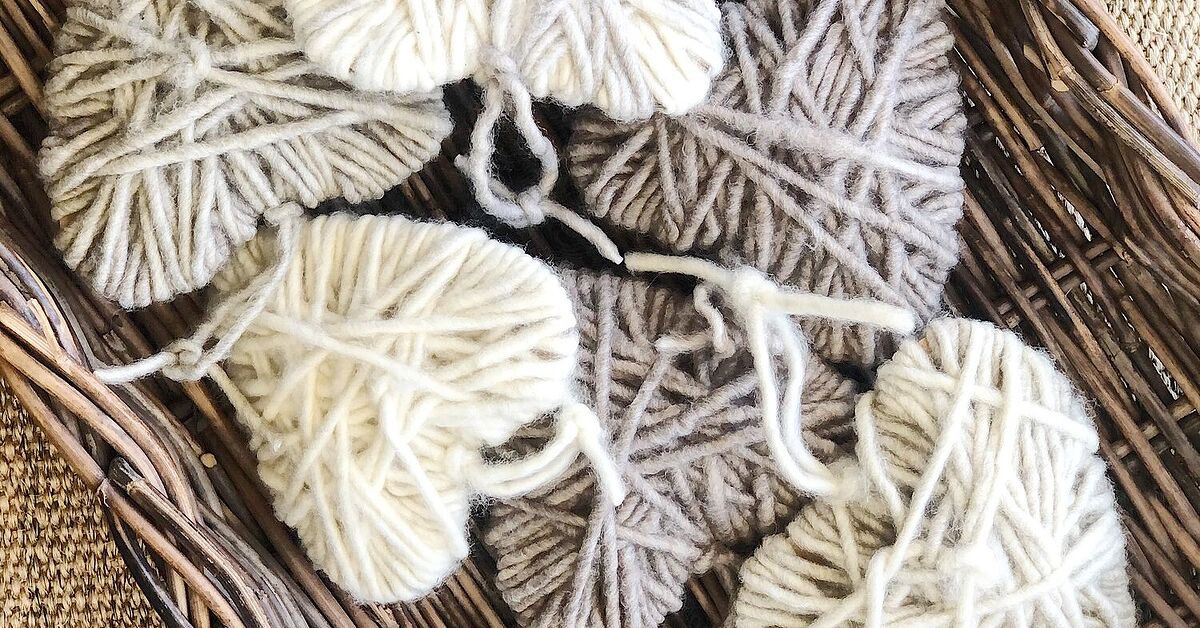
Some crafts require specialty machines, seventeen tiny tools, and the patience of a museum conservator. DIY yarn wrapped hearts require cardboard, yarn, scissors, and a willingness to accept that a loose strand may occasionally stick to your sleeve. That is a much friendlier arrangement.
These soft, colorful hearts are easy enough for beginners, inexpensive enough for classroom projects, and attractive enough to become genuine home décor rather than something you quietly hide when company arrives. Make one as a gift topper, create a dozen for a Valentine’s Day garland, or turn leftover yarn into a cheerful collection of handmade ornaments.
The basic technique is wonderfully forgiving: cut a heart-shaped base, wrap yarn around it in different directions, secure the final strand, and add any embellishments that make you happy. Neat wrapping creates a polished look, while crisscrossed wrapping produces a playful, cozy texture. Either way, the finished heart looks far more complicated than it really is. We will not tell your guests.
Why DIY Yarn Wrapped Hearts Are Worth Making
A yarn heart craft offers an appealing combination of simplicity and creative freedom. You do not need knitting, crochet, sewing, or embroidery experience. The yarn is used as a decorative wrapping material, so anyone who can pass a strand around a cardboard shape can complete the project.
It is also an excellent scrap-yarn activity. Small balls and partial skeins that are too short for larger fiber projects can become stripes, color blocks, tassels, bows, or hanging loops. Cardboard from a shipping box, cereal box, or clean food package can serve as the base, making this an affordable way to reuse materials already in the house.
Most importantly, every heart can look different. A tightly wrapped red heart feels classic and romantic. Pink, cream, and burgundy yarn creates a softer farmhouse-style palette. Rainbow yarn turns the project into bright children’s room décor, while gray, white, and black produce a modern version that can stay on display long after February 14.
Supplies for a Yarn Wrapped Heart Craft
Essential Materials
- Cardboard, chipboard, foam board, or heavy cardstock
- Yarn in one or more colors
- Scissors
- A pencil or marker
- A heart template or heart-shaped cookie cutter
- Craft glue, double-sided tape, or a low-temperature glue gun
Optional Decorations
- Ribbon or twine for hanging
- Wooden beads
- Mini pom-poms
- Felt flowers or leaves
- Buttons
- Small bells
- Letter beads
- Fabric scraps
- Gift tags or handwritten notes
Medium-weight yarn is usually the easiest choice for beginners because it covers the base efficiently without becoming difficult to control. Bulky yarn creates a plush heart quickly, but it can make small shapes look crowded. Fine yarn offers greater detail and smoother color transitions, although it requires more wrapping and therefore more patience.
Acrylic yarn is practical, widely available, and offered in countless colors. Cotton yarn creates a cleaner, more defined surface, while wool and wool-blend yarns produce a warm, slightly fuzzy finish. Novelty fibers can add sparkle or texture, but test them on a small heart first. Some decorative yarns shed enthusiastically, as though your craft table has offended them.
How to Make DIY Yarn Wrapped Hearts
Step 1: Create a Heart Template
Fold a piece of paper in half and draw half of a heart along the folded edge. Cut through both layers, unfold the paper, and check the shape. Folding the paper helps keep both sides symmetrical, although perfect symmetry is not required. Handmade hearts are allowed to have personality.
For a more uniform collection, trace a heart-shaped cookie cutter, print a simple template, or use one finished cardboard heart as the pattern for all the others. Hearts between 3 and 6 inches wide are comfortable to wrap and work well for ornaments, garlands, and gift decorations.
Step 2: Trace and Cut the Base
Place the template on cardboard and trace around it with a pencil. Cut out the heart using sturdy scissors. Thin cardboard is easiest for children, while corrugated cardboard creates a thicker, more substantial ornament.
Trim any sharp corners or uneven edges. The yarn will hide minor imperfections, but a smooth outline makes wrapping easier. If the cardboard has bold printing that may show through light-colored yarn, cover the front and back with paint, paper, or a quick layer of matching yarn before beginning the main wrapping pattern.
Step 3: Secure the Starting End
Attach the end of the yarn to the back of the cardboard heart with tape or a small dot of glue. Let glue cool or dry enough to hold the strand before wrapping. Starting on the back keeps the visible side tidy.
Leave the yarn attached to the skein if possible. Cutting a very long piece in advance may seem organized, but long yarn has a special talent for tying itself into mysterious knots. Working directly from the skein usually creates fewer tangles.
Step 4: Wrap the Outside Edges
Begin by winding yarn around the outer edge of the heart. Pay special attention to the center notch and the bottom point, since these areas determine whether the shape still reads as a heart after it becomes fluffy.
Wrap several times through the center notch from different angles. Around the bottom point, cross strands diagonally so the yarn does not slide upward. Rotate the cardboard as you work rather than trying to pass a large skein around it in the same position.
Step 5: Fill the Center
Once the perimeter is partly covered, wrap the yarn vertically, horizontally, and diagonally across the heart. Change directions frequently to distribute the material evenly. The goal is to cover visible cardboard without building one enormous yarn mountain in the center.
For a smooth heart, place each new strand close to the previous one and maintain gentle, consistent tension. For a rustic or playful heart, cross strands freely and allow the texture to become more dimensional.
Do not pull so tightly that the cardboard bends. The yarn should feel secure but not stretched to its limit. A comfortable tension makes the finished decoration look full while protecting the base from warping.
Step 6: Add Another Color
To switch colors, cut the first yarn and secure its end on the back with glue or tape. Attach the second color in the same area and continue wrapping. The transition can be hidden beneath later strands.
Create wide color blocks for a bold modern style, narrow stripes for a playful look, or random changes for a patchwork effect. Variegated yarn provides automatic color changes and is especially useful when you want an interesting design without managing several separate balls of yarn.
Step 7: Finish the Wrapping
Continue until the cardboard is covered to your liking. Cut the yarn, leaving a 3- to 4-inch tail. Slip the tail underneath several strands on the back and pull it snug. Add a small amount of glue for extra security, then trim the excess.
Inspect the front and gently move individual strands to cover any gaps. This is also the moment to redefine the center notch and bottom point if the wrapping has made the heart look suspiciously like a potato.
Step 8: Add a Hanging Loop
Cut a length of ribbon, yarn, or twine and form it into a loop. Attach both ends to the back of the heart. For a cleaner finish, slide the ends under existing strands and secure them with glue.
If you plan to string several hearts into a garland, you can also thread a long cord through the wrapped strands near the top of each heart. Space them evenly or allow them to slide so the arrangement can be adjusted after hanging.
Creative Yarn Wrapped Heart Designs
Ombré Hearts
Choose three to five shades from the same color family. Begin with the darkest shade at the bottom and gradually move toward the lightest at the top. Overlap neighboring colors slightly so the transition feels soft rather than sharply divided.
Conversation Hearts
Wrap small cardboard hearts in pastel yarn, then glue letter beads or felt letters to the front. Add short messages such as “LOVE,” “XOXO,” “BE MINE,” or “BESTIE.” These work well as party favors, place cards, and personalized classroom Valentines.
Rustic Farmhouse Hearts
Use cream, oatmeal, dusty rose, or muted red yarn. Add a jute hanging loop, a small wooden bead, and a simple gingham bow. Slightly irregular wrapping adds to the handmade character, so there is no need to chase perfection around the heart with tweezers.
Rainbow Scrap-Yarn Hearts
Gather short leftover pieces in different colors. Tie or glue them together one at a time and wrap the heart in random sections. This version is ideal for using scraps and gives children complete freedom to choose their own combinations.
Minimalist Neutral Hearts
Combine white, ivory, taupe, gray, and charcoal yarn. Keep the wrapping smooth and avoid extra embellishments, or add only one small leather, wood, or metal accent. Neutral yarn hearts make attractive year-round decorations on baskets, cabinet knobs, and gift packages.
Floral Yarn Hearts
Attach small felt flowers, artificial greenery, or dried-looking craft stems to one side of the heart. Arrange the decorations asymmetrically for a contemporary wreath-inspired design. Keep the floral cluster lightweight so it does not pull the ornament sideways when hung.
Ways to Display Handmade Yarn Hearts
One of the best things about DIY yarn wrapped hearts is their versatility. They can be used as seasonal decorations, handmade gifts, or finishing touches for other projects.
- Valentine’s Day garland: String several hearts across a mantel, window, bookshelf, or classroom bulletin board.
- Gift toppers: Tie a small heart onto a wrapped present instead of using a disposable bow.
- Door decorations: Attach a large yarn heart to a wreath, basket, or wooden sign.
- Table settings: Add name tags and place one heart at each seat.
- Tree ornaments: Use red and white hearts for Valentine décor or adapt the colors for Christmas.
- Nursery decorations: Make a soft pastel mobile using lightweight hearts and secure hanging cords.
- Bookmarks: Attach a small flat heart to the end of a long braided yarn tail.
- Memory keepsakes: Use yarn from an old scarf, sweater, or previous project with sentimental value.
Making This Yarn Heart Craft With Children
Yarn wrapping can help children practice hand-eye coordination, color planning, sequencing, and fine motor control. It also provides a satisfying repetitive action that does not demand exact results. Younger children can wrap large, simple cardboard hearts, while older children can experiment with patterns, beads, braids, and written messages.
Prepare the cardboard bases in advance for younger crafters. Use washable craft glue, blunt-tip scissors, and medium or bulky yarn that is easy to grip. Place each yarn color in a separate bowl or container to reduce tangles.
Instead of correcting uneven wrapping, encourage children to cover the visible cardboard in any way they choose. A child who wants a purple-and-orange heart with three pom-poms and one enormous button is not making a mistake. That child is serving as creative director.
Adults should handle utility knives, heavy cardboard cutting, and hot glue. Low-temperature glue guns are less intense than standard models, but their tips and melted adhesive can still cause burns. Supervision remains important.
Common Problems and Easy Fixes
The Yarn Keeps Sliding Off the Point
Wrap diagonally around the bottom point instead of winding straight across it. A small dot of glue on the back can anchor the first few passes. Once those strands are secure, later wrapping will hold them in place.
The Center Notch Has Disappeared
Push a few strands downward into the notch with your fingers, then wrap vertically through the center several times. Avoid placing too many horizontal strands across the top of the heart.
The Cardboard Is Bending
Reduce your wrapping tension. You can also glue two thin cardboard hearts together before starting or switch to chipboard, corrugated cardboard, or foam board for a stronger base.
Cardboard Is Still Visible
Continue wrapping only in the uncovered areas rather than adding more yarn everywhere. You can also color the base to match the yarn before wrapping, making tiny gaps less noticeable.
The Heart Looks Too Bulky
Remove several strands and rewrap them with more even spacing. Use a lighter yarn weight for small shapes, or make a larger cardboard base so the thickness feels proportional.
The Ends Keep Coming Loose
Tuck each tail underneath several tight strands on the back. Secure it with craft glue and allow the adhesive to dry fully before hanging or handling the heart.
Personal Experiences and Lessons From Making DIY Yarn Wrapped Hearts
The first lesson from making a batch of yarn wrapped hearts is that the cardboard shape matters more than expected. A heart can look beautifully balanced on paper but lose definition once several layers of yarn are added. Hearts with a deeper center notch and a slightly longer bottom point usually hold their recognizable shape better. The yarn softens every edge, so an exaggerated template often produces the most natural-looking finished result.
It is also useful to make one test heart before cutting an entire stack of bases. During one crafting session, a collection of ten small cardboard hearts looked perfectly reasonable until the bulky yarn came out. After wrapping, they resembled cheerful pink dinner rolls. Increasing the template by about an inch gave the yarn enough room to build texture without swallowing the shape.
Working directly from the yarn skein was another practical improvement. Cutting several yards in advance created a long strand that wrapped around chair legs, scissors, and at least one coffee mug. Keeping the yarn attached to the skein and turning the heart during wrapping made the process faster and calmer. For small leftover pieces, loosely winding each color into a compact ball prevented the scraps from becoming one highly committed knot.
Color planning can be simple, but laying the yarns next to one another before starting helps. Colors that look attractive as separate skeins do not always have enough contrast when wrapped together. A pale pink, cream, and light peach combination may blend into one soft cloud. That can be lovely, but adding burgundy, coral, or a strand of metallic yarn gives the design more definition.
The most polished hearts were not necessarily the ones wrapped with absolute precision. Slight changes in direction helped distribute the yarn and created an appealing handmade texture. The key was controlling where the extra thickness developed. Adding too many strands across the middle produced a swollen center, while carefully covering the perimeter first made the final shape more even.
When crafting with children, pre-attaching the first strand saved considerable frustration. Starting is often the hardest part because the yarn slips before enough layers exist to hold it. A piece of tape on the back lets children begin wrapping immediately. Once the heart has a foundation, they can work independently and make decisions about color, pattern, and decoration.
Embellishments were most successful when used sparingly. One bow, a few letter beads, or a small felt flower gave the heart a focal point. Covering every available inch with buttons and pom-poms quickly hid the yarn texture that made the project charming in the first place. There is a thin line between “festive” and “the craft drawer exploded,” and the heart will usually tell you when you have crossed it.
Finally, making several hearts together turned out to be more enjoyable than treating each one as a serious individual art piece. Once the basic technique became familiar, experimenting felt easier. One heart could be neat and monochromatic, the next striped, and the next made entirely from odd scraps. Displayed as a garland, the differences made the collection more interesting. The project worked best when perfection was replaced by playfulness, which is a useful lesson for many craftsand possibly for February in general.
Conclusion
DIY yarn wrapped hearts prove that an attractive handmade decoration does not need an expensive supply list or advanced fiber-art skills. With a cardboard base, a little yarn, and a few simple wrapping techniques, you can create personalized hearts for garlands, gifts, ornaments, table settings, and year-round décor.
Start with one uncomplicated design, learn how the yarn behaves around the center notch and bottom point, and then experiment with colors, textures, embellishments, and sizes. Use leftover materials whenever possible, invite children to create their own versions, and remember that a slightly uneven heart often has more charm than one that looks factory-made. After all, real hearts are not perfectly tidy either.
Note: Adults should supervise children using scissors, hot glue, small beads, or other potential choking hazards. Allow all adhesive to cool or dry completely before displaying or handling the finished hearts.












