
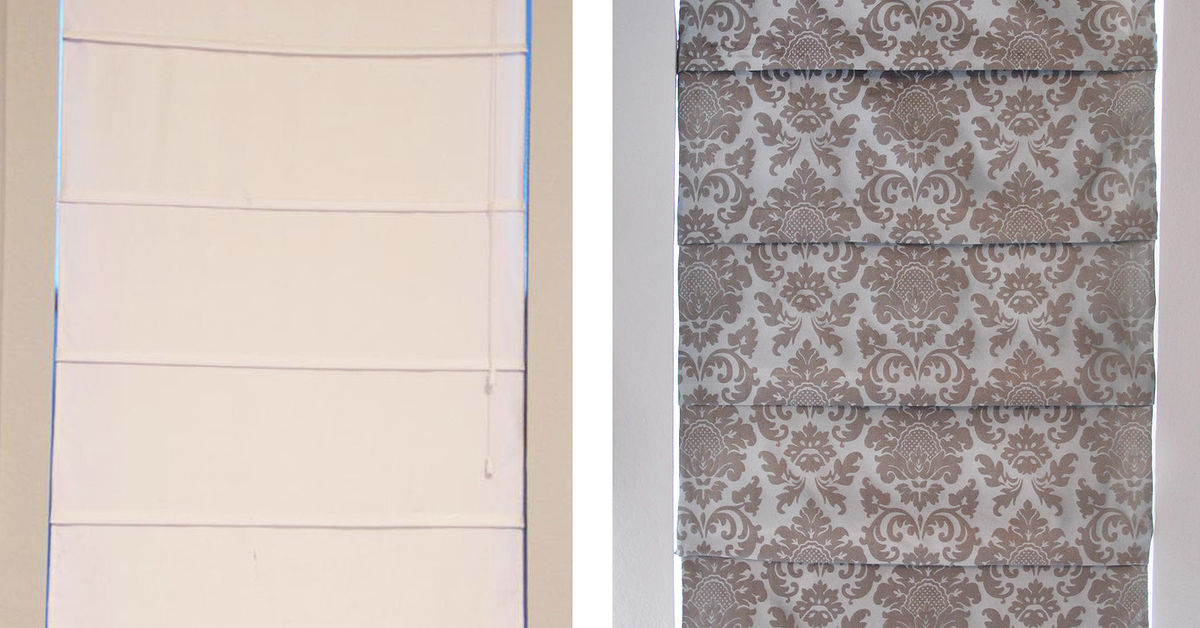
Your Roman shades have been through a lot. Sun. Dust. That one time someone “tested” the shade like it was a pull-up bar. And now the fabric looks tired, dated, or suspiciously “greige” in a way that was definitely a choice… in 2009.
The good news: you can recover Roman shades without sewing and get a crisp, custom look for a fraction of the price of new window treatments. The even better news: you don’t need to own a sewing machine, know what a bobbin is, or make small talk with one at a craft store. This guide walks you through a no-sew Roman shade makeover with real-world tips, common pitfalls, and clean finishing tricks.
Why Recover Instead of Replace?
Re-covering is the sweet spot between “live with it forever” and “accidentally spend a weekend’s grocery budget on window coverings.” It’s especially smart if your shade mechanism still works well (cords lift smoothly, folds stack evenly, headrail is solid).
- Save money: you reuse the working hardware and only buy fabric + adhesives.
- Get a custom look: match your paint, bedding, or that statement wallpaper you swore you wouldn’t buy (and then did).
- Reduce waste: keep a perfectly usable shade out of the landfill.
- Upgrade function: add lining for privacy, light filtering, or room-darkeningstill no sewing required.
Know Your Roman Shade Before You Start
Most Roman shades are a fabric panel that folds up neatly (like an accordion) when raised. The fabric is usually attached at the top to a headrail or mounting board (often with Velcro), and the folds are formed by battens/dowels and a ring-and-cord system that lifts the shade evenly.
Quick shade “type check”
- Flat Roman shade: lies flat when down; folds stack cleanly when up. Great for patterns.
- Hobbled Roman shade: has soft folds even when down. Forgiving, cozy, and hides minor imperfections.
- Relaxed Roman shade: gentle curve at the bottom. Charming and slightly less “crisp.”
You can recover any of these styles without sewing. The difference is mainly how precise you need to be with pleat spacing and pattern alignment.
Supplies for a No-Sew Roman Shade Makeover
You don’t need everything belowpick the method that matches your shade and your patience level. The goal is a secure bond, neat edges, and a fabric surface that won’t bubble or sag.
Core supplies
- New fabric: home décor weight cotton, linen blends, polyester, or upholstery fabric (avoid anything super stretchy).
- Measuring tape + ruler: a metal ruler helps for straight cuts.
- Sharp fabric scissors or rotary cutter: clean edges = easier finishing.
- Iron + ironing board: yes, still no sewingironing is how you get “custom” instead of “craft day.”
- Painter’s tape or clips: for temporary holds while aligning stripes/patterns.
No-sew attachment options (choose one main approach)
- Spray fabric adhesive: fast, smooth coverage for large panels.
- Fabric glue: great for edges and detail work; slower but controlled.
- Heavy-duty double-sided fabric tape: clean and quick; best for lighter fabrics.
- Hot glue gun: excellent for hems/edges on the back side; not ideal for large flat surfaces (can create bumps).
Finishing tools that make it look professional
- No-sew hem tape (fusible web): creates crisp, flat “hems” with an iron.
- Velcro (hook-and-loop): for reattaching fabric to the headrail/board.
- Staple gun + staples: hidden staples on the back side are a no-sew powerhouse.
- Lining (optional): light-filtering, privacy lining, or blackout lining.
Fabric tip: If your fabric is thin, a lining (or even a plain white backing) helps the shade hang better and look less “see-through” in bright daylight.
Step-by-Step: How to Recover Roman Shades (No Sew)
This is the classic “recover the existing shade” methodreuse the hardware and refresh the fabric. Plan for a few hours of hands-on time plus drying/curing time for adhesives.
Step 1: Take the shade down and document the cord setup
Remove the shade from the brackets carefully. Before you pull anything apart, take a few photos: front, back, sides, and a close-up of how the cords route through rings. These photos are your “assembly instructions” laterbecause shades have a magical ability to look simple until you disassemble them.
Step 2: Inspect the mechanism (decide what you’re keeping)
If the lift cords are frayed, the rings are torn, or the headrail is cracked, you can still recover the shadebut consider replacing/repairing worn parts first. Recovering is most satisfying when the shade operates smoothly after the makeover.
Step 3: Remove (or loosen) the old fabric
Many Roman shades attach at the top with Velcro. If yours has a Velcro strip, gently peel the fabric away. On some shades, the fabric is stapled to a board; in that case, remove staples from the back side with a flathead screwdriver or staple remover.
You may be able to leave the old fabric in place and wrap over it (especially if it’s thin and smooth). But if the old fabric is bulky, bumpy, or stained, removing it helps the new fabric lay flatter.
Step 4: Measure like a person who wants their shade to look expensive
Measure the finished width of the shade and the finished length (top to bottom when fully extended). Then decide how you’ll finish the edges:
- Iron-on hem tape: add ~1–2 inches per side to fold under cleanly.
- Wrap-and-staple (back side): add ~2 inches per side for a secure wrap.
- Fabric tape only: follow the tape’s guidance, but give yourself at least 1 inch for folding.
Example: If your shade is 34 inches wide, cut fabric about 36–38 inches wide depending on whether you’re folding under (hem tape) or wrapping to the back (more allowance). For length, add a few inches extra so you can square the bottom edge and create a neat finish.
Step 5: Prep the fabric (iron first, thank yourself later)
Iron the fabric flat before attaching it. If your fabric is washable, pre-wash and dry it to reduce shrinkage later (especially important in kitchens or bathrooms where humidity happens).
If you’re using a bold pattern or stripes, align the fabric on a large flat surface (floor covered with a clean sheet works), and use painter’s tape to hold it in place while you position the shade.
Step 6: Attach the fabric to the shade (pick your method)
Method A: Spray adhesive (smoothest large-panel look)
- Lay the shade flat (front side up) on a protected surface.
- Work in small sections (about 12 inches at a time) so the adhesive stays tacky, not dry.
- Spray the shade (or the fabricfollow the product instructions), then smooth fabric from the center outward.
- Repeat section by section, keeping the fabric straight.
This method is fast and gives the cleanest “factory” surface when done carefully. Ventilate well, and don’t overspraymore glue isn’t more elegant.
Method B: Fabric glue + smoothing (best for control and edges)
- Apply a thin, even layer of fabric glue where the fabric will sit.
- Press fabric down and smooth firmly.
- Let it set, then continue in sections.
Fabric glue is slower, but it’s great for avoiding overspray and for tricky corners or thick fabrics.
Method C: “Wrap, fold, and hide” (staples + hot glue on the back side)
If you’re allergic to waiting for glue to dry, hidden staples are your friend. Center the fabric, wrap the sides to the back, fold neatly like you’re wrapping a gift, and staple along the back edges. Use hot glue to lock down folds for a crisp finish.
Step 7: Finish the edges (no fraying, no regrets)
This is where a DIY shade starts looking custom. Choose one:
- Iron-on hem tape: fold the raw edge under, insert hem tape, and press with an iron for a flat “hem.”
- Double-fold + glue: fold under once, then again, and glue for a thicker, polished edge.
- Wrap to back + staple: cleanest from the front; strongest overall.
Step 8: Deal with battens/dowels and pleats
If your shade uses dowels/battens (common for crisp pleats), reuse them. Make sure they sit straight and evenly spaced. Some DIYers use adhesive to keep battens from shifting inside channelsespecially if you’re wrapping new fabric around an existing shade structure.
Step 9: Reattach the top (Velcro is the VIP)
Many Roman shades attach at the top with hook-and-loop tape. If your original Velcro is still strong, reuse it. If it’s tired, replace it:
- Use a strong Velcro option designed for fabric or upholstery.
- Staple the Velcro to the mounting board/headrail if possible for extra security (adhesive alone can fail in heat/humidity).
- Let adhesive-backed Velcro cure fully before heavy use if you’re relying on the adhesive bond.
Step 10: Reinstall and test
Mount the shade back in place. Slowly raise and lower it a few times. Watch for one side lifting faster (cord routing issue), fabric catching on brackets, or folds stacking unevenly (battens/rings alignment).
No-Sew Upgrade Ideas (Because If You’re Already Here…)
Add privacy or blackout lining
You can attach lining with spray adhesive or fabric tape. A lining can: reduce show-through at night, help the shade hang straighter, and improve light control.
Create a faux Roman shade (no cords at all)
If you want the Roman look without the cord system, you can make a “faux” version using folds secured with fabric tape or hot glue and hang it with a tension rod or simple mounting board. This is especially useful for purely decorative shades or windows you rarely adjust.
Trim it like a boutique shade
Add ribbon, pom-pom trim, or tape trim along the bottom edge using fabric glue or hot glue (on the back side). Keep trim lightweight so it doesn’t distort how the shade hangs.
Troubleshooting: Common Problems and Easy Fixes
Problem: Wrinkles and bubbles
- Cause: adhesive applied unevenly, fabric not ironed, or smoothing skipped.
- Fix: work in smaller sections and smooth from the center outward; iron fabric first; avoid heavy glue puddles.
Problem: Pattern looks crooked
- Cause: fabric shifted while bonding.
- Fix: use painter’s tape/clips during alignment; measure from the same reference edge (not from the “hope line”).
Problem: Edges fray or look bulky
- Cause: raw edges left unfinished, or thick fabric folded too many times.
- Fix: hem tape for thin, flat edges; wrap-and-staple for thick fabrics; trim seam allowances strategically.
Problem: Shade doesn’t stack evenly when raised
- Cause: battens/dowels shifted, rings misaligned, or fabric bonded too stiffly in fold areas.
- Fix: check batten spacing, confirm ring columns are straight, and avoid thick glue lines where folds need to flex.
Cleaning and Care (So It Stays Nice)
Roman shades collect dust like they’re training for a competition. Regular light cleaning keeps the fabric brighter and helps the folds stay crisp.
- Weekly: vacuum gently with a brush attachment or use a microfiber cloth.
- Spot cleaning: test any cleaner on a hidden area first.
- Deep cleaning: wipe carefully and avoid soaking the mechanism; remove soap residue to prevent discoloration.
Safety Notes: Corded Shades and Kids
If your Roman shade uses cords, treat safety as part of the makeovernot an afterthought. The safest choice for homes with young children is cordless window coverings, but if you have corded shades, reduce risk by keeping cords out of reach and using appropriate safety devices.
- Move cribs, beds, and furniture away from corded window coverings.
- Use cord cleats/tension devices where applicable and keep cords secured.
- Check that cord stops and safety components are correctly installed and adjusted.
When You Should Replace Instead of Recover
No-sew recovering is amazing… unless your shade is actively auditioning to be a problem. Consider replacing the whole unit if:
- The headrail is cracked or warped.
- The lift cords are badly frayed or the mechanism jams.
- The shade is heavily water-damaged or smells like it has “history.”
- You need a major safety upgrade (e.g., switching to cordless in a child’s room).
Real-World No-Sew Roman Shade Experiences (The Stuff Tutorials Don’t Warn You About)
Let’s talk about the “experience” part of recovering Roman shadesthe part that doesn’t show up in the pretty after photo. Not horror stories, just the reality that makes your finished shade look polished instead of “I tried my best and now we all pretend not to notice.”
1) The fabric you love online may behave differently in real life.
A thick linen blend can look dreamy, but if it’s too heavy, your shade may stack like a lumpy accordion. Lightweight cotton looks crisp but can show the old shade color underneath unless you add lining. A common experience is buying fabric for the print and then realizing the weave is looser than expected. The fix is simple: add a lining (even a basic light-filtering layer) or choose a medium-weight décor fabric that holds a fold.
2) Spray adhesive is fast… and also a little chaotic.
People love it because it creates a smooth front surface quickly, but the “spray” part is not subtle. The most common lesson is: mask more than you think you need. Cover your workspace, protect floors, and keep pets out of the room unless you want a dog with a lint collection hobby. Working in 12-inch sections feels slower, but it prevents the adhesive from drying before the fabric is positioned. The moment you rush is the moment your stripes go from “tailored” to “optical illusion.”
3) Pattern alignment is where confidence goes to be humbled.
Stripes, plaids, and big florals look incredible on Roman shades because the front panel is basically a fabric billboard. But those same patterns make tiny mistakes obvious. A common real-world trick is to mark a centerline on both the shade and the fabric (with chalk or painter’s tape) and match centers first. Then smooth outward. If you’re doing multiple shades in the same room, you’ll also notice that “close enough” on one window looks less close on two. Measuring from consistent reference points (like the top edge and centerline) helps keep everything visually aligned.
4) Edges decide whether your DIY looks custom.
This is the big one. Many people start strong and then get tired at the finishing stage. The result: a slightly wavy side edge or a bulky bottom corner that catches the light. The best “experience-based” solution is to choose one finishing method and commit: hem tape for crisp, flat folds; wrap-and-staple for thick fabrics; or double-fold-and-glue for a tailored look without staples. Taking five extra minutes to press edges (even if they’re glued) can upgrade the final look dramatically.
5) Testing the lift is not optional.
Once everything is reassembled, people often pull the cord and discover one side lifts faster. It’s usually not the fabricit’s cord routing or ring alignment. The fix is to raise/lower slowly and watch the columns of rings and cords. If one cord is catching, re-threading or loosening a ring column often solves it. This is also where taking photos before disassembly pays off like interest in a high-yield savings account.
6) The “I’ll finish it tomorrow” phase is real.
Adhesives need cure time. Velcro bonds get stronger after they set. Glue needs to dry fully before you stress the shade. A common experience is doing the fun part (the fresh fabric!) and wanting to hang it immediately. If you can wait, you’ll get a stronger bond and fewer edge surprises later.
Bottom line: recovering Roman shades with a no-sew approach is absolutely doableand it’s one of those upgrades that makes a room feel finished. You’ll spend more time on measuring, smoothing, and finishing than you expect, but that’s also what makes the result look like you bought it that way. And honestly, the best part is saying, “Oh these? I recovered them,” while pretending it was effortless.
Wrap-Up
A no-sew Roman shade recovery is the rare DIY that’s budget-friendly, high impact, and surprisingly satisfying. Reuse the hardware, choose a fabric you love, take your time on alignment and edges, and you’ll get a custom-looking shade without a single stitch.












