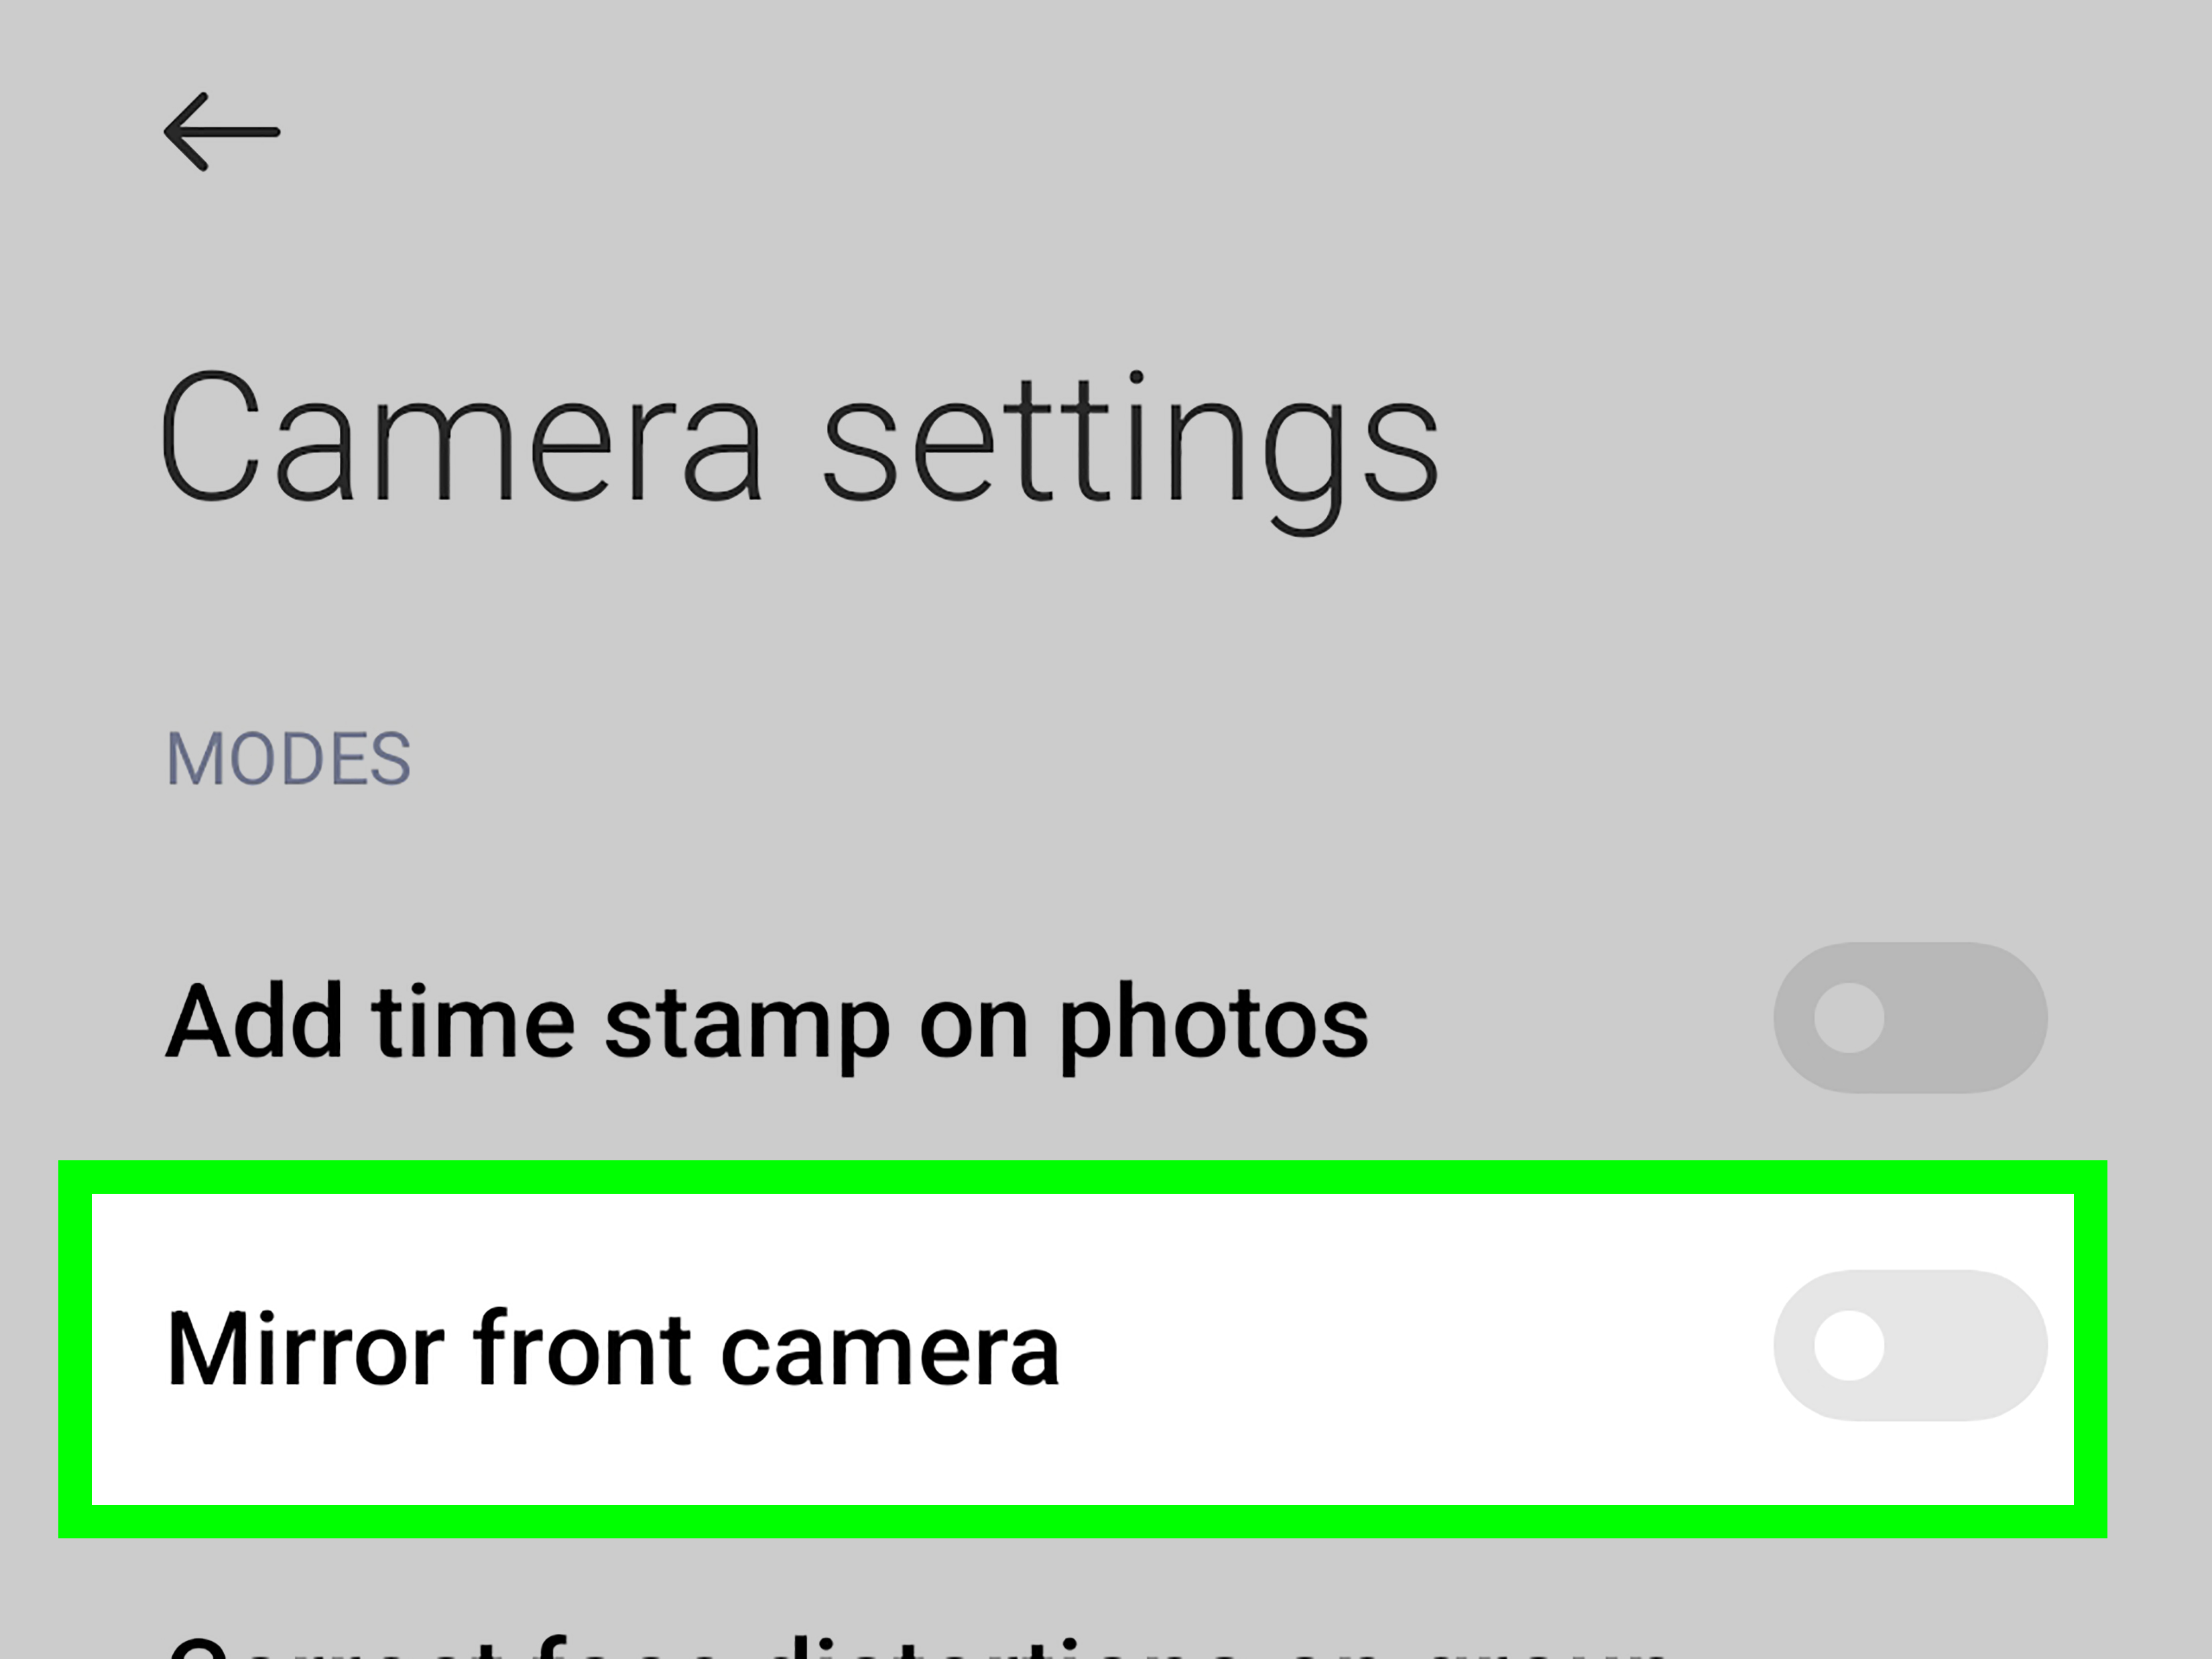
Few modern phone problems are as oddly personal as opening a selfie and realizing your face, shirt logo, bookshelf, or carefully posed coffee mug looks backward. One second you are taking a normal photo. The next, your camera has apparently joined a circus mirror committee. The good news: your phone is probably not broken. In most cases, the issue comes from a front camera mirror setting, sometimes labeled as Mirror Front Camera, Save selfie as previewed, Mirror selfie, or something equally polite but mildly confusing.
This guide explains how to turn off inverted camera settings on iPhone and Android, including Samsung Galaxy, Google Pixel, and other Android phones. You will also learn why selfies flip in the first place, how to fix photos you already took, and what to do when an app like Instagram, TikTok, Snapchat, Zoom, or WhatsApp seems to ignore your phone’s camera setting completely. Because yes, apps like to have opinions too.
What Does “Inverted Camera” Mean?
When people say their phone camera is “inverted,” they usually mean one of three things. First, the front camera preview looks like a mirror. Second, the saved selfie is flipped horizontally, making text appear backward. Third, a video call or social media app shows the image differently from the phone’s regular Camera app.
The most common issue is horizontal mirroring. This is different from a photo being upside down or rotated sideways. A mirrored selfie flips left and right. For example, if your shirt says “New York,” a mirrored photo may make it look like mysterious alien typography. This happens because front cameras often show a live mirror-style preview to make posing feel natural. When you raise your right hand, the image on screen behaves like a bathroom mirror. That feels normal while composing the shot, but it can create confusion when the saved photo looks different.
Most phones give you a choice: save selfies as they appear in the preview, or save them in the corrected, non-mirrored orientation. The setting name changes by brand, which is why this simple task can feel like trying to find the secret menu at a restaurant that only serves icons.
Quick Answer: How to Turn Off Inverted Selfies
On iPhone
Go to Settings > Camera, then find Mirror Front Camera. Turn it off if your saved selfies are coming out mirrored and you want them corrected. Turn it on if you want selfies to save exactly as they appear in the front camera preview.
On Google Pixel
Open the Camera app, tap the settings or down-arrow menu, go to camera settings, then find Save selfie as previewed. Turn it off if you want selfies saved in the normal, non-mirrored orientation. Turn it on if you want the saved selfie to match the preview.
On Samsung Galaxy
Open the Camera app, tap the Settings gear, then find Save selfies as previewed. Turn it off to stop saving mirrored selfies. Turn it on if you prefer the final photo to look exactly like the front camera preview.
On Other Android Phones
Open the Camera app, tap Settings, and look for a setting named Mirror selfie, Flip selfie, Save as previewed, Pictures as previewed, or Front camera mirror. Turn that setting off if your saved selfies look backward.
How to Turn Off Inverted Camera Settings on iPhone
Apple keeps the iPhone selfie mirror control inside the main Settings app, not inside the Camera app itself. That surprises many users because the logical place for camera settings would be, you know, the camera. But once you know the route, it is easy.
Step-by-Step Instructions for iPhone
- Open the Settings app on your iPhone.
- Scroll down and tap Camera.
- Look for Mirror Front Camera.
- Turn Mirror Front Camera off to stop saving mirrored selfies.
- Open the Camera app, switch to the front camera, and take a test selfie with text in the frame.
If the text is readable after you take the photo, the image is no longer mirrored. A book cover, shirt logo, street sign, or sticky note works perfectly for testing. This is the fastest way to confirm whether the setting is doing what you expect.
Should Mirror Front Camera Be On or Off?
Use Mirror Front Camera off when you want your selfie to look the way other people see you. This is usually best for professional headshots, online profiles, ID-style photos, product photos, and any image with text in the background.
Use Mirror Front Camera on when you want the saved photo to match the preview you saw while taking it. Some people prefer this because it looks more familiar, like a mirror. Neither option is morally superior. Your phone will not judge you. Probably.
How to Turn Off Inverted Camera Settings on Google Pixel
Google Pixel phones use a setting commonly called Save selfie as previewed. This controls whether the saved selfie matches the front camera preview or is saved in a corrected orientation. The exact path can vary slightly depending on your Pixel model and Android version, but the setting is usually inside the Pixel Camera app.
Step-by-Step Instructions for Pixel
- Open the Camera app.
- Switch to the front camera.
- Tap the settings icon or the down-arrow menu at the top of the screen.
- Open More settings if needed.
- Find Save selfie as previewed.
- Turn it off to save selfies in the normal, non-mirrored orientation.
If you cannot find the setting, update the Camera app through the Google Play Store, restart the phone, and check again. Some Pixel camera menus change names slightly after app updates. The setting may also appear under composition-related controls on newer versions.
How to Turn Off Inverted Camera Settings on Samsung Galaxy
Samsung Galaxy phones usually place the selfie mirror option inside the Camera app settings. The setting is called Save selfies as previewed. When this is turned on, your selfie saves the way it looks in the preview. When it is turned off, the phone saves a corrected version.
Step-by-Step Instructions for Samsung
- Open the Camera app.
- Tap the Settings gear icon.
- Scroll to the Selfies section.
- Find Save selfies as previewed.
- Turn it off to stop saving mirrored selfies.
- Take a front camera test photo with readable text in the frame.
On some Samsung models, the live viewfinder may still appear mirrored even when the final saved photo is corrected. That is normal. The preview is designed to help you pose naturally, while the saved file can still be flipped into a readable, real-world orientation.
How to Fix Inverted Camera Settings on Other Android Phones
Android is wonderfully flexible, which is another way of saying every manufacturer puts settings in slightly different places just to keep life spicy. Motorola, OnePlus, Xiaomi, Oppo, Vivo, Nokia, and other Android phones may use different labels for the same feature.
Common Android Setting Names to Look For
- Mirror selfie
- Flip selfie
- Save selfie as previewed
- Save selfies as previewed
- Pictures as previewed
- Front camera mirror
- Mirrored photo
To find the option, open your Camera app, tap the settings gear, and scan the photo, selfie, composition, or front camera section. If there is a search bar in your phone settings, try searching for “mirror,” “selfie,” or “camera.” If the built-in app does not offer the feature, you can use a gallery editor or a trusted third-party camera app that includes mirror controls.
Why Your Selfie Preview Still Looks Mirrored
One of the most confusing parts of this whole issue is that the live preview may still look mirrored even after you turn off the saved-photo mirror option. This does not always mean the setting failed. Many phones continue to show a mirror-style preview because it feels more natural when you are framing your face. The important test is the saved photo, not the live preview.
Think of the preview as the dressing room mirror and the saved photo as the final picture. The mirror helps you adjust your hair, glasses, angle, or “I definitely woke up like this” expression. The saved image is where the phone decides whether to keep the mirror effect or correct it.
How to Fix Photos You Already Took
Turning off inverted camera settings only affects future photos. It will not automatically repair older selfies. Fortunately, you can flip existing photos manually in your phone’s photo editor.
Fix a Mirrored Selfie on iPhone
- Open the Photos app.
- Select the selfie you want to fix.
- Tap Edit.
- Tap the Crop icon.
- Tap the Flip icon, usually shown as a triangle-like symbol in the top corner.
- Tap Done.
Fix a Mirrored Selfie on Android
- Open your Gallery or Google Photos app.
- Select the photo.
- Tap Edit.
- Look for Crop, Rotate, or Flip.
- Use the horizontal flip tool to correct the image.
- Save a copy if you want to keep the original.
For photos containing text, flipping is easy to verify. If the words read normally, you fixed it. If the words look like a secret code from a spy movie, flip it again.
Why Instagram, TikTok, Snapchat, Zoom, or WhatsApp May Still Look Inverted
Some apps use their own camera interface instead of fully respecting your phone’s default Camera app settings. That means your iPhone or Android camera may save selfies correctly, while a social media or video call app still shows a mirrored preview. This is especially common in video calls, where mirror previews are often used to make your own image feel more natural to you.
Before blaming your phone, test the regular Camera app first. If your normal Camera app saves the photo correctly, the issue is probably app-specific. Open the app’s own settings and look for options such as mirror video, flip camera, selfie mirror, or camera preview. If the app does not provide a toggle, you may need to record with your phone’s Camera app first and then upload the corrected photo or video.
Troubleshooting: What If the Setting Is Missing?
If you cannot find the mirror or inverted camera setting, do not panic-scroll until your thumb files a complaint. Try these fixes first.
Update Your Phone
On iPhone, go to Settings > General > Software Update. On Android, go to Settings > System > Software update, though the wording may vary. Camera features can move or appear after updates.
Update the Camera App
On Android, open the Google Play Store or Galaxy Store and check for camera-related updates. Pixel and Samsung camera apps often receive improvements outside full system updates.
Reset Camera Settings
Some Android camera apps include a Reset settings option inside the Camera settings menu. This can restore missing or confusing options to their default state. On iPhone, you can review camera settings manually or reset broader system settings if needed, but start with the simple Mirror Front Camera toggle first.
Clear Camera App Cache on Android
If the Camera app behaves strangely, go to Settings > Apps > Camera > Storage and clear the cache. Avoid clearing data unless you understand what will reset, because it may remove app preferences.
Check Work Profiles or Restricted Devices
School, company, or managed phones may restrict camera settings. If your device is managed, some options may be hidden or controlled by an administrator.
Best Settings for Natural-Looking Selfies
For most people, the best setup is simple: turn off the setting that saves selfies as previewed or mirrored. This usually gives you photos where text is readable and your appearance matches how others see you. For creators, business profiles, resumes, dating profiles, and professional bios, non-mirrored selfies are usually the safer choice.
However, if you strongly prefer the mirror version because it looks more familiar, that is fine too. The “best” selfie setting depends on your goal. A mirrored selfie can feel more comfortable because it resembles what you see every day in the mirror. A non-mirrored selfie is more accurate to how the world sees you. Both are valid; one just makes your shirt slogans easier to read.
Examples: Which Setting Should You Choose?
Example 1: You Are Taking a LinkedIn Profile Photo
Turn off mirrored selfies. You want a clean, natural image that does not reverse your face or background details. If there is a logo, certificate, or sign behind you, it should read correctly.
Example 2: You Are Taking a Casual Selfie
Choose whichever version you like better. If the mirrored version feels more like “you,” save selfies as previewed. If you want a more realistic orientation, turn the setting off.
Example 3: You Are Photographing Makeup or Hair
Use the setting that best shows the side you are discussing. If you are explaining “left side” and “right side,” remember that a mirrored image can confuse viewers. For tutorials, non-mirrored is usually clearer.
Example 4: You Are Recording a Video With Text
Test first. Some phones apply mirror settings differently to photos and videos. Record a short clip with readable text in the frame, play it back, and confirm whether the final video is mirrored.
Common Mistakes to Avoid
The first mistake is changing the wrong setting. Invert colors, Classic Invert, and Smart Invert are accessibility display settings, not selfie camera mirror settings. They affect screen colors, not whether your camera flips a photo.
The second mistake is judging the setting by the preview instead of the saved image. Always take a test photo and check the final result. The third mistake is assuming every app follows your phone’s Camera settings. Many social apps have separate camera behavior.
The fourth mistake is forgetting about old photos. If a selfie was already saved backward, you need to edit that individual photo. Changing the setting today will not march backward through your gallery correcting every image like a tiny digital librarian.
Experience Section: What This Looks Like in Real Life
The easiest way to understand inverted camera settings is to run the “shirt test.” Wear a shirt with words on it, open the front camera, take a selfie, and then look at the saved photo. If the words are readable, your saved image is not mirrored. If the words are backward, your phone is saving the selfie as previewed. This small test solves more confusion than ten minutes of staring suspiciously at your own face.
In everyday use, the most common frustration happens when the preview looks great but the saved photo looks slightly unfamiliar. That is not because your phone secretly changed your face. It is because you are used to seeing yourself in a mirror. When the phone saves the image in the non-mirrored orientation, it may look “off” to you, even though it looks normal to everyone else. This is why two people can look at the same selfie and disagree about which version is better. One person sees familiarity. The other sees accuracy.
Another real-world situation appears during content creation. Suppose you are filming a quick tutorial and pointing to a product label, a whiteboard, or a step-by-step note. If your selfie camera saves mirrored content, the final result can look unprofessional because viewers cannot read the words. This is where turning off Mirror Front Camera on iPhone or turning off Save selfies as previewed on Android becomes more than a vanity setting. It becomes a clarity setting.
Video calls add one more layer of weirdness. Many apps show your own preview as mirrored because it helps you move naturally on screen. If you touch your hair on the right side, the preview behaves like a mirror, so your brain does not short-circuit before the meeting even starts. But other people on the call may see the normal, non-mirrored version. That means your preview is not always the same as what others see. Before a presentation, webinar, or interview, it is smart to record a short test or ask a friend what they see.
The best habit is to decide your default based on purpose. For personal selfies, use the version you like. For work, tutorials, product photos, documents, text, logos, or anything that needs to look “real world,” use the non-mirrored orientation. Then keep the flip tool in Photos, Gallery, or Google Photos as your backup plan. It is fast, reversible, and much easier than retaking twenty selfies while muttering at your phone like it has betrayed the family.
Conclusion
Turning off inverted camera settings on iPhone and Android is usually simple once you know the correct setting name. On iPhone, check Settings > Camera > Mirror Front Camera. On Google Pixel, look for Save selfie as previewed. On Samsung Galaxy, open Camera settings and find Save selfies as previewed. On other Android phones, search the camera settings for mirror, flip, preview, or selfie options.
The key is understanding the difference between the live preview and the saved photo. The preview may still behave like a mirror, but the final image can be saved normally. When in doubt, take a selfie with text in the frame. If the words are readable, you are good. If not, flip the setting or edit the photo manually. Your camera is not haunted; it is just trying to be helpful in the most confusing way possible.
Note: Menu names can vary by phone model, Android skin, app version, and software update. If the exact wording does not appear, look for similar terms such as mirror selfie, flip selfie, save as previewed, or front camera mirror.