There are two kinds of people in this world: people who throw away gum wrappers, and people who look at a shiny little rectangle and think, “Ah yes, romance.” If you are in the second groupor hoping to join itlearning how to make a heart out of a gum wrapper is one of the easiest, cheapest, and most charming paper crafts you can try.
A gum wrapper heart is tiny, quick, and surprisingly satisfying. It requires no scissors, no glue, no fancy craft kit, and no heroic trip to the store where you somehow leave with glitter, three candles, and a decorative basket you never intended to buy. All you need is a clean gum wrapper, a flat surface, and a little patience. In just a few minutes, that wrapper can become a cute handmade heart for a note, card, bookmark, phone case decoration, lunchbox surprise, or Valentine’s Day mini gift.
This guide walks you through the full process step by step, explains common mistakes, offers creative uses, and adds real-world tips from the kind of experience you only get after folding enough wrappers to question your life choicesin a good way.
What Is a Gum Wrapper Heart?
A gum wrapper heart is a small folded paper heart made from the rectangular wrapper that comes around a stick or piece of gum. It borrows ideas from simple origami, especially folding to a center crease, creating triangular points, and shaping corners to make the top curves of the heart.
Unlike traditional origami, which often starts with a square sheet of paper, gum wrapper hearts usually begin with a long rectangle. That makes the project perfect for everyday materials. The wrapper is already colorful, lightweight, and easy to crease. If it has a metallic or patterned side, the finished heart can look like a tiny piece of treasure you rescued from the bottom of a backpack.
Materials You Need
You do not need much to make this craft. In fact, the supply list is so short it almost feels suspicious.
Basic Supplies
- One clean gum wrapper
- A flat surface, such as a desk or table
- Clean, dry hands
- Optional: a ruler or fingernail for sharper creases
Stick-gum wrappers are usually easiest because they are long and rectangular. Foil-paper wrappers can also work well, but they wrinkle quickly, so fold carefully. If your wrapper has a paper side and a shiny side, decide which side you want showing before you start.
Before You Fold: Prepare the Wrapper
Start by flattening the wrapper. Smooth it gently from the center outward. Do not panic if there are small wrinkles. Gum wrappers are not royal wedding invitations; a little texture gives them personality.
If the wrapper is sticky, torn, damp, or covered in gum dust, choose another one. A clean wrapper folds more neatly and holds its shape better. If the wrapper has a strong crease from the package, use that crease to your advantage when possible. Many folding methods begin by creating strong center lines, so existing folds can help guide your work.
Step-by-Step Guide: How to Make a Heart Out of a Gum Wrapper
The following method is beginner-friendly and works with most rectangular gum wrappers. Read through the steps once before folding. That way, your hands will not be halfway through step five while your brain is still emotionally processing step two.
Step 1: Place the Wrapper Face Down
Put the wrapper on your table with the side you want visible facing down. This matters because many folds turn the hidden side into the inside of the heart. If the wrapper has a shiny side, place the shiny side down if you want it to show on the finished heart.
Step 2: Fold the Wrapper in Half Lengthwise
Fold the wrapper in half lengthwise, bringing the long top edge down to meet the long bottom edge. Press firmly along the fold. Then unfold it. You should now have a horizontal crease running through the center.
This crease acts like a guide. Good creases are the secret sauce of paper folding. Weak creases lead to wobbly hearts, and wobbly hearts look like they just heard bad news.
Step 3: Fold the Top and Bottom Edges Toward the Center
Bring the top long edge down to meet the center crease. Press it flat. Then bring the bottom long edge up to meet the same center crease. You should now have a thinner rectangle, folded neatly into the middle.
This step gives the heart more structure. It also hides rough edges and makes the finished piece look cleaner.
Step 4: Fold the Wrapper in Half Vertically
Now fold the rectangle in half from left to right. Press the crease, then unfold it. You should have a vertical center line. This is the line that helps both sides of the heart stay even.
If your heart turns out lopsided later, this is usually where the trouble began. Do not worry. Handmade crafts are allowed to have character. Still, aim for symmetry if you can.
Step 5: Fold the Bottom Corners Up to the Center Line
Take the bottom left corner and fold it upward so the lower edge lines up with the vertical center crease. Repeat with the bottom right corner. The bottom of the wrapper should now form a point, similar to the beginning of a paper airplane.
This pointed section becomes the lower tip of the heart. Make the folds sharp and even. If one side is higher than the other, unfold and adjust before moving on.
Step 6: Flip the Wrapper Over
Turn the wrapper over carefully. You should see the basic heart shape beginning to appear, although at this stage it may still look more like a folded arrow. That is normal. Every gum wrapper heart goes through an awkward phase. So do haircuts.
Step 7: Fold the Top Edge Down
Fold the top edge downward toward the middle of the shape. This creates the upper body of the heart. The exact amount depends on the size of your wrapper, but a small fold usually works best. If you fold too much, the heart becomes squat. If you fold too little, it looks like it is wearing a tall hat.
Step 8: Shape the Top Corners
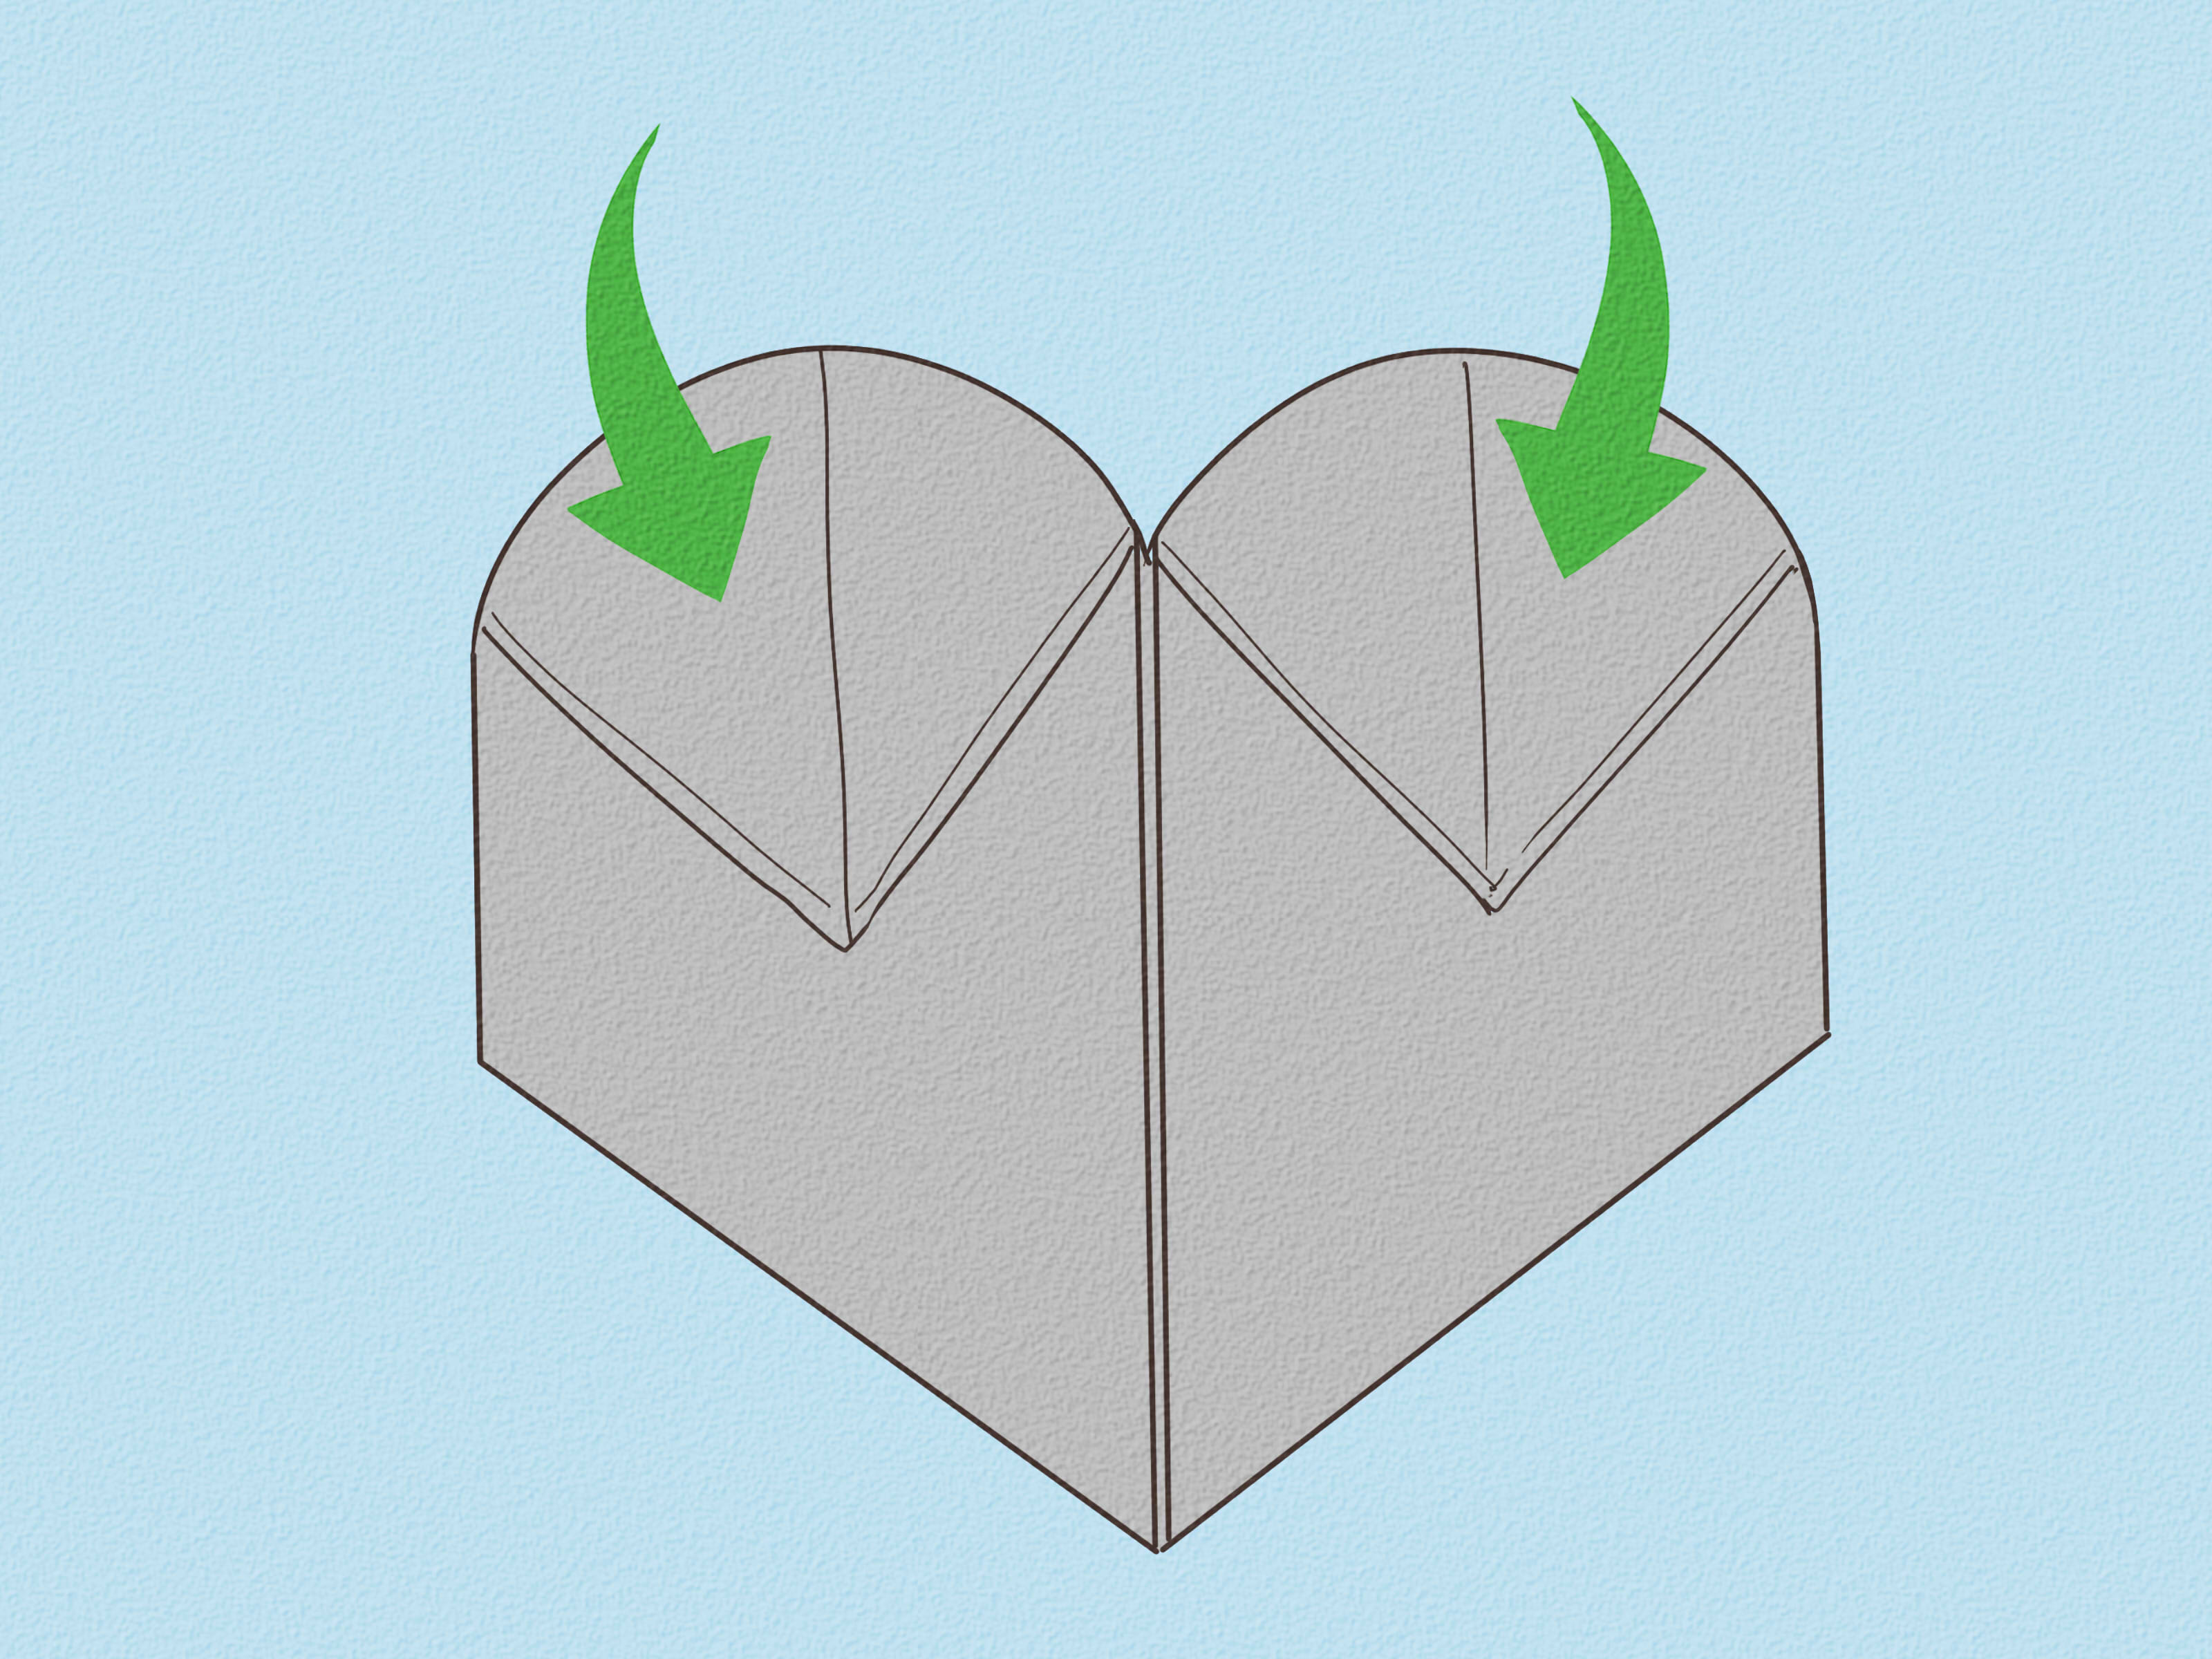
To create the classic heart curves, fold the top left and top right corners inward or downward slightly. These tiny diagonal folds soften the square top and make the shape read as a heart.
You can also fold the outer side corners in just a bit. This rounds the shoulders of the heart and keeps it from looking too boxy. The key is subtlety. Think “gentle curve,” not “aggressive paper surgery.”
Step 9: Press Everything Flat
Once the heart looks right, press all folds firmly. Run your fingernail, a ruler edge, or the side of a pen gently over the creases. This helps the wrapper hold its shape.
Step 10: Adjust the Final Shape
Look at your heart from the front. If one side sticks out, tuck it in. If the top is too sharp, fold the corners a little more. If the bottom point is uneven, gently refold one side. Small adjustments make a big difference.
Congratulations. You have turned snack trash into a tiny emotional artifact. Humanity is doing okay after all.
Common Mistakes and Easy Fixes
The Heart Looks Uneven
This usually happens when the vertical center crease is off. Unfold the wrapper as much as possible and remake the center fold. Match the edges carefully before pressing down.
The Wrapper Keeps Opening
Foil wrappers can be springy. Press the creases harder and hold them for a few seconds. You can also place the finished heart under a book for a few minutes to flatten it.
The Top Does Not Look Like a Heart
The top corners probably need smaller diagonal folds. Fold each top corner down and inward just a little. Then fold the outer shoulders in slightly. The heart shape often appears in the final tiny adjustments, not the big folds.
The Wrapper Tears
You may be pressing too hard or using an old wrapper. Try a fresh one and fold slowly. Gum wrappers are small, so force is not your friend here. Gentle pressure wins.
Best Gum Wrappers for Making Hearts
The best gum wrappers are rectangular, clean, and flexible. Wrappers from stick gum usually work better than small square wrappers because the long shape gives you enough paper to fold the point and top curves.
Metallic wrappers create a shiny heart, which is great for gifts or decorations. Paper wrappers are easier for beginners because they crease without bouncing back. If you are teaching kids or making several hearts at once, start with paper-style wrappers before moving to foil.
Creative Ways to Use Gum Wrapper Hearts
Add One to a Greeting Card
A gum wrapper heart can turn a plain note into something personal. Tape it inside a birthday card, thank-you card, or Valentine. It says, “I made this,” which is much warmer than “I bought this while panic-shopping near the checkout lane.”
Use It as a Bookmark
Slide a flat wrapper heart into a book as a tiny bookmark. It works especially well for paperbacks, journals, and planners. Just make sure it is pressed flat so it does not bend the pages.
Decorate a Phone Case
Place the heart inside a clear phone case for a quick decoration. This is one of the easiest ways to show off your craft without gluing anything permanently. Change it whenever you find a better wrapper or develop a new personality for the week.
Make a Mini Garland
If you fold several hearts, you can tape them to string and make a tiny garland. Hang it on a mirror, desk, locker, or bulletin board. Mix different wrapper colors for a cheerful recycled look.
Turn It Into a Lunchbox Surprise
A small gum wrapper heart tucked into a lunch note can make someone smile. It is simple, lightweight, and sweet without being dramatic. Basically, it is the craft version of a friendly wink.
Why This Tiny Craft Is So Popular
Gum wrapper hearts are popular because they are quick, portable, and personal. They are also a perfect example of upcycling: taking something that would usually be tossed away and turning it into something decorative or meaningful.
The craft also has a nostalgic quality. Many people first learned gum wrapper folding at school, during road trips, or while sitting with friends. It feels casual and low-pressure. You do not need to be “artistic.” You only need to fold, adjust, laugh at the first attempt, and try again.
There is also something appealing about small handmade objects. A gum wrapper heart will not win a museum grant, but it can carry a message. It says someone took a minute to make something by hand. In a world of instant texts and copy-paste emojis, that tiny bit of effort stands out.
Tips for Teaching Kids or Beginners
If you are teaching this craft to kids, use larger paper first. Cut a rectangle from notebook paper or wrapping paper and practice the folds. Once everyone understands the shape, switch to gum wrappers.
For beginners, the hardest part is usually shaping the top curves. Show them how tiny folds can change the whole look. Encourage imperfect results. The first heart may resemble a confused kite, but the second one will usually be better.
Also, keep the mood light. Paper crafts should not feel like a standardized test with snacks. If the wrapper tears, grab another. If the heart is uneven, call it “abstract.” Confidence is part of the craft.
Experience: What I Learned Making Gum Wrapper Hearts
The first time you make a heart out of a gum wrapper, you may expect it to be ridiculously easy. After all, it is just one tiny wrapper. How complicated can it be? Then the wrapper springs open, the corners refuse to match, and suddenly you are negotiating with a piece of paper like it owes you rent.
From experience, the biggest lesson is that neat preparation matters. A wrapper that is flattened well at the beginning is much easier to fold later. If you skip that step, every crease fights back. It is like trying to fold a map after a raccoon has slept in it. Smooth the wrapper first, line up the edges, and give each crease a little attention.
The second lesson is that the heart shape appears late in the process. During the middle steps, the wrapper may not look romantic at all. It may look like a triangle, a badge, a tiny roof, or a failed spaceship. Do not quit too early. The final top-corner folds are what transform the shape from “paper geometry homework” into “cute little heart.”
I also learned that different wrappers behave differently. Paper wrappers are forgiving. They crease politely and stay where you put them. Foil wrappers are flashier but more dramatic. They wrinkle, pop open, and sometimes act like they have somewhere else to be. However, foil hearts look great once finished because they catch the light and feel more decorative.
Another useful experience is making more than one. The first heart teaches your fingers where the folds go. The second heart looks cleaner. By the third or fourth, you start adjusting the shape naturally. You learn how much to fold the top edge, how deeply to tuck the corners, and how to press without tearing the wrapper. It becomes a tiny rhythm: flatten, fold, crease, flip, shape, admire.
Gum wrapper hearts also work better when you give them a purpose. Making one just to learn is fun, but making one for a card, a bookmark, or a small surprise gives the project more charm. A handmade heart tucked into a note feels personal, even if it took only three minutes. That is the magic of small crafts: the time investment is tiny, but the emotional return can be surprisingly large.
Finally, this craft is a great reminder that creativity does not always require expensive supplies. Sometimes it starts with whatever is already in your pocket. A gum wrapper heart is not perfect, polished, or fancy. That is exactly why it works. It is quick, human, and a little playful. It turns an ordinary object into a small keepsake, and honestly, that is a pretty good deal for something that came free with chewing gum.
Conclusion
Learning how to make a heart out of a gum wrapper is simple, fun, and oddly satisfying. With one clean wrapper and a few careful folds, you can create a tiny handmade heart that works as a card decoration, bookmark, phone case insert, lunchbox note, or sweet little keepsake.
The key is to start with a flat wrapper, make strong center creases, fold evenly, and shape the top corners gently. Your first attempt may not be perfect, but that is part of the charm. Each wrapper teaches your fingers what to do next. Before long, you may find yourself saving wrappers “just in case,” which is how every harmless craft obsession begins.
So the next time you unwrap a piece of gum, do not toss the wrapper right away. Give it a second life. Fold it into a heart, pass it to someone, tuck it into a card, or keep it as a tiny reminder that creativity can show up in the smallest placeseven next to a minty piece of gum.