
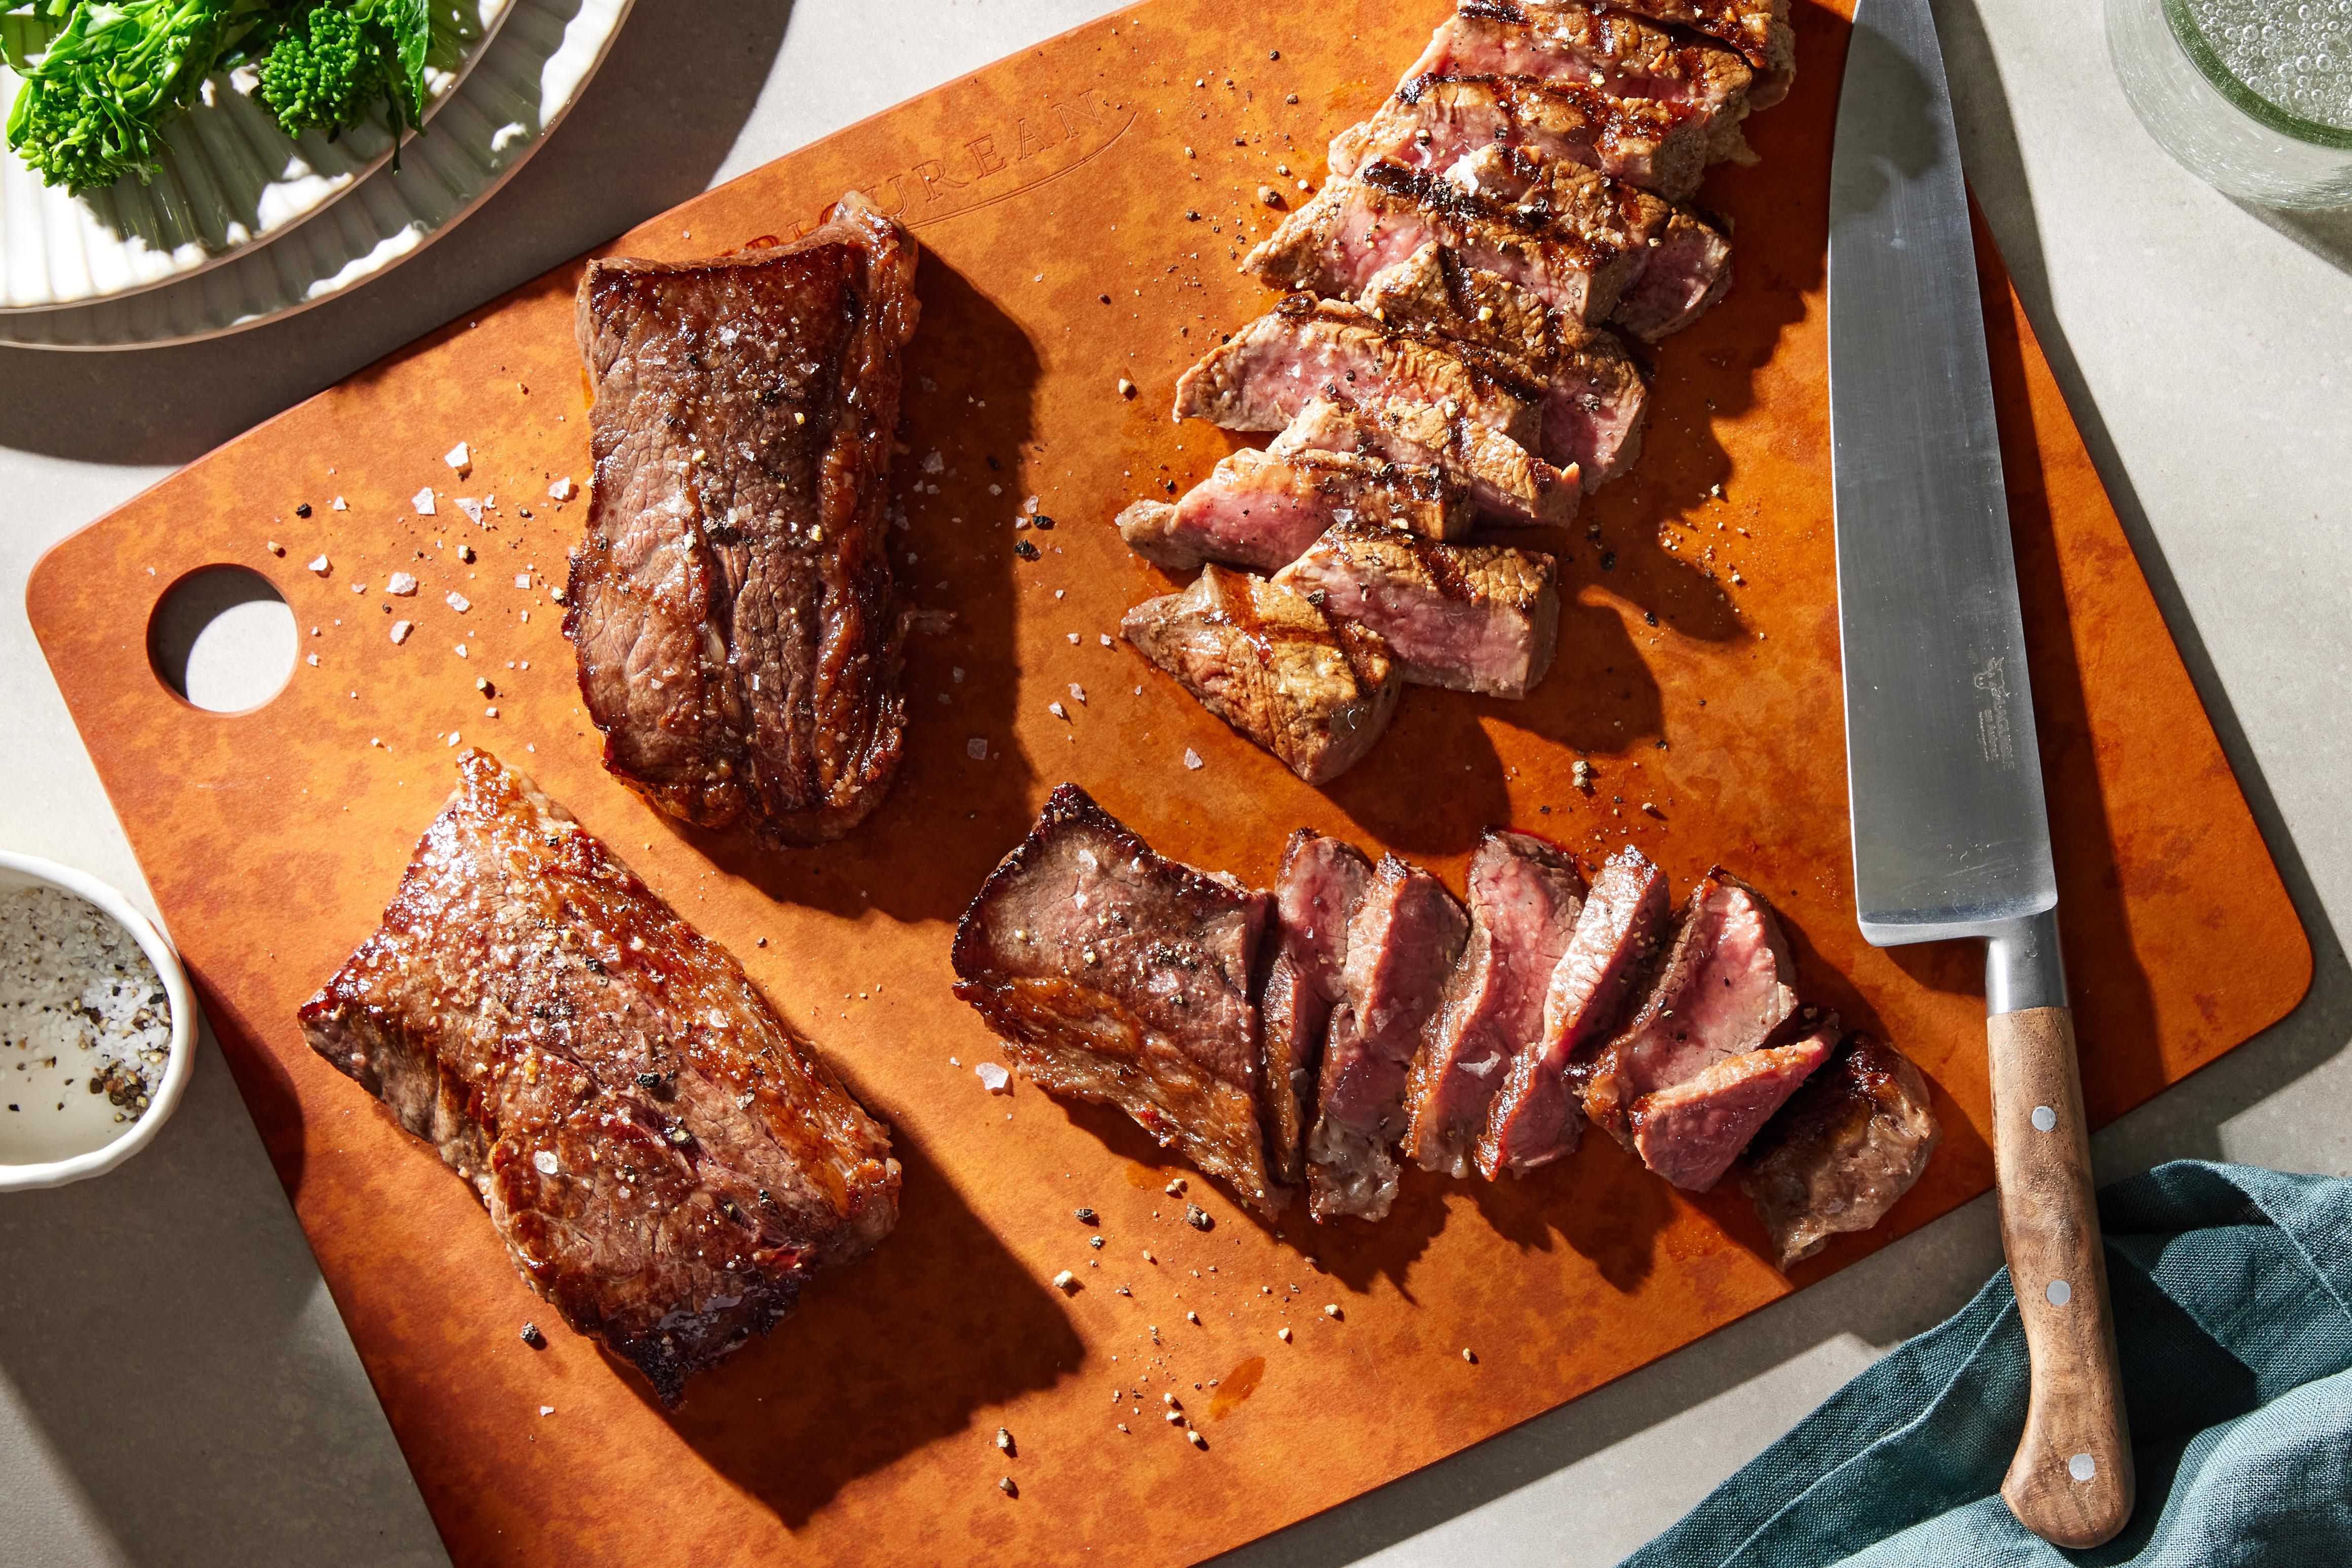
Tri-tip is the kind of beef cut that makes you feel like you’ve hacked the dinner system. It’s flavorful, versatile, and usually friendlier to your grocery budget than flashier steaks that act like they pay rent. If ribeye is the loud extrovert at the meat counter, tri-tip is the quietly competent friend who shows up on time, brings snacks, and somehow still looks impressive.
If you’ve never cooked it before, tri-tip can seem a little mysterious. Is it a roast? A steak? A weekend grilling project? The answer is basically “yes.” Tri-tip comes from the bottom sirloin, has a distinctive triangular shape, and can be cooked whole like a small roast or cut into steaks. Done right, it’s juicy, beefy, and tender enough to make everyone at the table assume you suddenly became a backyard pitmaster with strong opinions about thermometers.
In this guide, you’ll learn how to cook tri-tip steak three delicious ways: on the grill, in the oven, and in a cast-iron skillet. You’ll also get tips for seasoning, doneness, slicing, and stretching this affordable cut into a seriously satisfying entree.
Why Tri-Tip Is Such a Smart Budget Buy
Tri-tip earns its keep because it delivers a lot of flavor without the premium price tag of strip steak, filet, or ribeye. It’s leaner than some luxurious cuts but still meaty and rich, especially when you cook it to medium-rare or medium and let it rest before slicing. That means you can serve a dinner that feels special without your wallet filing a formal complaint.
It’s also a flexible cut. You can roast it for a weeknight family meal, grill it for a summer cookout, or sear it in a skillet when the weather outside is acting dramatic. Leftovers are useful too. Slice them thin for sandwiches, tacos, salads, rice bowls, or a next-day “I absolutely planned this” lunch.
Before You Start: Tri-Tip Basics
1. Bring it closer to room temperature
Take the tri-tip out of the refrigerator about 30 to 45 minutes before cooking. This helps it cook more evenly. A freezing-cold roast thrown straight into high heat tends to brown on the outside before the inside gets the memo.
2. Pat it dry
Moisture is the enemy of a good crust. Use paper towels to blot the surface dry before adding oil or seasoning. This one tiny step makes a big difference in browning.
3. Keep the seasoning simple
Tri-tip has a strong beefy flavor, so it doesn’t need a ten-page spice manifesto. Kosher salt, black pepper, garlic powder, onion powder, and a little smoked paprika work beautifully. If you want classic California flavor, go Santa Maria style with salt, pepper, garlic, and a few herbs.
4. Use a thermometer
This is not the time for vague intuition and wishful thinking. An instant-read thermometer makes tri-tip far easier to cook well. For food safety, whole cuts of beef should reach 145°F and rest for at least 3 minutes. For texture and juiciness, many home cooks aim to pull tri-tip a little earlier depending on preferred doneness, then let carryover heat finish the job.
5. Let it rest, then slice against the grain
Resting gives the juices time to settle instead of sprinting across your cutting board. After resting, slice the meat thinly against the grain. This is the secret handshake of tender tri-tip. If you slice with the grain, you’ll end up chewing like you’re trying to prove a point.
Best Seasoning for Tri-Tip Steak
For a reliable all-purpose rub, combine:
- 1 tablespoon kosher salt
- 1 1/2 teaspoons black pepper
- 1 teaspoon garlic powder
- 1 teaspoon onion powder
- 1 teaspoon smoked paprika
- 1/2 teaspoon dried rosemary or oregano
Rub the mixture all over the meat with 1 to 2 teaspoons of oil. If you have time, let it sit for 30 minutes. If you have more time, refrigerate it for a few hours. If you have no time, season it and proceed anyway. Dinner does not always wait for ideal conditions.
Method 1: How to Grill Tri-Tip Steak
Grilling is probably the most crowd-pleasing way to cook tri-tip. You get smoky flavor, a nice char, and that “I know what I’m doing” energy that comes from holding tongs near a fire.
What you need
- 1 tri-tip roast or thick tri-tip steak, about 1 1/2 to 3 pounds
- Prepared rub or simple salt and pepper seasoning
- Gas or charcoal grill
- Instant-read thermometer
How to do it
- Preheat the grill for two-zone cooking: one side hotter for searing, one side cooler for finishing.
- Season the tri-tip and lightly oil the grates.
- Sear the meat over direct heat for a few minutes per side until nicely browned.
- Move it to indirect heat, close the lid, and continue cooking until it reaches your target temperature.
- Rest it for 10 to 15 minutes before slicing thinly against the grain.
Why this method works
Tri-tip benefits from a mix of sear and gentle finishing heat. The direct heat builds flavor on the outside, while indirect heat helps the center cook more evenly. That means less gray overcooked band and more rosy, juicy slices.
Best for
Cookouts, meal prep, feeding guests, and anyone who thinks dinner tastes better with grill marks. Which, honestly, is a fair position.
Method 2: How to Cook Tri-Tip in the Oven
If the weather is bad, your grill is out of gas, or you simply prefer cooking indoors where the thermostat and your dignity are protected, oven-roasted tri-tip is a fantastic option.
How to do it
- Preheat the oven to 425°F.
- Pat the tri-tip dry and season it generously.
- Place it on a rack in a shallow roasting pan or baking dish.
- Roast until it reaches your preferred doneness.
- Rest under loose foil for 10 to 15 minutes, then slice thinly.
Extra tip for flavor
Roast onions, carrots, or potatoes in the same pan if you want a built-in side dish. The drippings help everything taste like you made a much fancier dinner than you actually did.
Why this method works
The oven gives you steady, even heat. It’s a great choice if you want a predictable result and fewer moving parts. It also works well for beginners because once the meat is in, the thermometer does most of the talking.
Best for
Weeknight dinners, cold-weather cooking, and people who want tri-tip without having to clean outdoor grill grates while mosquitoes conduct surveillance.
Method 3: How to Cook Tri-Tip in a Cast-Iron Skillet
This method is perfect when you want a bold crust and rich, steakhouse-style flavor at home. A hot cast-iron skillet gives tri-tip beautiful browning, and finishing it in the oven prevents the outside from overcooking while the inside catches up.
How to do it
- Preheat the oven to 400°F to 425°F.
- Heat a large oven-safe cast-iron skillet over medium-high heat until very hot.
- Add a little high-heat oil.
- Sear the tri-tip for 2 to 4 minutes per side until deeply browned.
- Transfer the skillet to the oven and roast until the center reaches your target temperature.
- Rest the meat on a cutting board before slicing.
Flavor upgrade
During the final minute of searing, add smashed garlic cloves, a knob of butter, and a sprig of rosemary or thyme. Spoon the foaming butter over the top. It’s dramatic, delicious, and just enough culinary theater to make dinner feel fancy.
Why this method works
Cast iron holds heat well, so you get an excellent crust. Finishing in the oven prevents the dreaded burnt-outside, underdone-inside situation that can happen when you try to do everything on the stovetop.
Best for
Apartment kitchens, rainy evenings, and anyone who wants maximum crust with minimum backyard involvement.
How Long Does Tri-Tip Take to Cook?
Cooking time depends on thickness, starting temperature, and method. A small tri-tip can cook much faster than a thick one, so there’s no universal magic number. Think of time as a rough estimate and temperature as the actual truth.
In general:
- Grill: often around 25 to 40 minutes total, depending on size and heat setup
- Oven at 425°F: often around 30 to 45 minutes
- Skillet + oven: about 6 to 8 minutes searing, then additional oven time as needed
Start checking early. Tri-tip is much easier to rescue from “not quite done” than from “accidentally turned into a commemorative leather project.”
Doneness Guide for Tri-Tip
Here’s a practical doneness guide for pulling tri-tip from the heat:
- Rare: around 125°F
- Medium-rare: around 130°F to 135°F
- Medium: around 140°F to 145°F
- Medium-well: around 150°F
Remember that the temperature will rise a bit while the meat rests. If food safety is your top priority, cook whole cuts of beef to at least 145°F and allow for the full rest time before serving.
How to Slice Tri-Tip the Right Way
This deserves its own section because slicing is where many otherwise excellent tri-tips go sideways. The grain in tri-tip changes direction, so don’t just start cutting randomly like you’re opening mail. Look closely at the meat first. You may need to cut the roast into two sections where the grain shifts, then slice each section against the grain.
Thin slices are usually best, especially for serving a group. They feel more tender, look generous on a platter, and make the cut go further. That’s especially useful when your goal is an inexpensive entree that still feels abundant.
What to Serve with Tri-Tip
Because tri-tip is rich and savory, it pairs well with simple sides. Budget-friendly favorites include roasted potatoes, garlic bread, grilled corn, rice pilaf, green beans, coleslaw, or a crisp salad. For a California-inspired dinner, serve it with pinquito beans, salsa, and toasted bread. For a weeknight shortcut, pile slices over mashed potatoes and let the juices do the heavy lifting.
Leftovers also shine in tacos, wraps, steak sandwiches, quesadillas, grain bowls, and scrambled eggs. Few things are more satisfying than realizing your affordable dinner just turned into tomorrow’s excellent lunch.
Common Tri-Tip Mistakes to Avoid
Overcooking it
Tri-tip is lean enough that it can dry out if pushed too far. Use a thermometer and pull it before panic sets in.
Skipping the rest
Fresh off the heat, the juices are still active. Slice too soon and they’ll head straight for the board instead of staying in the meat.
Slicing with the grain
This is the most common tenderness mistake. Against the grain equals easier bites. With the grain equals chewing practice.
Using too much marinade
Tri-tip can handle marinades, but it doesn’t need to swim in one for a full day unless the recipe is built for it. Too much surface moisture can interfere with browning. If you marinate, pat it dry before cooking.
Which Cooking Method Is Best?
If you want smoky flavor and outdoor flair, choose the grill. If you want steady, simple cooking, choose the oven. If you want an amazing crust and deep savory browning, choose cast iron. The truth is there isn’t one perfect method, only the best one for your kitchen, your schedule, and your patience level on any given night.
That’s what makes tri-tip such a winner. It adapts. It performs. It doesn’t require luxury ingredients or restaurant equipment. It just asks for decent seasoning, careful temperature control, and the respect of being sliced properly after all its hard work.
Final Thoughts
Learning how to cook tri-tip steak three ways gives you a serious dinner advantage. You get a flavorful beef entree that feels special but stays budget-conscious, and you can change the method depending on the season, your kitchen setup, or whether your grill currently has the emotional capacity to cooperate.
Start with a simple rub, cook with a thermometer, rest the meat, and slice against the grain. That’s the formula. Once you’ve done it once, tri-tip stops feeling like a mystery cut and starts feeling like one of the smartest dinner moves you can make.
And honestly, any cut of meat that can feed a table, stretch into leftovers, and still make you look like you know your way around a hot pan deserves a standing ovation. Or at least a second helping.
Experience and Practical Cooking Notes
The first time many home cooks try tri-tip, there’s often a brief moment of confusion at the store. It doesn’t look exactly like the steaks people grew up seeing in restaurant ads, and it doesn’t behave exactly like a pot roast either. That’s part of the charm. Once you cook it a couple of times, tri-tip starts to feel like the dependable middle ground between a steak dinner and a roast dinner. It’s approachable, but it still has enough personality to feel interesting.
One of the best real-world lessons with tri-tip is that the simplest versions are often the most successful. People tend to assume they need a complicated marinade, a secret family rub, or a smoker that costs as much as a used scooter. In reality, tri-tip responds beautifully to basic seasoning and smart cooking. Salt, pepper, garlic, heat control, and patience will take you a long way.
Another common experience is discovering that tri-tip is a fantastic “company without stress” entree. It looks substantial on a platter, slices beautifully, and gives you that steakhouse vibe without requiring everyone’s steak to be cooked individually. That alone can save a lot of chaos if you’re feeding several people. Instead of juggling multiple pans and trying to remember who wanted what, you cook one larger cut, rest it, slice it, and serve. Suddenly dinner feels organized, calm, and maybe even slightly elegant.
From a budget standpoint, tri-tip also teaches an important kitchen lesson: expensive is not always better. When cooked well, tri-tip has enough flavor to stand proudly beside costlier cuts. It may not have the same buttery richness as a heavily marbled ribeye, but it more than makes up for that with versatility and value. For families trying to balance price, taste, and practicality, that matters.
There’s also the leftover factor, which deserves more appreciation than it usually gets. A good tri-tip dinner rarely ends at dinner. The next day, those thin slices can become tacos with onions and salsa, sandwiches with horseradish mayo, breakfast hash with potatoes, or a quick rice bowl with vegetables. In real home kitchens, that kind of flexibility is gold. It means you’re not just cooking one meal; you’re building momentum for the next one.
Many cooks also find that tri-tip improves their confidence with beef in general. It teaches useful habits: checking internal temperature instead of guessing, respecting rest time, and paying attention to grain before slicing. Those skills transfer to other cuts too. So even if tri-tip starts as a money-saving dinner idea, it often ends up being a practical cooking lesson disguised as a very tasty entree.
And then there’s the simple satisfaction factor. There is something deeply rewarding about slicing into a rested tri-tip and seeing a juicy center, a browned crust, and a platter full of dinner that didn’t wreck your grocery budget. It feels like a small victory. Not a fireworks-and-trophy kind of victory, but a quiet, delicious one. The sort of victory that says, “Yes, I did make a smart dinner choice, and yes, I would like another slice.”












