
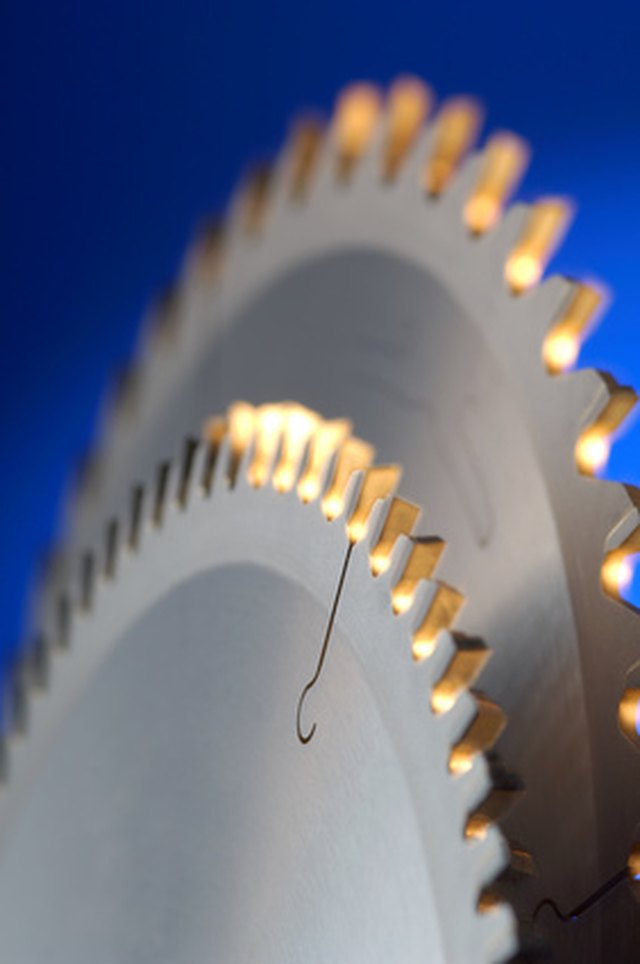
Removing the blade on a Bosch miter saw is not difficult, but it does have one little plot twist: on many Bosch miter saws, the blade bolt uses left-hand threads. That means the bolt often loosens by turning clockwise, which is the opposite of what your brain, your wrist, and possibly your grandfather’s toolbox instincts expect.
Whether you own a Bosch GCM12SD, CM10GD, CM8S, CM12SD, or another Bosch sliding compound miter saw, the basic process is similar: unplug the saw, move the guard assembly out of the way, lock the arbor, loosen the blade bolt, remove the outer washer, and slide the blade off the arbor shaft. The key is to work slowly and avoid forcing anything. A miter saw blade is basically a circular row of tiny teeth designed to ruin lumber. It does not need encouragement to ruin fingers.
This guide explains how to remove the blade on a Bosch miter saw safely, what tools you need, why the bolt turns the “wrong” direction, what to do if the blade bolt is stuck, and how to avoid common mistakes when changing a miter saw blade.
Before You Start: Identify Your Bosch Miter Saw Model
Bosch has made several popular miter saws, including 8-1/2-inch, 10-inch, and 12-inch models. Some use a 5 mm hex key, while others use a Bosch 6/4 mm hex key. Some models have a glide arm system, while others use a more traditional sliding mechanism. The blade removal steps are similar, but the guard linkage, screw locations, blade size, arbor size, and wrench size can vary.
Before removing the saw blade, check the model number on your saw. It is usually printed on the nameplate or label near the motor housing or base. Then confirm the exact blade size, arbor size, and recommended wrench in your owner’s manual. For example, a Bosch GCM12SD is a 12-inch dual-bevel glide miter saw, while a Bosch CM10GD uses a 10-inch blade. Installing the wrong blade size is not a clever shortcut; it is a high-speed bad idea wearing carbide teeth.
Tools and Supplies You Will Need
- The correct Bosch hex key or blade wrench for your model
- Work gloves for handling the blade, not for operating the saw
- Safety glasses
- A clean rag
- A small brush or vacuum for sawdust cleanup
- Penetrating oil, only if the blade bolt is stuck
- Your replacement blade, if you are changing blades
Most Bosch miter saws include an onboard wrench storage area. If the original wrench has vanished into the same alternate universe as tape measures and 10 mm sockets, buy the correct replacement before starting. A sloppy wrench can strip the blade bolt, and once that happens, your simple five-minute blade change becomes a small woodworking tragedy.
Safety First: Do These Things Before Touching the Blade
The most important step is also the least glamorous: disconnect the power. If your Bosch miter saw is corded, unplug it from the outlet. If it is cordless, remove the battery pack. Do not rely on the trigger being “off.” Do not rely on being careful. Do not rely on your cat not stepping on things. Physically disconnect the power source.
Next, place the saw on a stable bench or stand. Make sure the saw head is raised to the up position and the bevel is set at 0 degrees unless your model manual says otherwise. Clear loose wood scraps, offcuts, pencils, screws, and the mysterious washer you have been ignoring for three months from the saw table.
Wear safety glasses, especially if you will be brushing out packed sawdust around the guard. Gloves are useful when handling the blade by its edges, but do not wear loose gloves while operating the saw. Loose fabric and spinning machinery are not friends; they are enemies with scheduling conflicts.
Understanding the Bosch Miter Saw Blade Assembly
A Bosch miter saw blade is mounted on an arbor shaft. The typical assembly includes the inner washer, the blade, the outer washer, and the blade bolt. The inner washer usually stays on the arbor shaft when the blade is removed. The outer washer comes off with the blade bolt.
The lower blade guard protects the blade when the saw is not cutting. To remove the blade, you need to move the guard and cover plate enough to access the blade bolt. On many Bosch miter saws, this involves loosening cover plate screws and rotating the guard assembly out of the way. You do not normally remove the entire guard. You simply move it enough to access the arbor area.
The arbor lock button keeps the blade from spinning while you loosen the blade bolt. On many Bosch models, the arbor lock is a red button located on the opposite side of the upper guard. You press and hold it while slowly rotating the blade by hand until the lock fully seats. When it seats correctly, the blade will stop rotating.
How to Remove the Blade on a Bosch Miter Saw: Step-by-Step
Step 1: Disconnect the Saw from Power
Unplug the saw or remove the battery. This is not optional. A miter saw can cause serious injury in a fraction of a second, and blade removal puts your hands close to the cutting area. Keep the plug visible if possible so you know the saw is not connected.
Step 2: Raise the Saw Head
If the saw head is locked down for storage, press down slightly on the handle, pull out the head lock pin, and allow the head to rise slowly. Do not let it snap upward. Set the bevel angle to 0 degrees so the blade is upright and easier to access.
Step 3: Move the Guard Assembly
On many Bosch models, you will need to loosen the front cover plate screw and rear cover plate screw with the supplied hex key. Some models instruct you to loosen the front screw a couple of turns and the rear screw several turns without fully removing them. Then the cover plate and lower guard can be rotated out of the way.
On certain Bosch glide models, there may also be a guard link or knob that must be moved so the lower guard stays raised while you work. Move the guard gently. If it does not move, do not pry it like you are opening a paint can. Recheck the screws and linkage.
Step 4: Press the Arbor Lock
Press and hold the arbor lock button. Slowly rotate the blade by hand until the lock drops fully into place. You will feel the blade stop turning. Keep holding the arbor lock while loosening the blade bolt.
Important: never press the arbor lock while the saw is running or while the blade is coasting. The arbor lock is for blade changes, not for dramatic braking demonstrations.
Step 5: Loosen the Blade Bolt
Insert the correct hex key or blade wrench into the blade bolt. On many Bosch miter saws, the blade bolt has left-hand threads, so you loosen it by turning it clockwise. This is the step that confuses many people. If you turn the bolt counterclockwise on a left-hand-thread Bosch blade bolt, you may actually tighten it.
Apply steady pressure. Do not jerk the wrench violently. Do not use a cheater bar unless you are absolutely sure it is safe and appropriate for your model. If the bolt does not move, stop and review the troubleshooting section below.
Step 6: Remove the Blade Bolt and Outer Washer
Once the bolt is loose, remove it carefully along with the outer washer. Set both parts in a safe place. A magnetic tray is useful here. So is a small bowl. The floor is not a storage system, despite what many garages seem to believe.
Step 7: Slide the Blade Off the Arbor Shaft
Hold the blade carefully by the sides. Slide it away from the inner washer and off the arbor shaft. Then lower it out of the saw. Leave the inner washer on the arbor shaft unless your manual specifically instructs you to remove it for cleaning or inspection.
Watch the carbide teeth as you remove the blade. Even a dull blade is sharp enough to cut skin. A sharp blade can make a tiny mistake memorable for all the wrong reasons.
What Direction Do You Turn the Bolt on a Bosch Miter Saw?
For many Bosch miter saws, including several popular glide and sliding compound models, the blade bolt loosens clockwise because it uses left-hand threads. To reinstall the bolt, you usually tighten it counterclockwise.
However, do not treat this as permission to attack every Bosch saw with maximum clockwise enthusiasm. Always confirm your model manual. Some saw designs differ, and previous owners sometimes replace hardware incorrectly. If the bolt feels wrong, pause. The cost of pausing is low. The cost of stripping an arbor bolt is usually higher and comes with colorful language.
What to Do If the Blade Bolt Is Stuck
A stuck blade bolt is common, especially on saws that have cut a lot of framing lumber, trim, resin-heavy boards, or dusty material. Sawdust and pitch can pack around the arbor area, and a bolt that was overtightened during the last blade change may refuse to cooperate.
Check the Direction First
Before assuming the bolt is seized, confirm the thread direction. On many Bosch models, clockwise loosens the bolt. If you have been turning counterclockwise, you may have been tightening the bolt with the dedication of a medieval blacksmith.
Use the Correct Wrench
A worn hex key or wrong-size wrench can round the bolt head. Make sure the wrench seats fully in the bolt. Clean sawdust out of the recess if needed.
Apply Steady Pressure
Hold the arbor lock fully engaged and apply firm, controlled pressure. Avoid bouncing, hammering, or using an impact driver unless the manufacturer or a qualified service technician recommends it. Impact tools can damage the arbor lock, strip the bolt, or turn a stuck bolt into a very expensive lesson.
Use Penetrating Oil Carefully
If the bolt seems rusted or gummed up, apply a small amount of penetrating oil around the bolt area and let it sit. Keep oil away from electrical components, belts, and surfaces that should remain dry. Wipe away excess before reassembling the blade.
Know When to Stop
If the bolt is stripped, the arbor lock will not seat, the guard is damaged, or the blade is jammed at an odd angle, stop and contact a Bosch service center or qualified repair technician. There is no trophy for turning a minor maintenance task into a parts-ordering adventure.
Inspect the Blade After Removal
Once the blade is off the saw, inspect it before tossing it back onto a shelf. Look for missing carbide teeth, cracks, warping, resin buildup, heat discoloration, or a bent plate. A dirty blade can often be cleaned. A cracked or warped blade should be replaced.
If the blade has burn marks, dull teeth, or leaves ragged cuts, it may be time for sharpening or replacement. For fine trim, crown molding, and furniture-grade cuts, a higher-tooth-count crosscut blade generally leaves a smoother finish. For rough framing work, a lower-tooth-count blade cuts faster but leaves a rougher edge. Match the blade to the job, not to whatever was closest to the checkout counter.
Installing a New Blade: Quick Reassembly Tips
Although this article focuses on removing the blade, most people remove a blade because they plan to install another one. Before installing the new blade, confirm that it matches your Bosch miter saw’s required diameter, arbor size, kerf, and speed rating. The blade’s maximum RPM rating must meet or exceed the saw’s no-load RPM.
Check the rotation arrow on the blade and match it to the blade rotation arrow on the saw guard. On a miter saw, the teeth at the front of the blade usually point downward toward the table. If the blade is installed backward, it will not cut correctly and may be dangerous.
Slide the blade onto the arbor shaft against the inner washer, reinstall the outer washer, and thread the blade bolt by hand first. On many Bosch left-hand-thread models, tightening means turning the bolt counterclockwise. Engage the arbor lock and snug the bolt firmly, but do not overtighten it. Then release the arbor lock and spin the blade by hand to confirm that it turns freely without rubbing the guard, throat plate, or table insert.
Common Mistakes to Avoid
Forgetting to Unplug the Saw
This is the biggest mistake and the easiest one to avoid. Disconnect power before any blade change, adjustment, or repair.
Turning the Bolt the Wrong Way
Many Bosch miter saw blade bolts loosen clockwise. If you forget this, you may overtighten the bolt and make removal much harder.
Removing the Inner Washer
In many blade changes, the inner washer stays on the arbor shaft. If it falls off, clean it and reinstall it correctly before mounting the blade.
Installing the Blade Backward
Always check the blade rotation arrow. The teeth should face the correct cutting direction. Backward blades are not “extra safe.” They are extra wrong.
Overtightening the Blade Bolt
The bolt needs to be secure, not punished. Overtightening can make future blade changes difficult and may damage components.
When Should You Remove or Replace a Bosch Miter Saw Blade?
You should remove or replace the blade when cuts become rough, the saw burns wood, the blade leaves excessive tear-out, the saw vibrates unusually, the blade is visibly damaged, or you need a different blade for a specific material. A fine-finish blade is better for trim and molding. A general-purpose blade is useful for everyday shop work. A specialty blade may be needed for laminate, non-ferrous metals, or composite material, but only if your saw and blade are rated for that use.
A sharp, clean blade reduces strain on the motor and improves cut quality. If you feel like you have to shove the saw through the workpiece, the blade may be dull, dirty, or wrong for the material. The saw should cut with controlled pressure, not a wrestling match.
Maintenance Tips While the Blade Is Off
Blade removal is a perfect time to clean the saw. Vacuum sawdust from the guard area, arbor area, fence, table, and dust chute. Wipe resin buildup from the blade washers. Check that the lower guard moves freely and returns fully. Inspect the power cord if your saw is corded. Look at the table insert for damage. Confirm that the fence is secure.
Do not spray lubricant randomly into the saw. Many miter saw parts are designed to run dry or with specific lubrication points. Excess oil attracts sawdust, and sawdust plus oil creates a gritty paste that behaves like shop-made sadness.
Real Workshop Experience: Lessons From Removing Bosch Miter Saw Blades
The first time many people remove a Bosch miter saw blade, the job feels more confusing than it should. The saw looks straightforward, the blade is right there, the wrench fits, and then the bolt refuses to loosen. That is when the internal debate begins: “Am I weak? Is the bolt welded? Did Bosch hide a secret German riddle in this tool?” Usually, the answer is simpler: the blade bolt has left-hand threads, and you are turning it the wrong way.
In practical shop use, the best approach is to slow down before adding force. On a Bosch glide miter saw, for example, the guard assembly can look intimidating because of the linkage and cover plate. But once you understand the sequence, it becomes routine. Raise the saw head, set the bevel upright, loosen the cover plate screws, move the lower guard out of the way, press the arbor lock, rotate the blade until the lock seats, and turn the blade bolt clockwise to loosen it. That sequence matters. Skipping around usually creates frustration.
One useful habit is to take a phone photo before removing anything. Snap a picture of the washer position, blade direction, and guard assembly. It takes five seconds and can save ten minutes of staring at parts like they personally betrayed you. This is especially helpful if you are changing blades on a saw you bought used, because previous owners sometimes improvise. Improvisation is great in jazz. It is less great around high-speed cutting tools.
Another real-world lesson: clean the arbor area before installing the new blade. A tiny chip of wood or a crust of pitch behind the washer can prevent the blade from seating flat. That can lead to wobble, vibration, poor cuts, and unnecessary panic. A clean rag and a small brush are not fancy tools, but they are often the difference between a smooth blade change and an afternoon spent diagnosing a problem you accidentally created.
It also helps to label blades if you store several of them. A 60-tooth blade for general crosscuts, an 80-tooth blade for fine trim, and a rougher framing blade can look similar when they are dusty. Mark the blade sleeves or storage hooks. When you are halfway through installing crown molding and your patience is hanging by one tiny brad nail, you will appreciate not having to decode every blade in the shop.
Finally, do a slow test before returning to full work. After the new blade is installed, rotate it by hand with the saw unplugged. Make sure it clears the guard and table insert. Recheck the cover plate screws. Confirm the arbor lock has released. Then plug in the saw, stand slightly to the side, and run it briefly without cutting. Listen for rubbing, wobbling, or odd vibration. If everything sounds normal, make a test cut on scrap wood before returning to your actual project.
Changing a Bosch miter saw blade is a small maintenance task, but it teaches a bigger shop principle: most tool problems get easier when you combine the right manual, the right wrench, and the humility to stop before forcing metal parts into submission. The blade does not care how confident you feel. It only cares whether everything is installed correctly.
Conclusion
Removing the blade on a Bosch miter saw is a safe and manageable job when you follow the right sequence. Disconnect the power, raise the saw head, move the guard assembly, engage the arbor lock, loosen the blade bolt, remove the outer washer, and slide the blade off the arbor shaft. The most important Bosch-specific reminder is that many models use a left-hand-thread blade bolt, so the bolt often loosens clockwise.
Work slowly, use the correct wrench, keep track of the washers, and never force a stuck bolt without checking the thread direction first. Once the blade is off, inspect it, clean the arbor area, and install the replacement blade with the correct rotation direction and speed rating. Done correctly, a Bosch miter saw blade change is quick, clean, and satisfying. Done carelessly, it becomes the kind of “learning experience” that involves replacement parts and a long silence in the garage.
Note: This article is written for general Bosch miter saw blade removal guidance. Always follow the owner’s manual for your exact model, especially for blade size, wrench size, bolt direction, guard movement, and safety procedures.














