
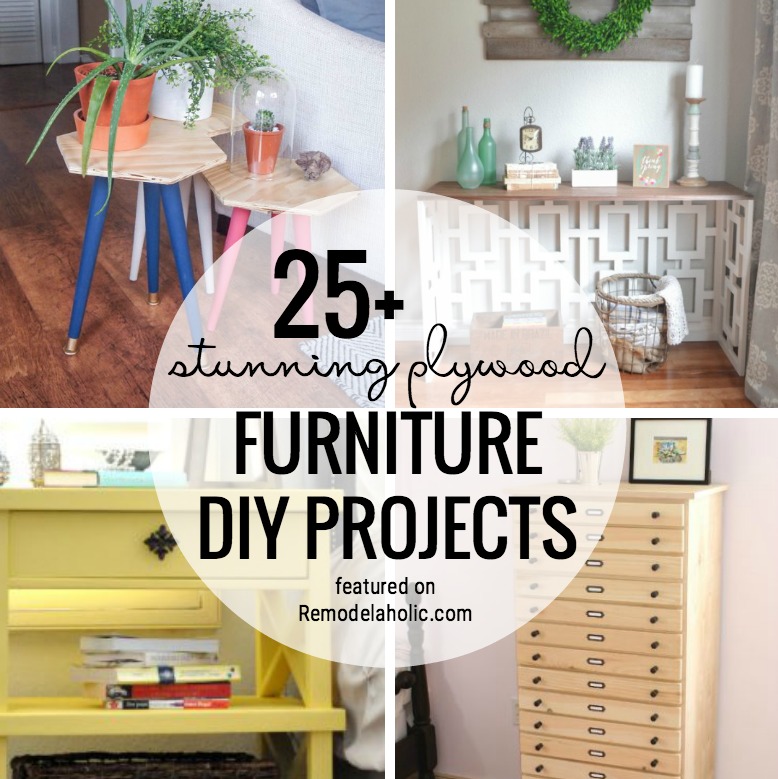
Plywood has spent far too long hiding behind drywall, under roofing, and inside cabinets like a talented actor who never gets a speaking role. Today, furniture makers are letting this practical sheet material step into the spotlight. Its attractive grain, layered edges, dimensional stability, and relatively approachable price make it ideal for modern DIY furniture.
These plywood furniture DIY projects range from beginner-friendly shelves to sculptural chairs, storage beds, media consoles, and space-saving desks. Many can be built with a circular saw, drill, sander, straightedge, and a determination not to measure the same board incorrectly three times.
Whether your style is Scandinavian, industrial, mid-century modern, minimalist, or “I saw this online and refuse to pay $900 for it,” the following ideas offer plenty of inspiration.
Why Plywood Is Excellent for DIY Furniture
Plywood is manufactured by bonding thin wood veneers in alternating directions. This cross-layered construction helps large panels remain more stable than many equally wide pieces of solid lumber. It is especially useful for desks, cabinets, shelves, and other furniture requiring broad, flat surfaces.
Furniture-grade birch, maple, oak, and walnut plywood can look refined with little more than careful sanding and a clear finish. Baltic birch plywood is particularly popular when exposed edges are part of the design because its numerous thin layers create a distinctive striped appearance.
Choose the Right Grade and Thickness
For visible furniture, select smooth panels with an attractive face veneer and as few patches or defects as possible. Three-quarter-inch plywood is a dependable choice for structural panels, desktops, shelving, benches, and cabinet boxes. Half-inch material works well for lighter components, while quarter-inch plywood is commonly used for drawer bottoms and cabinet backs.
Plan the Cuts Before Starting
Create a cutting diagram based on the dimensions of a standard sheet. Group pieces with matching widths so they can be ripped during the same setup. Remember to allow for the saw blade’s kerf, because a missing eighth of an inch has a remarkable ability to ruin an otherwise peaceful afternoon.
Decide How the Edges Will Look
Exposed plywood edges can become an intentional design feature, especially when the layers are clean and void-free. For a traditional appearance, conceal them with iron-on veneer tape, thin hardwood strips, solid-wood face frames, or carefully applied wood filler and paint.
28 Stunning Plywood Furniture DIY Projects
1. Minimalist Plywood Coffee Table
Begin with a rectangular plywood top and two wide panel legs. Join the legs with dados, pocket screws, or concealed brackets. Round the corners and apply a matte clear finish for a simple table that looks at home beside nearly any sofa.
2. Waterfall-Edge Side Table
Create the impression of one continuous folded panel by joining the top and sides with carefully cut miters. Reinforce the joints with splines or interior blocks. The clean silhouette works beautifully as a nightstand, plant stand, or compact living-room table.
3. Stacked-Plywood End Table
Cut identical plywood profiles, laminate them into a thick block, and sand the surfaces flush. The striped edges become the main attraction. Use a geometric shape for a modern look or experiment with curves for something more sculptural.
4. Mid-Century Modern Media Console
Build a long plywood cabinet with sliding doors, open electronics compartments, and tapered wooden legs. Add ventilation openings and cable-management holes before assembly. A warm veneer and understated hardware produce a polished mid-century appearance without requiring complicated ornamentation.
5. Floating TV Cabinet
A wall-mounted plywood console keeps the floor clear and helps a small room feel more spacious. Construct a shallow cabinet with hinged or sliding fronts, then secure it to wall studs with a substantial cleat. Never trust drywall anchors with your television equipment and emotional well-being.
6. Modular Cube Storage System
Build several plywood cubes in one or two standard sizes. Stack them horizontally, vertically, or in a stepped arrangement. Connect adjoining units discreetly so the furniture can evolve from a bookcase into a room divider, media center, or toy-storage wall.
7. Leaning Ladder Bookcase
Cut two angled side panels and install shelves that become progressively deeper toward the floor. The rear edges can rest against the wall while the broad base provides stability. Anchor the top for safety, especially in homes with children, pets, or adventurous vacuum cleaners.
8. Floor-to-Ceiling Plywood Bookcase
Turn an empty wall into custom storage using tall plywood cabinet sections. Fixed shelves can sit in dados for strength, while adjustable shelves offer flexibility. Add trim for a built-in appearance or leave the layered edges visible for a contemporary architectural effect.
9. Sculptural Wave Shelf
Cut repeated curved ribs and connect them with shelves or narrow plywood strips. The result can resemble a wave, ribbon, or abstract landscape. This project requires careful pattern-making, but the finished piece doubles as storage and wall art.
10. Compact Writing Desk
A desktop, two side panels, and a narrow stretcher are enough to create a clean, practical workstation. Add a shallow pencil drawer or rear cable slot. Keep the depth modest so the desk fits comfortably in a bedroom, hallway, or apartment living area.
11. Wall-Mounted Folding Desk
Build a shallow plywood cabinet with a front panel that lowers to become the work surface. Folding brackets, chains, or support arms hold it level. When the workday ends, close the panel and pretend the unanswered emails are no longer inside.
12. Plywood Desk With Built-In Shelves
Extend one side of a plywood desk upward to form open shelving. The integrated structure provides space for books, office supplies, and plants without requiring a separate bookcase. A contrasting painted back panel can add depth and personality.
13. Double Workstation
Use a long plywood top supported by drawer cabinets, panel legs, or wall-mounted brackets. Install a central divider or shared shelf to define each workspace. This design is useful for couples, siblings, study partners, or anyone who owns two monitors and fourteen charging cables.
14. Plywood Dining Table
Laminate two plywood layers to create a substantial tabletop, then attach a trestle, pedestal, or angled panel base. Hardwood edging protects vulnerable corners. A durable clear coat helps the surface survive spills, homework, hot serving dishes, and enthusiastic family discussions.
15. Matching Plywood Dining Bench
Construct a long seat with wide slab legs and a stretcher between them. Slightly bevel or round the seat edges for comfort. A bench can accommodate more people than individual chairs and slides neatly beneath the table when additional floor space is needed.
16. One-Sheet Lounge Chair
Design interlocking side profiles, a seat, and a backrest that can be cut from one plywood sheet. Rounded contours make the chair feel less boxy. Test the angles with a cardboard mock-up before committing expensive material to a seat that accidentally encourages perfect posture through suffering.
17. Layered Rocking Chair
Create curved rockers by laminating several matching plywood pieces. Connect the sides with a slatted or upholstered seat. Accurate templates are essential because mismatched curves can make the chair wobble, twist, or rock toward places nobody intended to visit.
18. Flat-Pack Guest Chair
Cut slotted panels that slide together without permanent hardware. The chair can be disassembled and stored flat when not required. Smooth every slot carefully and test the fit on scrap material before cutting the final pieces.
19. Upholstered Plywood Bench
Build a strong plywood base, then add high-density foam, batting, and upholstery fabric to the seat. The finished bench works in an entryway, dining nook, or bedroom. Hidden storage beneath a hinged top makes it even more useful.
20. Entryway Storage Bench
Combine shoe cubbies, a sturdy seat, and an open compartment for baskets. Reinforce the center so the top does not sag. Hooks or a matching plywood wall panel can transform the bench into a complete mudroom station.
21. Rolling Toy Box
Construct a low plywood chest with rounded hand openings and locking casters. Install a soft-close lid support if you include a hinged top. Bright paint, stencil patterns, or exposed birch grain can make the box playful without turning the room into a permanent cartoon explosion.
22. Platform Bed With Storage
Build a rigid plywood platform over a framework of drawer boxes or open cubbies. Divide the base into manageable modules so it can be moved through doorways. Check mattress ventilation requirements and make certain the structure cannot rack from side to side.
23. Floating Plywood Nightstand
A small wall-mounted box provides a surface for a lamp and phone while keeping the floor open. Add a drawer, open shelf, or charging port. Mount the nightstand into studs or a secure wall cleat rather than relying on hopeful optimism.
24. Upholstered Plywood Headboard
Cut a plywood panel to match the bed, soften the corners, and wrap it with foam, batting, and fabric. Decorative channels or individual padded sections create a tailored look. A French cleat makes installation straightforward and allows the headboard to be removed later.
25. Plywood Wardrobe
Construct a tall cabinet with adjustable shelves, hanging rails, and drawers. Build the carcass in smaller sections if ceiling height or narrow stairs make installation difficult. Sliding doors are practical where there is insufficient clearance for traditional swinging doors.
26. Rolling Kitchen Island
Build a plywood cabinet with drawers, open shelves, and heavy-duty locking casters. Protect the work surface with hardwood, stainless steel, tile, or an appropriate countertop material. A towel rail and removable serving tray can make the island even more versatile.
27. Record Player Console
Create a cabinet with a reinforced top for the turntable, open compartments for audio equipment, and vertical dividers for records. Leave sufficient ventilation around electronics. Adjustable feet help level the console so your favorite album does not sound as though it is being played aboard a fishing boat.
28. Plywood Pet Bed and Side Table
Build a cube-style side table with an open lower compartment sized for a washable pet cushion. Ventilation holes and rounded entrances improve comfort. The design gives your pet a cozy retreat while preserving the tabletop for human possessions they will eventually knock onto the floor.
How to Make DIY Plywood Furniture Look Professional
Use a Reliable Cutting Guide
A track saw is convenient, but a circular saw paired with a straightedge guide can also produce accurate cuts. Support the full sheet on rigid foam insulation so the material cannot shift or collapse while being cut.
Reduce Veneer Tear-Out
Use a sharp, fine-tooth blade intended for plywood. Position the best face according to the direction of the saw blade, make a shallow scoring pass when appropriate, and apply painter’s tape over delicate cut lines. Test the method on an offcut before attacking the centerpiece of your project.
Dry-Fit Before Applying Glue
Assemble the components without glue to confirm that joints fit, edges align, and the structure is square. Plywood thickness may differ slightly from its advertised measurement, so dados and grooves should be sized to the actual panel.
Sand Without Destroying the Veneer
Begin with a moderate grit and finish with a finer one, moving with the grain. The decorative face veneer may be thin, so aggressive sanding can expose the underlying layer. That unexpected bald patch is difficult to disguise as artistic intention.
Choose a Finish That Fits the Project
A water-based clear coat preserves the pale appearance of birch, while oil-based finishes generally add warmth. Paint can conceal lower-grade surfaces and filled edges. Apply the chosen finish to a scrap sample first because plywood veneers may absorb stain unevenly.
Hands-On Experiences and Lessons From Building Plywood Furniture
The most important lesson from working with plywood is that success begins before the saw is switched on. Large sheets look simple, but they become awkward the moment one corner catches on a workbench and the opposite edge attempts to escape through the garage door. Breaking a full sheet into manageable sections with a circular saw is usually safer and easier than wrestling it across a table saw alone.
A second lesson is to inspect every panel before buying it. Set the sheet on its long edge and look along the surface for bowing or twisting. Examine both faces for scratches, patches, and damaged veneer. Check the edges for internal gaps when they will remain exposed. Saving a few dollars on a poor sheet rarely feels economical after hours of filling voids and repairing splintered corners.
Cutting order also matters. Make the largest, most important pieces first, then use the remaining material for shelves, drawer fronts, braces, and smaller components. Label each part immediately. A collection of nearly identical rectangles becomes surprisingly mysterious after lunch, particularly when one of them is half an inch shorter for a perfectly sensible reason that you can no longer remember.
During assembly, square corners are more valuable than heroic quantities of screws. Measure both diagonals of a cabinet box; matching diagonal measurements indicate that the box is square. Clamp the assembly on a flat surface and correct it before the glue cures. A slightly crooked cabinet can create misaligned doors, stubborn drawers, and shelves that appear to be quietly leaving the room.
Visible edges deserve an early design decision. On high-quality multi-ply panels, a sanded and clear-coated edge can look excellent. Less refined plywood often benefits from hardwood edging or veneer tape. Apply edge treatments before final assembly whenever possible, especially on interior shelf edges that will later be difficult to reach.
Another useful experience is learning when not to overcomplicate the joinery. Dados provide excellent support for fixed shelves, but pocket holes and glue can be perfectly suitable for many painted cabinets and beginner projects. Decorative miters look elegant, yet they demand more precision than basic butt joints reinforced with cleats. The best joint is not necessarily the fanciest one; it is the joint you can cut accurately and repeat consistently.
Finishing rewards patience. Vacuum the surface, remove remaining dust with a clean cloth, and apply several thin coats rather than one heavy coat. Light sanding between coats can produce a much smoother result. Rushing this stage is tempting because the furniture already looks finished from across the room, but close inspection has a cruel sense of humor.
Finally, the most satisfying plywood furniture projects solve a specific problem. A floating desk can reclaim a narrow hallway. A storage bench can control a mountain of shoes. A custom media cabinet can hide cables that otherwise reproduce behind the television. Begin with the room’s dimensions and daily habits, then design the furniture around them. Custom fit is the advantage that makes DIY furniture worth the sawdust.
Final Thoughts
Plywood is more than a budget substitute for solid wood. Used thoughtfully, it becomes a strong, attractive, and highly adaptable furniture material. Its broad panels support minimalist forms, efficient storage, exposed layered edges, and compact designs that would be difficult or expensive to produce with traditional lumber.
Start with a modest project such as a floating nightstand, cube shelf, or side table. Once you are comfortable cutting panels square and finishing the edges, larger plywood furniture DIY projects become much less intimidating. Soon, an ordinary sheet in the lumber aisle will look less like construction material and more like a coffee table waiting for directions.














