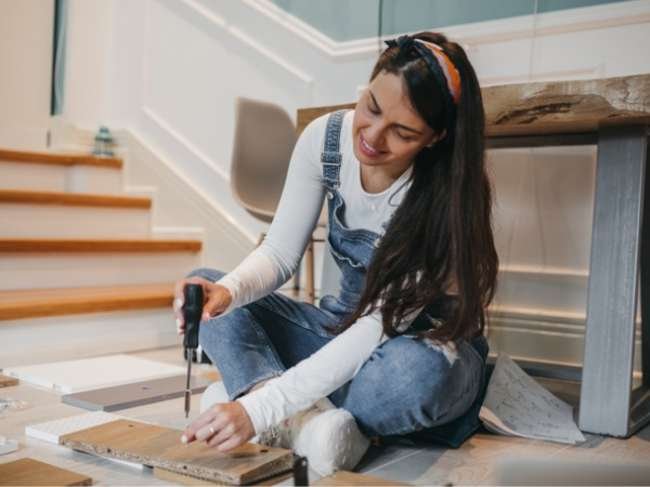
Shelves are the rare home project that can solve clutter, decorate a blank wall, and justify buying another power toolall before lunch. Better still, creative DIY shelving does not require custom-cabinet money. With a board, a few dependable fasteners, and a willingness to measure twice, you can turn awkward corners, forgotten doors, old crates, and even retired skateboards into hardworking storage.
The best DIY shelving ideas combine personality with purpose. A rope shelf can soften a bedroom, an industrial pipe unit can organize a kitchen, and a French-cleat wall can make a garage behave as though it finally attended finishing school. The 19 projects below range from beginner-friendly weekend upgrades to more ambitious built-ins, with practical notes on materials, placement, and load.
Before You Build: Make the Shelf Safe, Straight, and Useful
Start by deciding what the shelf must hold. Framed photos and a tiny succulent place far less stress on hardware than cookbooks, cast-iron pans, or paint cans. Locate wall studs whenever possible, choose anchors rated for the wall material and expected load, and follow the hardware manufacturer’s capacity limits. Long shelves may bow without center support, while deep shelves create more leverage against the wall.
Mark bracket positions with painter’s tape, check them with a level, and predrill where appropriate. In drywall, a shelf carrying substantial weight should ideally connect to studs or suitable heavy-duty anchors. Freestanding and tall shelving should also be secured against tipping. Creativity is wonderful; a midnight shelf avalanche is not.
Research note: This original guide synthesizes practical design and installation guidance from Bob Vila, This Old House, Family Handyman, The Home Depot, Lowe’s, HGTV, Better Homes & Gardens, Popular Mechanics, Apartment Therapy, Rockler, WOOD Magazine, House Beautiful, and Architectural Digest.
19 Creative DIY Shelving Ideas for Every Room
1. Chunky Floating Box Shelves
Build hollow rectangular boxes from plywood or straight lumber, then slide them over wall-mounted cleats. The thick profile looks expensive, hides the hardware, and works especially well beside a fireplace or television. Paint the boxes to match the wall for a quiet architectural look, or stain them dark for dramatic contrast. Cleats fastened into wall framing provide a more dependable base than hardware attached only to drywall.
2. Industrial Pipe-and-Plank Shelving
Threaded black steel pipe, flanges, elbows, and stained boards create shelving with a workshop-meets-loft personality. Use it in a kitchen for mugs and cookware, in an office for books, or in an entryway for baskets. Seal raw wood, degrease the pipe before assembly, and fasten wall flanges into solid framing whenever possible.
3. Hanging Rope Shelves
Drill matching holes near the corners of two or three boards, thread strong rope through them, and tie secure knots beneath each level. A ceiling hook or sturdy wall bracket supports the finished unit. Rope shelving is best for light décor, plants, and small toiletries because it can sway. Think charming display, not encyclopedia warehouse.
4. A Modular Pegboard Shelf Wall
Create an oversized pegboard from plywood, evenly spaced holes, and hardwood dowels. Move the dowels whenever your storage needs change, then rest small boards across them to form shelves. This flexible system is ideal above a desk, craft table, or nursery changing station. Precision matters: a drilling template keeps the grid from wandering downhill.
5. Repurposed Ladder Bookshelves
An old wooden ladder becomes instant vertical storage. Lean a single ladder securely against the wall and place boards across selected rungs, or open two matching stepladders and bridge them with long planks. Sand splinters, lock moving parts, and anchor the structure. The result offers rustic character without pretending every board was rescued from a picturesque barn.
6. Vintage Drawer Shadow Boxes
Salvaged drawers can become quirky wall cubbies. Remove damaged hardware, reinforce loose joints, line the interiors with wallpaper, and mount the drawers with their open sides facing forward. Mix sizes to create a gallery-wall effect. Shallow drawers suit keys and collectibles; deeper versions can hold folded towels or small baskets when properly supported.
7. Leather-Strap Shelves
Loop wide leather straps around a smooth board and fasten the straps to studs with sturdy screws and washers. The soft curves contrast beautifully with squared lumber, making this a strong choice for bedrooms and living rooms. Keep valuable breakables away from the edges, and select thick, structurally sound leather rather than a decorative strip with heroic ambitions.
8. Wraparound Corner Shelves
Turn a neglected corner into useful storage with two shelves that meet in an L shape. Hidden cleats create a floating appearance, while visible brackets can add farmhouse or industrial style. Use corner shelves for spices, plants, or a compact home-office library. Make a cardboard template first because few corners are as perfectly square as they claim.
9. Slim Picture-Ledge Shelves
A picture ledge uses a narrow base, a back rail, and a small front lip to keep frames from sliding. Build several long ledges and rotate artwork seasonally without adding new nail holes. They also work for children’s books, record sleeves, cookbooks, and tablets. Keep the depth modest so the display feels airy rather than like a tiny loading dock.
10. Stacked Wooden Crate Shelving
Sand unfinished crates, paint or stain them, and arrange them in a staggered grid. Screw neighboring crates together and anchor the full assembly to the wall. Alternate vertical and horizontal orientations to accommodate books, shoes, baskets, and décor. Matching finishes create order; mixed colors produce a cheerful, collected-over-time look that forgives beginner joinery.
11. Skateboard Deck Shelves
Retired skateboard decks already have personality, finished edges, and predrilled truck holes. Mount them on metal brackets or suspend them with threaded rod for a playful bedroom, game room, or studio display. Use decks in good condition, remove sharp hardware, and reserve them for light objects. Your shelf should celebrate gravity, not test it.
12. Scrap-Wood Mosaic Shelves
Combine leftover boards in different widths, species, and stains to build a staggered shelving composition. Mount short shelves at varying heights, leaving deliberate negative space between them. This is an excellent way to use cutoffs while creating a custom focal wall. Repeat one elementsuch as bracket color or board thicknessto keep the arrangement visually connected.
13. Copper-Pipe Kitchen Shelves
Copper pipe supports add warmth and shine to simple wood shelves. Use fittings to create upright frames, rails, or under-shelf mug bars. The material looks especially attractive beside white tile, green cabinetry, or natural oak. Polish it for a bright finish or let it develop patina. Avoid placing unsealed wood directly beside a wet sink zone.
14. Recessed Between-Stud Shelving
When wall construction allows, a recessed niche can add storage without consuming floor area. After confirming there are no pipes, ducts, or electrical lines in the cavity, frame a shallow box between studs and finish it with trim. This project suits bathrooms, hallways, and spice storage, but wall investigation is mandatory. Surprises belong in birthday gifts, not demolition.
15. A French-Cleat Display System
A French cleat uses two matching beveled strips: one fastened to the wall and the other attached to the shelf or cabinet. The pieces lock together under gravity, allowing components to be moved or replaced. Build a full cleat wall for tools, art supplies, or modular display boxes. It is adaptable, strong, and wonderfully satisfying to rearrange.
16. Over-the-Door Perimeter Shelving
The wall above a doorway is usually wasted. Install a sturdy shelf across the opening, or continue shelving around the room near ceiling height for books and seldom-used objects. This approach frees lower wall space and creates a library-like effect. Store lighter items overhead and keep everything behind a retaining lip in earthquake-prone areas.
17. A Plant Shelf With a Protective Rail
Build a sunny window shelf with a raised front edge, dowel rail, or shallow tray to help contain pots. Use moisture-resistant finish and removable saucers, and leave enough space for leaves to grow without pressing against glass. A narrow multi-level design can turn one bright wall into a small indoor garden without surrendering every horizontal surface.
18. Faux Built-Ins From Ready-Made Bookcases
Place inexpensive bookcases side by side, secure them to one another and the wall, then add baseboards, face trim, filler strips, and crown molding. Paint everything one color so the separate units read as custom millwork. This project delivers major visual impact with fewer advanced cuts than true built-ins, although careful leveling determines whether the illusion succeeds.
19. Rolling Workshop Shelves
Build a plywood-and-2-by-4 shelving cart on locking casters for tools, bins, paint, or gardening supplies. Add a pegboard side, labeled cubbies, and a work surface on top. Rolling storage lets you clean behind the unit and bring supplies to the project. Use casters rated for the expected total weight, not merely for optimistic weekend energy.
How to Choose the Right DIY Shelf
Match the design to the room rather than choosing only by appearance. Bathrooms need moisture-resistant materials and finishes. Kitchens benefit from washable surfaces and shelf depths suited to dishes or pantry containers. Children’s rooms call for rounded edges, tip restraint, and reachable storage. Garages demand stout framing, generous brackets, and clear load ratings.
Also consider maintenance. Open shelving displays everything, including dust and the mug you meant to wash yesterday. If you prefer visual calm, combine open shelves with matching bins or closed boxes. For rentals, use existing studs where permitted, keep holes limited, and choose modular units that can move to the next home.
The Real DIY Shelving Experience: Lessons From the Workshop
A realistic shelving project rarely begins with a dramatic burst of sawdust. It begins with moving a lamp, discovering the wall is not straight, and realizing the “quick measurement” taken three days earlier was suspiciously optimistic. The most successful builders slow down during layout. They tape shelf outlines on the wall, place the objects nearby, and check whether doors, switches, vents, and heads will collide with the new design.
Material selection is the next surprise. A board that looks straight in the store may resemble a ski slope at home. Sight down every board before buying it, reject twisted pieces, and let lumber acclimate indoors before final cutting when possible. Plywood often offers better dimensional stability for box shelves and built-ins, while solid wood provides attractive edges and can be easier to finish naturally. MDF paints smoothly but is heavy and reacts poorly to moisture.
Finishing before installation usually saves frustration. Sand through appropriate grits, soften sharp edges slightly, remove dust, and apply paint or stain on a protected work surface. It is much easier to coat the underside of a shelf on sawhorses than while crouching beneath it with paint slowly migrating toward your elbow. Allow finishes to cure, not merely feel dry, before stacking books or baskets on top.
Installation exposes the difference between “looks level” and “is level.” Floors, ceilings, and adjacent cabinets may all be slightly out of square, so trust the level for the shelf and use visual judgment for the overall composition. When several shelves form a group, a laser level or long level helps align the first reference line. Install the strongest fastener first, recheck, and only then complete the remaining holes.
Loading the shelf should be gradual. Place a few items, observe any movement, and distribute weight near supports rather than concentrating it in the center of a long span. Heavy books are deceptively demanding; a shelf full of novels weighs much more than a shelf styled with three vases and a fern. If a board begins to sag, add a center bracket, reinforce the front edge, or shorten the unsupported span instead of hoping the wood develops confidence.
The most satisfying DIY shelving projects also leave room for change. Adjustable standards, pegboards, French cleats, crates, and movable dividers adapt as hobbies and households evolve. A shelf built for toys may later hold textbooks; a kitchen ledge may become a coffee bar. Designing for flexibility turns a weekend project into a long-term storage system rather than a beautiful obstacle.
Finally, perfection is not required. Small gaps can be caulked, nail holes can be filled, and an imperfect stain can become “rustic” with remarkable speed. What matters is that the shelf is secure, useful, and suited to the space. Measure patiently, mount responsibly, and let the creative details carry the personality.