
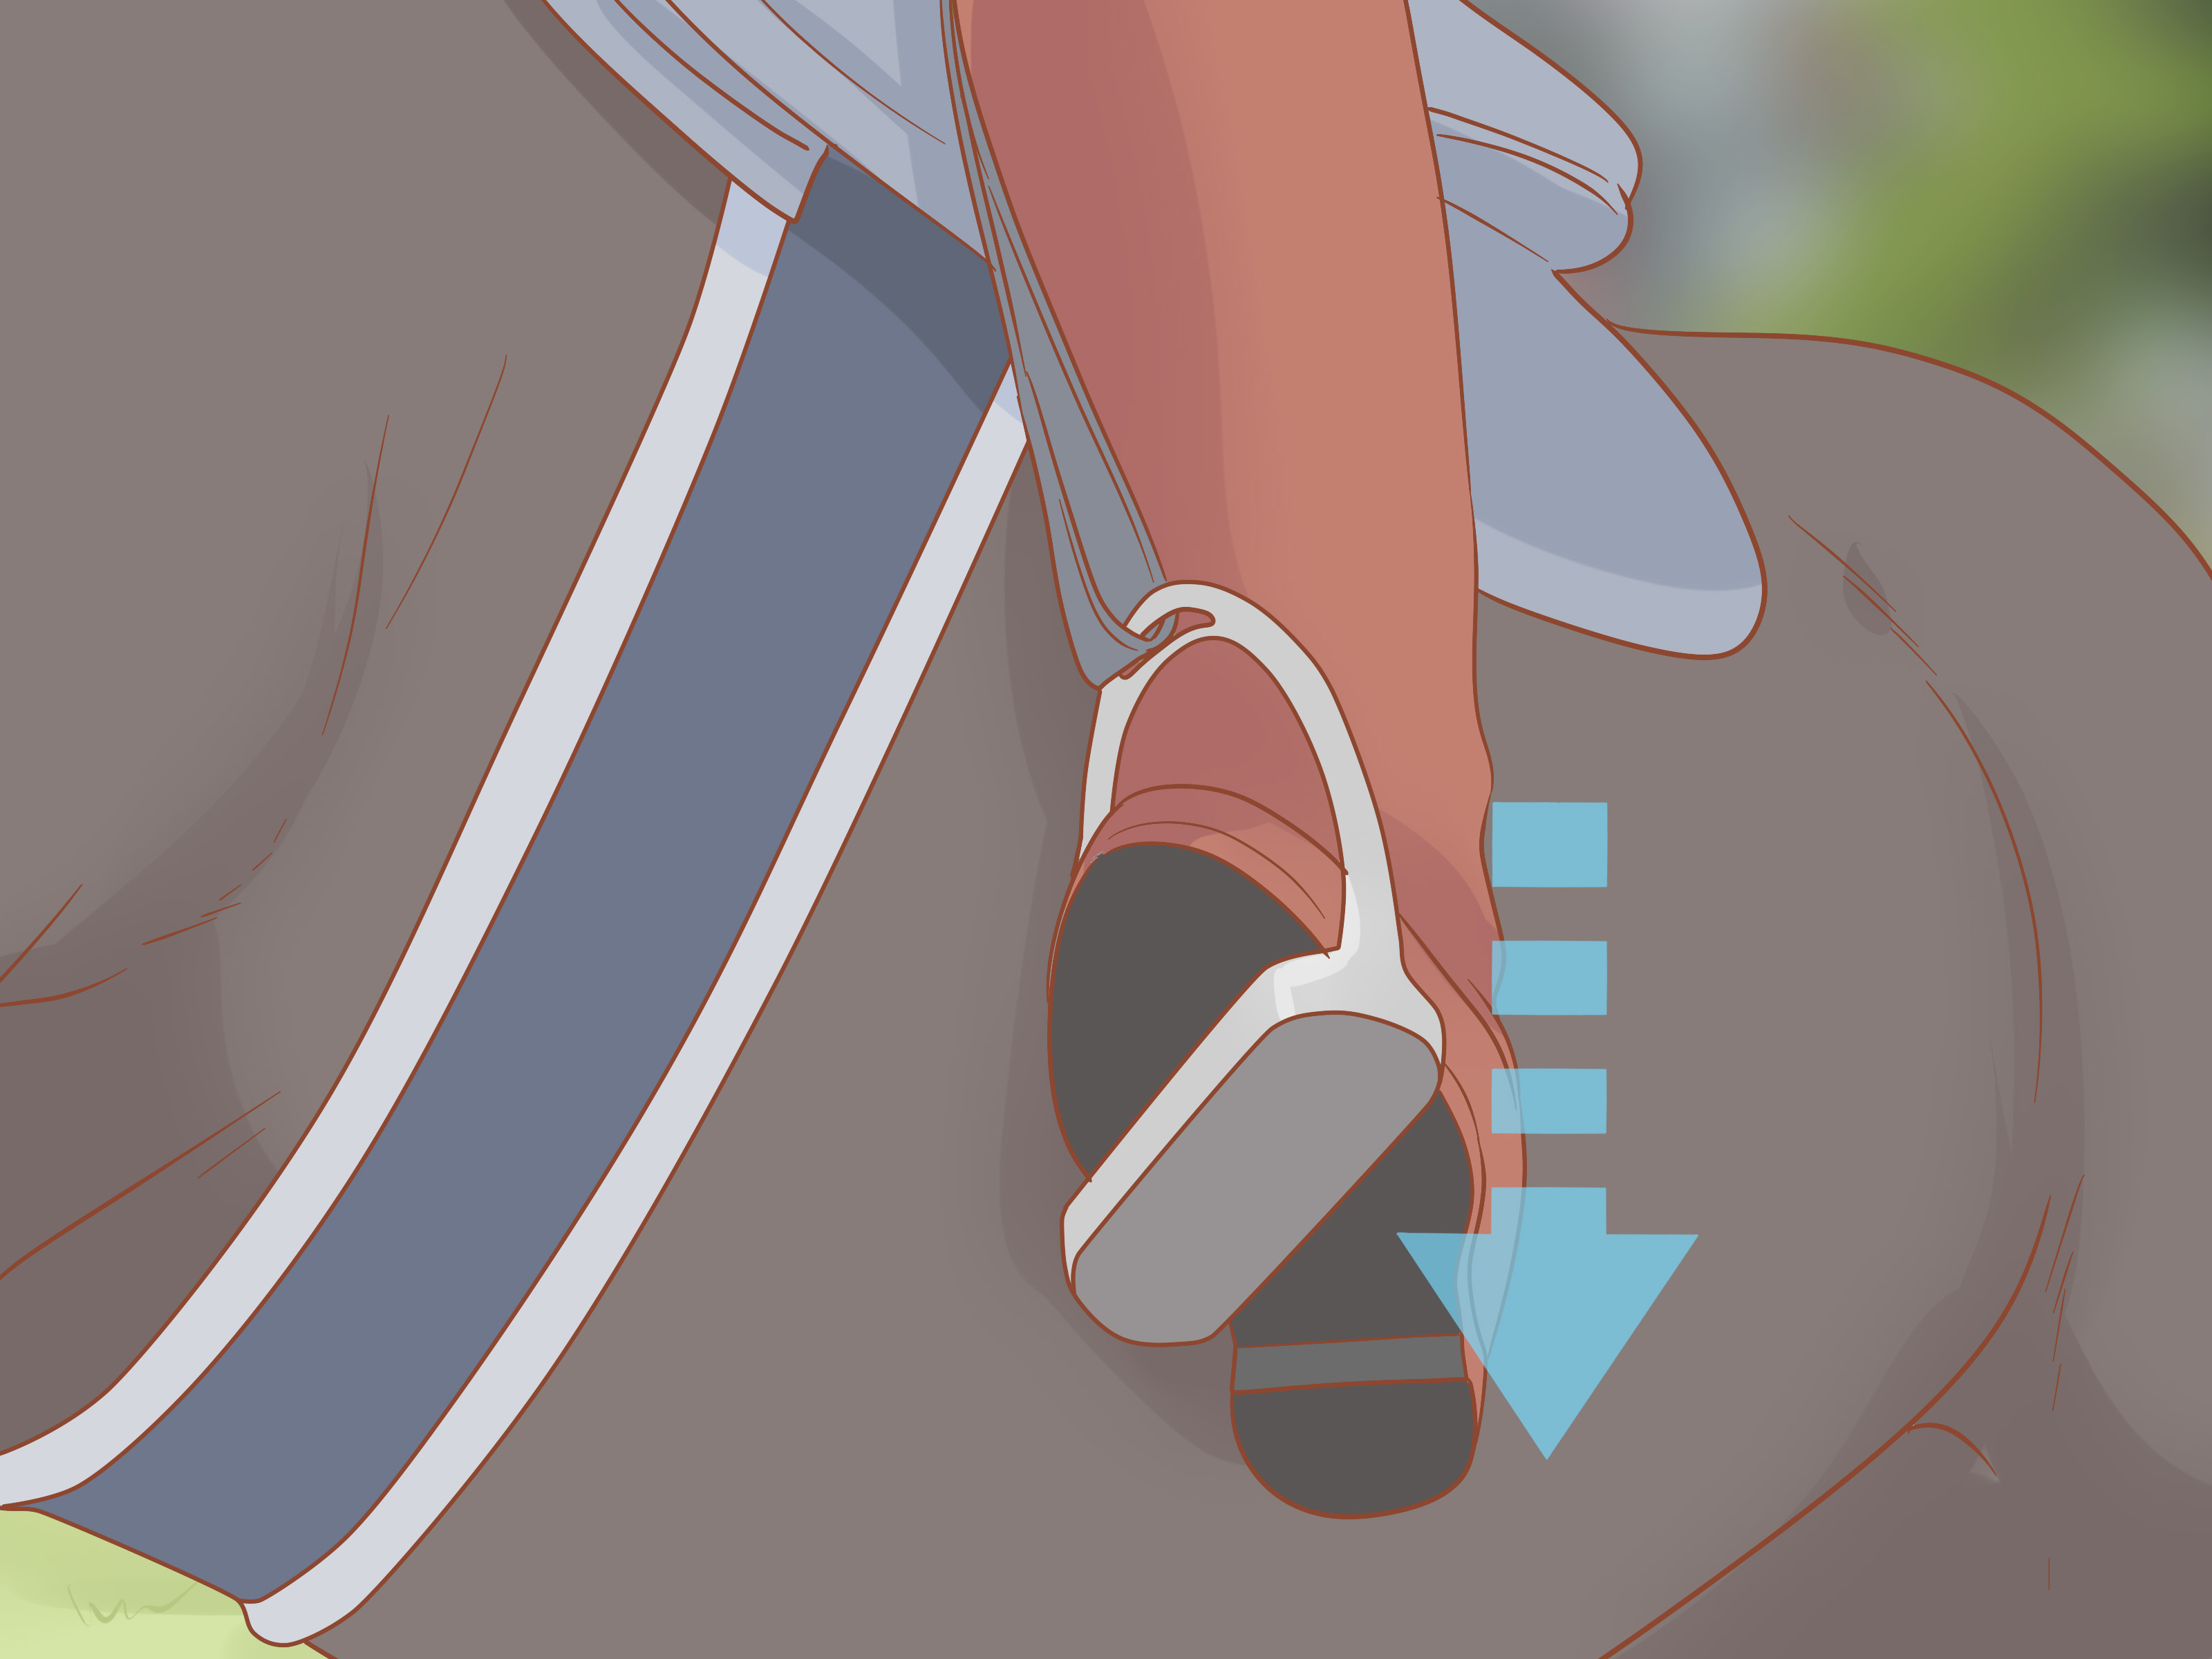
Good riding is not a wrestling match with a thousand-pound animal. Thankfully. If steering a horse were all about arm strength, every riding lesson would come with a gym membership and a warning label for your biceps. In reality, the best riders control and steer a horse using quiet, organized signals from the seat, legs, balance, and only then the hands.
Your reins matter, of course. They are part of the conversation. But your seat and legs are the grammar. They tell the horse where your weight is, how much energy you want, whether you are asking for a turn, a transition, a bend, or a polite “please stop drifting toward the snack bucket.” When your seat and leg aids become clear, your horse can respond with less confusion, less tension, and far less tug-of-war.
This guide explains four practical ways to control and steer a horse using your seat and legs. It is written for riders who want better communication, smoother turns, steadier rhythm, and a safer ride. Whether you ride English, Western, trail, dressage, hunter, or simply enjoy lessons at the barn, the principles are the same: balance first, pressure second, release immediately, and never let your hands do a job your body should be doing.
Important note: Horseback riding has real risks. Practice these skills with a qualified instructor, on a suitable horse, in a safe riding area, while wearing a properly fitted equestrian helmet and appropriate boots. Online advice is helpful, but it should not replace hands-on coaching.
Why Seat and Leg Aids Matter More Than Pulling the Reins
A horse feels tiny changes. A shift of your hip, a squeeze of your calf, a tightening of your thigh, or a crooked shoulder can all say something. The problem is that riders sometimes “say” five things at once without realizing it. Your hand says turn right. Your body leans left. Your outside leg floats away. Your eyes stare at the ground like it owes you money. The horse, being reasonable, chooses confusion.
Seat and leg aids give the horse information before the rein has to step in. Your seat influences rhythm, balance, speed, and direction. Your legs create forward motion, shape the horse’s body, prevent drifting, and support turns. Your hands should refine the message, not shout it.
Think of riding aids as a simple system:
- Seat: controls balance, rhythm, and weight direction.
- Legs: create energy, shape the horse’s body, and guide sideways or forward movement.
- Hands: receive and refine the energy, helping with direction and softness.
- Eyes and upper body: aim your balance toward the path you want.
The best steering usually feels boring from the outside. There is no dramatic yanking, no flapping, no “please turn, my beloved sofa with legs” panic. Instead, the rider looks where they are going, aligns their body, supports with the inside leg, guards with the outside leg, and uses the reins lightly to frame the turn.
1. Control Direction With a Balanced Seat
Your seat is the foundation of horse control. Before you can steer with your legs, your body has to be balanced enough that your legs are not busy holding you on. A rider gripping with the knees or leaning forward often loses the ability to give clear leg aids. The horse feels tension, uneven weight, and mixed signals.
Start With Correct Rider Alignment
A balanced riding position generally places your ear, shoulder, hip, and heel in a vertical line. Your heels should be gently down, your lower back relaxed, your core engaged but not stiff, and your seat centered in the saddle. You are not sitting like a sack of potatoes. You are also not sitting like a wooden fence post. You want relaxed strength.
A good test is this: if the horse quietly disappeared from under you for one second, would you land on your feet or fall on your face? Please do not test this literally. The idea is that your balance should be independent. You should not depend on the reins, the horse’s mouth, or a death grip with your thighs to stay in place.
Use Your Seat Bones Like Steering Sensors
Your seat bones help communicate weight and direction. To turn, you do not throw your body to one side. Leaning heavily inward can unbalance the horse and make the turn worse. Instead, keep your torso tall and allow a subtle increase of awareness into the direction of travel.
For example, when turning right:
- Look right with your eyes first.
- Turn your shoulders slightly in the direction of the turn.
- Allow your hips to follow the horse’s bend.
- Stay centered, with slightly more intention through the right seat bone.
- Do not collapse your right hip or lean like a motorcycle rider.
This is where many beginners accidentally overdo it. They hear “use your seat,” then shift their whole body sideways like they are trying to move furniture. The horse does not need a furniture-moving demonstration. The horse needs a quiet change in balance.
Example: Riding a Simple Corner
Imagine you are walking along the arena rail and approaching a corner. Instead of pulling the inside rein and hoping for the best, prepare early. Look through the corner. Sit tall. Keep both seat bones connected. Use your inside leg at the girth to ask the horse to bend around it. Keep your outside leg slightly behind the girth to prevent the hindquarters from swinging out. Your outside rein supports the shoulder so the horse does not fall through the turn.
The result is a smoother corner. The horse turns because your whole body is organized, not because your hand suddenly declared an emergency.
2. Use Both Legs to Create Forward Energy and Rhythm
Before you can steer well, your horse must move forward willingly. Forward does not mean fast. It means responsive, energetic, and mentally available. A horse that is behind your leg may ignore turning aids, drift through corners, or feel like steering a shopping cart with one broken wheel.
Both legs together usually ask the horse to go forward, maintain the gait, or increase energy. The key is timing. A clear leg aid should be applied, understood, and then softened. If you squeeze constantly, your horse may learn to tune it out. That is how riders accidentally create horses with “selective calf hearing.”
The Ask-Then-Release Rule
Good leg aids follow a simple pattern:
- Ask lightly with both calves.
- If the horse responds, soften immediately.
- If the horse does not respond, repeat more clearly.
- Reward the try by returning to a quiet leg.
The release is not optional. It is the part that teaches the horse which answer was correct. If the horse moves forward and your leg keeps nagging, the horse has no reward. Imagine someone rings your doorbell, you open the door, and they continue ringing it while standing in your kitchen. Annoying, right? Horses agree.
Use Your Seat to Follow the Motion
Your seat should follow the horse’s movement. At the walk, your hips move gently with the horse’s back. At the trot, your seat either posts with rhythm or sits softly depending on the exercise. At the canter, your hips follow a rolling motion. When your seat locks, the horse often shortens stride, hollows the back, or becomes tense.
If your goal is to go from walk to trot, prepare with your seat first. Sit tall. Breathe. Close both calves. Allow the horse forward. Do not throw your upper body ahead like you are late for a bus. Your balance should invite the transition, not chase it.
Example: Fixing a Lazy Walk
Suppose your horse is walking like every step requires a committee meeting. First, check yourself. Are you gripping? Are your reins too tight? Are you blocking with your seat? Then apply both calves evenly. If the horse marches forward, soften and follow the walk. If nothing changes, ask again more clearly, then release as soon as the horse steps forward with more purpose.
Do not kick every stride. That only teaches the horse that your leg is background noise. A good rider’s leg is meaningful, not musical percussion.
3. Steer With Inside Leg, Outside Leg, and Body Direction
One of the most useful riding concepts is that your horse should move between your aids. Your inside leg creates bend and forward energy. Your outside leg prevents the hindquarters from drifting. Your outside rein helps guide the shoulder. Your seat and eyes aim the whole package.
When riders rely only on the inside rein, they often pull the horse’s neck around while the body keeps traveling in the original direction. This is how you get the classic beginner turn: head to the right, body to the left, rider wondering why physics has betrayed them.
What the Inside Leg Does
The inside leg usually stays at or near the girth. Its job is to ask the horse to bend through the body and keep stepping forward. On a circle, your inside leg tells the horse, “Shape around this bend, but keep moving.”
For a right turn, your right leg is the inside leg. It should not clamp or shove constantly. It should support the bend. If the horse falls inward, your inside leg says, “Stay out on the circle.” If the horse loses energy, your inside leg says, “Keep stepping.”
What the Outside Leg Does
The outside leg often sits slightly behind the girth. Its job is to guard the hindquarters and keep the horse from swinging outward. In a right turn, your left leg is the outside leg. If your outside leg floats away, the horse may drift, bulge, or make the circle gradually resemble an eggplant.
Your outside leg does not need to be dramatic. It should be quietly present, like a helpful fence. The horse should feel that there is a boundary on the outside of the turn.
Use Your Eyes Like a Steering Wheel
Your eyes are not technically a riding aid, but they might as well be. Where you look changes your shoulders, hips, balance, and timing. If you stare down at the horse’s mane, your body curls forward. If you stare at the fence, your horse may assume that is where the team is going. Look through the turn, not at the ground.
A practical arena exercise is to ride a large circle and choose four points: top, bottom, left, and right. As you approach each point, look ahead to the next one. Keep your inside leg at the girth, outside leg guarding, and seat centered. This teaches your body to plan the line instead of reacting too late.
Example: Steering a Circle Without Overusing the Reins
Start at the walk on a 20-meter circle. Hold light rein contact. Look around the circle. Use your inside leg at the girth to maintain bend. Keep your outside leg slightly behind the girth. If the horse drifts inward, add inside leg. If the hindquarters swing out, close the outside leg. If the shoulder bulges out, support with the outside rein.
Your goal is not to remove the reins completely. Your goal is to stop using them as the main steering device. The reins are the punctuation. Your seat and legs write the sentence.
4. Control Speed, Halts, and Sideways Movement With Seat and Legs
Steering is not only about turning left and right. Real control includes transitions, halts, half-halts, straightness, and lateral movement. Your seat and legs are essential for all of these.
Use Your Seat to Slow Down Without Pulling
To slow a horse, many riders instinctively pull back. Sometimes that works in the least elegant way possible. But pulling alone can make a horse brace, raise the head, hollow the back, or lean on the bit. A better approach starts with your seat.
To ask for a downward transition, sit tall, breathe out, deepen your seat slightly, and close your core as though you are resisting motion through your body. Keep your legs softly present so the horse stays straight and active behind. Then close your fingers briefly on the reins if needed. As soon as the horse responds, soften.
This is especially important because slowing down should not mean falling apart. A walk-to-halt transition should feel like the horse steps into balance, not like the front end hit a stop sign while the back end kept scrolling social media.
Half-Halt: The Tiny Reset Button
A half-halt is a brief rebalancing aid. It says, “Pay attention, shift your balance, and get ready.” It is useful before corners, transitions, circles, jumps, changes of direction, or anytime the horse starts to rush or lean.
A simple half-halt includes:
- A taller upper body.
- A momentary engagement of the core.
- Steady legs to keep energy active.
- A brief closing of the fingers on the reins.
- An immediate softening when the horse rebalances.
The half-halt should be quick and clear. It is not a long pull. It is not a debate. It is more like tapping the brakes before a turn, except the brakes are your whole body and the vehicle has opinions.
Use Legs for Lateral Control
Sideways movement teaches the horse to move away from leg pressure. This improves steering because the horse learns that your leg can mean more than “go faster.” It can mean “move your ribcage,” “keep your shoulder here,” “do not drift,” or “step sideways while staying forward.”
A basic leg yield is a good example. In a leg yield, the horse moves forward and sideways away from the rider’s leg while remaining fairly straight or slightly flexed away from the direction of travel. This can help correct drifting, improve responsiveness, and make the horse more adjustable.
Example: Correcting a Horse That Drifts Right
If your horse drifts right on a straight line, do not simply pull left. Instead, ride forward between both legs. Close your right leg to block the drift. Keep your left rein steady enough to guide the shoulders, but avoid dragging the horse left. Keep your seat centered and your eyes on the destination. When the horse straightens, soften your right leg.
This teaches the horse that your leg creates a boundary. Over time, the horse becomes easier to keep straight because your aids are consistent.
Common Mistakes When Steering With Seat and Legs
Leaning Instead of Weighting
Subtle weight aids are helpful. Leaning is not. Leaning inward can make the horse fall into the turn. Leaning backward can block forward motion. Leaning forward can put weight on the horse’s forehand. Stay tall, centered, and elastic.
Kicking Instead of Applying a Clear Aid
Repeated kicking teaches dullness. Use a light aid first, then a clearer aid if needed, then release. The release is what makes the horse sharper and more willing.
Pulling the Inside Rein Too Much
Overusing the inside rein bends the neck but does not control the body. It can also cause the horse to fall through the outside shoulder. Use inside leg to outside rein for a more balanced turn.
Forgetting the Outside Leg
The outside leg is the quiet hero of steering. Without it, the hindquarters can escape. If your circles become strange shapes, check whether your outside leg is actually doing its job.
Giving Conflicting Signals
If your leg says go, your hand says stop, and your seat says “I am nervous and possibly made of concrete,” the horse receives mixed instructions. Clear aids come from a coordinated body.
Practical Exercises to Improve Seat and Leg Control
Exercise 1: Walk-Halt-Walk Transitions
Ride at a relaxed walk. Sit tall, breathe out, deepen your seat, and ask for halt. Keep both legs softly on so the horse stays straight. Halt for three seconds. Then close both calves and walk forward. Repeat several times. Focus on smoothness, not speed.
Exercise 2: Large Circles With Minimal Rein
Ride a 20-meter circle at the walk or trot. Use your eyes, seat, inside leg, and outside leg to shape the circle. Use the reins lightly only to support. If the horse drifts, correct with your legs before reaching for more hand.
Exercise 3: Serpentines
Serpentines are excellent for changing bend. Ride three loops across the arena. Each time you change direction, change your inside leg and outside leg. Keep your body turning with the new line. This exercise reveals whether your steering comes from your whole body or just your hands.
Exercise 4: Leg Yield From the Quarter Line
At the walk, ride down the quarter line. Ask the horse to move gradually toward the rail while continuing forward. Keep your seat centered and your rhythm steady. Use the inside leg to ask for sideways movement and the outside aids to keep the horse organized. Start with just a few steps.
How to Know Your Seat and Leg Aids Are Working
You will know your aids are improving when your horse responds to lighter signals. Turns become rounder. Transitions become smoother. Your hands feel quieter. Your horse stays straighter. You feel less like you are managing a live weather event and more like you are having a conversation.
Signs of progress include:
- The horse moves forward from a light calf aid.
- The horse turns without heavy rein pressure.
- You can ride circles that look like circles, not potatoes.
- Your downward transitions feel balanced rather than abrupt.
- Your horse stays calmer because your signals are clearer.
- You feel more secure in the saddle without gripping.
Progress may be slow at first. That is normal. Horses and riders both need repetition. The goal is not perfection in one ride. The goal is clearer communication over time.
Experience Section: What Riding With Seat and Legs Feels Like in Real Life
The first time a rider truly feels a horse respond to the seat and legs, it can feel almost suspiciously magical. Not movie magic, where the horse gallops across a beach at sunset while everyone’s hair behaves beautifully. Real barn magic is quieter. It happens when you look through a corner, close your outside leg, support with the inside leg, and the horse simply turns as if the idea belonged to both of you.
Many riders start by steering mainly with the reins because reins are visible. You can see them. You can hold them. They feel like the obvious steering wheel. Seat and leg aids are less obvious, especially at the beginning. A new rider may hear an instructor say, “Use more inside leg,” and think, “Great, but my inside leg is currently busy panicking.” That is completely normal. Independent aids take time.
One common experience is discovering that the horse is not ignoring you; the horse is answering exactly what your body is saying. For example, a rider may try to turn left while looking right at a friend outside the arena. The horse drifts right. The rider blames the horse. The horse, if it could speak, would politely say, “You aimed your entire upper body at the gate, friend.” Once the rider looks left, centers the seat, and supports with the outside leg, the turn suddenly improves.
Another memorable lesson comes from transitions. Riders often think “go” means kicking and “stop” means pulling. But a smoother ride begins when the seat becomes part of the aid. To walk forward, the rider softens the hips and allows motion. To halt, the rider grows taller, breathes out, and quietly closes the body. The reins may still help, but they are no longer the emergency brake. The horse begins to halt straighter because the rider is not pulling the front end away from the hind end.
Riding with seat and legs also changes confidence. A rider who depends on the reins may feel nervous whenever the horse speeds up or drifts. A rider with better body control has more tools. Instead of reacting with tension, the rider can half-halt, close the outside leg, rebalance the seat, and ride forward into a better rhythm. That does not make riding risk-free, but it does make the rider more organized.
There is also a humbling side. Horses are excellent mirrors. If your left hip collapses, your horse may fall left. If your right leg swings back accidentally, your horse may think you asked the haunches to move. If you grip with both knees, your lower leg may lose contact and your horse may slow down. The horse is not being dramatic. The horse is reading the memo you did not know you sent.
Over time, the best experiences come from softness. You use less effort and get better results. A circle becomes round because your body planned it early. A trot transition happens from a quiet squeeze instead of a kick. A halt feels square and calm. The horse’s ears flick back, listening. Your hands relax. Your legs become clearer. Your seat becomes deeper without becoming heavy.
That is the real reward of learning to control and steer a horse with your seat and legs. You stop feeling like a passenger with reins and start becoming a rider with feel. The horse becomes less of a mystery and more of a partner. And yes, there will still be crooked circles, lazy transitions, and the occasional horse who believes the arena gate has a magnetic field. But with practice, patience, and good instruction, your aids become quieter, your horse becomes more responsive, and your rides become a lot more enjoyable.
Conclusion
Learning to control and steer a horse using your seat and legs is one of the most important steps toward becoming a balanced, effective rider. Reins are useful, but they should not be your only steering system. Your seat controls rhythm and balance. Your legs create forward energy, shape the horse’s body, and prevent drifting. Your eyes and posture aim the ride before the reins need to correct anything.
The four core skills are simple to understand but take time to master: build a balanced seat, use both legs for forward rhythm, steer with inside and outside aids, and control transitions with your seat and legs instead of relying on your hands. Practice them slowly, reward small improvements, and work with a knowledgeable instructor who can see what your body is doing in real time.
When your aids become clear, your horse does not have to guess. That is when riding becomes smoother, safer, and far more fun. And honestly, anything that reduces rein-pulling, leg-flapping, and confused arena geometry deserves a place in every rider’s toolbox.











