
Bathtub decals are like that one party guest who refuses to leave: they show up uninvited, hang around for years,
and when you finally try to remove them… they bring friends (hello, sticky residue). Whether you’re staring down
old non-slip stickers, faded cartoon fish, or mystery decals left behind by a previous tenant with questionable taste,
the goal is the same: get them off without scratching, clouding, or chemically bullying your tub.
This guide walks you through four proven, tub-friendly ways to remove bathtub decalsfrom gentle heat
to steam to adhesive removersplus the cleanup steps that keep your tub glossy instead of “oops, matte.”
You’ll also find real-world scenarios at the end (because decals never fail in exactly the same way twice).
Before You Start: Know Your Tub (So You Don’t Accidentally Ruin It)
“Bathtub” can mean a few different materials, and what’s safe for one can be a disaster for another.
Take 60 seconds to identify what you’re working with:
Porcelain / enameled cast iron or steel
- Feels hard and glassy.
- Usually tolerates more scraping (carefully) and more product options.
- Still: avoid metal tools unless you’re skilled and patient.
Acrylic / fiberglass
- Warmer to the touch, slightly “softer” feel.
- Scratches and hazes more easily.
- Needs gentler tools and more caution with chemicals and abrasives.
Universal “don’t regret this later” rules
- Ventilate if using any remover (open windows, run the fan).
- Test first in a hidden spot (behind the shower curtain line works great).
- Start gentle, then level up. Decal removal is a ladder, not a leap.
- Avoid steel wool and aggressive scouring pads unless you enjoy the “permanent scratch art” aesthetic.
Method 1: Heat + Slow Peel (Hair Dryer or Low-Temp Heat Gun)
If there’s a “default” method for removing decals, it’s heat. Warmth softens the adhesive so the decal
lifts instead of shredding into a thousand sad confetti bits.
Best for
- Most decals on porcelain, enamel, fiberglass, and acrylic (with reasonable heat).
- Thicker vinyl decals and non-slip stickers that still have some flexibility.
You’ll need
- Hair dryer (simplest) or a heat gun on low
- Plastic scraper, old gift card, or nylon putty knife
- Microfiber cloth
- Dish soap + warm water
Step-by-step
- Clean the area quickly with warm soapy water and dry it. Oils and soap scum fight your progress.
-
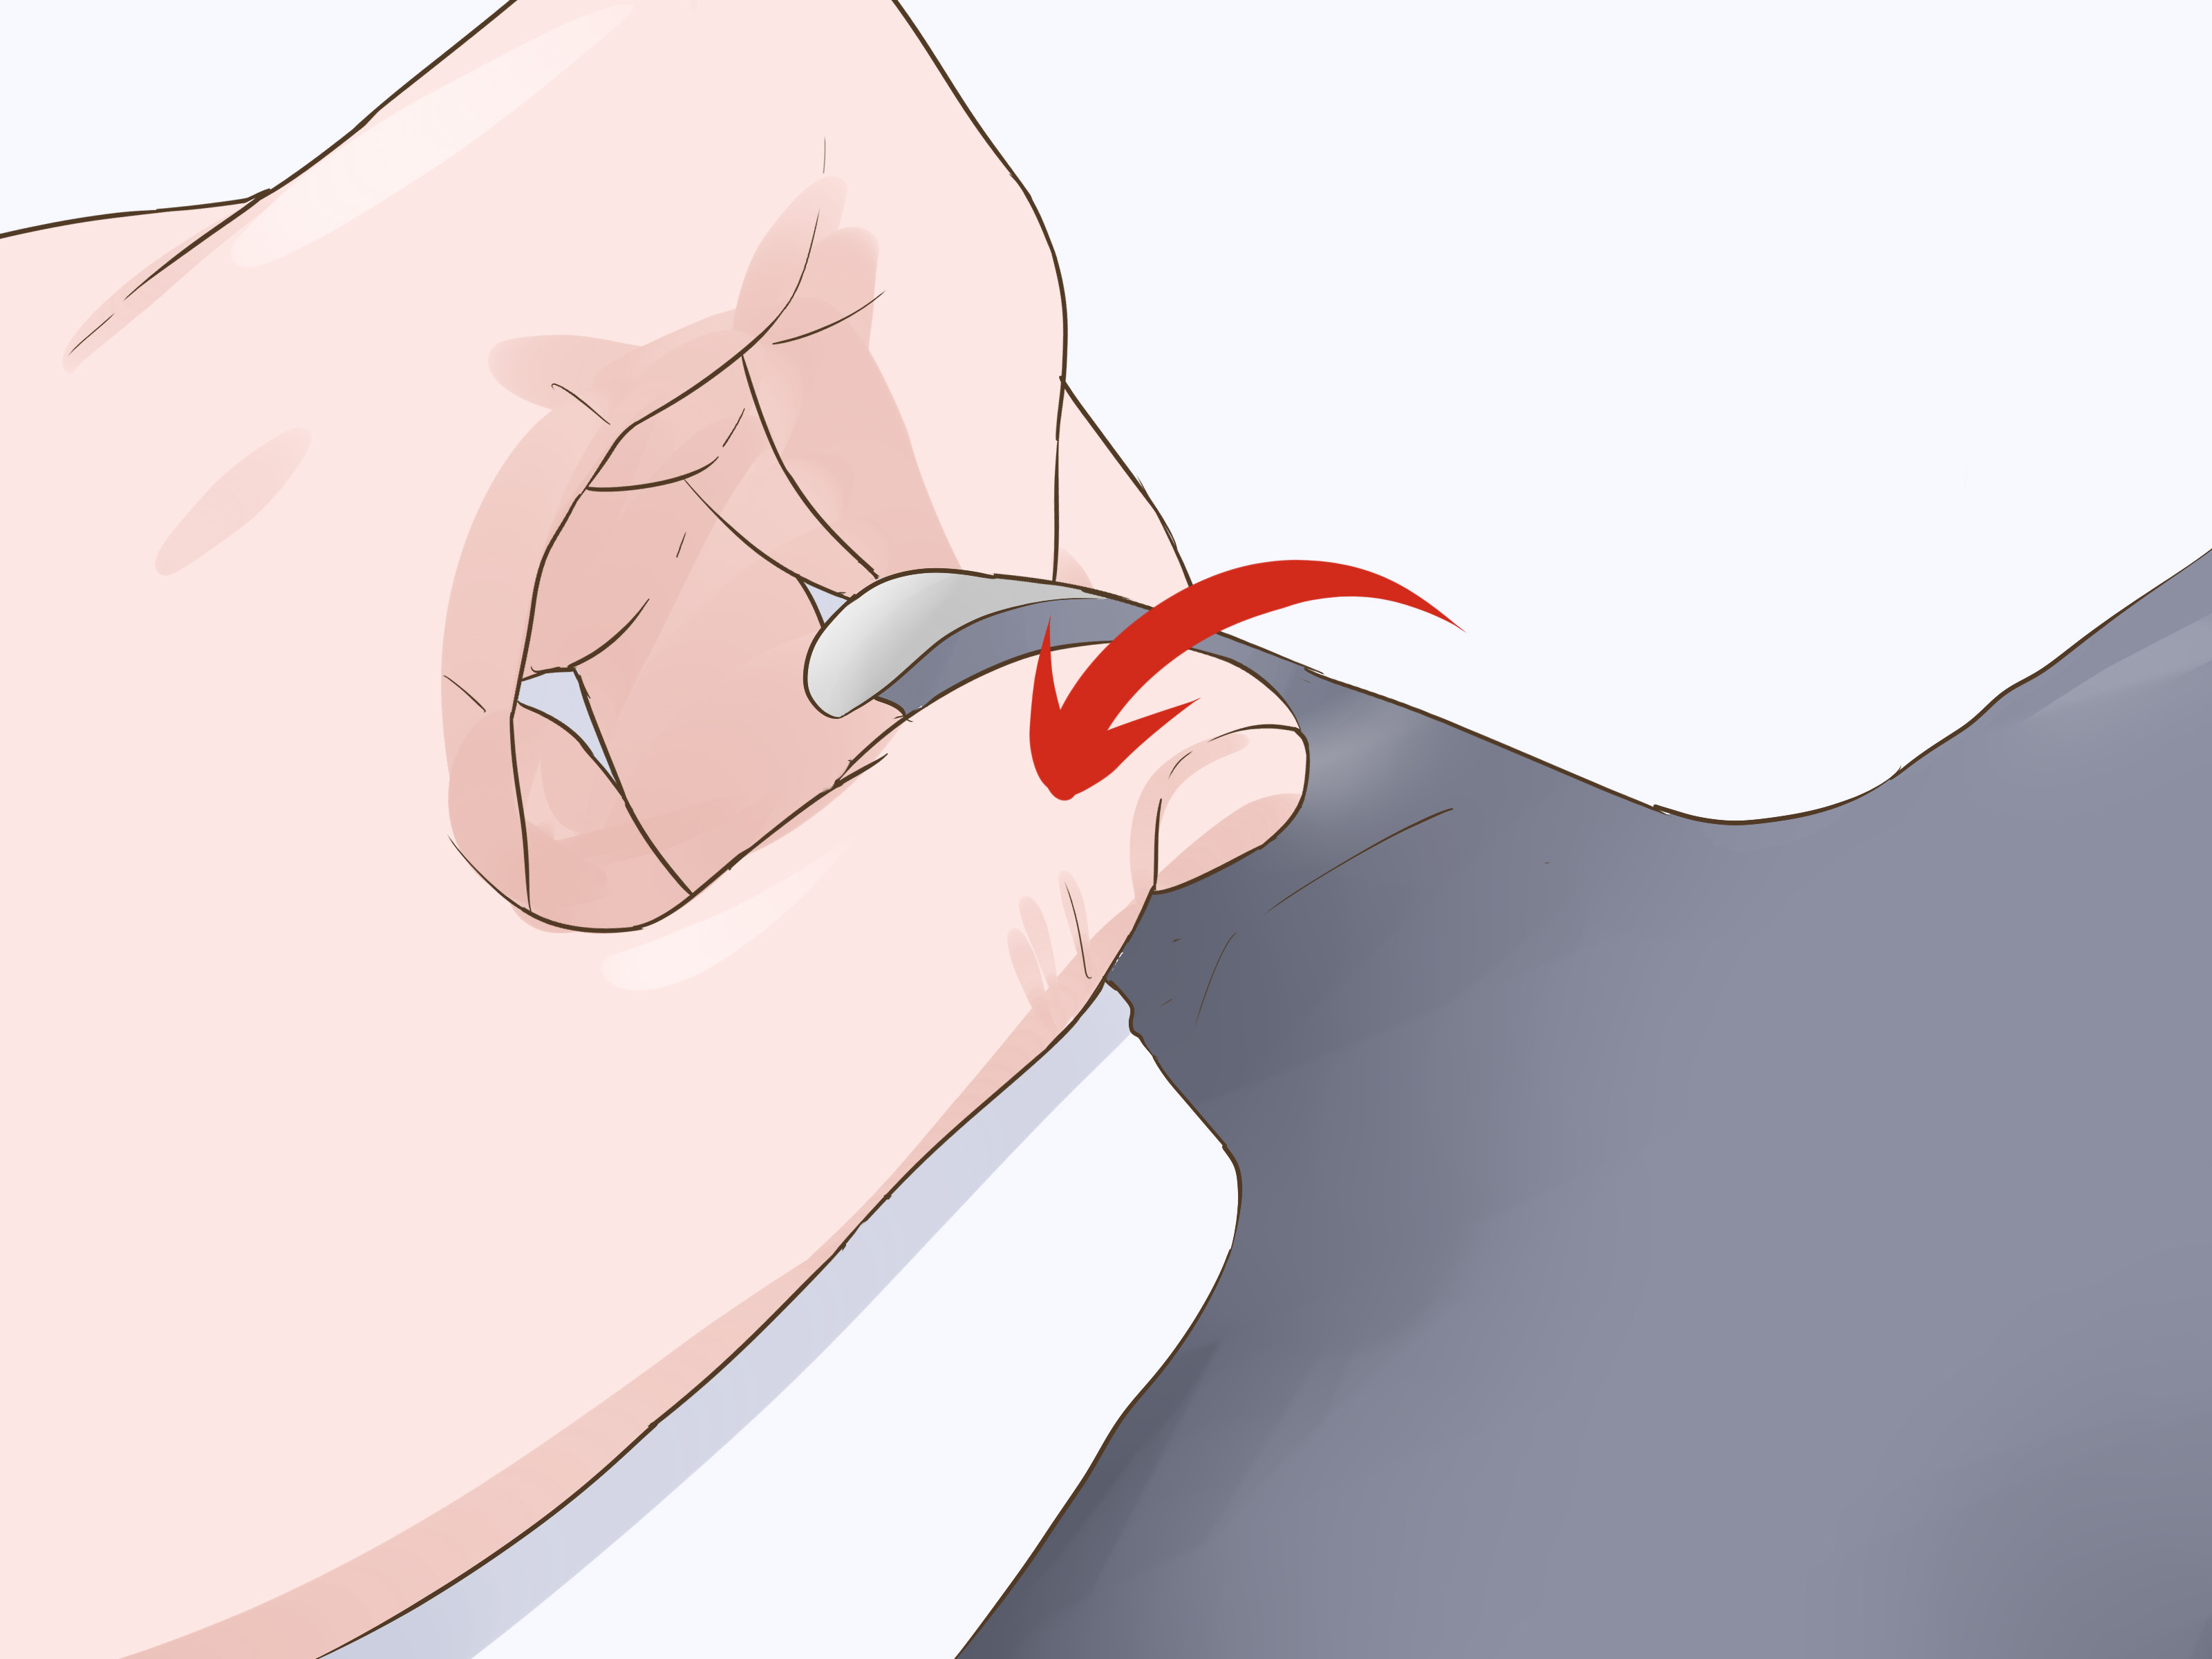
Heat a corner of the decal for 30–60 seconds. Keep the dryer moving; don’t hold it in one spot like
you’re trying to summon a portal. - Lift an edge with your fingernail or plastic scraper. Avoid metal blades on acrylic/fiberglass.
-
Peel slowly at a low angle (almost parallel to the tub surface). If it resists, reheat for
10–15 seconds and try again. -
Once the decal is off, wash the area with warm soapy water to remove any loosened adhesive film.
If residue remains, jump to Method 3 (adhesive removal).
Pro tips
- Old decals can become brittle. Heat helps, but you may still need the steam or remover methods.
- On acrylic: keep heat moderate. If the surface starts feeling too hot, pause and let it cool.
Method 2: Hot, Soapy Compress (For Stubborn, Brittle, or “Flaky” Decals)
When decals are old, they sometimes crumble instead of peeling. A hot, soapy compress softens both the decal material
and the adhesive slowlygreat for tubs that need a gentle approach.
Best for
- Acrylic and fiberglass tubs where you want to avoid harsh chemicals.
- Decals that shred or flake when you try to peel.
- Thin stickers that seem bonded to the tub by ancient magic.
You’ll need
- Very warm water (not boiling)
- Dish soap
- Old towel or several paper towels
- Plastic scraper or nylon brush
Step-by-step
- Mix warm water with a generous squirt of dish soap.
- Soak a towel/paper towels in the mixture, wring slightly, and lay it over the decal.
- Let it sit 10–20 minutes. Re-wet as needed to keep it warm.
- Try lifting an edge with a plastic scraper. If it starts to come up, keep the compress going and peel slowly.
- If the decal still fights you, repeat once more. After that, move to Method 1 (heat) or Method 4 (steam).
Why this works
Dish soap helps water penetrate around edges and under tiny cracks, while heat gently relaxes the adhesive bond.
It’s not dramatic, but it’s reliablelike the friend who shows up with snacks and a plan.
Method 3: Adhesive Removers (Rubbing Alcohol, Citrus Removers, and “The Right Stuff” for Your Tub)
This is the cleanup hero for the part everyone hates: the sticky residue that remains after the decal is gone.
The trick is choosing a remover that’s effective and compatible with your tub surface.
Best for
- Sticky residue left behind after peeling.
- Decals that lift partially but leave glue patches.
- “Shadow decals” where the sticker is gone but the adhesive is still throwing a tantrum.
Pick your remover (gentle to stronger)
- Warm soapy water: always the first pass.
-
Oil-based options (cooking oil, mineral oil, petroleum jelly):
great for many adhesives, often kinder to acrylic than harsh solvents. -
Isopropyl alcohol:
effective on many adhesives, but test firstespecially on acrylic/fiberglass.
Use minimal contact time and rinse well. -
Citrus adhesive removers:
popular for sticker residue; choose one that indicates it’s safe for plastics/acrylic when relevant. -
Stronger solvents (like acetone, paint thinner, mineral spirits):
generally not recommended for acrylic/fiberglass and should be used only with extreme caution,
if at all, and only if your tub manufacturer’s guidance allows it.
Step-by-step (safe, effective approach)
- Wash the area with warm soapy water and dry it completely.
-
Apply your chosen remover to a cloth (not directly to the tub if you’re worried about over-application),
then dab it onto the residue. - Let it dwell briefly (1–5 minutes depending on the product). Don’t “marinate” acrylic surfaces.
- Rub gently in small circles. If needed, use a plastic scraper to lift softened adhesive.
- Rinse thoroughly with warm water and dish soap to remove remover oils/film. Dry with microfiber.
Common mistakes
- Going straight to the nuclear option. Strong chemicals can dull acrylic and leave permanent haze.
- Scrubbing hard with abrasives. The decal may be gone, but now the scratch marks are forever.
- Not washing afterward. Many removers leave oily residue that attracts dirt and soap scum.
Method 4: Steam + Gentle Scrape (Plus a Porcelain-Only Razor Option)
Steam is heat’s overachieving cousin. It softens adhesive while adding moisture, which can make peeling smoother
especially for large decals or stubborn non-slip strips.
Best for
- Large decals you want to remove in one piece.
- Old decals that respond better to moisture + heat than dry heat alone.
- Homeowners who already own a handheld steamer and would like to feel smug about it.
You’ll need
- Handheld steamer (or steam cleaner)
- Plastic scraper / nylon putty knife
- Microfiber cloth
Step-by-step (steam method)
- Steam one edge for a few seconds at a time.
- Lift the corner with a plastic scraper.
-
Peel slowly while continuing to apply steam along the peel line.
Think “zipper,” not “ripcord.” - Wipe softened adhesive with a cloth; follow with Method 3 if residue remains.
- Finish by washing the area with warm soapy water and rinsing well.
Porcelain-only razor technique (use with care)
If your tub is porcelain/enamel (not acrylic or fiberglass), a razor scraper can help with ultra-stubborn bits
but only if you’re careful. Use a fresh blade, keep the surface wet, hold the blade at a shallow angle,
and scrape gently. If you’re unsure about your tub material, skip this and stick with plastic tools.
How to Get the Tub Truly Clean After Decal Removal
Once the decal is gone, the “after party” remains: adhesive film, grime outlines, and that strange rectangle of
color difference where the decal protected the surface from years of soap scum.
Post-removal cleanup checklist
- Wash with warm water + dish soap (removes remover oils and loosened gunk).
- Rinse thoroughly.
- Dry with microfiber to prevent water spots.
-
If there’s a dull outline: use a tub-safe cleaner for your surface type and a soft sponge.
Avoid abrasives on acrylic/fiberglass.
How to Prevent Future Decal Drama
-
If you want slip resistance, consider a non-adhesive bath mat (and hang it to dry so it doesn’t
become a science experiment). -
If you must use decals, choose ones designed for tubs and remove/replace them periodically.
The longer they stay, the more the adhesive “settles in.” - Regular cleaning reduces soap scum buildup around edges, which makes removal easier later.
Conclusion
Removing bathtub decals doesn’t have to become a three-day saga featuring five trips to the hardware store and one
existential crisis. Start with heat or a hot, soapy compress, escalate to
steam when needed, and finish strong with a surface-safe adhesive remover.
Work slowly, use plastic tools, rinse well, and your tub can go back to being a place for relaxation
not a sticky archaeological dig.
Extra: Real-World Experiences & Lessons From Decal Removal Projects (500+ Words)
Here’s what “real life” tends to look like when people remove bathtub decalsnot the neat, one-and-done version.
Consider these composite scenarios (aka: patterns that show up again and again in homes and rentals),
along with what usually works best.
Scenario 1: The Rental Move-In (a.k.a. “Why Are There 18 Fish?”)
You move into a new place, step into the tub, and discover a reef of peeling decals. Half are curling at the edges,
half are fused to the surface, and all of them look like they’ve hosted at least one tiny bacteria convention.
In this case, the best start is usually Method 1 (heat)because the decals that are already peeling
want to come off cleanly if the adhesive softens. The mistake people make here is trying to yank them off cold.
Cold-yanking turns flexible decals into shredded strips, which then require twice the scraping time.
Heat + slow peel often removes bigger pieces, which is a win for your sanity.
After the peel, you’ll almost always have residue. Many people panic and grab the strongest solvent they can find.
The smarter move is stepping through Method 3 from gentle to stronger: wash, then oil/citrus remover,
then consider alcohol only if it’s compatible with your tub material and passes a spot test. Rushing the chemical part
is how “decal removal” becomes “why is my tub cloudy now?”
Scenario 2: The Brittle No-Slip Stickers (a.k.a. “They Crumble Like Ancient Papyrus”)
Older anti-slip decals sometimes break apart when you look at them funny. You try to peel and they flake.
You try to scrape and you get dust, not progress. This is where Method 2 (hot, soapy compress) and
Method 4 (steam) really shine. The moisture helps soften the decal material and works into micro-gaps,
so you can lift larger sections instead of sanding your patience away one crumb at a time.
A helpful trick in this scenario is to focus on edges. If you can lift one clean edge, you can often “zip”
the decal off while applying steam/heat along the line. People who struggle most usually scrape randomly across the top,
which just removes the decal surface while leaving the adhesive layer perfectly intactlike removing frosting but leaving
the cake glued to the plate.
Scenario 3: The Acrylic Tub (a.k.a. “I Want It Clean, Not Sandblasted”)
Acrylic tubs are the ones that make people nervous, and honestly, that’s fair. The common experience is: a remover works…
and then the finish looks different. That’s why the winning strategy is almost always: gentle tools, short dwell times,
and lots of rinsing. Heat is usually safer than aggressive chemicals. Oil-based residue softening often beats harsh solvents.
And the best “tool upgrade” isn’t a sharper scraperit’s a better technique: low-angle peeling, re-heating as needed,
and using microfiber for cleanup instead of abrasive pads.
Scenario 4: The Decal Outline (a.k.a. “Why Is There a Perfect Rectangle?”)
Even after everything is removed, you may see a slightly cleaner area where the decal lived. That’s not always damageoften it’s simply
the rest of the tub having more soap scum/mineral film. People often assume they “ruined” the finish and start scrubbing harder,
which can actually cause the damage they feared. A better approach is patient cleaning: warm soapy water, then a tub-safe cleaner
appropriate for your surface, gentle wiping, and drying. Over a few normal cleanings, the contrast often fades.
Bottom line from all these experiences: decals come off fastest when you treat removal like a processsoften, lift, peel, dissolve residue,
washrather than trying to “win” with force. Your tub isn’t the enemy. The glue is.













