
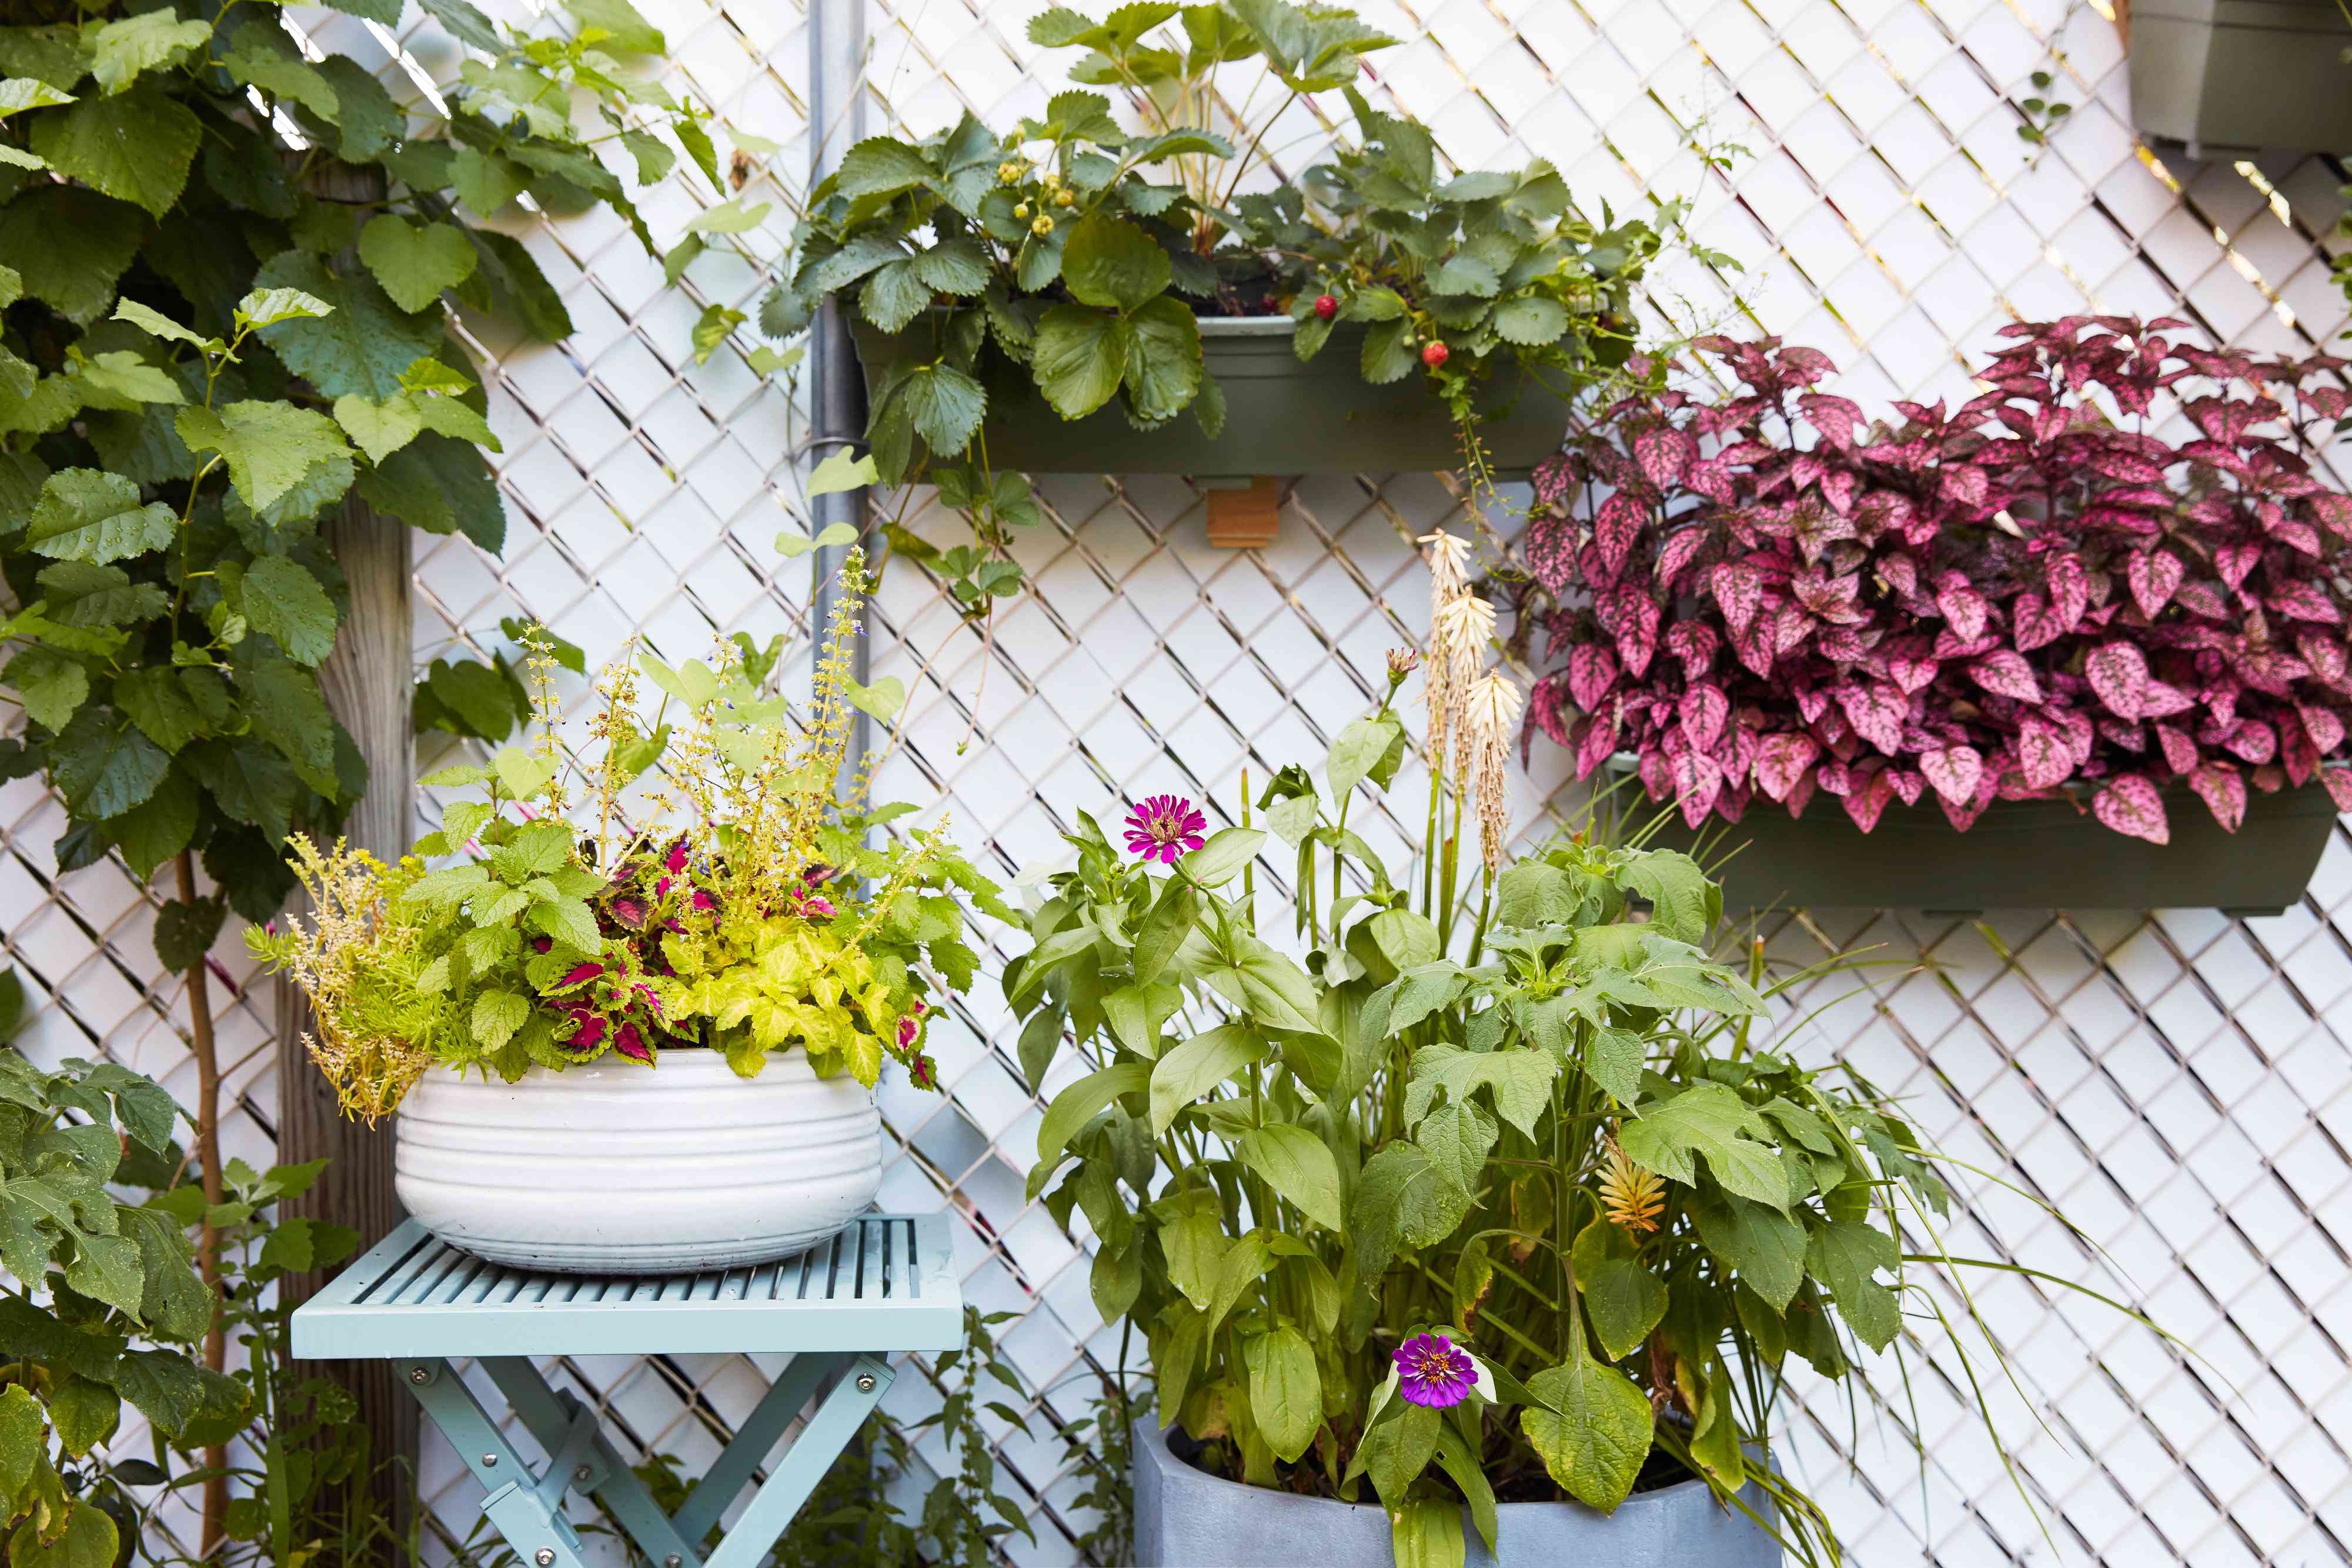
Chain-link fences are the golden retrievers of the fence world: loyal, tough, and not winning any beauty contests.
The good news? You don’t have to rip it out (and rip up your budget) to get privacy and curb appeal.
With the right cover, that metallic “schoolyard vibe” can become “cozy backyard retreat” by the weekend.
This guide walks you through seven budget-friendly ways to cover a chain link fencewhat they cost, how they look,
how long they last, and the little installation tricks that separate a clean DIY from a wavy “why is it doing that?”
situation.
Before You Start: 4 Quick Checks That Save Time (and Regret)
1) Decide what “cover” means to you
- Privacy: blocking views (neighbors, street, barking-dog fan club).
- Looks: camouflage the metal so your yard feels warmer.
- Wind: reduce gusts without turning your fence into a sail.
- Noise: you can soften it a little, but don’t expect soundproofing.
2) Measure like you mean it
Measure fence height and total length. If you have gates, corners, slopes, or a fence that
zigzags like it’s avoiding commitment, note those too. Covers come in rolls/panels; buying the wrong size is the fastest
way to fund your local return counter’s employee-of-the-month program.
3) Think about wind and weather
Breathable materials (like mesh privacy screens) handle wind better than solid tarps. If your yard is breezy, choose
something designed to let air pass through and attach it tightly so it doesn’t flap itself to death.
4) Confirm boundaries and local rules
If your project changes fence height/structure or adds heavy panels, check local requirements and confirm property lines.
It’s cheaper to measure than to mediate.
1) Mesh Privacy Screen (a.k.a. Windscreen) for Fast, Clean Coverage
If you want the quickest “wow, that looks better” upgrade, start here. A mesh privacy screen is made for fences: UV-rated,
breathable, and typically finished with reinforced edges and grommets so you can tie it down neatly.
Best for
- Long fence runs where you want consistent privacy
- Windy yards (mesh is designed to be air- and water-permeable)
- People who want privacy without becoming carpenters
Budget snapshot
Costs vary by size and privacy percentage, but many standard screens are priced to cover large sections without breaking
the bank. Higher “blockage” (more privacy) usually costs more.
How to install (the tidy way)
- Unroll the screen along the fence and align the top edge with the top rail.
- Start at one corner and loosely zip-tie through grommets to the fence fabric and rails.
- Work across, pulling the screen taut every few feet so it doesn’t sag later.
- Go back and tighten ties. Trim tails so you don’t create a “tiny plastic porcupine.”
Pro tips
- Tension matters: a slightly tighter screen lasts longer and looks more professional.
- Don’t skip the rails: tying to the top rail reduces droop.
- Color strategy: darker colors tend to visually “disappear,” while lighter colors read brighter and more noticeable.
Pros & cons
- Pros: fast install, big visual impact, strong privacy options, wind-friendly.
- Cons: not a “natural” look, can wear over time, needs occasional re-tightening.
2) Weave-In Privacy: Slats or Privacy Tape for a Built-In Look
Want your chain-link fence to look like it came with privacy from day one? Weave-in options do that. You’ve got two
main routes: vertical slats (classic) or privacy tape (a quicker weave that can create very high coverage).
Option A: Privacy slats
Slats slide down from the top and fill the “diamonds” with long, narrow strips. The look is clean, uniform, and
surprisingly neutralespecially in black, green, or brown.
Best for
- Homeowners who want durability and a consistent look
- Moderate privacy (good, but not total blackout)
Budget snapshot
Expect mid-range cost compared with other covers, but you get a long service life. It’s more labor than money: installing
slats is repetitive (and weirdly meditative if you enjoy podcasts).
Install notes
- Work in sections so you don’t get “halfway fatigue” and leave a checkerboard of privacy.
- If your fence leans, correct the lean firstslats won’t hide it; they’ll highlight it.
Option B: Privacy tape
Privacy tape weaves horizontally through the chain-link diamonds, creating a more solid visual barrier. If you want high
coverage without building a new fence, this is one of the most cost-effective “big change” options.
Best for
- Higher privacy needs (near patio, pool, or close neighbors)
- DIYers who prefer weaving over panel-building
Install notes
- Keep tension consistent so the finished surface doesn’t look wavy.
- Secure the end of each run (don’t rely on friction alone).
Pros & cons (slats and tape)
- Pros: integrated look, customizable colors, good longevity, minimal “flapping.”
- Cons: time-consuming install, can trap debris (leaves love it in there), may reduce airflow more than mesh.
3) Bamboo Rolls for a Natural, “Vacation Backyard” Vibe
Bamboo fencing rolls are a classic chain-link cover because they’re lightweight, easy to attach, and instantly warmer-looking
than metal. Think: beachy, garden-y, or minimalistdepending on what else is happening in your yard.
Best for
- Quick style upgrade with a natural material
- People who want privacy plus texture (not a flat wall)
How to install
- Unroll the bamboo along the fence and line it up with the top rail.
- Attach at the top first, then the sides, then the bottom (so it hangs straight).
- Use fence ties, galvanized wire, or outdoor-rated zip ties every 12–18 inches.
Pro tips
- Prevent sagging: add more tie points along the top rail than you think you need.
- Plan for aging: bamboo is organic; it looks best when you accept that it will weather.
- Layering trick: add shrubs or tall planters in front for a richer, more private look without fully blocking airflow.
Pros & cons
- Pros: natural style, easy install, good coverage, widely available.
- Cons: can deteriorate over time, may fade, may need replacement sooner than synthetic screens.
4) Reed or Willow Screens for the Cheapest “Instant Hide”
Reed fencing is the budget MVP when you want to cover a fence for the least money today. It’s typically sold as rolled mats.
The look is casual and breezylike your fence spent spring break at the coast and came back with opinions.
Best for
- Renters (with permission) or homeowners who want a short-term upgrade
- Backyard zones where “good enough” privacy is perfect
Install basics
Treat it like bamboo: attach the top edge first, then sides, then bottom. Use lots of tie points so wind doesn’t unravel it.
Reality check (important)
Reed screens tend to look their best early on, then slowly weather. If you want something that looks identical for years,
pick mesh or slats instead.
Pros & cons
- Pros: very affordable, lightweight, fast to install.
- Cons: shorter lifespan, can discolor, can get brittle.
5) Faux Greenery Panels (Artificial Ivy/Hedge) for “Wall of Green” Without the Wait
If you love the idea of a lush green fence but don’t want to wait a season (or three), faux ivy rolls and artificial hedge
panels can camouflage chain link fast. They’re especially handy for small sectionslike around a patio seating area.
Best for
- Instant visual cover
- People who don’t want plant maintenance
- Spot coverage (hot tub corner, trash bin zone, neighbor-facing patio)
How to install
- Hang the panel/roll on your side of the fence and align it straight.
- Attach at corners first, then add ties along edges and a few in the middle.
- Trim or overlap panels so seams don’t gape.
Make it look less “plastic”
- Mix in a few real planters nearby (the eye reads the whole area as greener).
- Choose a slightly darker green and avoid super-glossy leaves if possible.
- Stagger seams instead of stacking them in a single vertical line.
Pros & cons
- Pros: instant coverage, minimal upkeep, strong camouflage power.
- Cons: can fade in harsh sun, may look artificial up close, not as breathable as mesh.
6) Budget Panels: Lattice, Trellis, or Partial Wood Sections
Wood fence panels can be pricey, but you can still get a “real fence” look on a budget by using lighter, cheaper options:
lattice panels, trellis sections, or partial wood runs where you need privacy most (like behind a grill or along a seating area).
Best for
- Small or medium fence sections where you want a premium look
- Creating a backdrop for climbing plants (real or faux)
- Blocking specific sightlines instead of covering the whole yard
How to do it without overbuilding
- Pick light panels: lattice/trellis is easier to mount than solid wood fencing.
- Use brackets wisely: attach to the fence framework where possible, and add support so panels don’t flex.
- Keep wood off the ground: leave a small gap so it doesn’t wick moisture and rot.
Pro tips
- Design trick: alternate lattice + greenery for a high-end look on a DIY budget.
- Paint move: a dark stain or paint can make mixed materials feel intentional and modern.
- Don’t ignore weight: heavier panels can stress chain-link structureskeep it light unless you’re adding posts/support.
Pros & cons
- Pros: upscale look, customizable, great plant support, strong privacy where placed.
- Cons: more labor, may need added structural support, can be less “inexpensive” if you cover huge runs.
7) Living Cover: Vines, Tall Plantings, and Planters That Create Privacy Over Time
Plants are the most charming way to cover a chain-link fenceand also the most honest relationship: they look better as
you invest time. For the right vine, chain link is a great support structure, especially for twining or tendril climbers.
Best for
- Homeowners who want a softer, greener yard
- People okay with a “build-up” phase
- Adding privacy while improving the whole garden vibe
Choosing the right vine (quick science, no lab coat required)
- Tendrils/twining vines wrap around supports like wire and chain linkperfect match.
- Clinging vines can attach directly to surfaces; great on masonry, but be cautious near wood siding.
- Sprawlers (like some roses) may need tying and training to stay tidy.
Easy living-cover game plan
- Start with planters if needed: if you can’t dig near the fence line, place long planters along the fence.
- Use trellis helpers: add a simple trellis panel in spots where vines need guidance.
- Train early: gently tie new growth so coverage starts low and spreads evenly.
- Mix heights: combine vines with tall ornamental grasses or shrubs for quicker privacy.
Pro tips
- Pick non-invasive options for your area: some fast growers can get out of hand depending on region.
- Don’t block airflow completely: a layered mix (plants + partial cover) often feels more comfortable than a solid wall.
- Maintenance matters: pruning keeps your “living screen” from becoming a “living takeover.”
Pros & cons
- Pros: beautiful, increases curb appeal, supports pollinators, can be very private once mature.
- Cons: takes time, needs watering/pruning, seasonal changes (deciduous vines drop leaves).
Putting It All Together: Which Cover Should You Choose?
- Need privacy fast: mesh privacy screen or faux greenery.
- Want a built-in, long-lasting look: slats or privacy tape.
- Want “natural style” on a budget: bamboo or reed rolls.
- Want the best-looking long game: vines + planters (and a little patience).
- Want a designer vibe in one corner: lattice/trellis panels + climbing plants.
Real-World Experiences: What DIYers Learn After the First Weekend (Extra Notes)
Here’s the part nobody tells you until you’re standing in your yard with a handful of zip ties and a look that says,
“I have made choices.” These are common experiences homeowners run into when covering a chain-link fenceand how to
avoid turning your project into an ongoing sitcom.
The Wind Lesson: A lot of people start with the idea of hanging something solid because it sounds like
“more privacy.” Then a breezy afternoon shows up, your cover starts flapping like it’s trying to communicate with airplanes,
and suddenly you understand why breathable mesh exists. If your neighborhood gets gusts, you’ll be happiest with a
true privacy screen that’s designed for fences. The bonus is that it looks cleaner, toono ballooning, no constant re-tying.
The Sag Surprise: Bamboo and reed rolls look fantastic right after installation… until gravity and weather
begin their slow negotiations. Most “sagging” isn’t a material failureit’s an attachment issue. DIYers who use a few ties
at the corners usually end up with a wavy, tired-looking fence cover. The ones who add more tie points along the top rail
(and a few mid-height) keep it looking crisp. Think of ties like stitches: the more evenly you place them, the better the
“hem” holds.
The “Everything Looks Better with Layers” Moment: One of the easiest ways to make a cheap fence cover look
expensive is to layer it. A mesh screen by itself is neat and practical; add tall planters with grasses in front of it and
suddenly it looks intentional. Bamboo looks warmer; add a couple of climbing planters or a string-light run and it becomes a
vibe. Even faux ivy looks more believable when there’s at least one real plant nearby to trick the eye.
The Color Trick: If you’re torn between “I want it to disappear” and “I want it to be a feature,” color does
the heavy lifting. Dark screens (charcoal, black, deep green) tend to visually recede, so your landscaping pops. Lighter covers
feel brighter and more noticeable, which can be great if you want a breezy, coastal lookbut they also show dirt faster.
Many DIYers pick a dark cover for the neighbor-facing side and save lighter, decorative touches for the patio area.
The Vine Reality Check: People love the romance of a living fence. And it can be gorgeous. But the real win is
choosing the right plant for the right support and being honest about your timeline. The first season can look sparse; the
second season starts to fill in; by the third you’re suddenly pruning like you’re the director of a plant-themed Broadway
production. The DIYers who succeed are the ones who train vines early (so growth starts low) and combine vines with planters
or partial screens so privacy improves immediately while the plants mature.
The Takeaway: Most fence-cover projects go “expensive” when people try to force one material to do everything.
Instead, match your cover to your goal: mesh for wind and speed, weave-in for a built-in look, bamboo/reed for natural texture,
faux greenery for instant camouflage, and vines for long-term beauty. And if you only remember one thing, remember this:
measure twice, tie more than you think you need, and don’t let the wind be the project manager.
Conclusion
Covering a chain-link fence doesn’t have to be a dramatic, budget-blowing backyard saga. With smart materials and a little
strategy, you can add privacy, style, and comfort without replacing the fence you already have.
Pick the solution that matches your timeline: instant covers for quick results, weave-in systems for a clean built-in look,
and living options for the best long-term glow-up.













