
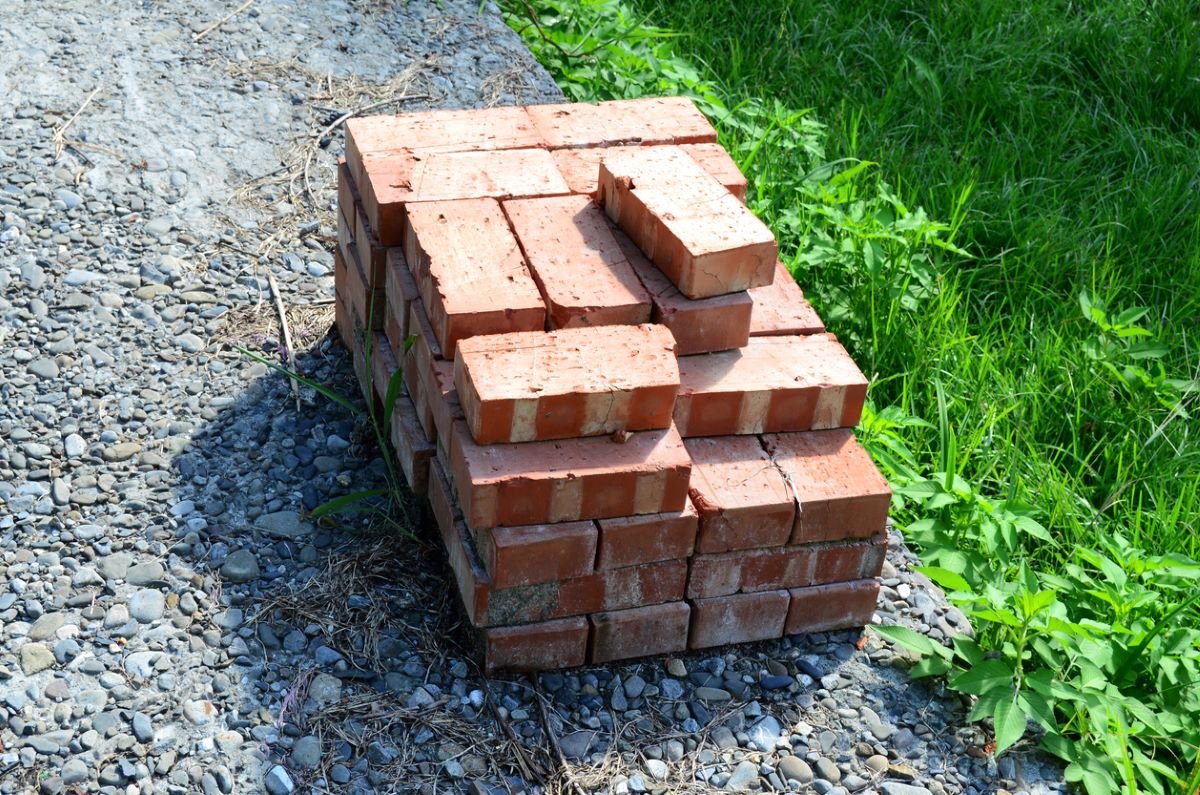
Old bricks are funny little things. One minute they are part of a serious wall, patio, chimney, or mystery pile behind the garage. The next minute, they are sitting there like unemployed rectangles, waiting for someone with a weekend, a pair of gloves, and slightly too much confidence. Good news: those dusty leftovers can still earn their keep.
Upcycling old bricks is one of the most satisfying DIY moves because it checks every box: it saves money, keeps useful material out of the waste stream, adds instant character, and makes your yard look like you hired someone who owns a clipboard. Whether you have three bricks or three hundred, there is probably a smart way to reuse them around the house, garden, patio, or utility area.
Before we begin, a tiny but important grown-up moment: old bricks are heavy, rough, and sometimes cracked. Wear gloves, eye protection when cutting or drilling, and avoid using unknown salvaged bricks for structural projects unless you know what they are and where they came from. For fire projects, use fire-rated materials where flames or extreme heat will touch the masonry. Bricks are tough, but they are not magic lava cookies.
Why Upcycle Old Bricks Instead of Tossing Them?
Reusing bricks is practical sustainability at its best. Construction and demolition materials can often be recovered and reused, which reduces disposal, saves resources, and avoids buying new materials for small projects. On a homeowner level, it is also refreshingly simple. You do not need a fancy workshop or an engineering degree to turn an old brick into a garden border, doorstop, planter riser, or candle holder.
Old bricks also have a look that new materials try very hard to imitate. Chips, color variations, softened edges, and a little weathering give them instant charm. That irregularity is not a flaw; it is the whole personality. A reclaimed brick path looks relaxed and lived-in. A brick garden edge says, “I planned this,” even when the project began because you tripped over the pile for the fourth time.
1. Build a Backyard Fire Pit
A brick fire pit is one of the classic ways to reuse old bricks, and for good reason. It creates a natural gathering spot for cool evenings, marshmallow negotiations, and relatives who suddenly become philosophers after sunset.
How to do it wisely
Choose a flat, level, nonflammable area away from your house, fences, sheds, low branches, outdoor furniture, and anything else that would prefer not to become a headline. Many fire-safety organizations recommend keeping fire pits at least 10 feet from structures or combustible materials, and local codes may require more. Check city, county, HOA, and burn-ban rules before building.
For the safest build, use fire brick or a metal fire ring where the flames and heat will directly contact the inner wall. Regular clay bricks may crack or spall under repeated high heat, especially if they have absorbed moisture. Use gravel, paver base, or another noncombustible foundation, and keep a hose, bucket of water, or fire extinguisher nearby. The goal is cozy, not “neighbor calls emergency services.”
2. Edge Garden Beds Like a Landscape Pro
Brick edging is the little black dress of landscaping: simple, reliable, and somehow always appropriate. It creates a clean border between lawn and planting beds, helps hold mulch in place, and gives flower beds a crisp, finished look.
Design ideas that work
Lay bricks flat for a low mowing strip, stand them upright for a stronger visual border, or angle them diagonally for a sawtooth cottage-garden effect. For curves, dig a shallow trench and set each brick carefully so the line feels intentional. A taut string line helps with straight runs; a garden hose works beautifully for mapping curves.
If your bed is near grass, set the bricks deep enough so they do not wobble when bumped by a mower wheel. Add a base of compacted sand or gravel for better stability and drainage. The project is inexpensive, but it instantly upgrades the yard from “plants happened here” to “landscape design occurred.”
3. Create a Rustic Garden Path
A brick garden path adds charm, direction, and a pleasing crunch-free alternative to wandering through mulch in flip-flops. You can build a continuous walkway if you have enough bricks, or create grouped brick stepping pads if your pile is modest.
Path patterns to consider
A running bond pattern is easy and classic. Basketweave looks vintage and works well for small patios or landing areas. Herringbone is stronger for high-traffic areas, though it usually requires more cutting along the edges. For a casual garden, perfection is not required. In fact, slightly mismatched salvaged bricks often look better than perfectly uniform ones.
Dig out the path area, add landscape fabric if weeds are an issue, spread compacted paver base or gravel, top with sand, and set the bricks. Fill joints with sand and tamp gently. Slope the path slightly so water drains away instead of creating a tiny brick swamp. A good path should invite you forward, not test your ankle stability.
4. Build Raised Garden Beds
Bricks make attractive raised beds for herbs, flowers, and vegetables. They are durable, weather-resistant, and heavy enough to stay put once placed correctly. Unlike wood, they will not rot. Unlike plastic, they do not look like they came from a storage-bin aisle.
Keep it stable and plant-friendly
For low beds, dry-stacked bricks may be enough if the bed is short and the soil pressure is light. For taller beds, mortar and a proper footing are safer because soil is surprisingly pushy once rain gets involved. Keep beds narrow enough that you can reach the center without stepping into the soil. A width of about 3 to 4 feet is comfortable for most gardeners.
Use clean bricks from a known source when growing edibles. Avoid bricks contaminated with oil, paint, chemicals, or unknown industrial residue. Fill the bed with a balanced mix of topsoil, compost, and organic matter. Good drainage matters, too; soggy roots are not “well hydrated,” they are unhappy.
5. Turn Bricks Into Candle Holders
Some bricks already come with built-in holes, which means they have been quietly auditioning to become candle holders for years. Clean one up, set it on a table, and place tealights or small votives in the openings. Suddenly your leftover masonry is rustic decor.
Style it without overthinking
For an indoor centerpiece, scrub the brick, let it dry completely, and place felt pads underneath so it does not scratch the table. For outdoor dining, use it on a patio table with citronella tealights or battery-operated candles. Add a small sprig of rosemary, a strip of burlap, or a few pebbles around it if you enjoy the “I casually host charming dinners” aesthetic.
Safety note: keep open flames away from dry leaves, napkins, curtains, and anything that flutters dramatically in the breeze. Battery candles are a great option if kids, pets, or clumsy adults are part of the guest list.
6. Use Bricks as Wheel Chocks
Sometimes genius is not glamorous. Sometimes genius is a brick stopping a trailer, lawn cart, or wheelbarrow from rolling down the driveway like it has somewhere important to be. Old bricks can work as simple wheel chocks for light-duty situations.
Where this works best
Use bricks to stabilize a wheelbarrow while loading mulch, hold a garden cart in place, or temporarily block a small trailer on level ground. Place the brick snugly in front of or behind the wheel, depending on the slope direction. For heavy trailers, vehicles, or steep grades, use proper manufactured wheel chocks rated for the load. A brick is useful, but it should not be promoted to safety manager of a two-ton situation.
This is also a handy trick in the garden. A brick can keep a hose reel, potting bench, or temporary work surface from shifting while you work. Low-tech? Absolutely. Effective? Also absolutely.
7. Raise and Protect Outdoor Planters
Bricks are excellent little risers. Place them under heavy planters to improve airflow, help drainage, and prevent pots from staining decks, patios, or porch floors. This is especially helpful for containers that sit through rainy seasons.
Simple planter upgrades
Use three or four bricks under large pots so the weight is evenly supported. For a more finished look, arrange matching bricks in a square platform. You can also create tiered plant displays by stacking bricks in stable, low arrangements and placing smaller pots on top.
This trick works indoors too, but use clean bricks and protect floors with felt pads, cork, or a tray. Nobody wants to explain that the new “industrial plant stand” came with bonus scratches in the hardwood.
8. Make a Secret Spare-Key Hideout
A brick with holes can hide a small waterproof container for a spare key. Place it among other bricks, stones, or garden edging so it blends in. The best hiding spot is not right beside the front door under the one brick that looks suspiciously important.
Make it less obvious
Choose a location that looks natural: a side garden bed, a potting area, or a cluster of landscape materials. Put the key in a small sealed tube or plastic container before sliding it into the brick opening. Better yet, use this trick for a shed key, gate key, or backup lockbox clue rather than your main house key. Security should be clever, not theatrical.
If your home already has a keypad, smart lock, or trusted-neighbor system, those may be better options. But for low-risk uses, a brick hideout can be practical and delightfully spy-movie-adjacent.
9. Use Bricks as Utility Helpers Around the House
Old bricks can be humble household workhorses. They can hold down tarps, prop open gates, support temporary shelves in a shed, weigh down landscape fabric, or keep trash-can lids from performing wind ballet. In a basement or garage, they can lift items slightly off the floor to reduce contact with minor moisture.
A modern note on water heaters and toilets
Some older DIY advice suggests using bricks to elevate a water heater in a basement or placing a brick in an older toilet tank to reduce water per flush. Both ideas need a modern reality check.
For water heaters, follow the manufacturer’s instructions, plumbing codes, and local requirements. A heater needs a stable, level, appropriate base, not a wobbly brick throne assembled during a coffee break. For toilets, a brick can crumble over time and damage internal parts. If you have an older toilet and want to reduce water use, a sealed plastic displacement container may be safer, but the best long-term upgrade is usually a high-efficiency WaterSense-labeled toilet.
That does not mean old bricks are useless indoors. Use them as sturdy bookends, doorstops, shelf weights, or workshop supports. Wrap one in fabric for a soft-bottomed doorstop, paint it for a kids’ room bookend, or stencil labels on a few for garage organization. Bricks may be ancient technology, but they are surprisingly good at modern clutter control.
How to Prep Old Bricks Before Reusing Them
Before you start any upcycled brick project, sort your bricks into three piles: solid, cracked-but-useful, and “why is this mostly dust?” Solid bricks are best for paths, edging, and beds. Cracked bricks can be used for rustic borders, drainage areas, or decorative fillers. Crumbling bricks should generally be recycled as rubble or used only where failure will not matter.
Clean bricks with a stiff brush and water. Avoid harsh acids unless you know exactly what you are doing and are working with appropriate protective gear. If you see white powdery residue, it may be efflorescence, which often comes from moisture drawing salts to the surface. Dry brushing or gentle rinsing usually handles light residue. Let bricks dry fully before using them in indoor decor.
Also pay attention to weight. A standard brick is heavier than it looks when you are carrying one. When you are carrying eighty, it becomes a gym membership with corners. Move bricks in small batches, use a wheelbarrow, and lift with your legs.
Best Places to Use Reclaimed Bricks
Old bricks shine in outdoor spaces with relaxed, rustic, cottage, farmhouse, traditional, or eclectic design. They pair well with gravel, mulch, native plants, weathered wood, galvanized tubs, and terracotta pots. They are especially useful in gardens because their warm color contrasts beautifully with green foliage.
Use reclaimed bricks near patios, vegetable beds, herb gardens, fire pit seating areas, side yards, potting benches, and shed entrances. Indoors, use them sparingly as accents. A brick candle holder on a farmhouse table? Charming. Thirty-seven loose bricks in the living room? That is less “upcycled decor” and more “unfinished construction site.”
Common Mistakes to Avoid
Using the wrong brick for fire
Not all bricks are safe for direct flame or repeated high heat. Use fire-rated material inside fire pits and fireplaces.
Skipping the base under paths
Bricks laid directly on soft soil may shift, sink, or become a trip hazard. A compacted base makes the project last longer.
Building raised beds too tall without support
Dry-stacked bricks are fine for low borders, but taller soil-retaining walls need a stronger build.
Using contaminated bricks around food crops
For edible gardens, avoid bricks exposed to chemicals, oil, lead paint dust, or unknown industrial use.
Assuming “free” means “easy”
Reclaimed bricks save money, but they still require cleaning, sorting, hauling, and planning. Free materials often arrive with a side dish of labor.
Real-World Experience: What Old Bricks Teach You After a Weekend of DIY
The first thing you learn from upcycling old bricks is that bricks multiply when unsupervised. You count twenty near the garage, then suddenly there are forty-two under the deck, nine behind the shed, and one mysterious half-brick in a flowerpot. Nobody knows how it got there. The brick does not answer questions.
In real DIY life, the best brick projects usually begin small. A garden edge is a perfect starter because it gives you a big visual reward without requiring mortar, engineering, or a dramatic speech about your “vision.” You dig a shallow trench, set the bricks, adjust them, step back, adjust them again, question your entire sense of straight lines, then finally realize the bed looks ten times better. That is the magic of brick: it makes ordinary plants look organized.
A brick path teaches patience. At first, it seems like you are just putting rectangles in dirt. Then you discover leveling sand, drainage slope, edge restraint, and the emotional complexity of a brick that sits one-eighth of an inch too high. The good news is that old bricks are forgiving. Their weathered edges make small imperfections look intentional. A reclaimed brick path does not need to look like a hotel courtyard. It should look like it belongs in your yard, with your plants, your soil, and your Saturday-morning coffee route.
Raised beds teach respect for weight. A few bricks feel manageable. A whole bed feels like you have accidentally joined a masonry apprenticeship. Still, once the walls are set and the soil goes in, the payoff is huge. Herbs spill over the edges, tomatoes look dignified, and the whole garden has a permanent, grounded feeling. The bricks hold heat, frame the soil, and make the bed feel like part of the landscape instead of a temporary experiment.
The small indoor projects are the most surprisingly delightful. A cleaned brick with tealights becomes a centerpiece people actually ask about. A painted brick bookend works better than many store-bought versions because it has one job and takes that job personally. A fabric-wrapped brick doorstop is almost comically simple, yet it solves a real household annoyance. Sometimes upcycling is not about creating a masterpiece. Sometimes it is about making the back door stop slamming every time the dog considers a squirrel.
The biggest lesson is to let the brick tell you what it wants to be. Clean, square, matching bricks are great for paths and edging. Odd, chipped bricks are perfect for rustic borders or hidden supports. Bricks with holes are made for candles, keys, drainage gaps, or creative little garden details. Once you stop seeing them as leftovers, they become a pile of possibilities with excellent upper-body training included.
Conclusion
Old bricks deserve a second act. They can become a fire pit, garden border, walking path, raised bed, candle holder, wheel chock, planter riser, secret hideout, or all-purpose utility helper. Better yet, most of these projects are affordable, beginner-friendly, and packed with character.
The key is to match the brick to the job. Use fire-rated materials for heat, stable bases for paths, clean bricks for gardens, and common sense for anything involving weight, water, or safety. Done right, upcycling old bricks turns a dusty pile into useful home improvements that look intentional, save money, and keep good material in circulation. Not bad for something that used to be the thing you kept meaning to haul away.











