
Note: This article synthesizes practical refinishing guidance from reputable U.S. home improvement, woodworking, furniture restoration, and safety resources, rewritten in original language for web publication.
Introduction: The Desk That Looked Like It Had Seen Things
A vintage desk has a special kind of charm. It may have solid wood drawers, dovetail joints, graceful legs, and the quiet dignity of a piece that has survived decades of coffee rings, homework, tax returns, and possibly one very aggressive stapler. But charm does not always mean pretty. Sometimes a vintage desk arrives with cloudy varnish, chipped veneer, mystery stains, rusty hardware, and a finish that looks less “antique” and more “forgotten in a garage since 1987.”
That is where refinishing comes in. Learning how to refinish a vintage desk can turn a tired, scratched, and dated piece into a beautiful statement for a home office, bedroom, craft room, or living space. The best part? A good before-and-after transformation does not require magical powers. It requires patience, the right tools, smart prep work, and the emotional strength to keep sanding when your arms begin writing a resignation letter.
In this in-depth guide, we will walk through the entire process of refinishing a vintage desk, from inspection and cleaning to stripping, sanding, repairing, staining, sealing, painting, and styling the final reveal. Whether you want to restore the natural wood grain or create a two-tone makeover with paint and stain, this step-by-step approach will help you make confident decisions and avoid common DIY disasters.
Before You Start: Should You Refinish or Restore?
Before grabbing sandpaper like a heroic weekend warrior, pause and study the desk. Refinishing and restoring are related, but they are not identical. Refinishing a vintage desk usually means removing or improving the existing finish and applying a new one. Restoration focuses on preserving the original appearance as much as possible.
If the desk is a valuable antique, has a maker’s mark, rare wood, hand-carved details, or historical importance, heavy refinishing may reduce its value. In that case, a gentle cleaning, wax, or professional restoration may be wiser. But if the desk is a sturdy thrift store find, family hand-me-down, flea market rescue, or curbside treasure with “please love me again” energy, refinishing can give it a second life.
Look for These Details First
Check whether the desk is solid wood, veneer over wood, particleboard, or a mix of materials. Solid wood gives you more flexibility because it can usually handle sanding and stain better. Veneer can be gorgeous, but it is thin. Sand too aggressively and you may blow through the top layer faster than you can say, “Well, that was educational.”
Also inspect the drawers, legs, joints, desktop, trim, and hardware. Wiggle the legs. Open every drawer. Look for water damage, loose veneer, missing screws, cracked wood, swollen panels, or old repairs. A little damage is normal. A desk that leans like it is trying to escape the room may need structural repair before beauty work begins.
Tools and Supplies for Refinishing a Vintage Desk
A smooth desk makeover starts with preparation. You do not need a professional workshop, but you do need basic refinishing supplies and a safe workspace. Work in a well-ventilated area such as a garage with doors open, a covered patio, or a workshop with airflow. Protect the floor with a drop cloth because stain and stripper are talented at finding the one place you forgot to cover.
Basic Supply List
- Drop cloth or plastic sheeting
- Nitrile gloves and safety glasses
- Respirator or dust mask appropriate for sanding and finishing
- Screwdriver for removing hardware
- Painter’s tape and labels for drawer parts
- Mild soap, water, and microfiber cloths
- Mineral spirits or a wood-safe cleaner for greasy buildup
- Wood filler or epoxy wood repair product
- Wood glue and clamps for loose veneer
- Paint stripper or furniture refinisher, if needed
- Plastic scraper or putty knife
- Steel wool or detail sanding pads
- Sandpaper in 80, 120, 150, 180, 220, and 320 grit
- Orbital sander for flat areas
- Tack cloth or vacuum with brush attachment
- Wood conditioner, stain, paint, primer, or toner
- Polyurethane, polycrylic, lacquer, wax, or furniture oil
- Quality brushes, foam applicators, or lint-free wiping cloths
Do not skip safety gear. Vintage furniture can contain old finishes, unknown coatings, and dust you do not want in your lungs. If the desk may have lead-based paint, especially if it is from the late 1970s or earlier, use a lead test kit and follow lead-safe practices. Avoid dry sanding old paint until you know what you are dealing with.
Step 1: Take Great “Before” Photos
Every good before and after desk refinishing story begins with photographic evidence. Take pictures from the front, back, sides, top, inside drawers, and close-up shots of scratches, stains, hardware, and damaged areas. These photos are helpful for reassembly, but they also provide that deeply satisfying “look what I did” moment later.
Natural light works best. Move the desk near a window or outside in shade. Photograph details like drawer pulls, screw placement, and decorative trim. If you plan to share the makeover online, take horizontal and vertical shots. Your future self will thank you when the final desk looks like it graduated from furniture finishing school.
Step 2: Remove Drawers, Hardware, and Loose Parts
Remove all drawers and hardware before cleaning or sanding. Put screws, knobs, handles, keyhole plates, and hinges into labeled bags. If the drawer pulls are different sizes, mark which drawer each one belongs to. Vintage desks love tiny hardware mysteries, and you do not want to solve a screw puzzle at midnight.
If the hardware is original and attractive, consider cleaning it instead of replacing it. Brass, bronze, or aged metal pulls can add character after the wood is refreshed. If the hardware is badly damaged or simply not your style, measure the hole spacing before buying replacements. Standard drawer pulls are not always a perfect match for older furniture.
Step 3: Clean the Desk Thoroughly
Cleaning is not glamorous, but it is essential. Old desks collect furniture polish, wax, skin oils, ink, dust, and random life residue. If you sand or stain over grime, the new finish may fail to bond evenly. Start with a mild soap and warm water solution, using a damp cloth rather than soaking the wood.
For sticky or greasy buildup, wipe the surface with mineral spirits on a clean cloth. Work gently and test first in an inconspicuous area. Clean the drawer interiors too. If they smell musty, let them air out in sunlight for a short period, then use baking soda, activated charcoal, or cedar blocks to help reduce odor.
Do Not Flood the Wood
Water is not a vintage desk’s favorite spa treatment. Too much moisture can raise the grain, loosen veneer, swell drawers, or stain the wood. Use damp cloths, not dripping ones. Dry the desk immediately and allow it to fully air-dry before repairs or sanding.
Step 4: Repair Damage Before Refinishing
Now the desk is clean enough to reveal its true personality. This is when you find dents, chips, veneer bubbles, loose legs, cracks, and perhaps one drawer that refuses to behave like a civilized rectangle.
Use wood glue and clamps for loose joints or lifting veneer. Place wax paper between the clamp and the desk to prevent accidental sticking. For missing veneer chips, use wood filler for painted finishes or carefully patch with matching veneer for stained finishes. Fill nail holes, gouges, and small cracks with stainable wood filler if you plan to stain, or regular wood filler if you plan to paint.
Let all repairs cure completely before sanding. Rushing this step can create sunken patches or lumpy areas under the final finish. Furniture refinishing rewards patience. It does not reward “close enough, I’m hungry.”
Step 5: Decide Whether to Strip, Sand, Paint, or Stain
Not every vintage desk needs full stripping. If the existing finish is mostly intact but dull, you may be able to clean, scuff sand, and apply a fresh topcoat. If the finish is peeling, crackled, gummy, uneven, or covered in old paint, stripping may be necessary.
When to Strip the Desk
Use a chemical stripper when the old finish is too thick, damaged, or detailed for sanding alone. Strippers are useful on carved legs, trim, edges, and stubborn varnish. Apply according to the product label, let it work, then scrape gently with a plastic scraper. Avoid digging into the wood.
When to Sand Instead
If the finish is thin and the desk is solid wood, sanding may be enough. Start with a moderate grit such as 120 to remove old finish and scratches, then move through finer grits like 180 and 220. Always sand with the grain. Sanding across the grain creates scratches that become painfully obvious once stain touches them. It is basically highlighting your mistakes in walnut-colored ink.
Paint or Stain?
Choose stain if the wood grain is beautiful and in good condition. Choose paint if the surface has patched veneer, uneven wood tones, or heavy damage. A popular compromise is a stained desktop with painted legs and drawer fronts. This gives the desk a custom look while hiding imperfections in less attractive areas.
Step 6: Sand the Desk Smoothly
Sanding is where the desk makeover begins to feel real. It is also where many beginners get impatient. Do not jump from rough sanding straight to finishing. A good progression matters.
For flat surfaces like the desktop, use an orbital sander with light pressure. Let the tool do the work. Pressing hard can create swirl marks, dips, and uneven spots. For edges, curves, corners, and trim, sand by hand with folded sandpaper or sanding sponges.
Suggested Sanding Progression
- 80 grit: Use only for rough surfaces, thick finish, or heavy damage.
- 120 grit: Good for removing remaining finish and leveling repairs.
- 150 or 180 grit: Smooths the surface before final sanding.
- 220 grit: Final sanding before stain, paint, or topcoat.
- 320 grit: Light sanding between clear coats.
Vacuum the dust thoroughly, then wipe with a tack cloth or slightly damp microfiber cloth. Dust left behind can turn a smooth finish into a gritty tragedy.
Step 7: Condition and Stain the Wood
If you are staining the desk, test the stain on the underside, back, or inside of a drawer first. Wood species absorb stain differently. Pine, birch, maple, and some veneers can become blotchy without a pre-stain wood conditioner. Walnut, oak, mahogany, and cherry often stain more gracefully, though they still deserve a test patch.
Apply wood conditioner if needed, following the label directions. Then apply stain with a clean cloth, brush, or foam applicator. Work in manageable sections and wipe away excess stain before it becomes sticky. The longer stain sits, the deeper the color usually becomes, but leaving it too long can create uneven patches.
For a vintage desk, medium brown, walnut, espresso, honey oak, and warm chestnut stains are classic choices. If you want a modern look, a natural matte finish can highlight the grain without making the desk look overly shiny.
Step 8: Prime and Paint, If You Want a Painted Makeover
Paint can completely transform a vintage desk, especially if the wood is not attractive enough to stain. But paint is not a shortcut around prep. Clean, sand, repair, and prime first. A bonding primer helps paint adhere and reduces bleed-through from tannins, old stains, or mystery marks.
For furniture, choose durable paint designed for cabinets, trim, or furniture. Latex enamel, acrylic enamel, mineral paint, and chalk-style paint can all work, depending on the look you want. Chalk-style paint gives a matte, vintage feel but usually needs wax or a protective topcoat. Enamel paint tends to be tougher for everyday use.
Paint in Thin Coats
Apply two or three thin coats instead of one thick coat. Thick paint can drip, stay tacky, and obscure details. Lightly sand between coats if needed, then remove dust before applying the next layer. A smooth painted desk is not created by luck; it is created by thin coats and emotional restraint.
Step 9: Seal the Desk for Daily Use
A desk is a working surface. It faces laptops, coffee mugs, notebooks, pens, wrists, lamps, and the occasional snack plate that was “only going to be there for a second.” A protective topcoat is essential.
Polyurethane is durable and works well for high-use surfaces. Oil-based polyurethane adds warmth and depth but may amber over time. Water-based polyurethane or polycrylic dries clearer and is often preferred over light paint colors because it is less likely to yellow. Furniture wax gives a soft sheen but is less protective for heavy desk use.
Apply the topcoat in thin, even layers. Follow drying times carefully. Lightly sand between coats with 320-grit sandpaper, then remove dust. For a desktop, three protective coats are a smart choice. Let the final finish cure fully before placing heavy objects on it. Dry to the touch is not the same as fully cured.
Step 10: Clean or Replace the Hardware
Hardware is jewelry for furniture. The wrong pulls can make a gorgeous desk look confused, while the right ones can make the entire piece feel intentional.
If keeping original brass or metal hardware, clean it gently. Warm soapy water may be enough. For tarnished brass, use a brass cleaner or a homemade paste of baking soda and lemon juice, but test first and avoid stripping away patina if you like the aged look. If replacing hardware, choose pulls that match the desk’s style. Mid-century desks look great with simple brass or black pulls. Traditional desks often suit antique bronze, aged brass, or classic cup pulls.
Step 11: Reassemble and Style the “After” Reveal
Once the finish has cured, reinstall the hardware and drawers. If the drawers stick, rub the runners with paste wax or a dry lubricant. Add felt pads under the legs to protect your floor.
Now style the desk for the after photos. Add a lamp, notebook, small plant, framed art, or vintage chair. Keep the styling simple so the desk remains the star. Take photos from the same angles as your before shots. The transformation will look more dramatic when viewers can compare the exact same view.
Before and After Example
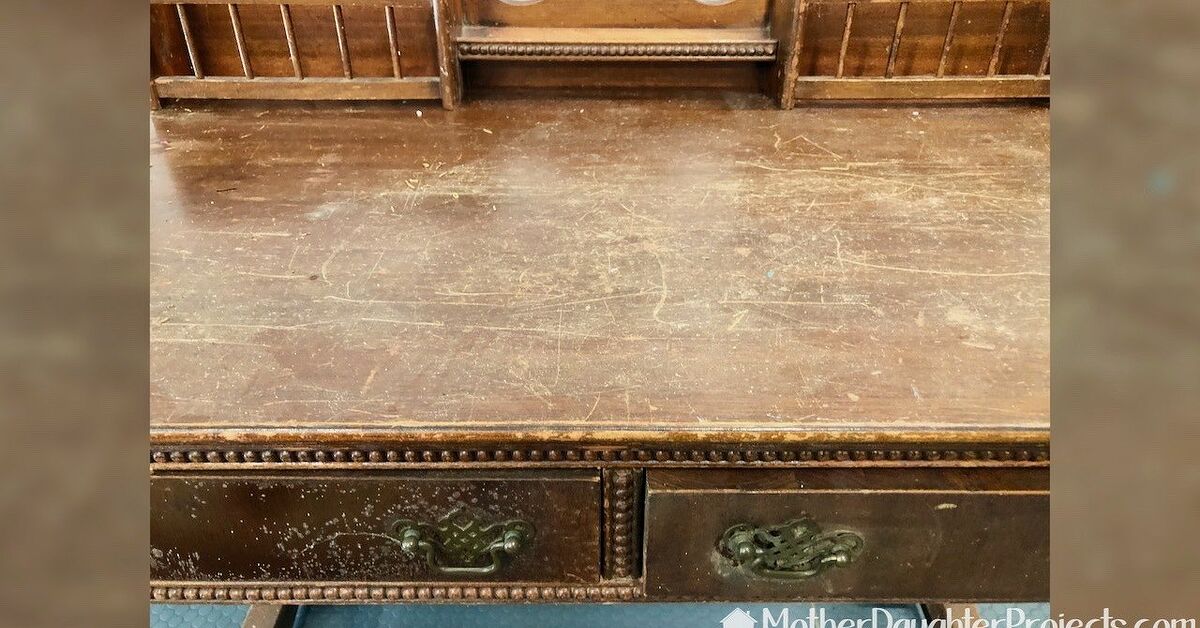
Before: The desk had a scratched orange-brown finish, dull brass pulls, water rings on the top, and drawers that smelled like old paper and ambition.
After: The desktop was sanded and stained in warm walnut, the base was painted soft black, the brass hardware was cleaned, and the drawers were lined with patterned paper. The result was a polished vintage desk that looked expensive, useful, and slightly smug about its comeback.
Common Mistakes to Avoid When Refinishing a Vintage Desk
Skipping the Cleaning Stage
Sanding dirty furniture pushes grime into the wood and can ruin adhesion. Always clean first, even if the desk looks “not that bad.” Famous last words.
Over-Sanding Veneer
Veneer is thin. Use gentle pressure and fine grit. If you see a different color or texture appearing, stop immediately. You may be close to sanding through the veneer.
Using Wall Paint Without Protection
Wall paint is not designed for constant contact, sliding objects, and daily desk use. If you use it, seal it with a durable topcoat. Better yet, choose paint made for furniture or cabinets.
Not Testing Stain
Stain can look completely different on the desk than it does on the can. Always test. The tiny test patch may save you from creating a desk that looks like it was dipped in barbecue sauce.
Rushing Cure Time
A finish may feel dry but still be soft underneath. Give the desk time before adding a computer, lamp, or heavy decor. Fresh finishes need patience to harden properly.
Best Finish Ideas for a Vintage Desk
The right finish depends on the desk style, wood condition, and your room decor. Here are several reliable ideas:
Natural Wood Restoration
Sand the desk, apply a clear or lightly tinted finish, and let the grain shine. This is ideal for walnut, oak, mahogany, and other attractive hardwoods.
Two-Tone Makeover
Stain the desktop and paint the base. This style is especially useful when the top is beautiful but the legs or drawer fronts need cosmetic help.
Classic Black Desk
Black paint with brass hardware creates a timeless, dramatic look. Choose satin or semi-gloss for a polished finish that is easier to clean.
Soft White or Cream Desk
A light painted desk can brighten a room, but use a non-yellowing water-based topcoat. Dark stains and tannins may bleed through, so primer matters.
Moody Green, Navy, or Charcoal
Deep colors look rich on vintage furniture and pair beautifully with aged brass, leather chairs, and warm wood floors.
How Long Does It Take to Refinish a Vintage Desk?
The timeline depends on the desk condition and finish choice. A light refresh may take a weekend. A full strip, repair, stain, and seal project may take several days because of drying and curing times.
Here is a realistic schedule:
- Day 1: Clean, disassemble, inspect, and repair.
- Day 2: Strip or sand the old finish.
- Day 3: Final sanding, stain, or primer.
- Day 4: Paint or apply first clear coats.
- Day 5: Add final protective coats.
- Day 6 and beyond: Allow curing before heavy use.
Can you do it faster? Sometimes. Should you? Not if you want the finish to last. Furniture refinishing is like baking: turning up the heat does not make the cake better; it makes everyone sad.
Budget: Is Refinishing a Vintage Desk Worth It?
In most cases, yes. Refinishing a vintage desk is often cheaper than buying a new solid wood desk of similar quality. Many modern desks are made from engineered wood or laminate, while older desks may have stronger construction and better details.
A basic refinishing project might cost $50 to $150 if you already own tools. Costs rise if you need a sander, specialty stripper, premium paint, new hardware, veneer, or professional repair. Still, the final result can look custom and high-end.
The biggest investment is time. If you enjoy hands-on projects, the process is rewarding. If you dislike sanding, waiting, cleaning brushes, and discovering that one drawer is possessed, you may prefer hiring a furniture refinisher.
Extra Experience: Lessons Learned from Refinishing a Vintage Desk
After refinishing a vintage desk, one thing becomes very clear: the desk is in charge. You may start with a plan, a color palette, and heroic confidence, but the furniture will reveal what it wants as you go. Maybe the top looks awful under the old varnish, so painting becomes the better option. Maybe the wood grain is unexpectedly gorgeous, and suddenly your painted desk plan feels like a crime against walnut. Flexibility is part of the process.
The first major lesson is to slow down during inspection. A desk can look simple from across the room, but close-up it may have veneer seams, old repairs, missing trim, or uneven stain absorption. Spend time studying the piece before committing to a finish. If the top is veneer, be gentle. If the drawers are solid wood but the sides are not, adjust your sanding and finishing approach. Treat each surface according to what it actually is, not what you wish it were.
The second lesson is that cleaning can dramatically improve a desk before refinishing even begins. Sometimes what looks like a ruined finish is actually wax buildup, smoke residue, or old polish. A careful cleaning can help you decide whether the desk needs full stripping or only a scuff sand and fresh topcoat. This step also prevents the new finish from reacting badly with hidden contaminants.
The third lesson is to test everything. Test stain. Test paint. Test topcoat. Test cleaners. Test your patience. A stain that looks elegant on oak may look muddy on pine. A clear coat that looks invisible on bare wood may yellow over white paint. A small test area can prevent a large regret. This is not wasted time; it is furniture insurance.
The fourth lesson is that good lighting matters. Sanding in poor light can leave shiny patches of old finish behind. Those patches may reject stain or show through paint. Move a work light across the surface at an angle to reveal scratches, glue spots, and uneven sanding. The desk may look smooth in dim light, but daylight is brutally honest.
The fifth lesson is to respect drying and curing times. Many beginners apply coats too quickly, then wonder why the finish feels tacky. Temperature, humidity, coat thickness, and product type all affect drying. Thin coats dry better and look more professional. If the label says wait, wait. Go drink coffee, organize screws, or admire your before photos like a proud archaeologist.
The sixth lesson is that hardware can completely change the final result. Original hardware often deserves a chance. A little cleaning can reveal warm brass or charming age that new hardware cannot imitate. However, if the original pulls are broken or unattractive, replacing them can modernize the desk instantly. Just measure carefully so you do not create extra holes that require more repair.
The seventh lesson is to style the desk after refinishing, but do not overload it. A vintage desk has its own personality. A simple lamp, a ceramic cup, a plant, and a notebook may be enough. Let the lines, grain, color, and hardware show. The best after photo should say, “This desk is ready for deep work,” not “A home decor store exploded here.”
Finally, refinishing a vintage desk is satisfying because it combines creativity with usefulness. You are not just making something pretty. You are saving a functional piece, reducing waste, and creating furniture with a story. Every dent repaired, every drawer cleaned, every coat of finish applied adds to that story. The final before-and-after moment is not only about appearance. It is about seeing potential where others saw scratches.
Conclusion: From Dusty Relic to Dream Desk
Refinishing a vintage desk is one of the most rewarding DIY furniture projects because the transformation can be dramatic and practical. A scratched, stained, outdated desk can become a beautiful workspace with character, durability, and style. The process requires careful cleaning, smart repairs, patient sanding, thoughtful finishing, and a protective topcoat that can handle real life.
The secret is not perfection. The secret is preparation. Study the desk, respect the material, choose the right finish, and give each step enough time. Whether your final look is natural wood, classic black, soft white, moody green, or a two-tone stain-and-paint combination, the best result is a desk that feels both refreshed and authentic.
So take the before photos, label the screws, sand with the grain, and do not panic when the project looks worse halfway through. That awkward middle stage is normal. With patience and a little grit, your vintage desk can go from “please hide me in the basement” to “excuse me, I belong in a magazine.”














