
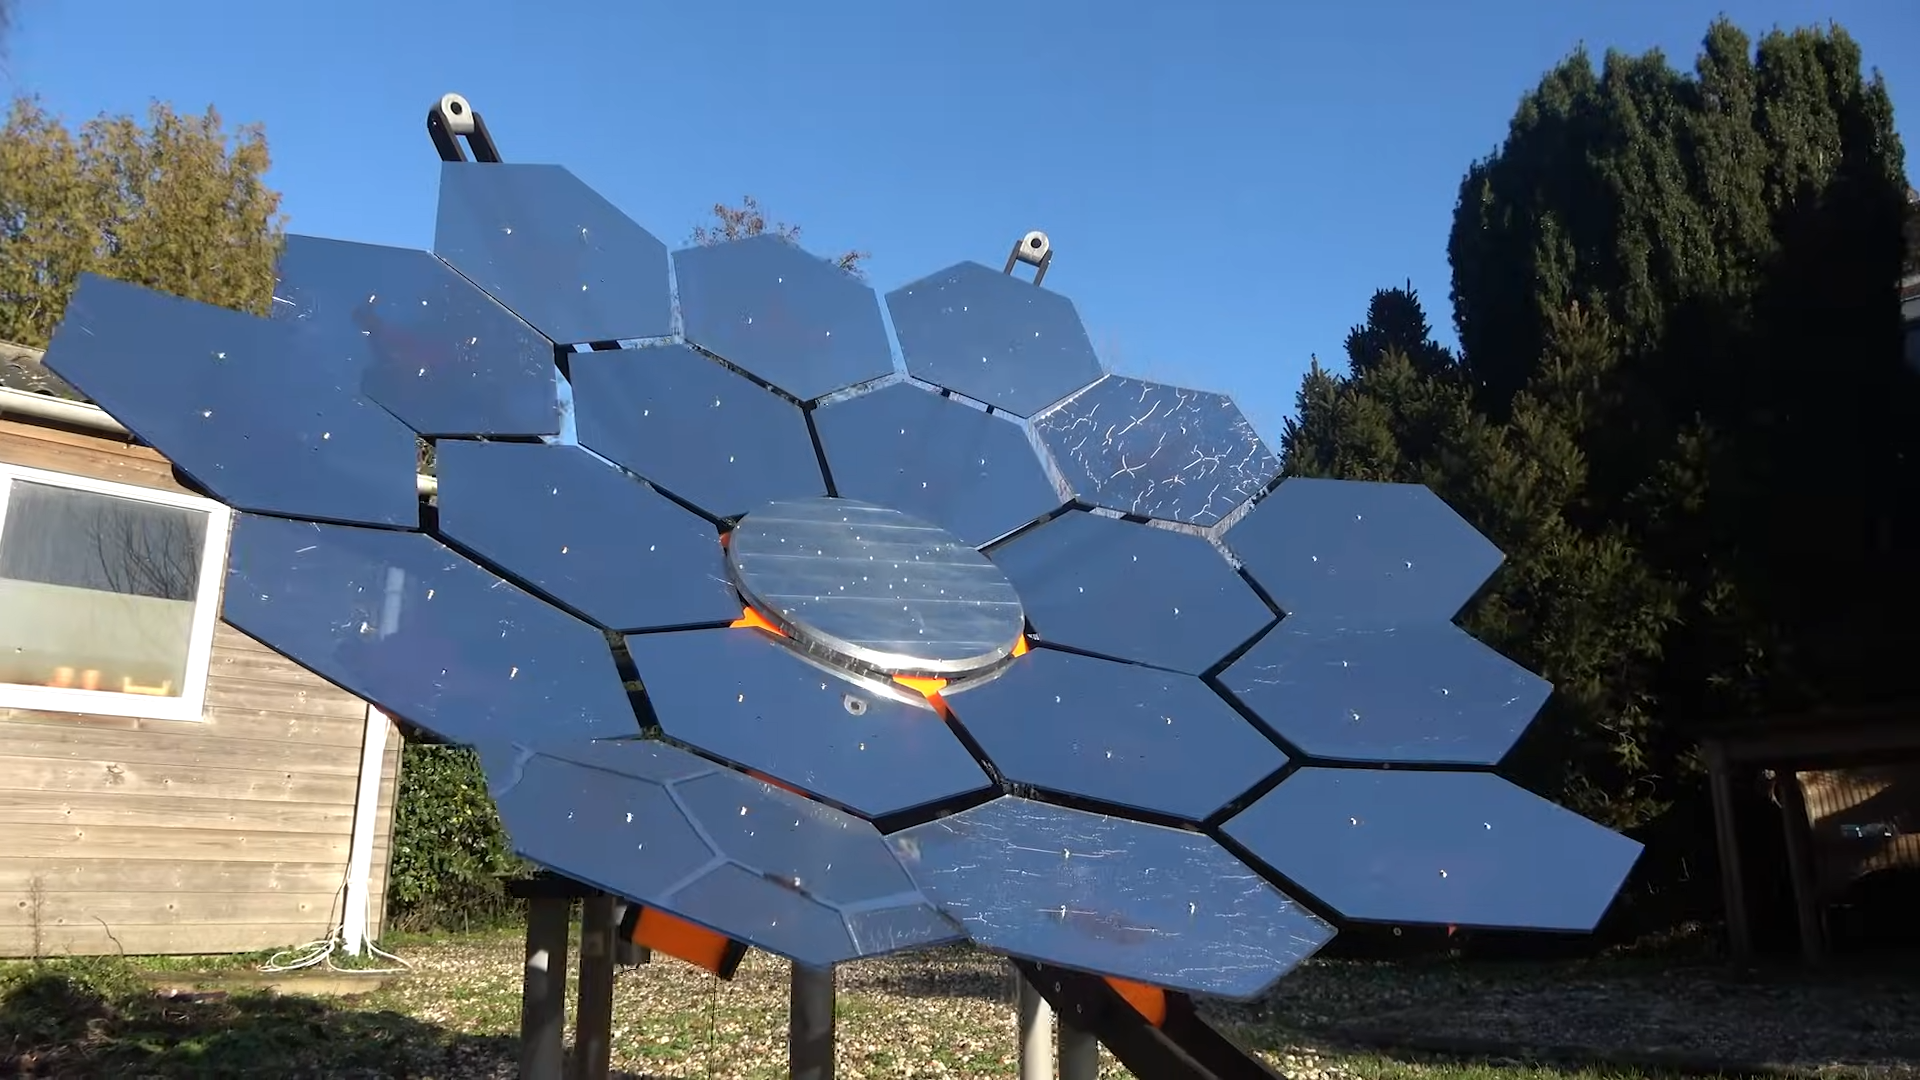
NASA’s James Webb Space Telescope is famous for its enormous golden mirror, its tennis-court-sized sunshield, and the nerve-rattling sequence in which the observatory unfolded itself in space. Less glamorousbut absolutely essentialis the solar array that deployed soon after launch and began supplying electricity to the spacecraft.
Your backyard solar generator will not photograph newborn galaxies, survive a trip to deep space, or require several billion dollars and a room full of engineers holding their breath. It can, however, borrow several smart ideas from Webb: calculate the power budget first, separate heat-producing components, build in modules, deploy the solar collector efficiently, and test everything before depending on it.
This guide outlines a portable DIY solar generator suitable for charging phones, running LED lights, powering a laptop, operating a router, or supporting small emergency devices. The suggested design uses a preassembled battery with a battery-management system rather than homemade lithium cells. That choice makes the project less like experimental rocketry and more like something you can safely keep near the camping gear.
What a DIY Solar Generator Actually Does
A solar generator is not a generator in the traditional engine-powered sense. It does not create electricity from fuel. Instead, it collects solar energy, regulates that energy, stores it in a battery, and delivers it through several useful outputs.
A basic portable system contains five functional sections:
- Solar panels convert sunlight into direct-current electricity.
- A charge controller manages the energy traveling from the panels to the battery.
- A battery stores energy for nighttime, cloudy periods, and sudden demand.
- An inverter changes battery-supplied DC electricity into household-style AC electricity.
- DC outputs power USB devices, lights, and compatible 12-volt equipment without using the inverter.
The system can be represented as a simple energy path:
Sunlight → Solar array → Charge controller → Battery → DC outputs or inverter → Devices
That block-diagram approach is very Webb-like. Complex missions are easier to understand when they are divided into smaller subsystems with clearly defined jobs.
Five James Webb Ideas Worth Borrowing
1. Start With a Power Budget
Spacecraft cannot casually add another extension cord after launch. Engineers identify every electrical load, estimate how long it will operate, and provide enough generation and storage to support it. A DIY solar generator deserves the same discipline.
List each device, its wattage, and its expected daily operating time. Multiply watts by hours to calculate watt-hours.
Watt-hours = watts × hours used
| Device | Power | Daily Use | Energy Required |
|---|---|---|---|
| LED camp light | 8 watts | 5 hours | 40 watt-hours |
| Laptop | 60 watts | 3 hours | 180 watt-hours |
| Wi-Fi router | 12 watts | 8 hours | 96 watt-hours |
| Two phone charges | Approximately 15 watt-hours each | One charge each | 30 watt-hours |
| Total | — | — | 346 watt-hours |
Add roughly 20% to 30% for inverter losses, wiring losses, changing weather, and imperfect real-world operation. A daily target of 346 watt-hours therefore becomes approximately 430 watt-hours. Space engineers call that margin. Home builders call it avoiding an argument with a dead battery at 11:30 p.m.
2. Use a Deployable Solar Array
Webb had to fit inside a rocket, so major components were folded for launch and deployed later. A portable solar generator benefits from the same compact-when-stored, spacious-when-working philosophy.
A practical setup uses two foldable 100-watt panels or a single 200-watt folding array. Hinged supports or removable kickstands allow the panels to face the sun while the battery enclosure remains in the shade. Quick-connect solar plugs make setup faster, but connectors must be properly rated for the system’s voltage and current.
Do not cover functional solar cells with gold film to imitate Webb’s mirror. The telescope’s gold-colored mirror and its solar array are different systems. Decorative gold honeycomb graphics belong on the enclosure, not between sunlight and photovoltaic cells.
3. Separate Hot and Cool Zones
Webb’s sunshield helps maintain radically different thermal environments on opposite sides of the observatory. Your generator does not need cryogenic instruments, but it still benefits from thermal separation.
The solar panels should sit in direct sunlight. The battery and inverter should not. Place the power box under a canopy, behind the panels, or in another shaded and ventilated location. Avoid leaving the system in a sealed vehicle, on hot pavement, or beneath a blanket of camping equipment.
Inside the enclosure, leave space around the inverter and charge controller for airflow. Do not pack wiring against cooling vents. A project box is not improved by turning it into a miniature electrical sauna.
4. Build Modular Subsystems
A modular generator is easier to troubleshoot and upgrade. Instead of permanently attaching everything into one heroic knot of wire, treat the system as separate modules:
- A folding solar-array module
- A protected battery module
- A charge-control module
- An AC inverter module
- A DC and USB distribution module
- A monitoring and fuse panel
This arrangement allows a damaged cable, failed controller, or undersized inverter to be replaced without rebuilding the entire generator. It also makes future expansion easier.
5. Test Before the Mission
NASA did not launch Webb and hope the folding mechanisms felt cooperative that morning. Components were repeatedly inspected and tested. Follow the same philosophy before relying on your generator during a storm or camping trip.
Test each output, simulate your expected load, verify charging in full and partial sunlight, inspect connector temperatures, and record how long the battery lasts. A label maker and a notebook are less exciting than a launch countdown, but considerably cheaper than replacing smoked electronics.
A Practical Webb-Inspired System
For light emergency power and recreational use, the following configuration offers a useful balance of portability, capacity, and simplicity:
| Component | Suggested Specification | Purpose |
|---|---|---|
| Solar array | Two 100-watt foldable panels | Collects solar energy while remaining portable |
| Battery | 12.8-volt, 50-amp-hour preassembled LiFePO4 battery with BMS | Provides approximately 640 nominal watt-hours |
| Charge controller | 20-amp MPPT controller compatible with the battery | Regulates charging and improves energy collection |
| Inverter | 300-watt pure sine-wave inverter | Runs modest AC loads such as laptop chargers |
| DC distribution | Fused USB-C, USB-A, and 12-volt outputs | Powers compatible devices without inverter losses |
| Protection | Manufacturer-specified fuses, disconnects, covered busbars, and correctly sized cable | Protects wiring and simplifies maintenance |
| Monitoring | Battery monitor with shunt or compatible state-of-charge display | Tracks voltage, current, and remaining energy |
A 12.8-volt, 50-amp-hour battery stores approximately 640 nominal watt-hours because 12.8 multiplied by 50 equals 640. Actual usable energy depends on the battery specifications, operating temperature, current draw, inverter efficiency, and configured discharge limits.
A 200-watt array receiving four effective peak-sun hours could theoretically collect 800 watt-hours. After allowing for heat, controller behavior, panel angle, wiring, clouds, and other losses, a planning estimate closer to 550 to 650 watt-hours may be more realistic. Local solar conditions vary, so use location-based production estimates rather than treating four hours as a universal promise from the Sun.
Choosing the Components
Use a Preassembled Battery
Building a lithium battery from loose cells introduces risks involving cell matching, insulation, compression, balancing, thermal behavior, and short-circuit protection. For this project, choose a professionally assembled battery with an integrated battery-management system and documentation for charging limits, continuous current, temperature restrictions, and fuse recommendations.
The battery should be secured inside the enclosure so it cannot slide, tip, or place tension on its terminals. Terminal covers are essential. A dropped wrench can become a surprisingly effective heating element when it bridges battery contacts.
Select the Charge Controller Carefully
An MPPT controller is a good match for a compact portable system because it converts available panel power into suitable battery-charging conditions. Confirm that the controller supports the battery chemistry and charging profile.
Check the solar array’s open-circuit voltage, especially when panels are connected in series. The combined voltage must remain below the controller’s maximum solar-input rating under all expected conditions. Cold temperatures can increase panel voltage, so “barely under the limit” is not a design margin.
Keep the Inverter Modest
A large inverter may look impressive on a product page, but it can demand extremely high current from a 12-volt battery. For phones, laptops, camera batteries, and small electronics, a 300-watt pure sine-wave inverter is often more appropriate than a giant unit designed for kitchen appliances.
Check both continuous and surge ratings. Devices with compressors, motors, heating elements, or pumps may draw more power than their ordinary operating label suggests. Refrigerators, coffee makers, microwaves, hot plates, hair dryers, and space heaters can overwhelm a small portable build.
Favor Direct DC Power
Whenever possible, run USB devices and 12-volt equipment directly from fused DC outputs. Converting battery power from DC to AC and then back to DC through a laptop or phone charger wastes energy.
A regulated USB-C Power Delivery module can efficiently charge compatible laptops and tablets, provided the module is correctly installed, fused, ventilated, and rated for the required output.
How to Assemble the Generator
Step 1: Draw the Electrical Diagram
Create a complete diagram before cutting cable. Mark the battery, controller, solar input, inverter, fuse locations, disconnects, busbars, monitor shunt, and every output circuit.
Each branch circuit should have protection appropriate for its conductor and connected equipment. Fuse selection is not based on optimism or whichever fuse happens to be closest to the toolbox. Follow the component manufacturer’s recommendations and recognized wire-ampacity guidance.
Step 2: Plan the Enclosure
Use a sturdy, nonconductive or appropriately bonded enclosure with a handle and protected controls. A rugged equipment case, vented project box, or compact cart can work. Heavy components should sit low to reduce tipping.
Divide the interior into functional zones. Keep high-current battery and inverter cables short. Place covered positive and negative busbars where they can be inspected without exposing accidental contact points. Provide ventilation openings that do not allow rain to fall directly onto electrical components.
Step 3: Install Mechanical Components First
Mount the battery restraint, controller, inverter, fuse holders, disconnect, monitor, outlets, and cable glands before completing the wiring. Remove metal shavings and debris from the enclosure. One forgotten shaving can turn a sophisticated energy system into a very small fireworks demonstration.
Step 4: Prepare the Wiring
Use stranded copper cable of the correct gauge, quality crimp terminals, adhesive-lined heat-shrink tubing, abrasion protection, and insulated terminal covers. Avoid household extension-cord wire for internal DC battery connections.
High-current cables should be properly crimped with the correct tool. Poor crimps create resistance, and resistance creates heat. Support cables so vibration and movement do not pull on terminals.
Step 5: Add Protection Near the Battery
Place the primary fuse or circuit protection close to the battery’s positive terminal, following the battery and inverter manufacturers’ instructions. Protect individual output branches with appropriately rated fuses.
Install a master disconnect that can isolate the battery from the rest of the system. Label it clearly enough that another person can operate it during an emergency.
Step 6: Connect Components in the Correct Sequence
Keep the battery disconnected and the panels covered while making connections. Many charge-controller manufacturers require the battery to be connected before the solar input so the controller can identify system voltage correctly. Other equipment may have different procedures, so follow the exact manual supplied with your controller.
Verify polarity with a multimeter before every final connection. Red insulation is helpful, but it is not legally obligated to tell the truth after someone rewires a used cable.
Step 7: Perform Initial Power-Up Tests
Begin without external loads. Confirm that the controller detects the battery, the monitor displays sensible information, and no component becomes warm unexpectedly. Then uncover or connect the panels and confirm that charging begins.
Test one output circuit at a time. Start with a small USB load, proceed to a low-power DC light, and finally test the inverter. Listen for unusual noise, inspect for odors, and use an infrared thermometer to identify heating connectors during a controlled load test.
Creating the James Webb Look
A Webb-inspired generator should look intentional without interfering with function. Consider a matte white or silver enclosure with gold hexagonal graphics, black control panels, and labeled subsystem zones.
Arrange the two folding solar panels like deployable wings. A lightweight hinged frame can open into a broad array and fold flat for transportation. Use locking braces so wind cannot collapse it. Add reflective alignment marks or a simple shadow indicator to help aim the panel surface toward the sun.
The decorative hexagons can also serve a practical purpose. Assign one to each system category: solar input, battery, AC output, DC output, communications, and thermal monitoring. Suddenly the design is not merely space-themed; it is organized. Somewhere, an aerospace engineer quietly approves.
Operating the Solar Generator Efficiently
Follow the Sun, Not the Shade
Place the panels where they receive direct light without shadows from branches, roof edges, tents, antennas, or neighboring panels. Even partial shading can reduce output substantially, depending on panel construction and electrical configuration.
Adjust the angle periodically during long operating sessions. The best fixed tilt depends on location, season, and time of day, but simply facing the array more directly toward the sun can noticeably improve charging.
Keep the Power Box Cool
Run an extension cable from the solar array to the shaded generator enclosure rather than placing the entire system in direct sun. Respect the controller’s allowable cable length, conductor size, and voltage-drop limits.
Do not operate the inverter inside a closed case unless the enclosure was designed for that configuration. Open ventilation panels or use thermostatically controlled fans when appropriate.
Monitor Energy Instead of Guessing
Battery voltage alone may provide an incomplete estimate of remaining capacity, particularly while charging or powering a load. A shunt-based monitor measures current entering and leaving the battery and can provide a more useful state-of-charge estimate when properly configured.
Record daily solar harvest and consumption during early use. Those numbers reveal whether the array is large enough, the loads are realistic, and the battery can recover before the next evening.
Common DIY Solar Generator Mistakes
- Buying the inverter first: Start with actual loads, not the largest wattage printed on a shiny box.
- Ignoring startup surges: Motors and compressors may demand much more power when starting.
- Using undersized wire: High current at low voltage can produce dangerous heating.
- Installing the fuse too far from the battery: The unprotected section of cable remains vulnerable.
- Mixing incompatible charging profiles: Battery chemistry and controller settings must match.
- Sealing everything in a waterproof case: Water resistance without thermal planning can trap damaging heat.
- Trusting the battery percentage immediately: Monitors require correct capacity settings and calibration.
- Expecting rated panel output all day: Nameplate wattage is measured under standardized conditions, not beneath every cloud in your neighborhood.
- Backfeeding a house outlet: This is dangerous and must never be attempted.
A Realistic Build Experience: From Cardboard Mock-Up to First Solar Charge
A sensible Webb-inspired project often begins with cardboard, painter’s tape, and a surprising amount of rearranging. Before drilling the enclosure, a builder can create full-size paper templates for the battery, inverter, controller, busbars, and outlets. The first arrangement usually looks beautifully symmetrical and electrically inconvenient. The inverter cables are too long, the disconnect is difficult to reach, and the charge controller’s cooling fins are facing a wall.
The second layout is typically less photogenic but much better. The battery sits low and centered, the fuse is close to its positive terminal, the inverter has breathing room, and the external connectors are located where cables will not cross the control panel. This is the moment when the project begins to feel less like assembling gadgets and more like designing a tiny spacecraft bus.
The first lesson during wiring is that thick battery cable has opinions. It does not bend neatly merely because a diagram contains a tidy right angle. Measuring cable runs with flexible rope before ordering conductors can prevent expensive mistakes. Leaving gentle bends also reduces stress on battery posts and inverter terminals.
The second lesson arrives during the initial outdoor test. A pair of 100-watt panels may produce encouraging power around midday, but output changes as thin clouds pass, shadows move, and panel temperature rises. Rotating the array slightly toward the sun can improve collection more than expected. Moving the battery enclosure into the shade may also reduce heat while the panels continue working happily in full sunlight.
A typical first load test might include a 60-watt laptop charger, an 8-watt lamp, and two phones. The system handles them easily, yet the monitor reveals that the inverter itself consumes power. Switching the phones to direct USB outputs and using USB-C for the laptop, when compatible, reduces the load. That small operational change may extend useful runtime without buying a larger battery.
The most valuable test is not a dramatic maximum-power experiment. It is a boring, realistic rehearsal. Charge the battery, run the same devices expected during an outage, and observe the system for several hours. Check cable connections, controller temperature, inverter airflow, and battery state of charge. Then recharge from solar the following day and record how long recovery takes.
This rehearsal often changes expectations. A small generator is excellent for communications, lighting, laptops, fans, and selected medical-device support when the equipment specifications are compatible. It is not a magical substitute for the electric grid. Appliances that create heat consume energy at a breathtaking rate. A coffee maker can turn a carefully conserved battery reserve into one very expensive cup.
The final improvement is usually labeling. Each connector receives a voltage and current label. The master disconnect gets a bright emergency marker. The inside lid holds a simplified wiring diagram, fuse list, shutdown procedure, and component model numbers. Spare fuses are stored in a separate insulated container.
After these refinements, the finished generator feels reassuringly uneventful. The panels unfold, the controller begins charging, and the monitor reports what the system is doing. No mysterious sparks, no hot connectors, and no frantic search for a manual. Like the Webb telescope, the most impressive part is not that the system looks futuristic. It is that every subsystem performs its assigned job in the correct order.
Maintenance and Long-Term Storage
Inspect cables, connectors, strain reliefs, and fuse holders before major trips or severe-weather seasons. Look for discoloration, looseness, corrosion, cracked insulation, or signs of overheating. Clean solar-panel surfaces according to the manufacturer’s directions.
Store the battery within its recommended temperature and state-of-charge range. Recharge it at the intervals specified by the manufacturer. Do not continue using a battery that is swollen, physically damaged, leaking, unusually hot, recalled, or behaving unpredictably.
Keep lithium batteries out of household trash and ordinary curbside recycling. At the end of the battery’s useful life, use an appropriate battery collection or household hazardous-waste program and protect the terminals during transport according to local guidance.
Conclusion
A DIY solar generator inspired by the James Webb Space Telescope is not about gluing gold hexagons to a battery box and declaring victory. Its real inspiration comes from the observatory’s systems thinking: define the mission, calculate the power budget, deploy the energy collector, separate thermal zones, protect each subsystem, and test the complete sequence before it matters.
A 200-watt folding solar array, a preassembled 12.8-volt battery, a compatible MPPT charge controller, a modest pure sine-wave inverter, and efficient DC outputs can create a capable portable power station for camping or emergency communications. The system becomes more useful when it is sized for realistic loads, kept cool, protected with appropriate fuses, and operated within documented limits.
Build for reliability rather than maximum wattage. Your generator may never travel a million miles from Earth, but when the lights go out and the router, laptop, and phones remain powered, it will still feel like a small triumph of space-age engineering.
Final note: This article is intended for educational planning of a portable, isolated, low-voltage solar system. Electrical work can cause fire, shock, battery damage, or personal injury. Use listed components, follow manufacturer documentation, and consult a qualified electrician for unfamiliar wiring, permanent installations, or any connection to building circuits.














