
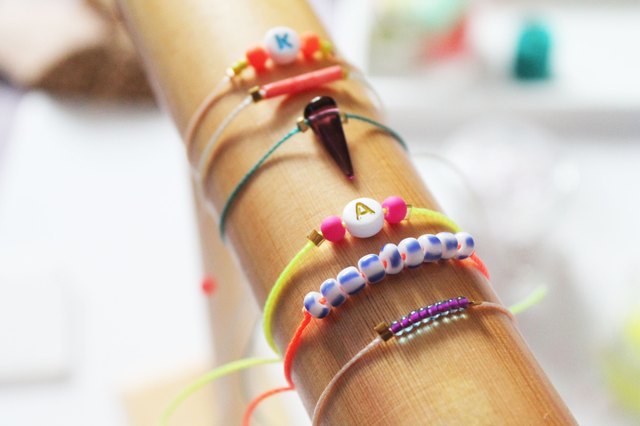
String bracelets are inexpensive, portable, endlessly customizable, and surprisingly difficult to stop making once you learn the basic knots. With a few strands of embroidery floss and a little patience, you can create colorful friendship bracelets that look far more complicated than they really are.
This beginner-friendly guide explains how to make string bracelets step by step, including how to choose materials, measure thread, tie the essential knots, create popular patterns, finish your bracelet, and fix the mistakes that inevitably appear when one strand decides to become a tiny agent of chaos.
What Do You Need to Make String Bracelets?
You do not need a professional jewelry studio, a mysterious collection of pliers, or a craft room organized by color temperature. Most beginner string bracelets require only a handful of affordable supplies.
Essential materials
- Embroidery floss: Six-strand cotton embroidery floss is a popular choice because it is smooth, colorful, flexible, and easy to knot.
- Sharp scissors: Clean cuts reduce frayed ends and make finishing easier.
- Ruler or measuring tape: This helps you cut strands of equal length.
- Tape, clipboard, or safety pin: You need something to hold the bracelet firmly while you work.
Optional supplies
- Letter beads, seed beads, or small charms
- A bracelet-making board
- Thread bobbins for organizing long strands
- Fabric glue for securing certain closures
- A button for a button-and-loop fastening
Embroidery floss is the easiest material for traditional friendship bracelets, but thin yarn, crochet cotton, hemp cord, satin cord, and waxed jewelry cord can also work. Thicker materials create chunkier bracelets, while fine thread produces a narrower, more detailed design.
Small beads can be a choking hazard, and scissors or safety pins require care. Younger children should make bracelets with adult supervision.
How to Measure and Prepare Your Bracelet String
Cutting the right amount of string matters because knotting shortens every strand. A thread that looks comically long at the beginning can become alarmingly short near the finish line.
Choose your bracelet size
Measure loosely around the wearer’s wrist. Add enough space for comfort and for the chosen closure. The finished knotted section should generally be slightly shorter than the wrist measurement because braided ties or loops add extra length.
Cut the strands
For a simple bracelet made with four to six strands, begin with pieces approximately 30 to 36 inches long. Use longer strands for wide bracelets, complex patterns, large wrists, or designs in which one color makes many more knots than the others.
It is much easier to trim extra floss than to persuade a six-inch strand to grow another foot through positive thinking.
Arrange your colors
Select two to six colors for your first project. High-contrast combinations make the pattern easier to see, while neighboring shades create a softer, blended effect. School colors, team colors, birthstone shades, and favorite color combinations can make a handmade bracelet feel more personal.
Secure the top
- Line up the cut strands.
- Tie an overhand knot about 3 inches from one end.
- Attach the knot to a clipboard or tape it firmly to a table.
- Separate the strands in the order required by your pattern.
Leave enough thread above the knot to braid or tie the bracelet closed later. Keeping the working area secure prevents twisted rows and gives you better control over knot tension.
The Four Basic Knots Used in String Bracelets
Most traditional friendship bracelet patterns are combinations of four knots: the forward knot, backward knot, forward-backward knot, and backward-forward knot. Each complete bracelet knot is usually formed by tying the working strand twice around another strand.
1. Forward knot
- Hold the second strand straight and slightly taut.
- Bring the left working strand over it to form a shape resembling the number 4.
- Pass the working strand underneath the straight strand and through the opening.
- Pull the knot upward toward the top of the bracelet.
- Repeat the same motion once more.
The working strand moves from left to right after a completed forward knot.
2. Backward knot
- Hold the strand on the left straight.
- Bring the right working strand over it to form a backward number 4.
- Pass the working strand underneath and through the opening.
- Pull the knot upward.
- Repeat the motion a second time.
The working strand moves from right to left.
3. Forward-backward knot
Make the first half as a forward knot and the second half as a backward knot. The working strand returns to its original side. This directional change is useful for diamonds, hearts, waves, and other detailed friendship bracelet patterns.
4. Backward-forward knot
Begin with one backward half-knot, followed by one forward half-knot. Again, the working strand ends where it started.
How tight should the knots be?
Pull each knot firmly enough to sit against the previous row, but not so tightly that the bracelet curls or the floss stretches. Consistent tension matters more than maximum tightness. Think “secure and even,” not “trying to tow a truck.”
How to Make an Easy Candy-Stripe String Bracelet
The candy-stripe pattern is one of the best friendship bracelets for beginners. It uses only forward knots and naturally creates diagonal stripes.
Step 1: Cut and arrange the floss
Cut six strands of embroidery floss, each about 36 inches long. You can use six different colors or repeat three colors twice. Tie the strands together, secure the knot, and arrange the colors from left to right.
Step 2: Knot the first strand across the row
Take the far-left strand and tie a complete forward knot around the strand immediately to its right. The working strand will switch positions with that strand.
Continue using the same working strand to make forward knots around every remaining strand. When you reach the far-right side, you have completed one row.
Step 3: Repeat with the new left strand
Return to the far-left side. Pick up the strand that is now first and knot it across all the other strands. Continue row by row.
As each color travels from left to right, diagonal stripes will develop. Stop when the knotted portion is long enough to fit around the wrist.
Step 4: Check the edges
If the bracelet begins curving, loosen your tension slightly. If gaps appear between rows, pull each knot upward before making the second half. The edge may not look machine-perfect, and that is fine. Handmade jewelry is allowed to have a personality.
How to Make a Chevron Friendship Bracelet
A chevron bracelet creates repeating V-shaped rows. It is a small step up from the candy stripe because it combines forward and backward knots, but it is still manageable for beginners.
Step 1: Prepare mirrored colors
Cut eight strands using four colors, with two strands of each color. Arrange them in a mirrored sequence. For example:
Blue, pink, yellow, green, green, yellow, pink, blue
The outside colors should match, the next pair should match, and so on toward the center.
Step 2: Knot from the left toward the center
Use the far-left strand to make forward knots over each strand until it reaches the middle. Keep the working strand visible so you do not accidentally grab its identical twin and send the pattern into an alternate universe.
Step 3: Knot from the right toward the center
Take the far-right strand and make backward knots over each neighboring strand until it reaches the center.
Step 4: Join the center strands
Tie the two matching center strands together with either a forward or backward knot. Use the same direction consistently for each row.
Step 5: Repeat
The next matching pair of colors will now sit at the outer edges. Repeat the process: knot inward from the left, knot inward from the right, and join the pair in the middle.
After several rows, the chevron design becomes clearly visible. Uneven V shapes usually mean one side is being pulled more tightly than the other.
Other Easy String Bracelet Patterns to Try
Spiral staircase bracelet
Use one working strand to tie repeated forward knots around a bundle of center strands. The knots naturally twist into a spiral. This is an excellent pattern for beginners who want quick, colorful results.
Three-strand braided bracelet
Divide the floss into three equal groups and braid them as you would braid hair. This style is fast, forgiving, and useful when making bracelets with younger children.
Alternating square-knot bracelet
Use two outer working cords around one or more center cords. Alternating the knot direction produces a flat macramé band instead of a spiral.
Beaded string bracelet
Slide beads onto selected strands between knots. Check that the bead holes are large enough for the chosen floss. Letter beads can spell names, initials, short phrases, or inside jokes that make absolutely no sense to anyone outside the friendship.
Heart or diamond patterns
These designs use all four directional knots and require closer attention to strand order. Practice candy stripes and chevrons first so the basic movements feel natural.
How to Finish and Tie a String Bracelet
Once the knotted section fits the wrist, tie an overhand knot directly below the final row. Then choose a closure.
Braided ties
- Divide the loose ends into three groups.
- Braid each end for 2 to 3 inches.
- Tie a knot at the end of each braid.
- Wrap the bracelet around the wrist and tie the braids together.
This is the simplest adjustable finish and requires no additional materials.
Loop-and-braid closure
Instead of beginning with a basic knot, fold the floss in half and create a small loop at the top. Finish the other end with one or two braids that can pass through the loop and tie securely.
Button closure
Create a loop at one end and attach a button at the other. Test the loop before finishing to ensure it fits around the button without slipping off.
Sliding knot closure
Overlap the two bracelet ends and tie a separate cord around them using square knots. This creates an adjustable closure, although it requires more careful construction than braided ties.
Common String Bracelet Problems and How to Fix Them
The bracelet keeps curling
Your knots are probably too tight or uneven. Relax your grip and apply similar tension to both halves of every knot. Gently flatten completed rows with your fingers as you work.
The colors appear in the wrong order
Stop immediately instead of knotting three more rows and hoping the bracelet will apologize. Compare the strands with your original arrangement. Carefully loosen the incorrect knot using a pin or blunt needle, then retie it correctly.
The working strands become tangled
Keep unused strings separated and comb them with your fingers after every row. For long strands, wrap the excess around small cardboard bobbins.
One strand is becoming too short
Some patterns use certain colors more heavily. You may be able to add a new piece with a small, secure knot positioned on the back. For the cleanest result, start over with a longer strand if you notice the problem early.
The bracelet is too narrow
Add more strands to the next version or choose thicker thread. The number and thickness of the strands generally determine the bracelet’s width.
The rows have visible gaps
Slide each half-knot firmly toward the previous row before tying the next half. Secure the top of the bracelet so it cannot move while you work.
Creative Ways to Personalize String Bracelets
- Use colors associated with a favorite sports team, school, holiday, or cause.
- Add initials with letter beads.
- Create matching bracelets with reversed color arrangements.
- Attach a small charm to the center or closure.
- Mix matte cotton floss with metallic embroidery thread.
- Make a coordinated bracelet stack using different patterns.
- Turn unfinished bracelets into key chains, zipper pulls, bookmarks, or bag charms.
When making a bracelet as a gift, consider the recipient’s usual colors and wrist size. A simple two-color bracelet in shades they actually wear may be more meaningful than an elaborate rainbow masterpiece destined to live permanently in a drawer.
Tips for Making Better Friendship Bracelets
- Practice with contrasting colors. It is easier to identify the working strand and spot mistakes.
- Complete both halves of every knot. One half-knot creates a weak, uneven row.
- Work in good lighting. Dark colors can be difficult to separate at night.
- Pause between rows. A row is a safer stopping point than the middle of a complicated sequence.
- Photograph the starting order. The picture provides a useful reference after interruptions.
- Label complicated strands. Small numbered pieces of removable tape can help with advanced patterns.
- Keep your first bracelet simple. Finishing an easy design builds more confidence than abandoning a 20-strand portrait of your dog.
What Making String Bracelets Is Really Like: Practical Experiences
The first experience many beginners have with string bracelets is a mixture of excitement and mild confusion. The supplies look harmless. The pattern diagram looks logical. Then eight nearly identical strands spread across the table, and suddenly the project feels like air-traffic control for embroidery floss.
The good news is that the awkward stage usually passes quickly. During the first few rows, you may need to repeat the words “over, under, through, and pull” every time you make a knot. After several minutes, your hands begin remembering the movement without constant instructions. That moment is satisfying because the bracelet changes from a technical exercise into a relaxing rhythm.
Tension is usually the first major lesson. Beginners often pull each knot as tightly as possible because tight knots seem more secure. The result may be a stiff bracelet that curls like a potato chip. On the next attempt, they loosen the knots too much and create a bracelet with tiny windows between the rows. Consistent medium tension is the answer, but it is learned through touch rather than theory.
Color choice creates another memorable experience. Four shades may look clearly different while sitting in separate skeins, yet become almost indistinguishable when tied into narrow rows. Using strong contrast for an early project makes the pattern easier to follow. After the knotting technique becomes familiar, subtle color palettes are much easier to manage.
Nearly every bracelet maker eventually ties a knot with the wrong strand. The immediate temptation is to ignore it. Sometimes that creates a quirky handmade detail. More often, the error grows into a diagonal line that announces itself across the entire design. Correcting mistakes early saves time. A pin, needle, or fingernail can usually loosen a fresh knot without damaging the floss.
Long strands also have a remarkable ability to form tangles while nobody is looking. Separating the strings after every row may seem unnecessary, but it prevents the sort of knot that requires ten minutes, excellent lighting, and negotiations with the universe. Small thread bobbins are especially helpful when making wide patterns.
One of the most enjoyable experiences is choosing a design for a specific person. A bracelet made in a friend’s favorite colors feels more personal than one selected from a store. Adding an initial, symbolic charm, or shared color combination turns a basic craft into a miniature record of a relationship.
Making bracelets with other people changes the experience again. At a sleepover, camp activity, family craft night, or classroom table, everyone can use the same basic supplies while creating something different. Conversation tends to flow naturally because hands are busy and eye contact is not required every second. Finished bracelets can be traded, stacked, or given away before the loose thread has even been trimmed.
The final lesson is that perfection matters less than completion. The first bracelet may have uneven edges, a suspicious bump, or a color that wandered into the wrong row. It can still be worn and appreciated. Each finished project improves hand control, pattern recognition, and confidence. By the third or fourth bracelet, the knots become cleaner, the rows become straighter, and choosing the next pattern becomes the hardest part.
Conclusion
Learning how to make string bracelets begins with four simple knots, a secure workspace, and a manageable pattern. Start with a candy stripe or basic braid, practice keeping your tension even, and move to chevrons, diamonds, hearts, beads, and adjustable closures as your confidence grows.
The real appeal of friendship bracelets is not just the finished accessory. It is the combination of color, repetition, creativity, and meaning. A few inexpensive strands can become a personalized gift, a shared activity, or a wearable reminder of someone important. Even an imperfect bracelet has value because every knot was made by handand because nobody else needs to know that row seven was untied three times.












