
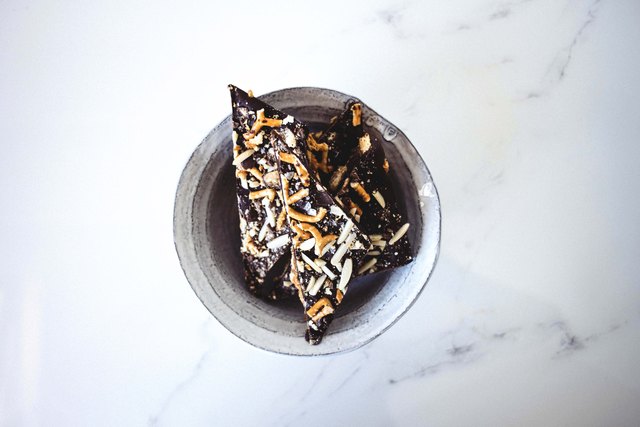
Some desserts demand three mixing bowls, a candy thermometer, and the emotional resilience of a competitive baker. Sweet, salty, nutty chocolate bark asks for considerably less: melt good chocolate, scatter on toasted nuts, add a little salt, and attempt to wait patiently while everything sets.
The result is a thin, snappy confection packed with contrasting flavors and textures. Dark chocolate supplies depth, roasted nuts bring buttery crunch, dried fruit adds chewy sweetness, and flaky sea salt wakes up the entire arrangement. It looks sophisticated enough for a gift box but remains gloriously irregular. Uneven pieces are not mistakes here; they are part of the charm.
This homemade chocolate bark recipe uses almonds, pistachios, pecans, dried cherries, and a restrained drizzle of caramel. Every ingredient has a job, yet the formula is flexible. Once you understand the balance between chocolate, toppings, and salt, you can customize it without turning the baking sheet into a crowded snack drawer.
Why Sweet, Salty, and Nutty Flavors Work Together
Chocolate already contains several flavor dimensions. Sugar softens the natural bitterness of cacao, while cocoa butter creates a rich texture that melts near body temperature. Nuts extend that richness with toasted, savory notes. Salt provides contrast and makes the sweetness seem brighter without requiring additional sugar.
Texture matters just as much as flavor. Smooth chocolate becomes more interesting when interrupted by crisp almonds, tender pecans, and crunchy pistachios. Dried cherries contribute a tart, chewy element, preventing every bite from feeling uniformly rich. A small amount of caramel ties everything together, but it should behave like a supporting actornot sprint onto the stage and deliver a 20-minute speech.
The Best Chocolate for Bark
Use chocolate that tastes good when eaten on its own because there is nowhere for weak flavor to hide. Chopped chocolate bars or couverture-style wafers generally melt more smoothly than ordinary chocolate chips. Chips often contain stabilizers designed to help them retain their shape, which is useful in cookies but less helpful when you want a fluid, even layer.
Bittersweet or semisweet chocolate containing roughly 60% to 70% cacao offers an excellent balance for this recipe. It is assertive enough to handle caramel and dried fruit without becoming overwhelmingly bitter. Milk chocolate also works, but its extra sweetness calls for fewer sugary toppings and slightly more toasted or salted ingredients.
Why the Nuts Should Be Toasted
Raw nuts can taste mild and occasionally grassy. Brief roasting intensifies their aroma, improves their crunch, and produces deeper nutty flavors. Toast almonds, pecans, and pistachios on a rimmed baking sheet at 350°F for approximately 6 to 10 minutes, checking frequently. Smaller pieces and pistachios may finish sooner than whole almonds.
Let the toasted nuts cool before placing them on the chocolate. Warm toppings can interfere with setting, while excessive heat may soften carefully tempered chocolate. Cooling also gives the nuts time to become crisp rather than deceptively soft from residual steam.
Sweet, Salty, Nutty Chocolate Bark Recipe
Yield: About 20 pieces
Preparation time: 20 minutes
Setting time: 30 to 60 minutes
Ingredients
- 12 ounces high-quality bittersweet or semisweet chocolate, preferably 60% to 70% cacao
- 1/3 cup roasted almonds, roughly chopped
- 1/3 cup roasted pistachios, roughly chopped
- 1/3 cup roasted pecans, roughly chopped
- 1/4 cup dried tart cherries or dried cranberries
- 2 tablespoons thick caramel sauce, at room temperature
- 1/2 teaspoon flaky sea salt, or to taste
- 1 tablespoon cacao nibs, optional
- 1/4 teaspoon ground cinnamon, optional
Equipment
- Rimmed baking sheet or large tray
- Parchment paper
- Microwave-safe bowl or heatproof bowl for a double boiler
- Flexible spatula
- Offset spatula or the back of a spoon
Step 1: Prepare the Tray and Toppings
Line the baking sheet with parchment paper. Measure and chop every topping before melting the chocolate. This preparation is important because the chocolate may begin setting soon after it is spread, especially in a cool kitchen. You do not want to be wrestling with a sealed pistachio bag while your bark quietly becomes pavement.
Reserve a few brightly colored pistachios and dried cherries for the top. Mixing some nuts into the chocolate provides crunch throughout, while placing the most attractive pieces on the surface gives the finished bark a polished appearance.
Step 2: Melt the Chocolate Gently
Place the finely chopped chocolate in a completely dry microwave-safe bowl. Microwave it in 20- to 30-second intervals, stirring thoroughly after each interval. Stop heating when a few small pieces remain, then continue stirring until the residual heat melts them.
Alternatively, set a heatproof bowl over a saucepan containing barely simmering water. The bottom of the bowl should not touch the water. Stir until the chocolate is almost fully melted, then remove it from the heat and finish stirring.
Water is chocolate’s uninvited nemesis. Even a small splash can cause melted chocolate to seize into a thick, grainy mass, so dry the bowl, spatula, and surrounding work area carefully.
Step 3: Temper for Extra Shine and Snap
Tempering is optional, but it creates a glossier surface, a cleaner snap, and better stability at room temperature. A practical seed method begins by melting about three-quarters of the chopped chocolate. Remove it from the heat, add the remaining chocolate, and stir continuously until smooth and slightly cooled.
Dark chocolate is commonly handled within a working range near 88°F to 90°F after it has been heated and cooled correctly. Exact temperatures vary by chocolate, so follow the manufacturer’s instructions when precision matters. If the bark is intended for casual family snacking rather than a confectionery display case, simple gentle melting remains perfectly acceptable.
Step 4: Build the Bark
Stir approximately half of the chopped nuts into the melted chocolate. Add the cinnamon now if using it. Pour the mixture onto the parchment and spread it into a rectangle approximately 1/4 inch thick. A thinner sheet creates delicate shards; a thicker one produces chunkier, candy-bar-like pieces.
Scatter the remaining almonds, pistachios, pecans, dried cherries, and cacao nibs evenly over the surface. Press larger pieces very lightly into the chocolate so they adhere without disappearing.
Drizzle the caramel in thin ribbons rather than large puddles. Finally, sprinkle the bark with flaky sea salt. Crush a few flakes between your fingers while leaving others intact for visible, concentrated sparks of saltiness.
Step 5: Let It Set
Leave the bark at cool room temperature until firm, usually 45 to 60 minutes. For faster results, refrigerate it for approximately 20 to 30 minutes. Avoid leaving it uncovered in a humid refrigerator for an extended period because chocolate can absorb moisture and nearby odors.
Once firm, lift the bark from the tray and break it into irregular pieces by hand. For cleaner portions, let it stand at room temperature for several minutes and cut it with a sharp knife. Serve the pieces on a platter, package them as gifts, or hide the most heavily topped shard for “quality control.”
How to Balance the Toppings
A dependable guideline is to use approximately 3/4 to 1 cup of toppings for every 12 ounces of chocolate. Too few additions make the bark look lonely; too many prevent the chocolate from holding everything together. The finished candy should still have visible pools of chocolate between the nuts and fruit.
Balance toppings by function rather than simply choosing everything delicious in the pantry:
- Rich and crunchy: almonds, pecans, cashews, hazelnuts, peanuts, or macadamias
- Bright and chewy: dried cherries, cranberries, apricots, figs, or candied orange peel
- Deep and bitter: cacao nibs, espresso powder, or very dark chocolate
- Salty and crisp: pretzels, toasted seeds, smoked nuts, or flaky sea salt
- Warm and aromatic: cinnamon, cardamom, ginger, or a restrained pinch of chile
If using salted nuts, reduce the finishing salt and taste a sample nut first. Fine table salt is not an ideal substitute for flaky salt because it distributes more densely and can quickly overwhelm the chocolate. If table salt is the only option, use a very small pinch.
Easy Chocolate Bark Variations
Dark Chocolate Pistachio Bark
Use 70% dark chocolate, pistachios, dried sour cherries, cacao nibs, and flaky salt. The green, red, and dark brown colors make this version especially attractive on holiday dessert trays.
Milk Chocolate Peanut Pretzel Bark
Combine milk chocolate with roasted peanuts, crushed mini pretzels, and a small caramel drizzle. Skip the dried fruit and use salt sparingly because both peanuts and pretzels may already be seasoned.
Orange Hazelnut Chocolate Bark
Top bittersweet chocolate with toasted hazelnuts, finely chopped candied orange peel, and a pinch of flaky salt. A tiny amount of ground chile can add warmth without making the candy aggressively spicy.
Nut-Free Sweet-and-Salty Bark
Replace tree nuts and peanuts with roasted pumpkin seeds, sunflower seeds, pretzels, toasted cereal, or cacao nibs. Check every package carefully if preparing food for someone with an allergy, since chocolate, seeds, and toppings may be processed on shared equipment.
Common Chocolate Bark Problems
The Chocolate Looks Dull or Streaky
Pale streaks or cloudy patches are usually bloom caused by unstable cocoa-butter crystals, moisture, or temperature changes. Bloom is generally a quality issue rather than evidence that the chocolate is spoiled. Proper tempering and stable storage help prevent it.
The Melted Chocolate Became Thick and Grainy
The chocolate may have overheated or come into contact with water. Use lower heat, shorter microwave intervals, and a dry bowl. Stirring frequently distributes heat and helps remaining pieces melt without additional cooking.
The Toppings Fall Off
Add toppings immediately after spreading the chocolate and press larger items gently into the surface. If the chocolate has already started to set, drizzle a small amount of freshly melted chocolate over loose ingredients to secure them.
The Bark Is Difficult to Bite
It was probably spread too thickly or served directly from a very cold refrigerator. Aim for a layer near 1/4 inch thick and let chilled bark rest at room temperature for 5 to 10 minutes before serving.
Storage, Gifting, and Allergen Awareness
Store chocolate bark in an airtight container with parchment between the layers. A cool, dry cupboard is appropriate for properly tempered bark when the room remains below approximately 70°F. In a warm or humid home, refrigerate the sealed container and allow it to approach room temperature before opening. Keeping it covered while warming reduces condensation.
For the best flavor and texture, enjoy homemade nut chocolate bark within about two weeks. Dried fruit and caramel may gradually soften surrounding chocolate or nuts, so simpler versions often remain crisp longer.
To give the bark as a gift, place several varied shards in a food-safe bag, tin, or parchment-lined box. Include a written ingredient list. Milk, soy, peanuts, and many tree nuts are major food allergens in the United States, and cross-contact can occur through shared utensils or processing equipment. Never describe homemade bark as allergen-free unless its ingredients and preparation environment genuinely support that claim.
A Realistic Home-Kitchen Chocolate Bark Experience
The experience of making sweet, salty, nutty chocolate bark begins with a reassuring discovery: the dessert looks far more complicated than it is. Chopping three kinds of nuts and lining a tray creates the atmosphere of serious candy production, yet most of the work is finished before the chocolate even melts.
The first important moment comes while toasting the nuts. Almonds may appear unchanged for several minutes and then suddenly smell warm and fragrant. Pecans darken around their ridges, while pistachios become crisper without needing much time. This stage teaches a useful lesson quickly: the nose often notices toasted nuts before the eyes do. Walking away to answer a message is an excellent way to produce a tray of expensive charcoal.
Melting the chocolate feels calm when handled in short intervals. The bowl may still contain several solid pieces after heating, but patient stirring usually finishes the job. Adding another full minute “just to be safe” does the opposite. Chocolate appreciates gentle persuasion and responds poorly to intimidation.
Spreading the glossy chocolate is the most satisfying part. The rectangle does not need straight edges, and the toppings create an attractive surface almost immediately. Pistachios add color, pecans supply sculptural curves, and dried cherries resemble small jewels. The caramel drizzle may initially look chaotic, but irregular lines become elegant once the bark is broken into pieces.
The salt creates the biggest practical surprise. Before it is added, the mixture can taste rich but slightly flat. After a restrained sprinkle, the cacao seems darker, the caramel tastes fuller, and the toasted nuts become more noticeable. Adding too much, however, is easy. Flaky salt should create occasional bright accents rather than make every bite resemble a chocolate-covered pretzel.
Waiting for the bark to set is technically passive and emotionally unreasonable. Testing an edge too early leaves a fingerprint, but it also reveals how the texture changes from soft and bendable to firm and snappy. Once set, the sheet breaks with a crisp crack. Some pieces emerge as neat triangles; others resemble small continents. Both disappear at approximately the same speed.
Serving the bark also demonstrates why uneven pieces are useful. Small shards suit coffee breaks, medium pieces fit dessert plates, and the heavily decorated sections attract anyone who believes toppings are a competitive sport. At a party, guests can choose according to appetite rather than accepting a uniform portion.
The most useful lesson from the entire experience is that restraint improves customization. One excellent chocolate, two or three complementary nuts, one chewy accent, and a little finishing salt usually taste more deliberate than ten unrelated toppings. Chocolate bark may welcome creativity, but it still prefers a guest list to a crowded convention.
Conclusion
Sweet, salty, nutty chocolate bark succeeds because it combines maximum sensory payoff with minimal ceremony. Quality chocolate provides the foundation, toasted nuts deliver crunch, dried fruit supplies contrast, and flaky sea salt sharpens every flavor. The recipe is easy enough for a weekday project yet polished enough for parties, holiday trays, and homemade gifts.
Start with the core formula, keep the toppings balanced, and customize according to the chocolate you enjoy. Whether you choose pistachios and cherries, peanuts and pretzels, or hazelnuts and orange, the best bark offers a little surprise in every irregular piece.
Note: This recipe contains chocolate and tree nuts and may contain milk or soy, depending on the products used. Review ingredient labels and prevent cross-contact when serving anyone with food allergies.














