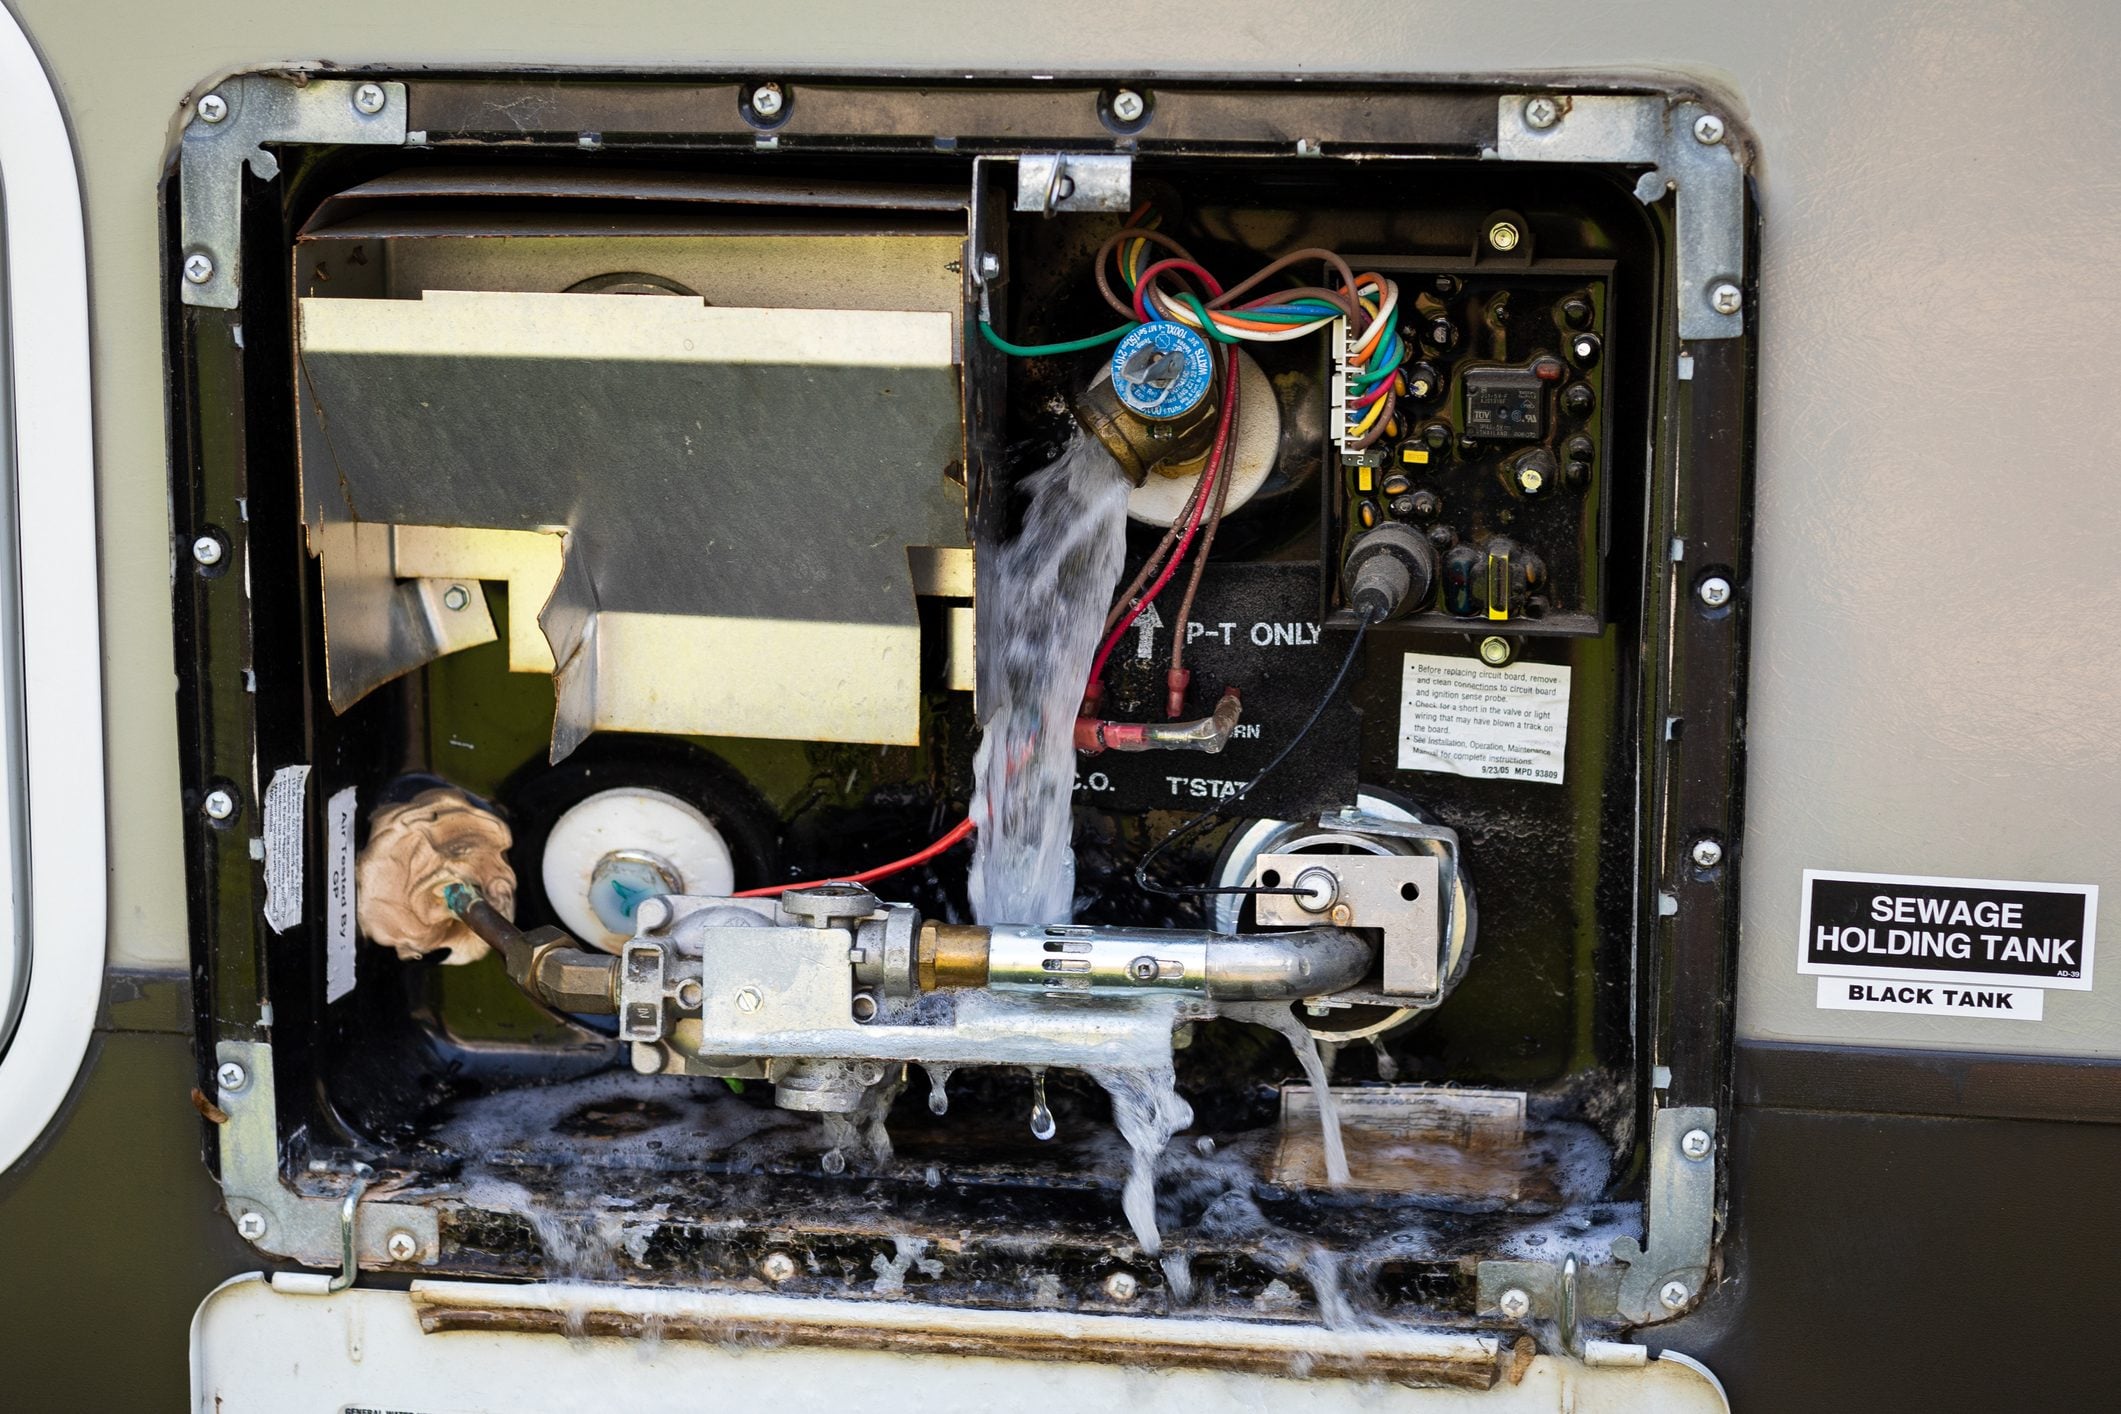
Note: This is a general RV water heater drainage guide based on common manufacturer procedures. Your RV may use a tank, tankless, hydronic, or combination water-heating system, so always check your owner’s manual before removing plugs, valves, filters, or service panels.
An RV water heater is one of those appliances you barely notice until it becomes a tiny metal volcano, develops a mysterious rotten-egg aroma, or decides to freeze itself into an expensive repair bill. Draining an RV water heater is not glamorous. Nobody has ever posted a dramatic slow-motion video of a drain plug being removed while inspirational music swells in the background. Still, it is one of the simplest and most useful maintenance jobs an RV owner can learn.
Whether you are preparing for winter storage, flushing mineral sediment, inspecting an anode rod, or simply parking the camper for an extended break, draining the water heater helps protect the tank and keeps stale water from hanging around longer than an unwanted campground conversation. The job usually takes less than an hour, requires only a few basic tools, and can save you from cracked tanks, weak hot-water performance, and unpleasant surprises when camping season returns.
Why You Should Drain an RV Water Heater
RV water heaters hold water inside a compact tank or heating system. When that water sits for a long time, minerals can settle to the bottom, odors may develop, and freezing temperatures can create enough expansion to damage plumbing or the tank itself. Draining the heater is especially important before winter storage, before long periods of nonuse, and whenever you notice cloudy water, reduced hot-water performance, debris in the water, or a sulfur-like smell.
For tank-style heaters, drainage also gives you a chance to inspect important parts. Many steel-tank Suburban-style heaters use a sacrificial anode rod. That rod slowly corrodes so the tank does not have to. It is basically the bodyguard of the water heater: it takes the hit so the rest of the tank can keep doing its job. Many older Atwood or Dometic aluminum-tank models use a nylon drain plug instead of an anode rod, so the replacement part and maintenance approach are different.
Draining is not always the same as flushing. Draining removes most of the water. Flushing adds clean water back through the opening or a flushing tool to stir up sediment and push debris out. Think of draining as emptying a cereal bowl and flushing as rinsing out the mysterious crust that has decided to become permanent architecture.
Before You Drain: Safety First, Drama Never
Water heaters combine heat, pressure, electricity, and sometimes propane. That is a four-part recipe for a bad afternoon if you rush the process. Never remove a drain plug, anode rod, pressure-relief valve, or service filter from a hot or pressurized heater.
Gather These Basic Tools
- Work gloves and safety glasses
- A towel or small bucket for drips
- A wrench or socket set
- A 1-1/16-inch socket for many Suburban anode rods
- A replacement nylon drain plug or anode rod if needed
- Potable-water-safe thread sealant or tape, if approved for your model
- An RV water heater flushing wand or tank rinser
- A garden hose with a controllable nozzle
Know What Type of Water Heater You Have
Open the exterior water heater access door and look for the manufacturer label. A traditional tank water heater will usually have a drain plug or anode rod near the lower part of the exterior panel. A tankless model may have drain valves, service ports, filters, or a specific winterization lever. A hydronic or combination unit may need a more specialized procedure.
Do not assume every heater drains the same way. A tankless system is not just a tank heater wearing modern clothes. It may have separate instructions for draining the water circuit, cleaning filters, opening freeze-protection valves, or removing service cartridges. The owner’s manual wins every argument.
How to Drain an RV Water Heater Step by Step
Step 1: Turn Off the Water Heater
Turn off the water heater at its interior control panel. If your heater has an electric heating element, turn off the electric switch and, when appropriate, the corresponding circuit breaker. If it runs on propane, turn off the gas mode and shut off the gas supply according to your RV and appliance instructions.
This step matters because heating an empty tank can damage the heating element, tank, controls, or all three. A dry-fired electric element is a fast way to turn a simple maintenance chore into a shopping trip for replacement parts.
Step 2: Let the Water Cool Completely
Give the heater enough time to cool. If you recently ran hot water, used propane mode, or operated the electric element, do not rush outside with a wrench and confidence borrowed from a home-improvement show. Hot water can cause severe burns, and hot water under pressure can spray unexpectedly when a plug is removed.
If you need to speed up the cooling process, open a hot-water faucet inside the RV and allow the water to run until it feels cool. Keep in mind that you are wasting some water, so use this method thoughtfully when boondocking or camping with limited fresh-water capacity.
Step 3: Shut Off the Water Supply and Relieve Pressure
Turn off the RV water pump. Disconnect or shut off city-water pressure if you are connected to an external water source. Then open one hot-water faucet and one cold-water faucet inside the RV. This helps relieve pressure in the plumbing system.
Next, open the exterior water heater access door. Most tank heaters have a pressure-temperature relief valve near the upper portion of the heater. Once the system is cool and no longer pressurized, carefully lift the relief-valve lever to allow air into the tank. Air entering the tank helps water drain more smoothly instead of performing the slow, frustrating glug-glug routine of an upside-down milk jug.
Step 4: Remove the Drain Plug or Anode Rod
Stand slightly to one side of the drain opening rather than directly in front of it. Even after following the safety steps, some water can spill out with more enthusiasm than expected.
For many Suburban tank water heaters, use a 1-1/16-inch socket to slowly loosen and remove the anode rod. Water should begin draining through the opening. For many older Atwood or Dometic tank heaters, remove the nylon drain plug with the appropriate wrench. Avoid forcing a damaged or cross-threaded plug. If it is stuck, stop and inspect the tool fit before escalating from “maintenance” to “archaeological excavation.”
Let the tank drain completely. Depending on the model and how much sediment is inside, this may take several minutes. Keep children, pets, shoes you actually like, and anything that dislikes water out of the splash zone.
Step 5: Inspect the Anode Rod or Drain Plug
If your heater uses an anode rod, inspect it while it is out. A healthy rod may look rough, chalky, or uneven because it is designed to sacrifice itself. Replace it when it is heavily depleted, especially when a large portion of the rod has been consumed or the core wire is exposed. Water quality, storage habits, and usage frequency all affect how quickly an anode rod wears down.
If your heater uses a nylon drain plug, inspect the threads and head. Replace cracked, rounded, warped, or brittle plugs. A spare plug is inexpensive and takes up less space than a single granola bar, which makes it one of the smartest little backup parts to keep in the RV.
Step 6: Flush Sediment From the Tank
Draining removes most water, but tank-style water heaters often retain a small amount near the bottom. That remaining water can contain mineral deposits, rust particles, scale, or sediment. Use an RV water heater flushing wand or tank-rinsing tool attached to a garden hose to rinse the interior.
Insert the tool carefully through the drain opening and spray in several directions. Start gently and avoid excessive pressure. Allow the water and debris to flow out through the drain opening. Continue until the water runs relatively clear. A little sediment is normal. A bucketful of crunchy mineral debris is your heater’s way of asking why you ignored it for three seasons.
Step 7: Decide Whether to Reinstall the Plug or Leave the Tank Open
If you are draining the heater for a quick inspection or flushing session, reinstall the correct plug or anode rod after the tank is empty and clean. Use only thread sealant approved for potable-water plumbing and follow the water heater manufacturer’s instructions. Do not overtighten nylon plugs, because plastic threads can crack or strip.
If you are winterizing the RV, your manual may instruct you to drain the heater, bypass it, and leave it isolated from the plumbing system. The exact storage position depends on the heater and RV design. Some owners leave the drain opening open during storage for ventilation, while others reinstall the plug after draining. Follow your manufacturer’s storage procedure rather than copying a random campsite ritual from Uncle Larry’s fifth-wheel trailer.
Step 8: Restore the Water Heater Correctly Before Using It Again
Before turning the water heater back on, reinstall the drain plug or anode rod securely. Return the water heater bypass valves to their normal operating position. Turn on the water pump or city-water connection, then open a hot-water faucet inside the RV.
Let the faucet run until the sputtering stops and water flows steadily. This confirms that the tank has refilled and most air has been purged from the line. Only after the tank is full should you turn the electric or propane water heater back on. Skipping this step is one of the most common and expensive mistakes RV owners make.
Draining an RV Water Heater for Winter Storage
Winterizing is more than pulling one plug and hoping for the best. Before freezing weather, drain the fresh-water tank, open low-point drains, empty the water heater, and follow the RV manufacturer’s instructions for blowing out lines or pumping RV-safe antifreeze through the plumbing.
Most RVs with a tank water heater have a bypass system near the rear of the heater. Activating the bypass isolates the water heater so you do not waste several gallons of RV antifreeze filling a tank that should be empty. It also helps protect anode rods and water-heater components from unnecessary exposure to antifreeze.
Tankless units require extra attention. Some tankless models use dedicated drain valves, screens, cartridges, or winterization modes. Others have built-in freeze protection that works only when the unit has adequate power and fuel. Built-in protection is helpful, but it is not a magic spell against every cold snap, dead battery, propane issue, or unplugged RV.
Common RV Water Heater Drainage Mistakes to Avoid
- Removing the plug while the water is hot: This can cause scalding water to spray outward.
- Leaving water pressure on: Turn off the pump and city water before draining.
- Turning the heater on before the tank fills: Electric elements can burn out quickly in an empty tank.
- Using the wrong replacement part: Match the correct anode rod or drain plug to your heater model.
- Ignoring sediment: A quick flush can improve efficiency and reduce mineral buildup.
- Forgetting the bypass valves: Your heater may remain isolated after winterization unless you return it to normal operation.
- Assuming low-point drains empty everything: Some RV plumbing layouts still leave water in the heater tank.
How Often Should You Drain and Flush an RV Water Heater?
A practical schedule depends on how often you use the RV, the mineral content of the water, and the heater manufacturer’s recommendations. At a minimum, drain the water heater before winter storage or any prolonged period of nonuse. Full-time RVers and frequent travelers may benefit from inspecting the tank and flushing sediment several times per year, especially when camping in areas with hard water.
Pay attention to clues. Slow hot-water recovery, odd smells, cloudy water, reduced flow, noisy heating, or unusually heavy sediment during drainage may all suggest it is time for a cleaning. Regular maintenance is much cheaper than discovering a problem on the first cold morning of a trip, when everyone suddenly needs a shower at exactly the same time.
Real-World RV Water Heater Drainage Experiences and Lessons
One of the most common RV ownership experiences is learning that the water heater does not drain as dramatically as expected. New owners often imagine six or ten gallons of water blasting across the campsite like a fire hydrant. In reality, a properly cooled and depressurized tank usually starts with a steady stream, then slows to a trickle. The surprise comes when the pressure-relief valve is opened and air enters the tank. Suddenly, the water drains much faster, proving that tiny physics lessons are waiting everywhere in RV life.
Another lesson many travelers learn is that anode rods can look alarming even when they are doing exactly what they should. A used anode rod may appear lumpy, crusty, pitted, or covered in mineral deposits. That is often evidence that the rod has been protecting the tank. The key is not expecting it to look new forever. Owners who inspect the rod during every drainage session usually avoid the unpleasant discovery of a completely consumed rod when they are already miles from the nearest RV parts store.
Campers who travel through regions with hard water often notice more sediment during a flush. The first rinse may release only clear water, then a second or third pass can send out flakes of mineral scale that look like tiny pieces of eggshell. That does not automatically mean the heater is failing. It usually means the flushing wand is finally reaching the lower corners of the tank where debris likes to settle in and pay no rent.
Winterization provides another memorable learning curve. Many RV owners remember the first time they accidentally filled the water heater with RV antifreeze because the bypass valves were set incorrectly. It is not dangerous when the correct non-toxic RV antifreeze is used, but it wastes product and creates extra flushing work in the spring. After doing that once, most people develop a pre-winter checklist and become strangely passionate about labeling bypass valves.
There is also the classic springtime mistake: reinstalling the drain plug, turning the water heater back on, and forgetting to refill the tank. The result can be a burned-out electric element or a heater that refuses to work when everyone is ready for the first camping trip of the year. Experienced RVers often avoid this by making “fill tank, purge air, then heat” part of their startup routine. The hot-water faucet becomes the final confirmation step. When the sputtering stops and water flows smoothly, the tank is full and the heater can safely return to service.
Finally, many RVers discover that the best maintenance routines are the least dramatic ones. Draining the heater at the end of a season, flushing it before storage, inspecting the correct plug or anode rod, and keeping a spare part in the toolbox may not earn applause from the campground crowd. But it can prevent leaks, freeze damage, unpleasant smells, and ruined travel plans. In RV ownership, boring maintenance is usually a sign that everything is going beautifully.
Conclusion
Learning how to drain an RV water heater is a simple maintenance skill with a big payoff. Turn off the heater, let the water cool, shut off the water supply, relieve pressure, remove the correct drain plug or anode rod, flush sediment if needed, and refill the tank completely before heating it again. Whether you are winterizing, storing the RV, or keeping your hot water system healthy between trips, a careful drainage routine keeps your rig ready for the road instead of ready for the repair shop.