
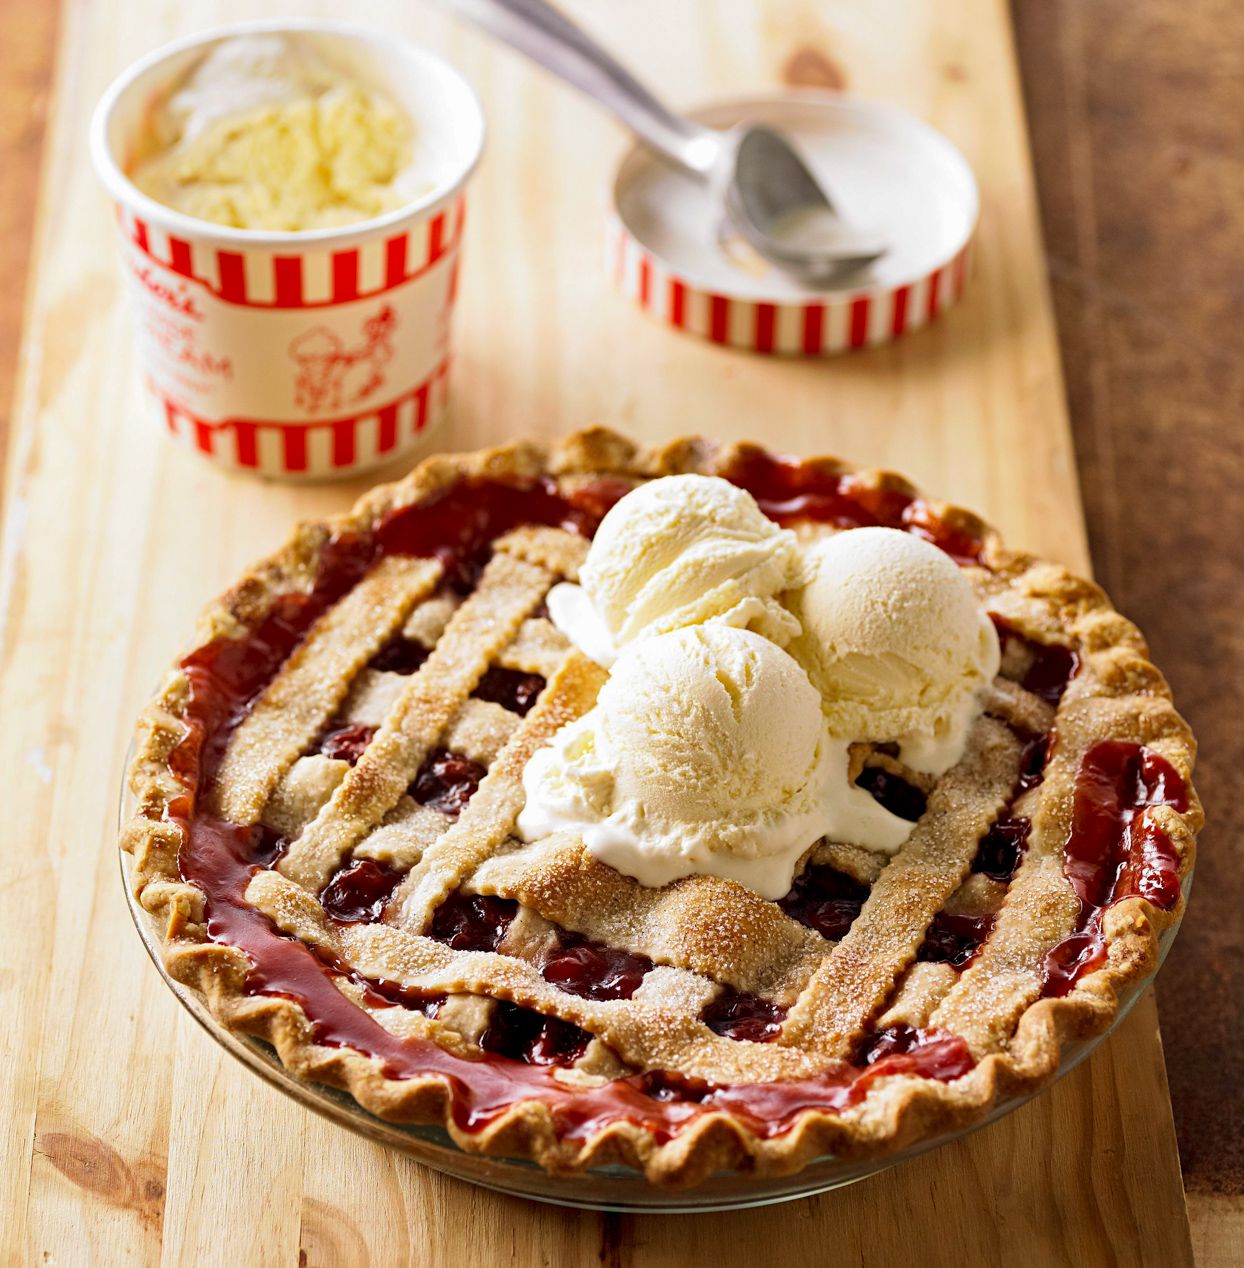
There are desserts, and then there is cherry pie with a lattice crustthe kind of dessert that walks into the kitchen wearing a gingham apron and somehow makes everyone behave nicer. A glossy cherry filling bubbling through a golden woven crust is basically the edible version of a front-porch sunset. It looks impressive, tastes nostalgic, and, thankfully, is much easier to make than it appears.
This cherry pie with a lattice crust recipe is built for home bakers who want a flaky, buttery crust, a bright sweet-tart cherry filling, and slices that hold together instead of collapsing into cherry soup. The secret is not one magic trick. It is a team effort: cold butter, properly thickened fruit, a hot oven start, and a patient cooling time. Yes, cooling time counts as baking discipline. The pie knows if you cheat.
Below, you will find a complete homemade cherry pie recipe, including ingredients, step-by-step instructions, lattice crust tips, troubleshooting advice, storage guidance, and personal baking experience from the “flour on the counter, cherry juice on the shirt” school of pastry education.
Why This Cherry Pie Recipe Works
A good lattice-top cherry pie balances three things: flavor, texture, and structure. The cherries should taste juicy and bright, not buried under sugar. The crust should be flaky but sturdy enough to support the filling. The lattice should vent steam while giving the pie that classic bakery-window lookthe one that makes people say, “You made that?” in the tone usually reserved for magic tricks.
This recipe uses a butter-based double pie crust because butter brings rich flavor and creates flaky layers when kept cold. The filling uses fresh or frozen pitted cherries, sugar, lemon juice, vanilla, almond extract, and cornstarch. Lemon sharpens the cherry flavor, vanilla rounds it out, and a tiny splash of almond extract makes the fruit taste more cherry-like without shouting, “Hello, I am almond extract, and I have arrived.”
Ingredients for Cherry Pie with a Lattice Crust
For the Homemade Double Pie Crust
- 2 1/2 cups all-purpose flour, plus more for rolling
- 1 tablespoon granulated sugar
- 1 teaspoon fine sea salt
- 1 cup cold unsalted butter, cut into small cubes
- 6 to 8 tablespoons ice water
- 1 teaspoon apple cider vinegar or lemon juice, optional
For the Cherry Filling
- 5 cups pitted cherries, fresh or frozen
- 3/4 cup granulated sugar, adjusted to taste
- 1/4 cup cornstarch
- 1 tablespoon fresh lemon juice
- 1 teaspoon lemon zest
- 1 teaspoon vanilla extract
- 1/4 teaspoon almond extract
- 1/4 teaspoon fine sea salt
- 1 tablespoon unsalted butter, cut into small pieces
For Finishing
- 1 large egg
- 1 tablespoon milk or water
- 1 to 2 tablespoons coarse sugar, optional
How to Make Cherry Pie with a Lattice Crust
Step 1: Make the Pie Dough
In a large bowl, whisk together the flour, sugar, and salt. Add the cold butter cubes and work them into the flour using a pastry cutter, two forks, or your fingertips. Stop when the mixture has pea-sized butter pieces with a few larger flakes. Those visible butter bits are not mistakes; they are future flakiness reporting for duty.
Add 6 tablespoons of ice water and the vinegar or lemon juice, if using. Mix gently until the dough begins to clump. Add more ice water, 1 tablespoon at a time, only if the dough feels dry. Divide the dough into two discs, wrap tightly, and chill for at least 2 hours. Overnight is even better.
Step 2: Prepare the Cherry Filling
In a large bowl, combine the cherries, sugar, cornstarch, lemon juice, lemon zest, vanilla extract, almond extract, and salt. Toss until the cherries are evenly coated. If using frozen cherries, do not panic when they release extra juice. Let them thaw, drain off excess liquid if needed, and then proceed. The goal is juicy filling, not a cherry swimming pool.
Let the filling sit for 10 to 15 minutes while you roll out the dough. This short rest helps the sugar draw out some cherry juices and gives the cornstarch a head start.
Step 3: Roll the Bottom Crust
On a lightly floured surface, roll one dough disc into a 12-inch circle. Transfer it to a 9-inch pie plate, gently pressing it into the bottom and sides without stretching. Leave about 1 inch of overhang around the edge. Place the pie plate in the refrigerator while you roll the lattice strips.
Step 4: Cut the Lattice Strips
Roll the second dough disc into a rough 12-inch circle or rectangle. Use a sharp knife, pizza cutter, or pastry wheel to cut strips about 3/4 inch wide. You can make them perfectly even, charmingly rustic, or somewhere between “bakery case” and “I tried, and everyone still gets pie.”
Step 5: Fill the Pie
Spoon the cherry filling into the chilled bottom crust. Dot the top with small pieces of butter. The butter adds richness and helps create a glossy, rounded filling flavor. Avoid pouring in a large amount of loose cherry liquid from the bottom of the bowl unless the filling looks dry.
Step 6: Weave the Lattice Crust
Lay half of the dough strips vertically across the pie, leaving space between each strip. Fold back every other strip halfway. Place one strip horizontally across the center, then unfold the vertical strips over it. Next, fold back the alternate vertical strips and place another horizontal strip. Repeat until the top is woven. Rotate the pie as needed. This is not a race. The pie is not timing you, though your family may be hovering suspiciously.
Trim the lattice strips and bottom crust so they line up neatly. Fold the edges under and crimp with your fingers or press with a fork. Place the assembled pie in the refrigerator or freezer for 15 to 20 minutes before baking. A chilled crust holds its shape better and bakes up flakier.
Step 7: Brush, Sugar, and Bake
Preheat the oven to 425°F. Place a baking sheet on the lower rack to catch any bubbling juices. Whisk the egg with milk or water, then brush the lattice and edges lightly with the egg wash. Sprinkle with coarse sugar if desired.
Bake the pie at 425°F for 20 minutes. Reduce the oven temperature to 375°F and continue baking for 35 to 45 minutes, or until the crust is deep golden brown and the filling bubbles thickly through the lattice openings. If the edges brown too quickly, cover them with foil or a pie shield.
Step 8: Cool Before Slicing
Let the pie cool for at least 3 hours before slicing. This is the hardest step because your kitchen will smell like a small-town bakery with excellent gossip. But cooling allows the filling to set. Slice too early and you may get a delicious puddle. Still tasty, yes. Photogenic? Less so.
Fresh, Frozen, or Canned Cherries: What Works Best?
Fresh cherries are wonderful when they are in season. Sweet cherries create a mellow, fruity pie, while sour cherries bring the classic tangy flavor many people associate with old-fashioned cherry pie. If using very sweet cherries, reduce the sugar slightly and keep the lemon juice. If using sour cherries, you may want the full amount of sugar or even an extra tablespoon or two.
Frozen cherries are a great option because they are usually picked at peak ripeness and already pitted. Thaw and drain them before mixing the filling. Canned cherries can work in a pinch, but choose tart cherries packed in water when possible, not overly sweet pie filling. If using canned cherry pie filling, consider adding lemon zest and a little vanilla to brighten the flavor.
Tips for a Flaky Lattice Pie Crust
Keep Everything Cold
Cold butter is the difference between flaky pastry and a sad cracker wearing a pie costume. Chill the dough before rolling, chill it again after shaping, and avoid overworking it. If the strips become soft while weaving, slide them onto a baking sheet and refrigerate for a few minutes.
Do Not Overfill the Pie
A generous cherry pie is beautiful, but overfilling can cause bubbling, leaking, and crust collapse. Use a standard 9-inch pie plate and mound the filling slightly in the center. The cherries will settle as they bake.
Look for Bubbling Filling
The filling must bubble in the center, not just near the edges. Bubbling shows that the cornstarch has reached the heat it needs to thicken the cherry juices. If the crust is brown but the filling is not bubbling, tent the pie with foil and keep baking.
Common Cherry Pie Problems and Easy Fixes
Why Is My Cherry Pie Runny?
A runny cherry pie usually means it was sliced too soon, not baked long enough, or did not have enough thickener. Let the pie cool fully and make sure the filling bubbles before removing it from the oven. For extra juicy cherries, add 1 additional tablespoon of cornstarch.
Why Is My Bottom Crust Soggy?
Start the pie at a high temperature, use a metal or glass pie plate, and bake on a preheated baking sheet. The quick heat helps set the bottom crust. Also, avoid adding too much loose liquid to the filling.
Why Did My Lattice Break?
The dough was likely too cold or too dry. Let it sit at room temperature for 5 minutes before weaving. If a strip breaks, patch it. Once baked and bubbling with cherries, nobody will inspect it like a pastry detective.
Serving Ideas
Cherry pie with lattice crust is excellent slightly warm or at room temperature. Serve it with vanilla ice cream, whipped cream, or a spoonful of Greek yogurt if you want to pretend this is a breakfast-adjacent decision. For a holiday table, add orange zest to the filling. For a deeper flavor, add a pinch of cinnamon or nutmeg. For a bakery-style finish, brush the crust with egg wash and sprinkle it with coarse sugar before baking.
How to Store Cherry Pie
Once cooled, cherry pie can be kept loosely covered at room temperature for about 1 day. For longer storage, refrigerate it for up to 4 days. Reheat slices in a 325°F oven until warmed through. You can also freeze baked cherry pie. Wrap it well, freeze for up to 3 months, and thaw overnight in the refrigerator before reheating.
Make-Ahead Instructions
The pie dough can be made up to 3 days ahead and stored in the refrigerator. It can also be frozen for up to 3 months. The cherry filling can be mixed several hours ahead and refrigerated, though it may release more juice as it sits. For best texture, assemble the pie shortly before baking.
You may also assemble the entire unbaked pie and freeze it. Bake from frozen, adding extra time as needed. Keep an eye on the crust and shield the edges if they brown too fast.
Recipe Summary
- Prep time: 45 minutes
- Chill time: 2 hours 20 minutes
- Bake time: 55 to 65 minutes
- Cooling time: 3 hours
- Total time: About 6 hours
- Yield: 1 9-inch pie, about 8 slices
Personal Experience: What Baking Cherry Pie Teaches You
Making a cherry pie with a lattice crust feels like one of those kitchen projects that starts with confidence and quickly introduces you to your own personality. Are you patient? Are you calm when flour gets on the floor? Can you pit cherries without turning your cutting board into a crime scene from a fruit-based mystery? These are the questions pie asks, and it asks them politely but firmly.
The first thing I learned from making lattice cherry pie is that cold dough is a friend, not an inconvenience. When the dough is properly chilled, it rolls cleanly, cuts neatly, and weaves without stretching into strange noodle shapes. When it gets too warm, it behaves like a toddler at bedtime: floppy, emotional, and not interested in your plans. A quick trip to the refrigerator fixes almost everything.
The second lesson is that the lattice does not need to be perfect. In photos, lattice pies often look like they were assembled by someone with a ruler, a pastry degree, and possibly a tiny construction crew. In real kitchens, strips vary in width, edges crimp unevenly, and one piece always tries to wander off diagonally. The funny part is that once the pie bakes, the golden crust and bubbling cherry filling make every little imperfection look intentional. Rustic is just another word for “delicious with confidence.”
Cherry filling also teaches restraint. It is tempting to add more sugar, more extract, more spice, more everything. But cherries do not need a marching band. They need support. Lemon juice brightens them. Vanilla softens the edges. Almond extract, used carefully, makes the flavor bloom. Too much almond extract, however, and your pie starts tasting like it borrowed perfume from a cookie. A tiny amount is enough.
The hardest part, without question, is waiting for the pie to cool. A hot cherry pie looks ready because the crust is golden and the filling is bubbling like it has exciting news. But inside, the juices are still loose. Cutting too soon gives you a slice that slumps across the plate. It will still taste wonderful, but it will not have that clean, proud wedge shape. Waiting three hours feels dramatic, but it works.
Another useful experience is baking the pie on a sheet pan. Cherry filling likes to bubble over when it is especially enthusiastic. A parchment-lined baking sheet saves the oven from sticky drips and future scrubbing regret. It is a small step that feels unnecessary until the one time you skip it.
Finally, cherry pie is one of those recipes that rewards repetition. The first pie teaches you timing. The second pie teaches you texture. By the third pie, you start developing opinions about strip width, sugar levels, and whether the edge should be crimped or fork-pressed. That is when you know the pie has won. You are no longer just following a cherry pie recipe; you are becoming the person people hope brings dessert.
Conclusion
A homemade cherry pie with a lattice crust is classic for a reason. It combines buttery pastry, juicy fruit, beautiful presentation, and just enough drama to make the baker feel heroic. With cold dough, balanced filling, a properly woven lattice, and enough cooling time, this recipe delivers a pie that is sweet, tart, flaky, and sliceable.
Whether you are baking for a summer picnic, Thanksgiving dessert table, birthday dinner, or a random Tuesday that clearly needed pie, this cherry pie recipe is reliable, flexible, and deeply satisfying. The lattice may look fancy, but the real magic is simple: good cherries, patient baking, and a crust that knows how to flake like it was born for applause.














