Note: This guide is written for homeowners, renters, and DIY movers who want to move a washer and dryer safely, protect the appliances, avoid leaks, and keep the laundry room from turning into a very expensive obstacle course.
Introduction: The Laundry Room Is Small, but the Job Is Not
Moving a washer and dryer sounds simple until you are standing behind the machines with a flashlight in your mouth, a mystery hose in one hand, and a dust bunny the size of a small woodland creature staring back at you. These appliances are heavy, awkward, connected to water, electricity, ventilation, and sometimes gas. In other words, they are not just big boxes. They are big boxes with consequences.
The good news is that learning how to move your washer and dryer is absolutely doable when you follow the right order. The trick is not strength alone. It is preparation, patience, and knowing when to call a professional. A washing machine can be damaged if the drum is not secured properly, and a dryer can become unsafe if the vent is crushed, clogged, or reinstalled poorly. A gas dryer adds another level of caution because gas connections should never be treated like a casual weekend experiment.
This step-by-step guide explains how to disconnect, drain, protect, move, load, reinstall, and test your washer and dryer. It also includes real-world moving experiences at the end, because sometimes the most useful advice comes from someone who has already scraped a knuckle, forgotten a bucket, or learned that “just slide it out” is not a plan.
Before You Move: Know What Type of Washer and Dryer You Have
Before touching a hose or pulling anything from the wall, identify your appliance setup. The moving process changes depending on whether you have a top-load washer, front-load washer, electric dryer, gas dryer, stacked laundry center, pedestal-mounted pair, or ventless dryer.
Front-Load Washer
A front-load washing machine usually needs shipping bolts or transit bolts installed before transportation. These bolts stabilize the internal drum so it does not bounce around like a bowling ball in a cardboard box. If you saved the original shipping bolts, congratulations: past you deserves applause. If not, check the model number and order the correct replacement kit before moving day.
Top-Load Washer
Top-load washers may not use the same style of shipping bolts, but the tub still needs to be kept stable. Some manufacturers recommend special packing material or a foam insert. Always check the owner’s manual for your model. A few minutes of reading can save you from a repair bill that ruins the joy of your new laundry room.
Electric Dryer
An electric dryer is usually simpler to disconnect than a gas dryer, but it still requires care. You need to unplug the power cord, disconnect the vent hose, clean lint buildup, and protect the cord and rear connections during the move.
Gas Dryer
A gas dryer should be disconnected and reconnected by a qualified professional. This is not the place for confidence powered by online bravado. Gas lines must be handled correctly to prevent leaks and safety hazards. If your dryer uses gas, schedule service ahead of moving day.
Tools and Supplies You Will Need
Gather your moving supplies before you start. Nothing slows down a move like discovering you need pliers after the washer has already been pulled halfway into the hallway.
- Appliance dolly or heavy-duty hand truck
- Moving straps or lifting harness
- Adjustable wrench or slip-joint pliers
- Bucket or shallow pan
- Old towels
- Packing tape or painter’s tape
- Zip ties or rubber bands
- Moving blankets
- Plastic stretch wrap
- Shipping bolts or manufacturer-approved drum support
- Work gloves
- Measuring tape
- Flashlight
An appliance dolly is strongly recommended because washers and dryers are bulky and difficult to grip. A regular furniture dolly may work for short, flat moves, but an appliance dolly with straps is safer for stairs, ramps, and truck loading. Moving blankets protect the finish, and stretch wrap helps keep doors, cords, and hoses from flopping around like they are trying to escape.
Step 1: Measure the Route Before Moving Anything
Measure the washer, dryer, doorways, hallways, staircases, elevators, and truck ramp. This sounds boring, but it is much better than discovering halfway through the job that your dryer is one inch wider than the basement doorway. That kind of surprise builds character, but not in a fun way.
Clear the route completely. Remove rugs, shoes, baskets, pet bowls, plants, and anything that could become a tripping hazard. If doors can be removed from hinges to create extra clearance, do it before the appliances are on the dolly. Protect tight corners with cardboard or moving blankets, especially if you are renting and want your security deposit to remain a happy memory.
Step 2: Clean and Empty Both Appliances
Remove all clothing, dryer sheets, lint, detergent pods, and loose items. Check pockets, drums, and dispenser drawers. A wet sock hiding inside the washer can create odor during a long move, and loose objects can rattle around during transportation.
Wipe down the washer drum and leave the door or lid open for several hours if possible. Front-load washers especially benefit from airing out because moisture can linger around the gasket. Clean the dryer lint screen and remove lint from around the door and drum. Moving day is also the perfect time to clean behind the dryer, where lint tends to gather like it has been paying rent.
Step 3: Shut Off Utilities Safely
Turn Off the Water Supply
Behind the washer, you should find hot and cold water valves. Turn both valves clockwise until they are fully closed. Do not force a stuck valve. If it will not turn, call a plumber or maintenance professional. A broken water valve can quickly turn your laundry room into an indoor splash park.
Disconnect Power
Unplug the washer and dryer from the wall outlets. If the plugs are difficult to reach, move the appliances only enough to access them safely. Never yank on the cord. For electric dryers, remember that the outlet is typically larger and higher-voltage than a standard household outlet, so handle the cord carefully and keep it dry.
Handle Gas With Professional Help
If you have a gas dryer, turn off the gas supply valve only if you know how to do so safely, and have a qualified technician disconnect the gas line. The same applies when reinstalling it at the new home. A gas dryer is convenient, but the connection is not a “figure it out as we go” situation.
Step 4: Disconnect and Drain the Washer Hoses
Place towels and a bucket behind the washer before loosening the water hoses. Even after the valves are closed, water remains inside the hoses. Disconnect the hoses from the wall first, then from the washer if needed. Keep the hose ends pointed into the bucket so water drains cleanly instead of sneaking under the appliance.
Next, remove the drain hose from the standpipe or laundry sink. Lower it into a bucket to drain any remaining water. Some washers also have a drain filter or small emergency drain hose near the bottom front panel. If your model has one, empty it according to the manual. This step can prevent surprise puddles inside the moving truck.
Once the hoses are drained, place them in a plastic bag or secure them inside the washer drum. Tape the power cord to the back of the machine or bundle it with a rubber band. Avoid taping directly over delicate controls or painted surfaces with aggressive tape.
Step 5: Disconnect the Dryer Vent
Carefully pull the dryer away from the wall so you can reach the exhaust vent. Loosen the clamp and remove the vent hose from the dryer. If the vent hose is plastic, foil, crushed, torn, or packed with lint, replace it with proper metal venting during reinstallation. A good dryer vent supports airflow, improves drying performance, and reduces fire risk.
Use this opportunity to clean lint from the dryer outlet, vent hose, and wall duct opening. Also check that the exterior vent flap opens freely. If the duct is long, clogged, or difficult to access, hire a dryer vent cleaning professional. A clean vent is not just a neatness issue; it is a safety issue.
Step 6: Secure the Washer Drum
This is one of the most important steps when moving a washing machine. If your washer is a front-loader, install the manufacturer-approved shipping bolts before transportation. These bolts hold the tub and internal suspension in place. Moving a front-load washer without them can damage the drum, bearings, suspension, or internal parts.
If you do not have the bolts, do not guess with random hardware from the garage. Use the model number to order the correct kit or contact the manufacturer. Some top-load washers may need foam support or special packing material. When in doubt, follow the appliance manual. The washer drum is built to move during washing, not to bounce for miles in the back of a truck.
Step 7: Wrap and Protect the Appliances
Close and secure doors and lids. Use stretch wrap to keep them shut, but do not wrap so tightly that you bend hinges or damage controls. Cover each appliance with a moving blanket and secure the blanket with tape, rope, or stretch wrap. Keep tape away from painted or stainless-steel surfaces whenever possible.
Protect corners because they are the first places to get bumped. Also protect the floor. Use cardboard, furniture sliders, or plywood sheets if you need to move the machines across hardwood, vinyl, or tile. Dragging a washer across a floor is a quick way to create scratches that look like a raccoon tried to escape your laundry room.
Step 8: Use an Appliance Dolly Correctly
Slide the appliance dolly under the washer or dryer from the side or back, depending on the best balance point and your path. Center the appliance on the dolly and secure it with the built-in strap. Tilt slowly and let the dolly carry the weight. The person guiding the dolly should move with control, not speed.
Always keep the washer upright. Laying a washer on its side can allow internal components, moisture, or residual water to shift in ways the appliance was not designed to handle. Dryers should also be moved upright whenever possible to protect the cabinet, drum, and components.
For stairs, use at least two strong adults and move one step at a time. The person below the appliance carries more risk and should not be placed under an unstable load. If the stairs are narrow, steep, or curved, hire movers. Pride weighs less than a washing machine, and it is much cheaper to repair.
Step 9: Load the Washer and Dryer Into the Truck
Load appliances using a ramp whenever possible. Keep the dolly strapped until the appliance is inside the truck. Place the washer and dryer upright against a wall of the truck, then secure them with straps so they cannot shift during transit.
Do not stack heavy boxes on top of the machines. Avoid placing sharp objects near hoses, cords, control panels, or dryer vents. If the washer and dryer are traveling with other furniture, keep them separated with moving blankets. A washer is sturdy, but it does not need to spend the ride getting friendly with a metal bed frame.
Step 10: Reinstall the Washer at the New Home
Place the washer in its new location and remove all moving blankets, wrap, and shipping bolts before use. This is critical. Running a washer with shipping bolts still installed can cause severe vibration, noise, and damage.
Connect the water inlet hoses to the correct hot and cold connections. Many homeowners replace old rubber hoses with new braided stainless-steel hoses during a move because hoses wear out over time. Tighten connections snugly, but do not overtighten. Turn the water valves on slowly and check for leaks at both ends.
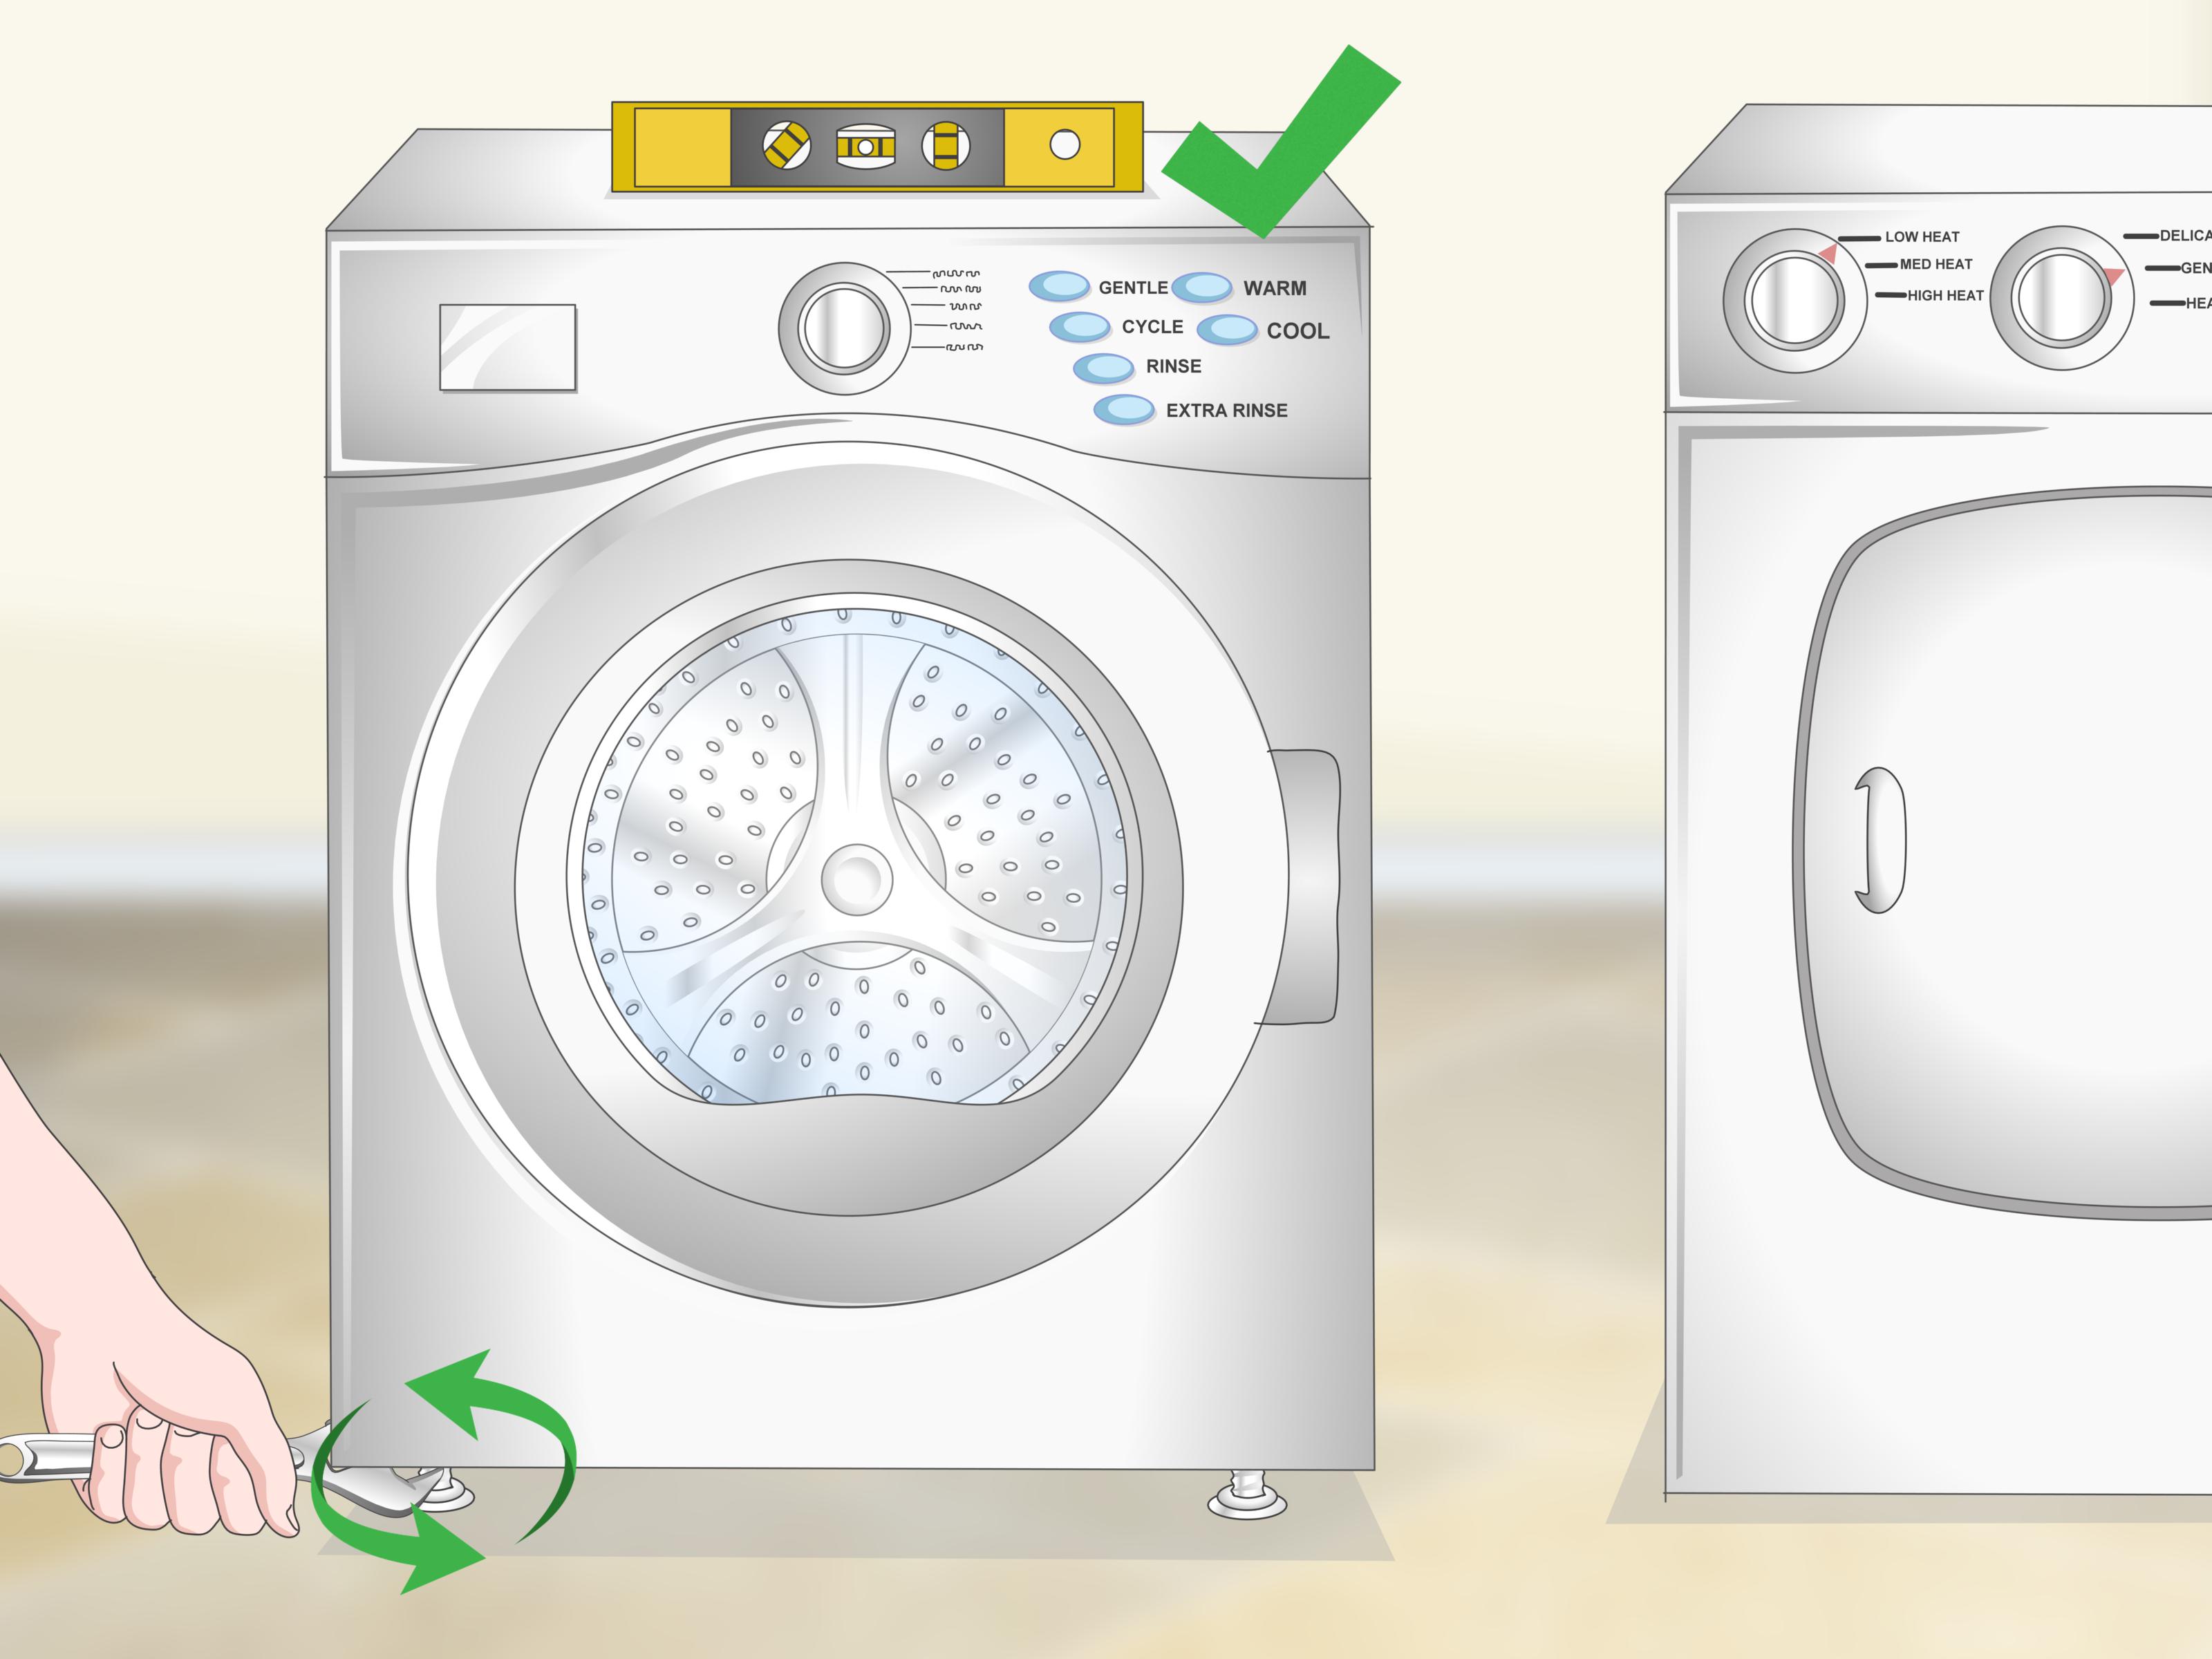
Place the drain hose securely into the standpipe or laundry sink. Make sure it is not kinked, crushed, or inserted too far down the pipe. Then level the washer by adjusting the feet. A washer that is not level can shake, walk, thump, and generally behave like it is auditioning for a drum solo.
Step 11: Reinstall the Dryer
For an electric dryer, connect the power cord only after the dryer is positioned and vented properly. For a gas dryer, have a qualified professional reconnect the gas line and check for leaks.
Attach the dryer vent using appropriate metal ducting. Avoid crushing the duct when pushing the dryer back into place. Leave enough room behind the appliance for airflow. Check that the vent path is not restricted and that the outdoor vent flap opens when the dryer runs.
Once everything is connected, run a short test cycle. Listen for unusual noises, watch for vibration, check for warm exhaust airflow, and inspect all connections. For the washer, run a rinse-and-spin cycle without clothes and check for leaks around the hoses and drain.
Common Mistakes to Avoid When Moving a Washer and Dryer
Forgetting to Drain the Washer
A washer can hold more leftover water than you expect. Drain hoses, filters, and internal lines can surprise you during lifting. Always keep towels and a bucket nearby.
Moving a Front-Load Washer Without Shipping Bolts
This is one of the most expensive mistakes. If the drum is not stabilized, internal parts can be damaged during transportation. Use the correct shipping bolts or manufacturer-approved support.
Dragging Appliances Across the Floor
Dragging can scratch flooring and damage appliance feet. Use a dolly, sliders, cardboard, or plywood to protect the surface.
Reusing a Crushed Dryer Vent
A crushed or clogged dryer vent reduces airflow and can create a fire hazard. Replace poor ducting and clean lint before reconnecting the dryer.
Ignoring Gas Dryer Safety
Gas connections require proper tools and leak checks. Hire a qualified professional for disconnecting and reconnecting gas dryers.
Should You Move a Washer and Dryer Yourself or Hire Professionals?
You can move a washer and dryer yourself if the path is short, the machines are accessible, you have the right equipment, and you have enough capable helpers. A ground-floor laundry room with wide doors is a reasonable DIY project. A basement laundry room with steep stairs, a stacked unit, or a gas dryer is a much stronger case for professional movers or appliance technicians.
Hiring help costs more upfront, but it can prevent appliance damage, personal injury, floor scratches, and unsafe connections. If your washer and dryer are new, high-end, stacked, unusually heavy, or still under warranty, professional handling is often worth it.
Real-World Experiences: What Moving a Washer and Dryer Teaches You
The first lesson from moving a washer and dryer is that the appliances are always heavier than they look. A dryer may seem light compared with a washer, but it is still awkward, wide, and easy to dent. A washer feels compact until you try to guide it around a corner and realize it has the personality of a stubborn refrigerator. The best moving experience starts with humility. Assume the machines are heavy, assume the hallway is tighter than it looks, and assume you will need more towels than you placed nearby.
One common experience is discovering that the water hoses have not been touched in years. They may be stiff, corroded, or attached so tightly that loosening them feels like opening a time capsule sealed by a plumber with superhuman grip. This is why it helps to begin the disconnecting process a day before the actual move. If a hose will not budge or a valve drips after being turned off, you still have time to call a professional instead of panicking while the moving truck waits outside.
Another practical lesson is that labels save time. Before removing hoses and cords, take photos of the connections. Label hot and cold hoses with tape if they are not already obvious. At the new home, those photos become your cheat sheet. This is especially useful when the laundry area is cramped and you are trying to remember which hose went where while kneeling behind the washer like a detective solving a plumbing mystery.
Many movers also learn that the dryer vent deserves more attention than expected. Behind the dryer, you may find lint, dust, missing socks, coins, pet hair, and possibly the emotional remains of every laundry day since 2016. Cleaning that area before reinstalling the dryer makes the new setup safer and more efficient. Replacing a flimsy, crushed vent hose with proper metal ducting can also improve airflow and reduce drying time.
Stairs are where confidence gets tested. Even with an appliance dolly, moving a washer down stairs requires coordination. The person on top controls the dolly, while the person below helps guide and stabilize. Everyone should communicate clearly before each step. No jokes, no rushing, no “I think I’ve got it” moments. If the stairs are narrow or the machine feels unstable, stop and hire professionals. A washer can be replaced. Knees, backs, and drywall repairs are less fun.
Finally, the reinstallation stage teaches patience. Do not shove the machines into place and immediately start a full load of towels. Run short test cycles first. Watch the water connections. Look under the washer with a flashlight. Check the dryer vent outside while the dryer is running. Listen for strange noises. A slow, careful test can catch leaks, vibration, and airflow problems before they become real damage.
The best experience is not the fastest move. It is the move where the washer arrives without drum damage, the dryer vents properly, the floor remains scratch-free, and nobody has to say, “Well, that sounded expensive.”
Conclusion: Move Slowly, Move Safely, and Respect the Hoses
Moving a washer and dryer is a manageable project when you treat it as a process instead of a brute-force challenge. Start by identifying your appliance type, gathering the right tools, shutting off utilities, draining hoses, cleaning vents, and securing the washer drum. Use an appliance dolly, protect floors and corners, keep the machines upright, and strap them securely in the truck.
At the new home, take your time with reinstallation. Remove shipping bolts before running the washer, level the machine, check hose connections, clean and attach the dryer vent properly, and hire a qualified professional for gas dryer work. The goal is not just to move the appliances from point A to point B. The goal is to have them work safely when they arrive.
In short, your washer and dryer can survive the move beautifully. Just give them a little planning, a sturdy dolly, a clean vent, and the respect due to two appliances that have seen every sock you own.