
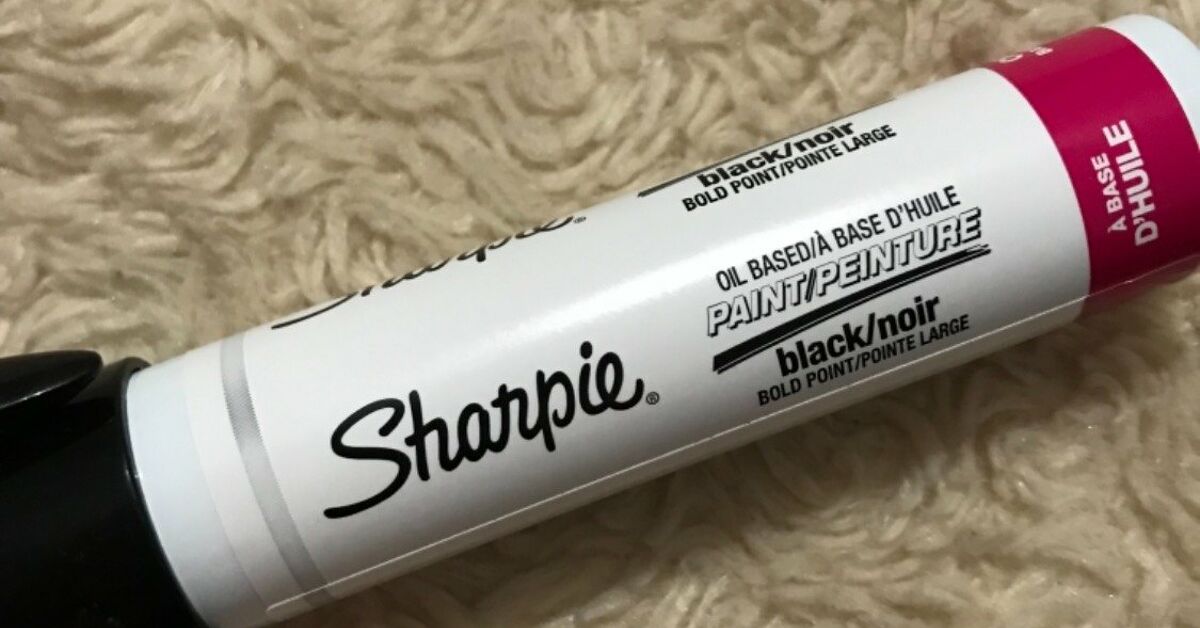
Want the cozy farmhouse charm of shiplap without buying lumber, renting a saw, bribing a handy cousin, or explaining to your landlord why the living room suddenly has nail holes? Meet the wonderfully sneaky Sharpie shiplap wall DIY: a budget-friendly faux shiplap technique that uses straight marker lines to create the look of real wall planks.
Yes, you read that correctly. A marker. A level. A little patience. That is the magic recipe. This project is perfect for renters, beginners, dorm rooms, small bathrooms, entryways, laundry rooms, RV interiors, or anyone who wants a fresh accent wall without turning the house into a construction zone. The best part? If you already have white paint and a ruler, the project can cost about four dollarsthe price of a good paint marker or permanent marker.
Real shiplap is beautiful, but it requires boards, cutting, nailing, caulking, sanding, painting, and a willingness to vacuum sawdust from places sawdust has no business visiting. Faux Sharpie shiplap gives you the visual rhythm of shiplap lines with almost no mess. It will not add actual wood texture, but from across the room, it can deliver that clean, charming, “I casually renovated this wall while drinking iced coffee” look.
What Is a Sharpie Shiplap Wall?
A Sharpie shiplap wall is a faux wall treatment where evenly spaced horizontal or vertical lines are drawn directly on a painted wall to imitate the gaps between shiplap boards. Instead of installing wood planks, you create the illusion of boards using a marker line. The result is light, affordable, removable with paint, and surprisingly stylish when done carefully.
Traditional shiplap is made from wood boards installed with a small reveal or gap between each board. That gap creates shadow, pattern, and texture. With the Sharpie method, the marker line becomes the “shadow.” The trick is not to make the line too thick, too wobbly, or too dramatic. Subtle is your friend. Think “architectural detail,” not “I attacked the wall with office supplies.”
Why This $4 Faux Shiplap DIY Works
The reason this project looks good is simple: the human eye loves repetition. Evenly spaced lines make a wall feel more intentional. They create order, movement, and a soft architectural pattern. On a white or light-colored wall, gray or black lines can mimic the shadow gaps of real shiplap. In a small room, the effect can make a plain wall feel finished without overwhelming the space.
This project is especially helpful when you want a farmhouse accent wall, coastal cottage style, modern rustic detail, or a clean backdrop behind a bed, sofa, desk, crib, or dining nook. It also works well in areas where real wood might be too heavy, too expensive, or too permanent.
Supplies You Need
You do not need a garage full of tools. You need basic measuring supplies and a steady hand. Here is the simple list:
- One black, gray, or charcoal Sharpie paint marker or permanent marker
- A long level, yardstick, ruler, or straight board
- Pencil for light guidelines
- Measuring tape
- Painter’s tape
- White or light wall paint for touch-ups
- Magic eraser or damp cloth for cleaning the wall before starting
- Step stool or ladder if needed
For the most realistic result, use a fine or medium-point marker rather than a huge chisel tip. A black line can look bold and graphic, while gray often looks softer and more like a natural shadow. If your wall is pure white, gray can be forgiving. If your wall is warm white, cream, greige, or pale beige, test the marker color first in a hidden corner.
Step 1: Choose the Right Wall
Pick a wall that can handle a little pattern. Behind a bed, behind a sofa, in an entryway, in a powder room, or around a breakfast nook are excellent choices. Avoid walls with heavy texture if possible. Orange-peel texture can still work, but deep knockdown texture may make the marker skip, wobble, or bleed into the surface.
If this is your first attempt, do not start with the most visible wall in the house. Practice somewhere less dramatic, such as a laundry room or guest bedroom. Confidence is great, but confidence plus practice is better. Your wall will thank you.
Step 2: Clean and Prep the Surface
Before drawing your faux shiplap lines, clean the wall. Dust, grease, fingerprints, and mystery smudges can interfere with smooth marker application. Wipe the surface with a damp cloth and let it dry completely. If the wall has rough spots, lightly sand them and wipe away dust.
If the wall color is uneven, dingy, or covered in old scuffs, consider painting it first. A fresh white, soft ivory, pale gray, or warm neutral background makes the Sharpie shiplap effect look cleaner and more intentional. Let new paint dry fully before adding marker lines. Rushing this step can cause smearing, drag marks, or regret, and regret is not a design style.
Step 3: Decide on Horizontal or Vertical Shiplap
Horizontal Sharpie Shiplap
Horizontal lines are the classic choice. They create the look of traditional shiplap boards and can make a room feel wider. This style is great behind beds, sofas, media consoles, and dining benches.
Vertical Sharpie Shiplap
Vertical lines feel a little more modern and can visually lift the ceiling. They are excellent for small rooms, narrow entryways, bathrooms, and RV interiors. Vertical faux shiplap can also look more custom because many people expect shiplap to run horizontally.
Both options work. Choose the direction that helps your room. If your room feels short, go vertical. If your room feels narrow, go horizontal. If your room feels boring, either one is already a big improvement.
Step 4: Choose Your Board Spacing
Common shiplap spacing often imitates boards that are about six, eight, or ten inches wide. For most homes, six-inch spacing looks classic and detailed. Eight-inch spacing looks relaxed and modern. Ten-inch spacing feels wider and cleaner, especially on large walls.
For a small wall, six inches usually looks best because the pattern is visible. For a large wall, eight inches may feel more balanced. Before committing, use painter’s tape to mark a few sample lines and step back. Your eye will tell you quickly whether the spacing feels too busy, too empty, or just right.
Step 5: Start in the Least Noticeable Area
Every DIY project has a warm-up zone. Start your first line where it will be hidden by furniture, a door, curtains, or a corner. That way, if your hand needs a minute to become best friends with the marker, the first line will not be the star of the room.
Measure from the ceiling or floor depending on your design. For horizontal shiplap, many people begin at the top and work down. For vertical shiplap, begin at one corner and work across. Use a pencil to place small marks at each spacing interval. Do not draw heavy pencil lines unless you plan to erase or cover them. Tiny guide marks are enough.
Step 6: Use a Level for Every Line
This is the step that separates “designer faux shiplap” from “my wall had a nervous breakdown.” Use a level, long ruler, yardstick, or straight board as your guide. Do not rely on the ceiling, floor, or trim being perfectly straight. Houses settle. Floors tilt. Ceilings lie. A level tells the truth.
Hold the straight edge firmly against the wall and draw the marker along it in one smooth motion. If the wall is long, draw the line in sections, carefully matching each section. Keep your pressure consistent. Too much pressure can make the line thick or uneven. Too little pressure can make it skip.
Step 7: Draw the Faux Shiplap Lines
Once your guide is level, draw the line. Move slowly, but not so slowly that your hand shakes. If using a paint marker, follow the marker instructions for shaking and priming the tip. Test it on scrap paper before touching the wall. A fresh paint marker can sometimes release too much ink at first, and nobody wants a surprise blob on the wall.
For the most realistic effect, keep the line thin and clean. Real shiplap gaps are shadowy, not cartoon outlines. If you want a softer look, use a gray marker or lightly drag the marker once instead of going over the line multiple times.
Step 8: Fix Mistakes Without Panic
Here is the lovely secret: mistakes are fixable. If a line wiggles, breaks, or goes slightly rogue, let the marker dry and touch it up with wall paint. Use a small artist brush for precision. Once the paint dries, redraw the corrected section.
If the mistake is minor, step back before fixing it. From six feet away, many tiny imperfections disappear. The goal is not microscopic perfection. The goal is a wall that looks charming, clean, and intentional. Real wood has character, too. Your wall can have a little personality without filing a formal complaint.
Step 9: Add Finishing Touches
After the lines are complete, let the wall dry fully. Avoid rubbing it immediately. Style the wall with simple decor so the pattern can shine. A mirror, framed prints, floating shelf, woven basket, wall hooks, or a simple headboard can all look beautiful against faux shiplap.
If your lines look too stark, soften the room with textiles: linen curtains, throw pillows, a jute rug, or warm wood furniture. Sharpie shiplap looks best when it is part of a layered room, not the only design element trying to carry the entire emotional burden of the house.
Best Rooms for a Sharpie Shiplap Wall
This easy faux shiplap wall idea works in many spaces, but some rooms are especially friendly to the technique:
- Bedroom: Create a budget headboard wall behind the bed.
- Entryway: Add charm behind hooks, benches, or shoe storage.
- Bathroom: Use it above wainscoting height or behind shelves, avoiding constantly wet areas.
- Laundry room: Turn a practical room into something cheerful.
- Home office: Make a clean video-call background.
- RV or camper: Add style without adding heavy boards.
Sharpie Shiplap vs. Real Shiplap
Real shiplap adds physical texture, depth, and durability. It can increase the custom feel of a room and may be worth it for permanent renovations. But real shiplap also costs more and requires more labor. You may need lumber, adhesive, nails, a saw, caulk, primer, paint, and trim adjustments.
Sharpie shiplap is not a replacement for real wood in every situation. It is a smart visual trick. It is ideal when you want the look for less money, less time, and less commitment. If your style changes later, simply paint over it. That is a beautiful sentence for renters, indecisive decorators, and anyone who has ever regretted a “bold design moment” from three years ago.
Common Mistakes to Avoid
Using Lines That Are Too Dark
A thick black line can look less like shiplap and more like notebook paper. Test your marker first. Gray or charcoal may look more realistic than pure black.
Skipping Wall Prep
Dirty or dusty walls can make lines uneven. Clean first, draw later. This is not glamorous, but neither is a marker line that skips over a dust bunny fossil.
Trusting the Ceiling or Floor
Always use a level. Many ceilings and floors are not perfectly straight. If you follow them blindly, your lines may slope.
Choosing Tiny Spacing
Spacing that is too narrow can look busy. For most walls, six to eight inches is a safe range.
Drawing Too Fast
Move steadily. Speed can cause skips, smears, or crooked sections. This is a budget project, not a race.
Design Ideas for a More Expensive Look
To make your $4 shiplap wall look like more than a clever trick, style it thoughtfully. Add painted trim around the wall for a framed effect. Use a soft white background and a warm gray marker for subtle contrast. Hang black metal hooks in an entryway for modern farmhouse style. Add natural wood shelves for warmth. Pair the wall with matte black hardware, brass accents, or woven textures.
You can also stop the shiplap halfway up the wall and add a chair rail or narrow trim piece. This creates the feel of wainscoting without installing panels. In a bathroom or hallway, a half-wall Sharpie shiplap treatment can look polished while keeping the pattern from taking over the room.
How Long Does a Sharpie Shiplap Wall Last?
A Sharpie shiplap wall can last for years if the wall is clean, dry, and not constantly scrubbed. It is best for low-touch areas. Behind a sofa, bed, or shelf, it should hold up well. In high-traffic zones where backpacks, chairs, or pets rub against the wall, expect occasional touch-ups.
If you want extra durability, test a clear water-based protective finish in a hidden spot first. However, many homeowners skip sealing because the beauty of this project is its simplicity. When the wall needs refreshing, touch up the paint or repaint the entire wall and start over.
My Real-Life Experience With a Sharpie Shiplap Wall
The first time I tried a Sharpie shiplap wall, I had the usual DIY confidence that arrives five minutes before reality taps you on the shoulder. I thought, “How hard can drawing straight lines be?” Then I remembered that even wrapping a birthday gift can turn into a geometry problem. So I started small: one bedroom accent wall behind a bed, where pillows could hide any crimes against symmetry.
The biggest lesson was that preparation matters more than artistic talent. I cleaned the wall, touched up old scuffs, and waited until the paint was fully dry. That waiting part was annoying, because DIY excitement has the patience of a squirrel, but it made the marker glide much better. When I tested the marker on paper first, a little extra ink came out, which would have been a very dramatic first mark on the wall. Testing saved the day.
Spacing was the next surprise. I first tried marks every six inches and thought it looked cute up close. But when I stepped back, the pattern felt a little busy for the size of the room. Eight inches looked calmer and more expensive. That is why painter’s tape samples are so helpful. A few temporary tape lines can prevent an entire wall of “Well, I guess we live with this now.”
Using a level was non-negotiable. I discovered my ceiling was not perfectly straight, which was rude but informative. If I had followed the ceiling, every line would have slowly drifted like it was trying to leave the room. The level kept everything honest. I also learned to draw each line with light, even pressure. Pressing harder did not make the wall look more real; it made the marker line look bossy.
The best part was how forgiving the project felt. One line had a tiny wobble where my hand bumped the straight edge. I touched it up with white paint using a small brush, waited for it to dry, and redrew that section. Nobody noticed. In fact, the only person who studied the wall closely was me, standing two inches away like a detective solving a very beige mystery.
After styling the wall with a simple wood headboard, white bedding, and two framed prints, the faux shiplap looked surprisingly finished. It did not fool anyone who touched it, of course. There was no wood grain and no real groove. But visually, it gave the room the same relaxed rhythm I wanted. The wall felt brighter, more layered, and more intentional, and the project cost less than lunch.
My advice from experience is simple: choose a low-pressure wall, test everything first, use gray if black feels too strong, and step back often. Your nose does not need to approve the wall from two inches away. Your room needs to look good from the doorway. That is where Sharpie shiplap shines. It is not fancy carpentry. It is clever decorating. And sometimes clever decorating is exactly what a plain wall needs.
Conclusion
A $4 Sharpie shiplap wall DIY is one of the easiest ways to create farmhouse charm, cottage texture, or a clean accent wall without power tools, wood planks, or a weekend-long renovation. With a marker, a level, careful spacing, and a little touch-up paint, you can transform a plain wall into a stylish focal point that looks far more expensive than it is.
This project is not about pretending to be a master carpenter. It is about using a smart visual shortcut to get a beautiful result on a tiny budget. Whether you live in a rental, decorate on a budget, or simply love a fast home refresh, faux Sharpie shiplap is a fun, low-risk project that proves good design does not always need a big price tag. Sometimes, it just needs a straight line and a brave first mark.














