
White pumpkins look like they were designed by autumn’s minimalist cousin: clean, creamy, slightly mysterious, and photogenic enough to make even a compost pile feel underdressed. When we first decided to grow white pumpkins, we imagined a tidy patch filled with moon-colored fruit, soft green vines, and a harvest basket worthy of a farmhouse magazine cover. What we actually got was a crash course in patience, pollination, soil, powdery mildew, watering schedules, vine management, and the humble art of not tripping over a pumpkin plant every morning.
Still, growing white pumpkins turned out to be one of the most rewarding projects in our garden. They are not wildly different from orange pumpkins in their basic needs, but they do have a few quirks. Their pale skin makes them easy to spot under leaves, but it also means they can show blemishes, sunscald, dirt, and handling marks more clearly. They need warmth, room to roam, steady moisture, healthy soil, pollinators, and a gardener who does not panic every time a leaf looks dramatic. Pumpkin leaves, for the record, are very dramatic.
This guide shares how we grew white pumpkins from seed to harvest, including what worked, what failed, what surprised us, and what we would absolutely do differently next season. Whether you want white pumpkins for fall décor, carving, painting, porch displays, or simply the joy of growing something beautiful, here is the complete story from our garden bed to the harvest table.
Why We Chose White Pumpkins
We grew white pumpkins because we wanted something different from the classic orange pumpkin patch. Orange pumpkins are cheerful, no argument there. But white pumpkins bring a softer, more elegant look to fall decorating. They pair beautifully with mums, corn stalks, sage-green gourds, dried grasses, black lanterns, and even the slightly chaotic pile of shoes near the front door that nobody in the house wants to discuss.
White pumpkin varieties can range from tiny decorative types to large carving pumpkins. Some are smooth and bright white, while others have a creamy ivory or pale blue-gray cast. Popular white pumpkin varieties include names such as Lumina, Casper, Snowball, Baby Boo, and Cotton Candy, though availability depends on your seed source and growing region. We chose a medium-size white pumpkin variety because we wanted fruit large enough for display but not so large that harvesting required a small construction crew.
The biggest reason to grow them yourself is quality. Store-bought white pumpkins are often expensive, especially before Halloween. Growing them at home gives you more control over the variety, harvest timing, and final look. Plus, there is something deeply satisfying about pointing at a beautiful white pumpkin and saying, “We grew that,” even if the plant did most of the work and we mostly watered, worried, and Googled things at midnight.
Choosing the Right Spot for White Pumpkins
The first rule of growing white pumpkins is simple: give them sun. Pumpkins need full sun, which generally means at least six to eight hours of direct sunlight per day. We planted ours in the brightest section of the garden, where the vines could stretch without taking over the tomatoes, peppers, herbs, patio furniture, and possibly the neighbor’s mailbox.
Space matters more than beginners expect. Pumpkin vines are enthusiastic travelers. A compact variety may behave politely, but many vining pumpkins spread 10 feet or more. We learned to treat the seed packet spacing instructions as a serious warning, not a friendly suggestion. For vining white pumpkins, a wide garden bed, open field edge, large raised bed, or sunny corner with room to sprawl is ideal.
Drainage is just as important as sunlight. Pumpkins dislike soggy roots. Our best planting area had loose, well-drained soil that held moisture without becoming muddy. If your soil is heavy clay, consider planting pumpkins in mounds or raised rows. This helps warm the soil faster in spring and keeps roots from sitting in excess water after rain.
Preparing the Soil Before Planting
White pumpkins are hungry plants. They grow big vines, wide leaves, thick stems, bright flowers, and eventually heavy fruit. That kind of performance requires good soil. Before planting, we loosened the bed and mixed in finished compost. Compost improves soil structure, supports beneficial soil life, and adds slow-release nutrients. It also makes you feel like a responsible gardener, which is helpful when the weeds start judging you later.
Pumpkins generally prefer fertile, well-drained soil with a slightly acidic to neutral pH, often around 6.0 to 6.8. A soil test is the best way to know what your garden actually needs. Guessing at fertilizer can lead to lush vines and disappointing fruit. Too much nitrogen, for example, can encourage big leafy growth while reducing fruit production. The plant looks impressive, but it behaves like a pumpkin influencer: all foliage, no substance.
We added compost before planting and then used a balanced vegetable fertilizer according to the label. Once vines began flowering, we shifted attention toward steady moisture and fruit development rather than pushing more leafy growth. The goal was not to create the world’s largest vine. The goal was pumpkins.
Starting White Pumpkins from Seed
We grew our white pumpkins from seed because pumpkin seeds are large, easy to handle, and wonderfully satisfying to plant. They look like they already believe in themselves. Pumpkins need warm soil to germinate well, so we waited until the danger of frost had passed and the soil had warmed. Planting too early can lead to poor germination, rotted seeds, or weak seedlings that sulk in cold soil.
In warm regions, direct seeding is often the easiest method. We planted seeds about one inch deep in small hills, placing several seeds per hill and thinning later to the strongest plants. Hills do not need to be dramatic volcano-shaped monuments. A slightly raised mound is enough to improve drainage and help the soil warm.
Gardeners in shorter-season climates may start pumpkin seeds indoors a few weeks before transplanting. However, pumpkins do not love root disturbance, so biodegradable pots or careful transplanting can help reduce stress. We direct-sowed because our growing season was long enough and because our indoor seed-starting shelf was already hosting tomatoes, basil, and one mysterious tray labeled “maybe peppers?”
Watering White Pumpkin Plants
Consistent watering made a major difference in our pumpkin patch. Pumpkins need regular moisture, especially during flowering and fruit set. Dry spells can stress the plants, while irregular watering may contribute to poor fruit development or splitting. We aimed for deep watering rather than frequent shallow splashes.
Morning watering worked best. It allowed the soil to absorb moisture before the hottest part of the day and gave leaves time to dry if they got wet. Wet foliage can increase the risk of fungal diseases, so we tried to water at the base of the plants. A soaker hose or drip irrigation system is ideal because it delivers water directly to the root zone without turning the leaves into a mildew resort.
Mulch helped us keep moisture consistent. We used straw around the plants once they were established. Mulch reduced evaporation, suppressed weeds, and kept developing pumpkins cleaner. For white pumpkins, that last point matters. Pale skin shows mud and blemishes more easily than orange skin, so keeping fruit off wet soil helps preserve that clean, ghostly glow.
Watching the Vines Grow
Once the plants settled in, they grew fast. Pumpkin vines have a way of expanding overnight, as if they attended a motivational seminar while we were sleeping. First came the big leaves, then the curling tendrils, then the long vines reaching into every open space.
We gently guided the vines away from paths and neighboring crops. This did not require aggressive pruning. We simply redirected new growth while it was flexible. Once vines get thick and rooted along the ground, moving them can cause damage. The trick is to guide early and then mostly leave them alone.
Some gardeners prune pumpkin vines to manage space or focus energy on fewer fruit. We did light vine management, removing only damaged growth and trimming a few tips that were heading where they absolutely did not belong. If you are growing for giant pumpkins, pruning becomes more strategic. For our white pumpkins, we wanted a healthy patch, not a competitive weigh-in.
Flowers, Pollination, and the Waiting Game
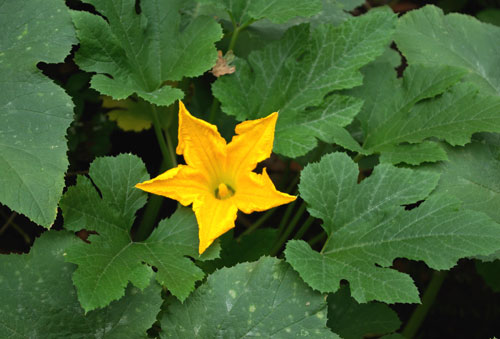
Pumpkin plants produce male and female flowers. The male flowers usually appear first, which can confuse new gardeners. We saw plenty of blossoms but no pumpkins at first, and for about a week we suspected the plants were just being decorative. Then the female flowers appeared, each with a tiny swelling at the base that looked like a baby pumpkin.
Pollinators are essential. Bees move pollen from male flowers to female flowers, allowing fruit to develop. To encourage pollinators, we avoided spraying insecticides during bloom and kept flowering herbs and annuals nearby. Basil, zinnias, marigolds, and other pollinator-friendly plants helped bring activity to the garden.
On mornings when bee activity seemed low, hand pollination was an option. This involves taking pollen from a fresh male flower and gently transferring it to the center of a female flower. It sounds like a delicate science experiment, but it is really just garden matchmaking. We tried it on a few flowers, mostly because curiosity is a powerful fertilizer.
Common Problems We Faced
White pumpkins are beautiful, but they are still pumpkins. That means pests and diseases may show up. Our main concerns were squash bugs, cucumber beetles, squash vine borers, and powdery mildew. The first step was regular scouting. Every few days, we checked the undersides of leaves, vine bases, flowers, and young fruit.
Squash bugs can cause leaves to wilt and decline. We removed egg clusters when we found them and kept the area free of plant debris. Cucumber beetles can damage leaves and spread disease, so early monitoring mattered. Squash vine borers are especially frustrating because their larvae tunnel inside stems. A plant may look fine one day and wilt dramatically the next, like it just received bad news.
Powdery mildew appeared late in the season as a white-gray coating on older leaves. Some mildew is common as pumpkin plants age, but severe infection can reduce leaf health. We improved airflow where possible, avoided overhead watering, and removed badly affected leaves when necessary. The goal was to keep the canopy healthy long enough for the pumpkins to mature.
Protecting the White Color
One thing we learned quickly is that white pumpkins need a little cosmetic care if you want them to look clean at harvest. Their pale skin makes every scrape, soil splash, and sun mark more visible. We placed straw under developing fruit to reduce contact with damp soil. Some gardeners use boards, cardboard, or upside-down plant trays. The idea is simple: keep the pumpkin dry, supported, and clean.
We also rotated the pumpkins gently once or twice while they were small enough to move safely. This helped prevent flat spots and encouraged more even coloring. Once they got larger, we left them alone. Pumpkin stems can crack or detach if handled roughly, and a pumpkin without a good stem does not store as well.
Sun exposure can affect pale pumpkins. Too much direct hot sun on exposed fruit may cause discoloration or sunscald. Leaves naturally shade the pumpkins, so we avoided heavy pruning. If a fruit became suddenly exposed during intense heat, we used nearby foliage or a light shade solution to protect it without trapping moisture.
How We Knew the Pumpkins Were Ready
Harvest timing is part science, part observation, and part resisting the urge to pick too early. White pumpkins are ready when they have reached their mature color, the rind is hard, and the stem begins to dry. For orange pumpkins, color change is obvious. For white pumpkins, the mature color may be bright white, ivory, cream, or pale gray depending on the variety.
The fingernail test helped. If the rind resisted puncture from a thumbnail, the pumpkin was close to ready. We also watched the vines. As the season ended, the vines began to yellow and decline. That is normal. By then, the plant had done its job.
We harvested before hard frost. Frost can damage pumpkin skin and reduce storage life. Using sharp pruners, we cut each pumpkin from the vine with several inches of stem attached. We did not carry them by the stem, even though the stem looks like a handle and practically begs for it. Stems can snap, and once that happens, the pumpkin becomes more vulnerable to rot.
Curing and Storing White Pumpkins
After harvest, curing helped toughen the skin and improve storage life. We placed pumpkins in a warm, dry, well-ventilated spot for about one to two weeks. Good airflow matters. Pumpkins should not be piled in a damp corner like forgotten laundry.
Before storage, we wiped off dirt and checked each pumpkin for cuts, soft spots, or damaged stems. Any pumpkin with damage was used first for decorating or cooking experiments. The best pumpkins went into a cool, dry storage area with space between them. Moisture is the enemy of long storage, especially for pale pumpkins that show blemishes quickly.
For porch displays, we kept them out of standing water and protected them from hard freezes. A white pumpkin can look elegant for weeks if it stays dry and unbruised. It can also turn into a sad biology lesson if left in wet leaves. We experienced both outcomes, so please accept this wisdom with the humility in which it was earned.
Can You Eat White Pumpkins?
Many white pumpkins are edible, though flavor and texture vary by variety. Some are bred mainly for decoration, while others have flesh suitable for soups, pies, roasting, or purees. If eating is your goal, choose a variety described as good for cooking. Decorative pumpkins may be perfectly safe but less flavorful, stringier, or watery.
We roasted one of our smaller white pumpkins as a test. The flesh was mild and slightly sweet, though not as rich as a classic pie pumpkin. It worked well in soup with onion, garlic, herbs, and a little cream. The seeds roasted beautifully, which is always a bonus. Pumpkin seeds are the garden’s way of saying, “Thanks for believing in me. Here is a snack.”
If you plan to cook with white pumpkins, wash the outside before cutting, use a sharp knife, and remove the seeds and stringy center. Roast the pieces until tender, then scoop and puree the flesh. For pie, drain watery puree before using it. For soup, watery texture is less of a problem because everything is heading into a pot anyway.
What We Would Do Differently Next Time
Next season, we would give the vines even more space. Our patch produced well, but we underestimated how quickly the plants would expand. More space means better airflow, easier pest checks, and less accidental vine stepping. It also reduces the number of moments when a gardener has to whisper, “Excuse me,” to a plant while trying to reach the hose.
We would also set up drip irrigation earlier. Hand watering worked, but it became time-consuming once the vines spread. A drip system or soaker hose under mulch would have saved time and kept foliage drier. For disease prevention, that is a big advantage.
Finally, we would label the plants better. At one point, we had white pumpkins, winter squash, and a mystery cucurbit all growing in the same general area. The label faded, the vines mingled, and our confidence disappeared. Use weatherproof labels. Future you deserves answers.
Extra Growing Experiences: Lessons From Our White Pumpkin Patch
The most memorable lesson from growing white pumpkins was that the garden rewards consistency more than perfection. We did not do everything flawlessly. We missed a few watering days, let some weeds get too comfortable, and discovered pest eggs later than we should have. Yet the plants kept growing because the basics were in place: sun, fertile soil, steady water, pollinators, and enough time.
One of our favorite moments came when the first tiny white pumpkin formed behind a female flower. It looked like a marble at first, pale and round under the leaves. Every morning, we checked it like nervous pumpkin grandparents. Within days, it had grown noticeably larger. That speed is part of the magic. Pumpkins turn sunlight, water, and soil into something you can decorate your porch with. It feels almost suspicious.
We also learned that white pumpkins are excellent teachers of observation. With orange pumpkins, color change tells a bold story. White pumpkins are subtler. We had to pay attention to rind hardness, stem dryness, vine condition, and the expected days to maturity. That made us better gardeners. Instead of relying on one visual cue, we learned to read the whole plant.
Another experience worth sharing is that mulch made the patch easier to manage. Before mulching, weeds popped up everywhere and soil splashed onto the young fruit after rain. After mulching, the bed looked cleaner, moisture stayed more even, and the pumpkins developed with fewer dirty spots. Straw worked well, though we had to fluff it occasionally where it packed down. If using straw, make sure it is relatively seed-free unless you want to grow a surprise lawn in your pumpkin patch.
Pollinators became part of the daily entertainment. Pumpkin flowers open early and are large enough to look like yellow teacups. Bees loved them. On sunny mornings, the flowers practically buzzed. We started noticing which nearby flowers attracted the most pollinators and decided to plant even more next year. A pumpkin patch is not just a crop; it is a small ecosystem with wings, leaves, vines, and the occasional gardener standing there with coffee, pretending to supervise nature.
The biggest challenge was keeping the leaves healthy late in the season. Once humidity increased, powdery mildew arrived. At first, we were offended. The white pumpkins were supposed to be white, not the leaves. But instead of panicking, we focused on airflow, careful watering, and removing the worst leaves. The plants still had enough healthy foliage to finish ripening the fruit. That taught us not every garden problem needs a dramatic solution. Sometimes management is enough.
Harvest day felt surprisingly ceremonial. Cutting the first white pumpkin from the vine was more satisfying than we expected. The stem was dry, the rind was firm, and the fruit had that soft, creamy color we had hoped for. We set it on the porch and immediately understood why people grow these. A homegrown white pumpkin has personality. It is not just décor; it is a whole season sitting by the front door.
If someone asked whether white pumpkins are worth growing, our answer would be yes, especially if you enjoy ornamental gardening with a practical twist. They are beautiful, fun, and not especially difficult as long as you respect their need for space and warmth. They do ask for attention, but not constant fussing. Give them the right conditions, check them regularly, and they will likely reward you with a harvest that looks like autumn dressed up for a candlelit dinner.
Conclusion
Growing white pumpkins was part gardening project, part patience test, and part seasonal celebration. We started with a packet of seeds and ended with a patch full of pale, beautiful pumpkins that looked almost too pretty to be real. Along the way, we learned that white pumpkins need the same essentials as other pumpkins: full sun, warm soil, good spacing, consistent water, pollinators, healthy leaves, and careful harvesting.
The difference is in the details. Because their skin is pale, white pumpkins benefit from mulch, gentle handling, and protection from excess moisture and harsh exposure. Because they are often grown for decoration, timing and appearance matter. And because they are pumpkins, they will absolutely attempt to conquer whatever space you give them.
For gardeners who want a fresh twist on a fall classic, white pumpkins are a wonderful choice. They bring elegance to the garden, charm to the porch, and just enough drama to keep the growing season interesting. Plant them well, water them deeply, watch for pests, protect the fruit, and harvest before frost. Then step back and enjoy the quiet thrill of a white pumpkin patch glowing in the autumn light.














