
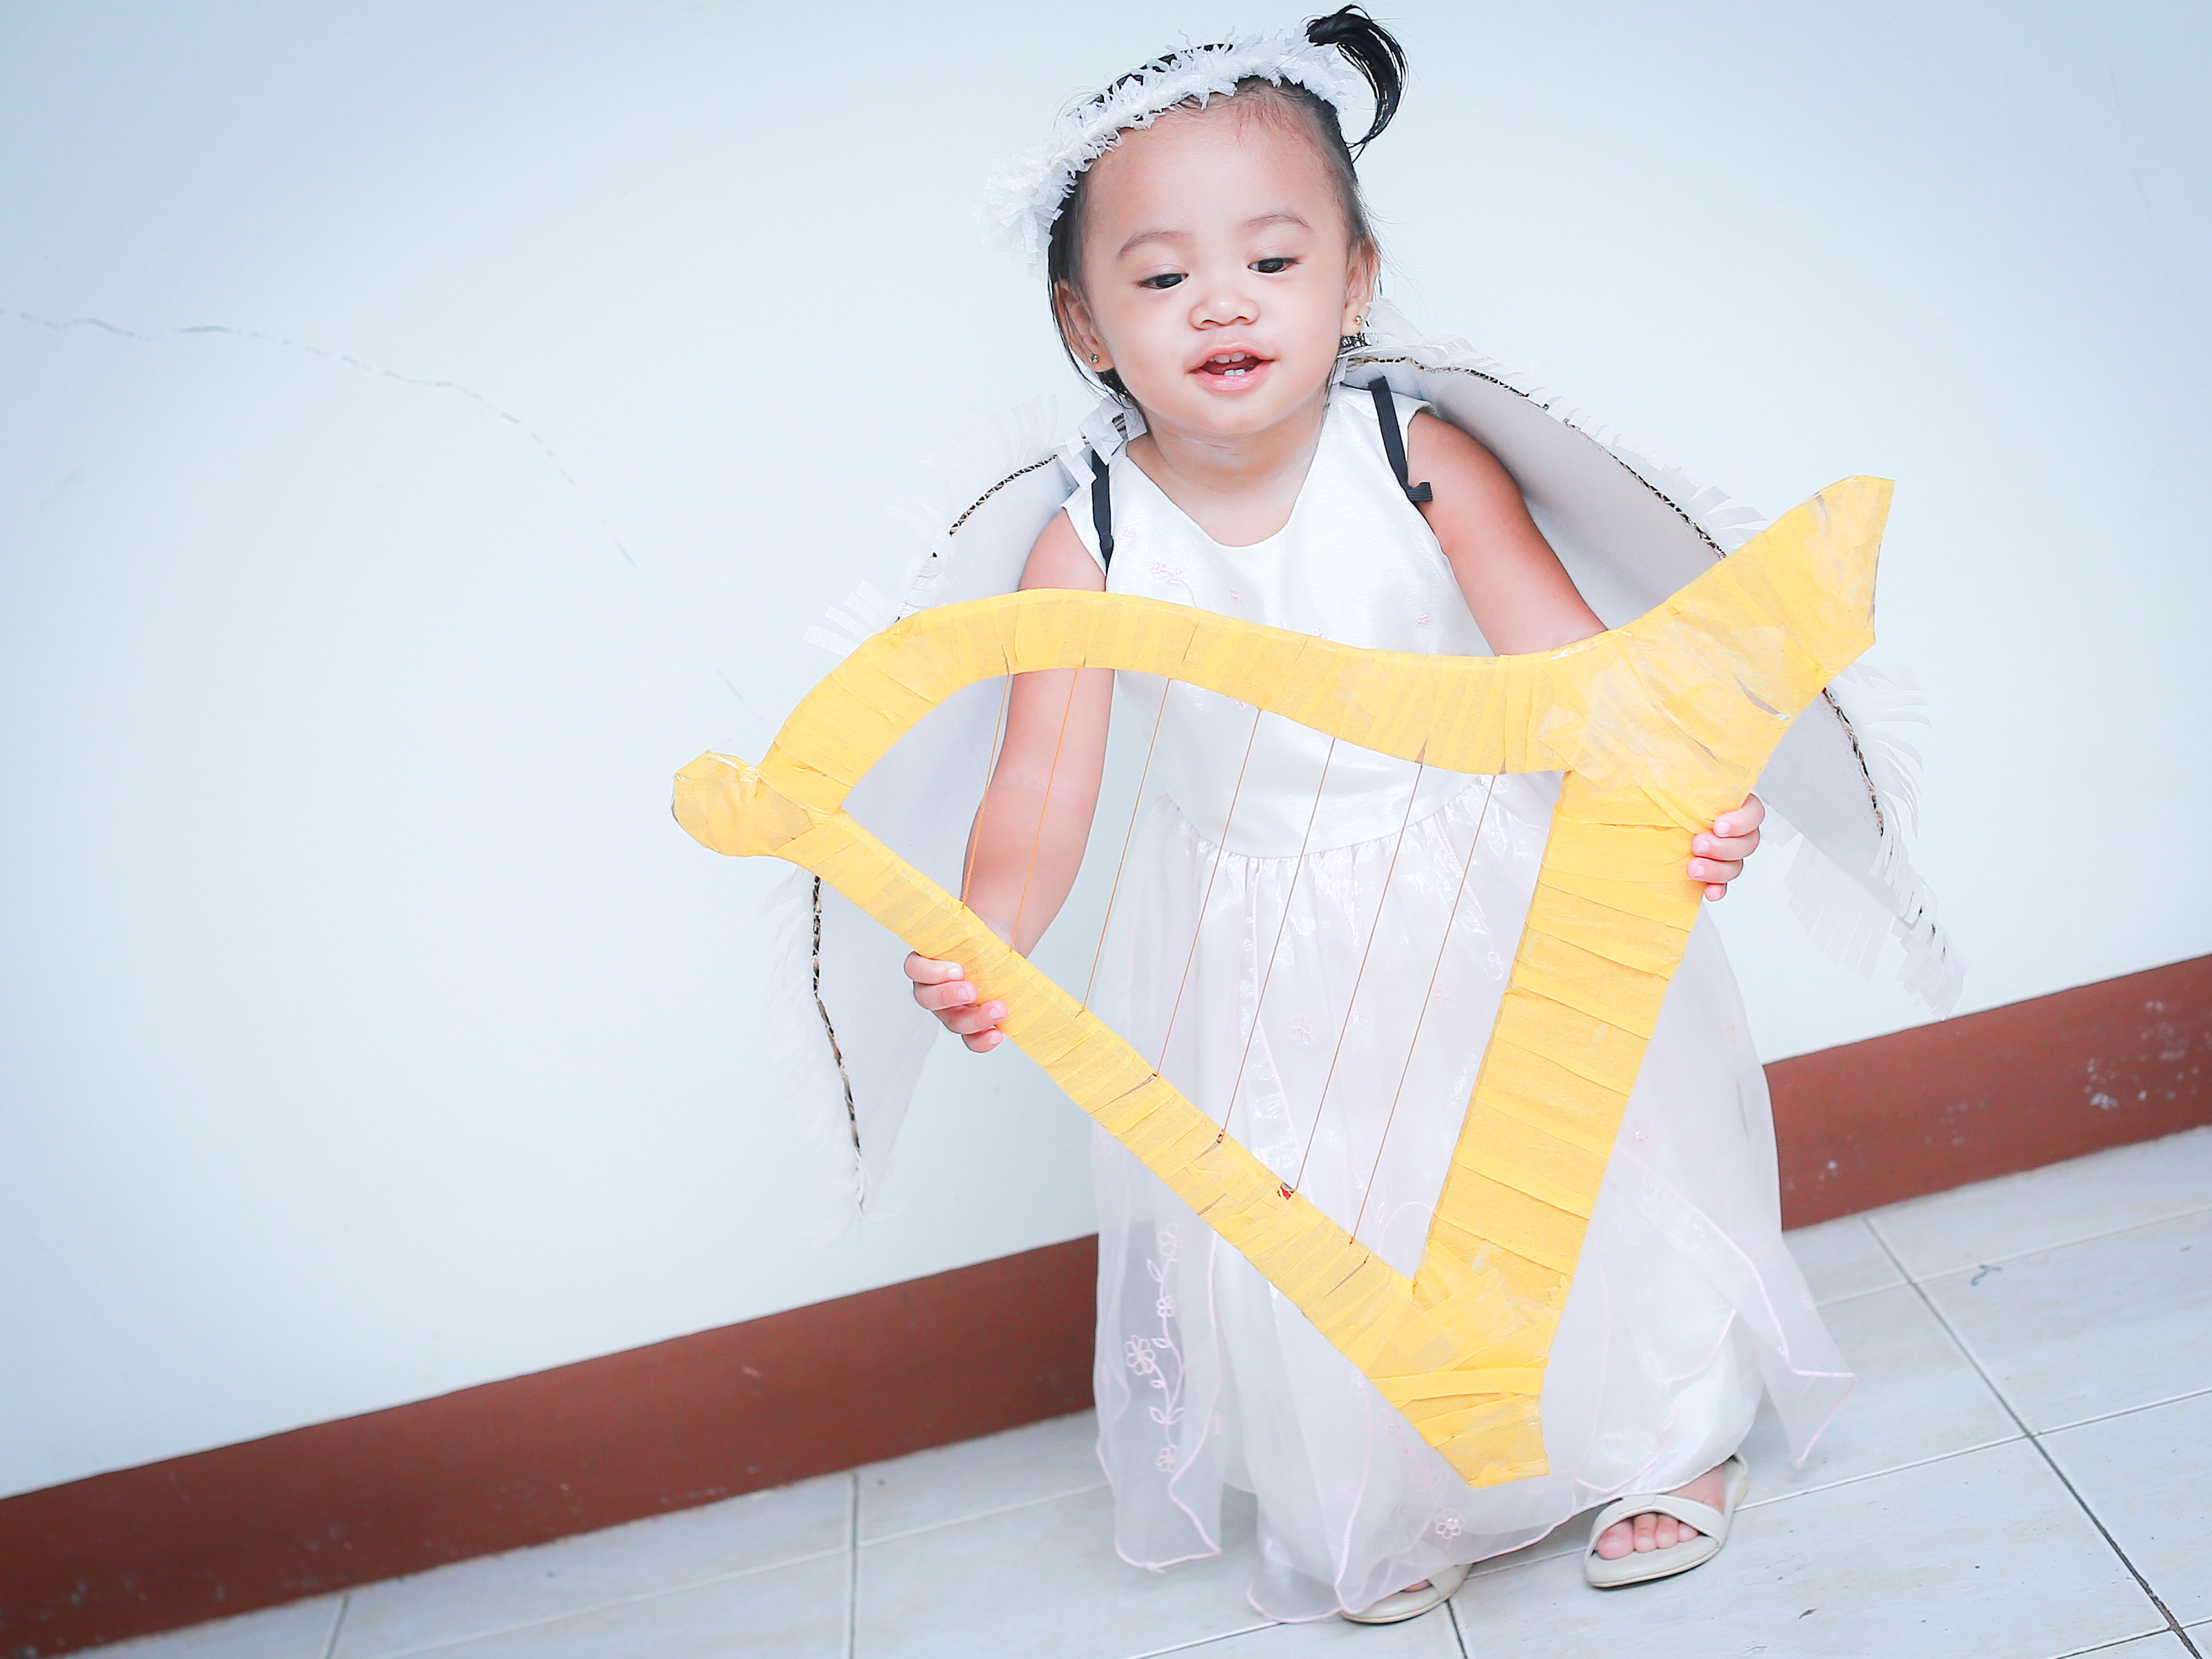
Making an angel costume sounds like one of those projects that requires a sewing machine, a craft room, and the patience of a saint. Good news: it does not. With a white outfit, a homemade halo, a pair of lightweight wings, and a little sparkle, you can create a beautiful DIY angel costume that works for Halloween, Christmas plays, school performances, church events, costume parties, or last-minute “I forgot tomorrow is spirit day” emergencies.
The best angel costumes are simple, comfortable, and easy to move in. Nobody wants wings so wide they knock over a snack table or a halo that tilts like a confused satellite dish. This guide walks you through how to make an angel costume in 9 steps using affordable materials such as cardboard, white fabric, ribbon, tulle, pipe cleaners, aluminum foil, glitter, and basic craft supplies.
You can make this costume for kids, teens, or adults. You can keep it classic and soft, make it glamorous with shimmer, or create a funny “angel on a budget” version using items you already have at home. Either way, your goal is the same: heavenly style without a heavenly price tag.
DIY Angel Costume Materials You Will Need
Before you start, gather your supplies. You do not need every item on this list, but having options makes the project easier to customize.
- White dress, robe, oversized T-shirt, tunic, hoodie, or sheet
- White leggings, tights, pants, or long-sleeve shirt for layering
- Cardboard, poster board, craft foam, or wire hangers for wings
- White felt, feathers, coffee filters, tissue paper, or cardstock
- Elastic, ribbon, string, or Velcro strips
- Hot glue gun, craft glue, or strong tape
- Scissors and pencil
- Pipe cleaners, craft wire, or a headband for the halo
- Aluminum foil, gold ribbon, gold garland, or metallic cardstock
- Silver or gold glitter, sequins, or stick-on gems
- White shoes, sandals, sneakers, or ballet flats
- Optional: battery-powered fairy lights for a glowing effect
For children, choose soft, lightweight materials. Wings should be comfortable, and the costume should not drag on the ground. If the angel cannot walk, sit, climb stairs, or collect candy without looking like a graceful but trapped curtain, it needs adjusting.
Step 1: Choose the Base Outfit
Start with the clothing. A classic angel costume usually begins with a white base: a simple dress, robe, tunic, long shirt, or white sweatsuit. If you are making a costume for a child, comfort matters more than elegance. A white hoodie and leggings can look adorable once you add wings and a halo, and the child can still run around without feeling wrapped in a bedsheet burrito.
For adults, a white maxi dress, flowy blouse, long tunic, or simple robe works well. You can also use a white sheet if you want a quick costume. Fold the sheet in half, cut a head opening in the center, and tie it at the waist with ribbon or rope. This gives a soft robe effect with very little effort.
Quick styling idea
Add a gold belt, silver sash, or white ribbon around the waist. This gives the outfit shape and keeps it from looking like laundry day got spiritual.
Step 2: Make the Angel Robe or Tunic Look Polished
Once you have the base outfit, make it look intentional. Trim the sleeves or hem with gold ribbon, lace, tulle, or sparkly fabric tape. If you are using a plain white T-shirt, wear it over white leggings or tights and cinch it with a sash. If it is too short, layer a white skirt underneath.
For a no-sew angel robe, use iron-on hem tape or fabric glue to attach trim around the neckline, sleeves, and bottom edge. You can also add small star stickers, pearl beads, or glitter dots for a soft celestial look. Keep decorations lightweight so the costume stays comfortable.
If the costume is for a Christmas pageant or school play, avoid too much loose glitter. It may look magical at first, but by the end of the event the floor may look like a craft store sneezed.
Step 3: Design the Angel Wings Shape
Angel wings are the main attraction. Start by deciding how large they should be. For children, wings should be small enough to fit through doorways and sit comfortably in a chair. For adults, shoulder-to-waist wings are easier to wear than dramatic floor-length wings.
Draw one wing shape on cardboard or poster board. A simple wing looks like a long oval or teardrop with a curved top and pointed lower edge. Cut it out, trace it to create the second wing, and make sure both sides match. If they are slightly uneven, do not panic. Angels are known for grace, not engineering degrees.
For stronger wings, glue two layers of cardboard together. For softer wings, use craft foam. For a lightweight costume, poster board works well. If you want wings that bend slightly, use wire hangers carefully shaped into wing frames and covered with white fabric or tights.
Step 4: Cover the Wings with Feathers or Paper Layers
Now it is time to give the wings texture. You can use real craft feathers, but paper alternatives are cheaper, cleaner, and easier to customize. White coffee filters, tissue paper, felt, cardstock, cupcake liners, and even paper plates can become feather layers.
Cut feather shapes from your material. They do not have to be perfect. In fact, slight differences make the wings look fuller. Start gluing feathers at the bottom of each wing and work upward in overlapping rows. This layering hides the glued edges and creates a soft feathered effect.
If you use coffee filters, fold them in half and trim the edges into soft curves. If you use cardstock, cut long oval feathers and snip tiny lines along the edges for texture. If you use felt, the wings will look plush and last longer. Add a few silver or gold accents near the edges if you want a glowing, heavenly finish.
Step 5: Add Straps So the Wings Are Wearable
Wings are lovely until they slide off every three seconds. To prevent that, add straps. Turn the wings over and attach two loops of elastic or ribbon so they can be worn like a backpack. Measure the loops around the wearer’s shoulders before gluing or taping them down.
Use strong tape, hot glue, or Velcro to secure the straps. For extra support, glue a small rectangle of cardboard over the strap ends. This spreads the pressure and helps prevent tearing. If the wings are for a young child, use soft elastic and check that the straps are not too tight.
Another option is attaching the wings directly to a white shirt or hoodie with safety pins or Velcro. This works best for small wings. For larger wings, backpack-style straps are more stable.
Step 6: Create a Halo That Actually Stays Up
A halo is simple, but it needs structure. The easiest method is to wrap a gold pipe cleaner around a headband. Twist another pipe cleaner into a circle, then attach it to the headband with a short upright piece. Cover the circle with gold garland, ribbon, metallic cardstock, or aluminum foil.
If you do not have a headband, attach the halo to a hair clip or bobby pins. For short hair, a thin elastic band can help hold it in place. For a funny costume, intentionally tilt the halo a little and call it “slightly chaotic good.”
For a brighter halo, wrap the circle with battery-powered micro lights. Only use lightweight lights, secure the battery pack safely, and avoid anything that gets hot. The goal is “gentle glow,” not “tiny UFO landing.”
Step 7: Add Angelic Details and Accessories
Now bring the costume together with details. A gold sash instantly makes the outfit look finished. White gloves, pearl bracelets, soft makeup, glittery cheeks, or a star wand can add personality. For shoes, choose white sneakers, sandals, ballet flats, or boots. Comfort wins, especially if the costume will be worn for trick-or-treating, a parade, or a long event.
You can also add tulle around the shoulders or waist for a cloud-like effect. A white scarf draped over the arms creates a graceful look. If you want a modern angel costume, pair white jeans with a white sweater, small wings, and a simple halo. It is easy, stylish, and less likely to get caught in a car door.
Step 8: Test the Fit Before the Event
Always test the costume before the big day. Have the wearer walk, sit, turn around, bend slightly, and move through a doorway. Check that the wings do not wobble, the halo does not fall, and the robe does not drag. If the costume is for a child, make sure they can see clearly and move safely.
If the outfit is too long, hem it with fabric tape or pin it up. If the wings are too heavy, trim them smaller or replace some materials with paper. If the halo keeps falling, secure it with extra clips or a more stable headband.
This step may not sound glamorous, but it saves you from emergency repairs later. Nothing tests a homemade costume like a child sprinting toward candy or an adult trying to sit in a folding chair with wings.
Step 9: Make Final Adjustments for Comfort and Safety
Finish by checking comfort and safety. Avoid sharp wire ends, loose cords, heavy accessories, and materials that block vision. If the costume will be worn outside at night, add reflective tape to the back of the wings or the hem. You can hide it among the feathers so it still looks nice while improving visibility.
Use battery-powered lights instead of candles or anything with an open flame. If you use glue, let it dry fully before wearing the costume. For young children, avoid small decorations that could fall off and become a choking hazard. For school or stage events, keep the wings compact enough that the wearer can stand close to others without starting a wing-related traffic jam.
The final costume should feel light, secure, and fun. When the person wearing it forgets they have wings on, you have done your job.
Easy Angel Costume Variations
Last-Minute Angel Costume
Wear all white, add a gold ribbon belt, make a halo from foil and a headband, and cut small wings from cardboard. Cover the wings with coffee filters or white paper. This version can be made quickly and still looks cute in photos.
No-Sew Angel Costume
Use a white oversized T-shirt or robe, fabric glue, stick-on gems, and ribbon trim. Make the wings from poster board and attach elastic straps. No needle, no thread, no problem.
Glam Angel Costume
Use a white dress, metallic belt, glittery makeup, soft curls, feathered wings, and a glowing halo. Add silver shoes or gold sandals for a polished finish.
Funny Angel Costume
Add a crooked halo, sneakers, sunglasses, or a sign that says “Angel in Training.” This version is great for parties and group costumes.
Common Mistakes to Avoid
The biggest mistake is making the wings too large. Giant wings look impressive for five minutes and annoying for the rest of the night. Keep them proportional to the wearer’s body and the event space.
Another common problem is using weak straps. If the straps are taped lightly to the wings, they may peel off. Reinforce them with extra cardboard or strong tape. Also avoid overly long robes, especially for children. A costume should not become a trip hazard with glitter.
Finally, do not overdecorate. A few sparkly details look angelic. Too many decorations can make the costume heavy, itchy, or visually busy. Think soft glow, not disco chandelier.
Experience Section: What I Learned from Making Angel Costumes
After making and helping with several angel costumes for school events, Halloween nights, and holiday programs, one lesson stands above all others: comfort is the secret ingredient. The costume can be gorgeous, but if the wings poke, the halo slips, or the robe drags, the wearer will spend the entire event adjusting it. A simple angel costume that feels good will always beat an elaborate one that behaves like furniture.
The easiest costume I ever helped assemble used a white long-sleeve shirt, white leggings, a gold ribbon belt, and cardboard wings covered with layered coffee filters. At first, the coffee filters looked too plain. Once they were overlapped in rows, they suddenly looked soft and feathery. That is the magic of layering. You do not need expensive supplies if you use shape and repetition well.
The halo is usually the funniest part. A pipe cleaner halo sounds almost too easy, but it works surprisingly well when attached to a headband. The trick is to keep the upright support short. If the halo sits too high, it wobbles like a radio antenna in a windstorm. A lower halo looks neater and stays in place longer. For thick hair, bobby pins help. For younger kids, a soft headband is usually more comfortable than clips.
Wings need testing more than any other part of the costume. People forget how much space wings take until the wearer tries to walk through a hallway, sit in a car, or hug a relative. Smaller wings are often better. They photograph well, feel lighter, and survive longer. Large wings are beautiful for staged photos, but for real life, compact wings win.
I also learned that hot glue is helpful but not always enough. Straps take pressure, especially when kids move around. Reinforcing the strap area with an extra patch of cardboard makes a big difference. If you are making the costume the night before an event, test the straps before bedtime. Morning repairs are never peaceful, especially when someone is already wearing one shoe and asking where the halo went.
Another practical tip is to keep a small repair kit nearby: tape, safety pins, extra ribbon, and a few spare pipe cleaners. Costumes have a way of failing at dramatic moments. A wing corner may bend, a feather may peel, or the halo may lean. Quick fixes keep the costume looking good without turning the event into a craft emergency.
Most importantly, let the wearer help choose details. Kids may want glitter, stars, or soft feathers. Teens may prefer a clean, stylish version. Adults may want elegance or humor. When the costume reflects the person wearing it, it feels less like a project and more like a character. That is when a homemade angel costume really shines.
Conclusion
Learning how to make an angel costume is easier than it looks. Start with a white outfit, add lightweight wings, make a secure halo, and finish with simple accessories. Whether you are creating a costume for Halloween, a Christmas play, a school event, or a themed party, the best approach is to keep it comfortable, affordable, and personal.
You do not need professional sewing skills or expensive materials. Cardboard, coffee filters, ribbon, pipe cleaners, and a little creativity can create a costume that looks charming and feels wearable. Add sparkle where it helps, test the fit before the event, and remember: the most angelic costume is the one that does not fall apart before the photos.














