
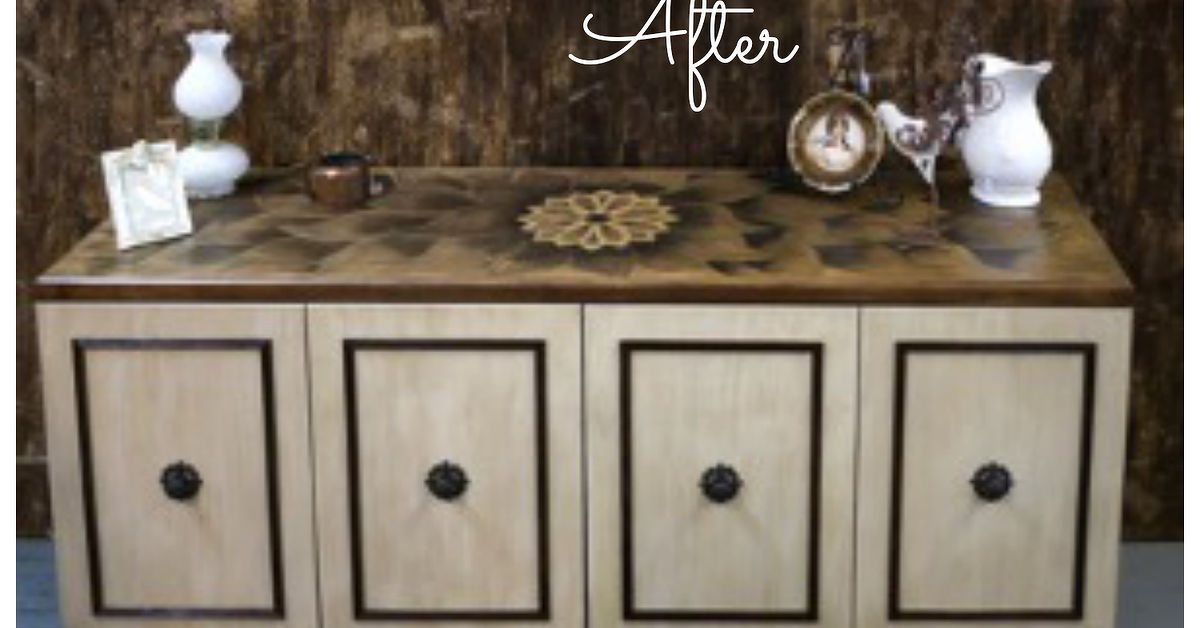
A plain old sideboard can sit in a dining room for decades doing exactly what it was born to do: holding napkins, holiday plates, and that one gravy boat nobody can identify. But every so often, a tired buffet looks at you and whispers, “I could be dramatic.” That is where the Beauty & The Beast stained art sideboard transformation begins: part furniture makeover, part fairy-tale mural, part “why did I think this would take one weekend?” adventure.
This project is not just about painting a cabinet yellow and calling it enchanted. A true stained-art buffet transformation uses the warmth of wood stain, the depth of layered color, and the romance of storybook design to turn functional furniture into a statement piece. Imagine carved legs, glowing rose tones, deep walnut shadows, golden highlights, and panels that feel like stained glass without requiring you to learn the ancient and slightly terrifying art of cutting glass.
Inspired by the visual language of Beauty and the Beastroses, castle windows, scrollwork, warm candlelight, antique charm, and just enough drama to make a dining room feel like it has its own soundtrackthis kind of DIY sideboard makeover fits beautifully in maximalist homes, cottagecore interiors, vintage dining rooms, and anyone’s house where “subtle” left the chat years ago.
What Is a Stained Art Sideboard Transformation?
A stained art sideboard transformation is a furniture refinishing technique that treats wood like a canvas. Instead of covering the whole piece with opaque paint, the maker uses wood stain, glaze, tinted topcoats, painted details, or faux stained-glass effects to create an image or decorative pattern while still allowing the grain to show through. The result feels richer and more dimensional than flat paint.
For a Beauty & The Beast buffet transformation, the design usually leans into romantic motifs: an enchanted rose, arched window shapes, jewel-toned panels, antique gold accents, and moody shadows. The goal is not to make the sideboard look like a cartoon prop. The goal is to make it look like something that might have been rescued from a forgotten castle library where the furniture definitely has opinions.
Why a Sideboard Is the Perfect Piece
A buffet or sideboard gives you a generous front surface, multiple drawers or doors, and enough architectural detail to carry a theatrical design. Flat panels can become faux stained-glass windows. Drawer fronts can hold vines, roses, or border work. Hardware can be updated with antique brass pulls to echo candleholders, castle gates, or vintage French furniture.
Unlike a coffee table, which has to survive cups, elbows, laptops, and the occasional snack-related emergency, a sideboard usually gets less daily abuse. That makes it a great candidate for decorative finishing, layered stain, and artistic detail work. It is still functional, but it can also become the visual centerpiece of a dining room, hallway, entryway, or living room.
Planning the Beauty & The Beast Design
Before touching sandpaper, plan the story. A successful stained art furniture makeover works because the theme is controlled. Too many roses, scrolls, castles, books, teacups, and gold swirls can quickly turn “enchanted” into “yard sale at a theater department.” Pick a focal point and let the rest of the piece support it.
Choose a Focal Motif
The most obvious focal motif is the enchanted rose. It is recognizable, romantic, and easy to adapt into a stained-glass-style composition. Place it on the center cabinet doors, the main drawer panel, or inside an arched frame. Around it, use amber, burgundy, navy, emerald, and smoky brown tones to create the look of glowing colored glass.
Other strong design options include castle-window panels, French scroll borders, book-page-inspired drawer fronts, or a dramatic two-tone finish with dark stained wood and golden accents. For a more subtle interpretation, use a deep walnut body with rose-stained panels and brass hardware. It will still whisper “fairy tale,” but it will not shout “theme park gift shop” at dinner guests.
Create a Color Palette
The strongest color palettes for this project usually combine warm wood tones with jewel colors. Think dark walnut, espresso, honey oak, antique gold, rose red, burgundy, smoky blue, forest green, and ivory. The wood stain gives the piece age and depth, while the jewel tones provide that stained-glass glow.
If the sideboard already has beautiful grain, preserve as much of it as possible. Stain is especially effective on doors, drawer fronts, tops, and raised panels. Paint can be reserved for areas where the wood is damaged, mismatched, or not attractive enough to highlight. This mixed approachpart stain, part paint, part artis often what makes a transformed buffet look custom instead of craft-project chaotic.
Tools and Materials You’ll Need
A stained art sideboard makeover is not difficult in theory, but it rewards patience. You will need basic refinishing supplies, plus a few artist tools for detail work.
- Degreasing cleaner or wood-safe soap
- Screwdriver for removing hardware
- Wood filler for dents, chips, and missing veneer
- Sandpaper in multiple grits, such as 120, 180, and 220
- Tack cloth or microfiber cloth
- Painter’s tape
- Wood conditioner for blotch-prone wood
- Gel stain or penetrating wood stain
- Furniture paint or primer, if using painted sections
- Small artist brushes for detail work
- Clear protective topcoat, such as polyurethane or polycrylic
- Optional decorative window film for faux stained-glass panels
- Antique brass, bronze, or crystal-style hardware
If the piece is older and may contain old paint or unknown finishes, take safety seriously. Older painted furniture can contain lead, and sanding unsafe coatings can create dangerous dust. When in doubt, test first, avoid aggressive sanding, use proper protective equipment, and consider professional help. A magical transformation is lovely; inhaling mystery dust from 1942 is not part of the aesthetic.
Step-by-Step: How to Transform a Buffet into Stained Art
Step 1: Inspect the Sideboard
Start by looking at the furniture honestly. Is it solid wood, veneer, laminate, or a mix? Are the drawers working? Are the doors aligned? Is the top badly scratched? Does the piece smell like basement, crayons, or regret?
Solid wood is the easiest to refinish with stain because it can handle sanding and absorbs color beautifully. Veneer can also be refinished, but it is thin, so sanding must be gentle. Laminate is not suitable for traditional staining, though it can be painted or decorated with adhesive film. Knowing what you are working with prevents heartbreak later.
Step 2: Remove Hardware and Clean Everything
Remove knobs, pulls, hinges if needed, and any removable shelves. Label hardware in small bags so you do not spend the reassembly stage crawling under the table like a detective with lower back pain.
Clean the entire piece thoroughly. Dining room furniture often has layers of furniture polish, kitchen grease, candle soot, and dust. Paint and stain do not bond well to grime. Use a suitable cleaner, wipe with a damp cloth, and let the piece dry completely before sanding.
Step 3: Repair Damage
Fill dents, gouges, and missing trim. Clamp loose joints. Re-glue lifted veneer if possible. If a veneer section is too damaged to save, consider painting that area while staining the better wood surfaces. This is one of the secrets of a professional-looking buffet furniture flip: do not force every surface to do the same job.
For example, if the top has gorgeous grain, stain it dark and glossy. If the side panels are plain or patched, paint them in a deep navy, black, or warm cream. Then use the front doors for the stained-art design. The result feels intentional rather than like you lost an argument with the furniture.
Step 4: Sand with Care
Sand the surface enough to remove shine and create a smooth base. For full refinishing, begin with a coarser grit and work toward a finer grit. For scuff-sanding before paint, a lighter sanding may be enough. Always wipe away dust between stages.
The important rule is simple: do not rush the prep. Most failed furniture makeovers are not ruined by the final coat; they are ruined by impatience at the beginning. If the surface is dusty, greasy, glossy, or uneven, the finish will announce it later with peeling, blotching, or brush marks. Furniture has a long memory.
Step 5: Condition the Wood Before Staining
Some woods absorb stain unevenly, especially pine, birch, maple, and other blotch-prone surfaces. A pre-stain wood conditioner helps the stain absorb more evenly. Apply it according to the product directions, wipe away the excess, and stain within the recommended window.
This step is especially useful when creating stained art because uneven blotches can distract from your design. You want intentional shadows, not random dark patches that look like the sideboard had an emotional episode.
Step 6: Draw the Design
Lightly sketch the design on the door panels or drawer fronts. Use chalk, transfer paper, or a very light pencil mark. For a stained-glass look, divide the image into shapes: rose petals, leaves, curved window panes, borders, and background sections.
If freehand drawing feels intimidating, use a printed template. Enlarge the design to fit the panel, transfer the outlines, and simplify details where needed. Furniture art needs to read well from across the room. Tiny details may be impressive up close, but they can disappear once the buffet is back against the wall.
Step 7: Layer Stain Like Paint
Apply stain in controlled sections using small brushes, lint-free cloths, or foam applicators. Gel stain is often easier for artistic work because it stays near the surface longer and offers more control. Use lighter colors first, then add darker tones to create depth.
For rose petals, start with a soft red or warm brown-red stain, then deepen the folds with burgundy or espresso. For leaves, use green-tinted stain or a mix of green glaze over a stained base. For faux lead lines between “glass” sections, use dark stain, black glaze, or a fine painted outline.
The magic is in the layering. A single flat red rose may look cute. A rose with amber highlights, dark edges, and translucent-looking shadows feels like it belongs under glass in an enchanted west wing.
Step 8: Add Faux Stained-Glass Effects
If the sideboard has glass doors, decorative window film is a budget-friendly way to create a stained-glass effect without replacing the glass. Clean the glass well, measure carefully, spray with water if the product instructions require it, and smooth out bubbles with a squeegee or soft card.
If the doors are solid wood, you can still mimic stained glass by painting or staining arched panels. Use dark outlines to separate color blocks, then add translucent-looking highlights. A glossy topcoat over these sections enhances the illusion of glass.
Step 9: Paint Supporting Areas
Paint can help frame the stained-art design. Deep charcoal, black, navy, or espresso paint makes jewel tones pop. Warm ivory or muted gold can soften the look and create a more romantic French-inspired finish.
Use primer when painting over glossy, dark, or tannin-rich wood. Primer improves adhesion and helps prevent stains from bleeding through. Apply thin coats rather than one thick coat. Thick paint is not confidence; it is future texture.
Step 10: Seal the Piece
A buffet needs protection. Once the stain, paint, and decorative work are fully dry, apply a clear topcoat. Water-based polycrylic is popular over painted surfaces because it dries clear. Oil-based polyurethane adds warmth and durability over stained wood, though it can amber over light colors.
Apply thin, even coats. Let each coat dry as directed, then lightly sand between coats if recommended. Pay extra attention to the top, drawer fronts, and cabinet doors because those areas get the most handling.
Design Details That Make the Piece Feel Expensive
Upgrade the Hardware
Hardware is jewelry for furniture. For a Beauty & The Beast-inspired sideboard, antique brass pulls, aged bronze knobs, crystal-style handles, or ornate backplates can make the whole piece feel more finished. If the original hardware is beautiful but dull, clean it before replacing it. Sometimes the old pulls are the best part of the story.
Add Gold Without Going Full Treasure Chest
Gold accents work beautifully, but restraint matters. Dry-brush gold on carved edges, highlight raised trim, or use a small amount around the stained-art panels. Too much gold can make the buffet look less “enchanted castle” and more “pirate captain bought a sideboard.”
Style the Finished Sideboard
Once finished, style the sideboard with objects that echo the theme without turning the room into a movie set. Try candlesticks, old books, a vase of roses, framed vintage art, amber glass, or a mirror with an antique frame. Let the furniture be the star. Supporting actors should know their place.
Common Mistakes to Avoid
The first mistake is skipping prep. Cleaning, sanding, and priming may not be glamorous, but they are what keep the finish from peeling. The second mistake is overcomplicating the design. A strong central rose with elegant borders often looks better than twenty tiny references fighting for attention.
The third mistake is ignoring the wood type. If the piece is laminate, traditional stain will not behave properly. If the veneer is thin, aggressive sanding can burn through it. If the finish is old and unknown, safety testing matters. The fourth mistake is using the wrong topcoat. A decorative buffet still needs protection, especially if it will hold serving dishes, lamps, or seasonal decor.
Why This Transformation Works So Well
The appeal of the Beauty & The Beast stained art sideboard is emotional as much as visual. It takes something ordinary and gives it a second act. That mirrors the heart of the story itself: look closer, see potential, and do not judge a piece of furniture by its scuffed top and questionable drawer smell.
It also taps into several strong home decor trends: vintage furniture, upcycling, maximalist interiors, handmade-looking finishes, stained glass details, and personalized statement pieces. Instead of buying a mass-produced cabinet, you create something with character. Even imperfections become part of the charm.
There is also a sustainability angle. Refinishing old furniture keeps usable pieces out of the waste stream and reduces the need for new fast furniture. A well-built buffet can last for generations if repaired and refinished thoughtfully. That makes this project not only beautiful, but practical.
Where to Use a Beauty & The Beast Buffet
A transformed buffet works beautifully in a dining room, where it can store linens, serving platters, and candles. In an entryway, it becomes a dramatic welcome piece. In a living room, it can function as media storage, book storage, or a bar cabinet. In a bedroom, it can become a romantic dresser alternative.
The key is balance. If the sideboard is bold, keep nearby walls and rugs calmer. If the room is already maximalist, repeat one or two colors from the piece elsewhere so it feels connected. For example, if the buffet has burgundy roses and deep blue panels, add burgundy flowers or blue velvet pillows nearby.
Experience Notes: What This Project Feels Like in Real Life
A Beauty & The Beast stained art sideboard transformation sounds glamorous, and it isbut it is also a project that teaches humility. The first hour is pure excitement. You remove the hardware, wipe away dust, and imagine your future masterpiece glowing under warm dining room lights. You may even say something confident like, “This should be easy.” That is usually when the buffet reveals a sticky drawer, chipped veneer, and a mysterious stain that looks like a coffee spill from the Carter administration.
The experience becomes much more enjoyable when you stop treating the piece like a quick weekend flip and start treating it like a collaboration. Old furniture has quirks. A drawer may sit slightly unevenly. A patch of wood may absorb stain darker than expected. A carved detail may take forever to clean. Instead of fighting every imperfection, the best transformations use them. Darker stain can become shadow. A patched area can become a painted border. A damaged center panel can become the perfect place for the enchanted rose design.
One of the most satisfying parts of the process is watching the first layers of stain create depth. Paint gives immediate coverage, but stain has a slower, moodier reveal. The grain starts showing through. The rose petals begin to look dimensional. The background shifts from flat brown to warm amber or deep walnut. It feels less like covering furniture and more like uncovering a secret it had been keeping.
The detail work requires patience, especially if you are outlining faux stained-glass sections by hand. Small brushes help, but so does accepting that handmade lines are allowed to look handmade. Real stained glass has subtle variation. Antique furniture has irregularities. A slightly imperfect vine or curved border can make the piece feel more authentic than a machine-perfect design.
Sealing the piece is the moment when the whole project finally exhales. The colors deepen, the sheen unifies the design, and the buffet starts looking less like a workbench experiment and more like actual furniture again. Reinstalling the hardware is the final bit of magic. Suddenly, the sideboard has presence. It looks intentional. It looks expensive. It looks like it knows where the good silverware is hidden.
The biggest lesson from this kind of makeover is that dramatic furniture does not have to be childish or overly themed. A Beauty & The Beast-inspired buffet can be elegant, moody, and surprisingly grown-up when the design focuses on atmosphere rather than literal decoration. Use roses, arches, warm stain, and antique metallics as design language. Let the story inspire the piece, but let the furniture remain furniture.
And yes, somewhere around the third coat of topcoat, you may promise yourself never to do another detailed furniture transformation again. Then someone will compliment it, the light will hit the stained-art panel just right, and you will immediately start searching for another neglected cabinet online. That is the curseand joyof furniture flipping.
Conclusion
A Beauty & The Beast “Stained Art Sideboard/Buffet Transformation” is more than a DIY furniture makeover. It is a way to turn an overlooked storage piece into a romantic, functional work of art. With careful prep, thoughtful staining, controlled color, protective finishing, and a little fairy-tale nerve, an old buffet can become the kind of statement piece people ask about the moment they walk into the room.
The secret is balance: preserve the wood where it shines, paint where it helps, use stained-art details with intention, and let the theme feel sophisticated rather than costume-like. Whether the finished piece lands in a dining room, hallway, or living room, it brings warmth, personality, and a sense of story into the home. Not every sideboard needs to become enchantedbut when one does, it should absolutely have excellent hardware.
Note: This article is an original synthesis based on practical furniture refinishing, staining, paint preparation, decorative glass-film, furniture upcycling, and lead-safe DIY guidance from reputable U.S. home improvement, design, environmental, and product education sources.














