
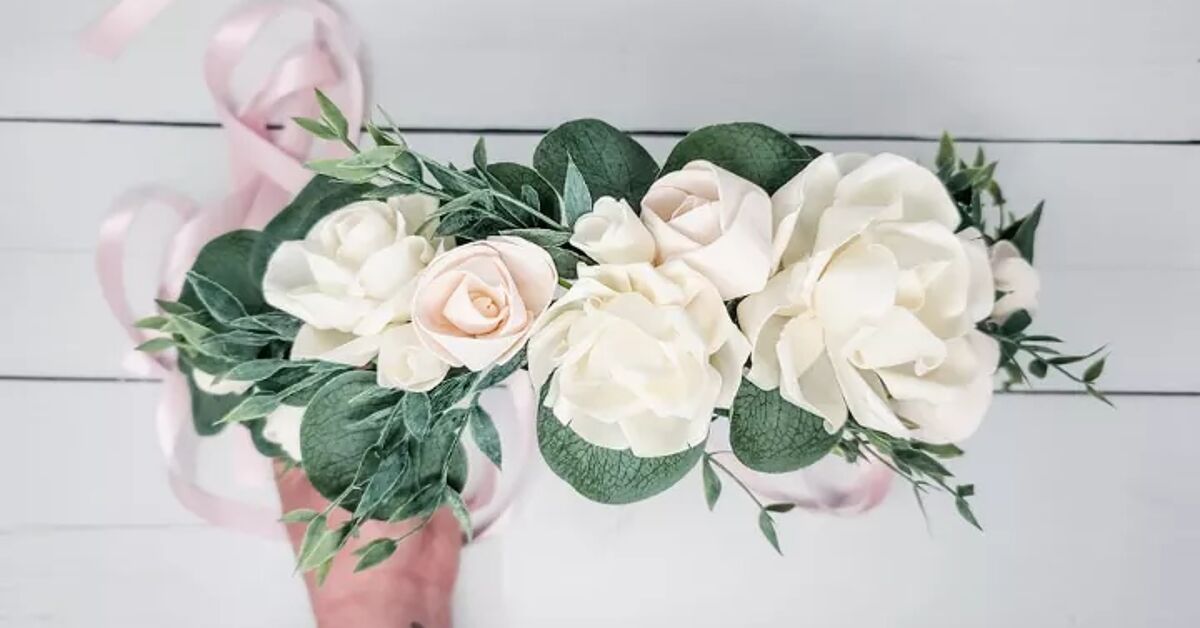
A flower crown is one of those magical accessories that can make a backyard birthday, wedding shower, festival outfit, photo shoot, or random Tuesday feel a little more cinematic. The good news: you do not need to be a florist with a mysterious apron full of secrets. You need a few fresh flowers, floral wire, floral tape, patience, and a willingness to accept that one tiny leaf will probably stick to your sleeve at least once.
This easy DIY flower crown tutorial walks you through how to make a flower crown in seven simple steps. You will learn how to choose flowers that hold up well, create a comfortable base, build small floral bundles, layer them neatly, and keep the finished crown looking fresh long enough for photos, dancing, compliments, and at least one person asking, “Wait, you made that yourself?”
Whether you want a delicate baby’s breath flower crown, a bold boho floral halo, a whimsical flower girl accessory, or a colorful garden-party headpiece, the same basic method works. Once you understand the structure, you can make your crown as subtle or as gloriously extra as your heart desires.
What You Need to Make a DIY Flower Crown
Before starting, gather everything in one place. Flower crown making moves much more smoothly when you are not wandering around the room looking for scissors with a half-finished crown balanced on your head like a confused woodland monarch.
Basic flower crown supplies
- Fresh flowers and greenery
- Floral wire or grapevine floral wire
- Thin floral wire for securing individual stems
- Floral tape
- Sharp scissors, floral shears, or wire cutters
- Ribbon, if you want an adjustable tie-back crown
- A small bowl or bucket of water for holding flowers
- Optional: hot glue for artificial flower crowns only
For a fresh flower crown, floral tape is more useful than regular tape because it stretches and sticks to itself when pulled gently. Floral wire gives your crown shape, while thin wire and tape keep the stems from staging a tiny rebellion halfway through the event.
Choosing the Best Flowers for a Flower Crown
The prettiest flowers are not always the easiest flowers to wear. A flower crown sits without a water source, moves with your head, gets exposed to warmth, and may survive a dance floor. That means sturdy blooms and flexible greenery usually perform better than fragile, oversized flowers.
Good choices for a fresh flower crown include spray roses, carnations, wax flower, baby’s breath, statice, mini daisies, chamomile, craspedia, ranunculus, small chrysanthemums, lavender, and eucalyptus. Greenery such as ivy, ruscus, myrtle, olive branches, dusty miller, and fern can add texture while helping cover wire and taped stems.
Large flowers such as peonies, hydrangeas, lilies, or full garden roses can look dramatic, but they are heavier and more likely to wilt or pull the crown out of shape. Use one or two as focal flowers rather than turning your entire headpiece into a botanical weightlifting competition.
For color, choose one main shade, one supporting shade, and one neutral. For example, blush pink spray roses, white wax flower, and soft green eucalyptus make a romantic flower crown. Bright marigolds, orange craspedia, and deep green leaves create a sunny festival look. White baby’s breath with olive branches gives you a clean, minimal crown that works beautifully for weddings, graduations, and outdoor portraits.
How to Make a Flower Crown in 7 Simple Steps
Step 1: Pick a style and plan your flower palette
Start by deciding what kind of flower crown you want to make. This sounds obvious, but it prevents the classic DIY problem of buying every pretty bloom in sight and accidentally creating a crown that looks like a grocery-store floral department exploded near your forehead.
Choose one of these simple styles:
- Full floral crown: Flowers and greenery cover the entire circle.
- Half flower crown: Flowers decorate only the front half, while greenery or ribbon finishes the back.
- Asymmetrical flower crown: A larger floral cluster sits on one side for a modern, editorial look.
- Greenery crown: Leaves and herbs create the base, with only a few flowers added as accents.
- Baby’s breath crown: Tiny white flowers create a light, cloud-like effect.
Lay your flowers on the table before cutting anything. This lets you see whether your colors are balanced and whether one giant bloom is trying to become the main character. Arrange flowers from larger to smaller so you can plan where focal flowers will go.
Step 2: Condition the flowers before you begin
Fresh flowers look their best when they have had time to drink water before you turn them into wearable art. Trim the stems at an angle, remove leaves that would sit below the waterline, and place the flowers in clean water for a few hours before assembling the crown.
If you bought flowers from a florist or grocery store, remove any bruised petals or limp leaves first. Small imperfections are easier to hide before the flowers are attached. Keep the blooms somewhere cool and out of direct sunlight while you work.
This step matters because flower crowns do not have the luxury of standing in a vase. A well-hydrated bloom starts stronger and has a better chance of staying perky through the ceremony, picnic, party, or photo session.
Step 3: Measure and build the flower crown base
Take your heavier floral wire and wrap it gently around the wearer’s head where the crown will sit. Leave about one-half inch of room so the crown does not feel too tight. Hair takes up space, heads move, and nobody wants to spend an event feeling like a decorative tomato cage.
Cut the wire slightly longer than your measurement. Twist the ends together securely, then bend the twisted section inward so there are no sharp points facing the scalp. Wrap the joined area with floral tape for extra comfort.
For a sturdier base, use two lengths of wire and twist them together before forming the circle. For an adjustable crown, make a partial wire circle and tie ribbon to both ends. This is especially useful for flower crowns made for children, bridal parties, or party guests with different head sizes.
Step 4: Prepare the greenery and flower stems
Cut your greenery and flower stems into short pieces, usually around two to three inches long. You do not need long stems because they will be secured to the wire base in small bundles.
Separate flowers into groups: focal flowers, medium flowers, filler flowers, and greenery. Focal flowers are the larger or more colorful blooms that catch the eye. Medium flowers create shape. Filler flowers soften gaps. Greenery provides the structure that makes everything look intentional rather than “I was chased through a meadow and this happened.”
Remove bulky leaves near the base of each stem. Keep enough foliage to look natural, but do not leave so much that it makes the crown lumpy. If a bloom has a very soft or weak stem, reinforce it by gently wrapping thin floral wire around the stem before adding it to the crown.
Step 5: Create small flower bundles
Instead of attaching every flower one by one, make small flower bundles first. This is the secret that makes a DIY flower crown look polished without requiring the patience of a museum conservator.
Each bundle can include one medium flower, one small accent flower, a filler bloom, and a piece of greenery. Keep the stems aligned, then wrap them together with floral tape. Pull the tape slightly as you wrap so it clings to itself and holds the stems firmly.
Make several bundles before attaching them to the crown. You can repeat the same combination for a coordinated look or vary the bundles slightly for a looser wildflower style. For example, a romantic crown might alternate blush spray rose bundles with white wax flower and eucalyptus bundles. A bright summer crown might mix mini daisies, yellow craspedia, and fern sprigs.
Step 6: Attach the bundles in overlapping layers
Place the first flower bundle near one end of the wire base. Position the flowers facing outward and slightly upward, then wrap the stems tightly to the base with floral tape or thin floral wire. Continue adding bundles in the same direction, overlapping each new bundle over the taped stems of the previous one.
This overlapping pattern is important. It hides the mechanics and creates the lush, flowing look associated with professional flower crowns. Think roof shingles, but much prettier and far less likely to need a ladder.
Work your way around the crown slowly. Pause every few bundles to lift the crown and check the shape. Make sure the flowers are sitting on the outside of the wire instead of drooping inward toward the wearer’s hair.
Keep heavier flowers toward the front or sides, where they will be easier to see and less likely to pull backward. Use smaller flowers and greenery around the back. If you are making a half crown, stop decorating once the front section looks full and finish the remaining wire with ribbon, greenery, or exposed wrapped wire.
Step 7: Finish, adjust, and store your flower crown
When you reach the final bundle, trim any extra stems and tuck the ends under nearby greenery. Wrap floral tape around exposed wire and stem ends so nothing pokes the wearer. Add a small matching sprig at the end, facing in the opposite direction, to make both sides look balanced.
Try on the crown before declaring victory. Check for sharp wire, loose flowers, uneven weight, or a section that looks suspiciously bald. Add small filler flowers or leaves to cover gaps. A few tiny blooms often make a bigger difference than one large flower.
If you are not wearing the crown right away, place it carefully in a shallow container lined with lightly damp paper towels. Cover it loosely and store it in a cool place. Make fresh flower crowns as close to the event time as possible for the best color, shape, and overall “I definitely did not make this in my kitchen” effect.
How to Keep a Fresh Flower Crown Looking Good
A fresh flower crown is temporary by nature, which is part of its charm. Still, a few smart habits can help it look beautiful for hours instead of turning into a tiny sad garden before lunch.
- Make the crown on the same day you plan to wear it whenever possible.
- Keep it away from direct sun, hot cars, and heaters.
- Handle it by the wire base instead of grabbing the flowers.
- Use sturdy blooms for long events, especially outdoor weddings and festivals.
- Choose a lighter design for children, since oversized crowns can slide or feel uncomfortable.
- Use artificial flowers when you need a crown that will survive travel, repeated wear, or a very enthusiastic costume party.
For wedding flower crowns, make a practice version a few days before the event. This helps you test the size, weight, and color palette. It is far better to discover that your crown is too wide while standing in your living room than five minutes before photos while wearing formal clothes and trying not to panic.
Easy Flower Crown Ideas for Different Occasions
Flower crown for a wedding
Use a restrained palette that matches the bouquet or wedding colors. White spray roses, baby’s breath, olive branches, wax flower, and small pieces of eucalyptus create a soft bridal look. For a flower girl, use smaller blooms and a lighter wire base so the crown stays comfortable.
Festival flower crown
Go brighter and bolder with marigolds, daisies, craspedia, colorful carnations, ferns, and trailing greenery. Add ribbon tails at the back for movement. Artificial flowers are often a practical choice for long outdoor events because they can handle heat, crowds, and accidental encounters with glitter.
Spring garden party flower crown
Try pastel blooms such as pale pink spray roses, lavender, chamomile, white wax flower, and soft green foliage. Keep the design loose and airy rather than densely packed. A garden party crown should look like you wandered through a lovely meadow, not like you are auditioning to become the hedge.
Simple baby’s breath flower crown
Baby’s breath is ideal for beginners because it is lightweight, easy to bundle, and forgiving. Wrap small pieces around the wire base in overlapping sections, then add a satin ribbon at the back. The result is delicate, inexpensive, and surprisingly elegant.
Common Flower Crown Mistakes to Avoid
The first flower crown does not have to be perfect. In fact, a little organic unevenness is part of the charm. Still, avoiding a few common mistakes will save you time and frustration.
- Using only heavy flowers: Large blooms can weigh down the wire and make the crown slide.
- Skipping greenery: Greenery hides tape, fills gaps, and adds a natural flow.
- Making the base too small: A tight crown becomes uncomfortable fast.
- Using long, bulky stems: Short stems are easier to secure and conceal.
- Attaching flowers in random directions: Keep the bundles pointing one way for a polished finish.
- Making it too far in advance: Fresh flowers are happiest when assembled close to wear time.
- Ignoring sharp wire ends: Always wrap and tuck them before wearing the crown.
Real-Life Flower Crown Experiences: What Beginners Learn
Making a flower crown is one of those crafts that looks almost suspiciously easy in photos. You see a perfect floral halo resting on someone’s head, and it seems like the flowers simply floated into position after a light breeze and a poetic moment. In reality, the experience is more hands-on, more creative, and occasionally more tangled than people expect.
First-time makers often discover that the wire base matters more than the flowers. A crown can have beautiful roses, delicate filler flowers, and greenery worthy of a magazine spread, but it will not feel good if the base is too tight, too loose, or poking into someone’s head. Measuring carefully and wrapping the ends well can make the difference between an accessory people happily wear for hours and one they quietly remove after three photos.
Another common experience is realizing that smaller flowers are more useful than expected. Many beginners start with large blooms because they look impressive at the market. Once they begin assembling the crown, they find that mini roses, wax flower, baby’s breath, chamomile, and little leaves do most of the important work. They fill gaps, hide tape, soften edges, and make the crown look full without making it heavy.
People also learn quickly that a flower crown changes as it comes together. A bundle that looks plain on the table can look beautiful once it overlaps with the next one. The reverse is also true: a flower that seemed perfect in the bouquet may feel too large, too bright, or too heavy once it sits on the crown. That is why laying out all the flowers first and working in small bundles is so helpful. It gives you room to adjust without having to dismantle the entire project in dramatic defeat.
For group activities, flower crown making is especially memorable because no two crowns come out the same. Give five people the same flowers, wire, and tape, and you will end up with five completely different personalities in floral form. One person makes a tidy, symmetrical crown that belongs at a garden wedding. Another creates a giant colorful masterpiece that appears ready to headline a music festival. Someone else adds so much greenery that the final result looks delightfully like a friendly forest creature.
Many hosts find that flower crown stations work well for bridal showers, birthdays, baby showers, spring parties, and outdoor gatherings. The trick is to prepare the difficult parts in advance. Pre-cut wire bases, sort flowers by type, trim most stems, and place floral tape and scissors at every table. Guests can focus on arranging instead of waiting in line for one pair of scissors like it is the world’s prettiest airport security checkpoint.
There is also a nice lesson in imperfection. Fresh flowers are natural materials, not plastic decorations made by a machine. A petal may turn slightly. A leaf may curl. One side may end up fuller than the other. These details do not ruin the crown; they make it feel alive. Often, the flower crown that looks a little loose and organic is more charming than one that is overly symmetrical.
The best experience comes when someone puts the finished crown on, looks in the mirror, and immediately smiles. That is the moment the wire, tape, clipped stems, and scattered leaves become something more than a craft project. A DIY flower crown becomes a tiny celebration you can wear.
Note: Use flowers and greenery that are comfortable for the wearer, avoid plants that may irritate skin, and keep fresh floral crowns away from pets or small children when plant safety is uncertain.
Conclusion
Learning how to make a flower crown is less about following rigid rules and more about understanding a few simple techniques: build a comfortable wire base, use short stems, create small floral bundles, overlap them in one direction, and keep the finished crown cool until it is time to wear it. With those basics, you can create a flower crown for a wedding, party, festival, costume, photo shoot, or any day that could use more flowers and fewer ordinary accessories.
Start simple, use sturdy blooms, and let your style lead the design. Your first flower crown may not look exactly like the inspiration photo in your head, but it will be uniquely yoursand that is usually much better.












