
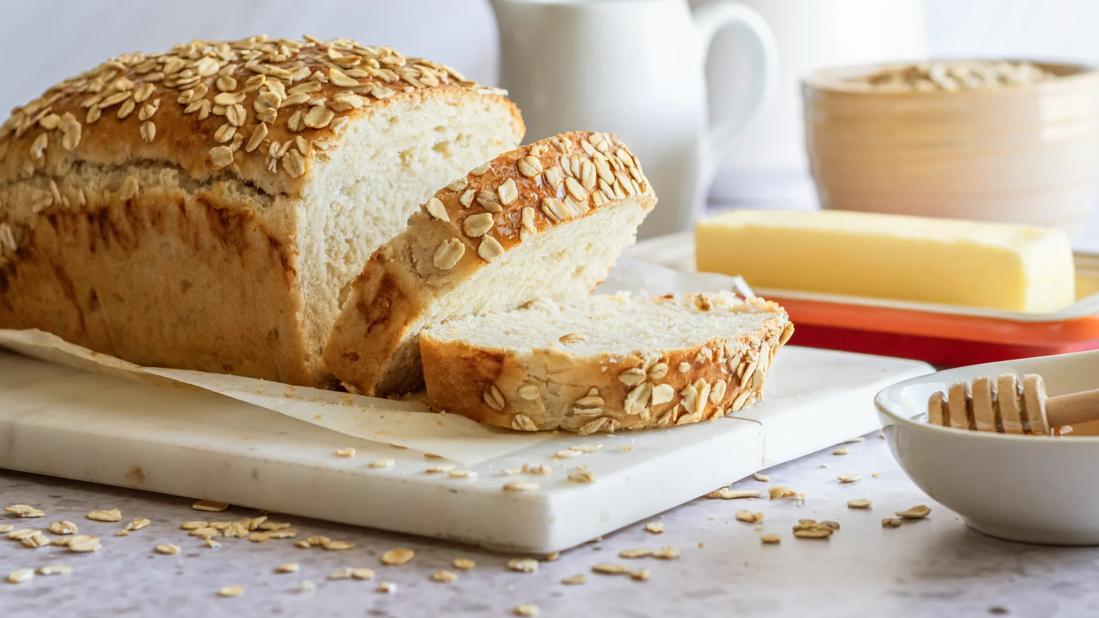
There are breads that politely sit on the counter, and then there is oats and honey breadthe kind that makes the whole kitchen smell like a bakery accidentally moved into your house. Soft, slightly sweet, tender in the middle, and just hearty enough to make toast feel like a real breakfast, this homemade oats and honey bread recipe is the loaf you bake once and then mysteriously “need” every week.
This recipe brings together rolled oats, honey, flour, yeast, milk, and butter to create a loaf that is comforting without being heavy. It is perfect for sandwiches, breakfast toast, honey butter, grilled cheese, or the classic “standing at the counter eating a warm slice because patience is overrated” moment.
The beauty of honey oat bread is balance. Oats add a gentle nuttiness and soft chew. Honey gives sweetness, color, and aroma. A little fat keeps the crumb tender. Yeast does the heavy lifting, like a tiny culinary construction crew. The result is a homemade bread recipe that tastes special but does not require professional bakery skills or a secret handshake.
Why This Oats and Honey Bread Recipe Works
A good oats and honey bread recipe should be soft enough for sandwiches, sturdy enough for toast, and flavorful enough that it does not need a heroic amount of butter. This loaf checks all three boxes.
First, the oats are softened before they go into the dough. This step matters because dry oats can steal moisture from the bread while it bakes. Soaking them briefly helps create a softer crumb and a better texture. Second, honey does more than sweeten. It helps the crust brown beautifully and gives the loaf a warm, floral flavor. Third, using a mix of all-purpose flour and whole wheat flour gives the bread structure without turning it into a doorstop in loaf form.
This bread is also flexible. You can bake it as one large sandwich loaf, shape it into two smaller loaves, or turn the dough into rolls. The recipe is written for home bakers who want reliable results, not drama. The only drama allowed is the smell of fresh bread causing everyone in the house to wander into the kitchen asking, “Is it ready yet?”
Ingredients for Homemade Oats and Honey Bread
Main Ingredients
- 1 cup old-fashioned rolled oats, plus extra for topping
- 1 cup warm milk, about 105°F to 110°F
- 1/3 cup honey
- 2 1/4 teaspoons active dry yeast, one standard packet
- 3 tablespoons unsalted butter, melted and slightly cooled
- 1 large egg, room temperature
- 2 cups all-purpose flour
- 1 1/2 cups whole wheat flour
- 1 1/2 teaspoons fine salt
- 1 tablespoon honey mixed with 1 teaspoon warm water, for brushing
Ingredient Notes
Old-fashioned oats are the best choice for this honey oat bread. They soften nicely while still giving the loaf texture. Quick oats can work in a pinch, but the bread may feel slightly less rustic. Steel-cut oats are not recommended because they stay too firm unless cooked separately first.
Honey gives this bread its signature flavor. Clover honey creates a mild sweetness, while wildflower honey adds a deeper floral note. Avoid using strongly flavored honey if you want a classic sandwich bread taste.
Whole wheat flour adds nuttiness and color. However, too much whole wheat flour can make the loaf dense. This recipe uses a friendly middle ground: enough whole wheat flavor to feel wholesome, not so much that your loaf needs a motivational speech to rise.
Step-by-Step Oats and Honey Bread Recipe
Step 1: Soften the Oats
Place the rolled oats in a large mixing bowl. Pour the warm milk over the oats and stir. Let the mixture sit for 10 minutes. The oats will begin to soften and absorb some liquid, which helps create a tender bread crumb later.
Step 2: Activate the Yeast
Add the honey to the warm oat and milk mixture, then sprinkle the yeast over the top. Let it sit for 5 to 10 minutes, until the surface looks foamy. If nothing happens, your yeast may be old or the liquid may have been too hot. Yeast is alive, but it is also dramatic.
Step 3: Mix the Dough
Add the melted butter, egg, all-purpose flour, whole wheat flour, and salt. Stir with a wooden spoon or use a stand mixer fitted with a dough hook. Mix until a rough dough forms. The dough should feel slightly tacky but not soupy. If it is extremely sticky, add flour one tablespoon at a time. If it feels dry, add a teaspoon or two of milk.
Step 4: Knead Until Smooth
Knead the dough for 8 to 10 minutes by hand or 5 to 7 minutes in a stand mixer. The dough should become smoother, elastic, and soft. Because oats hold moisture, this dough may feel a little tackier than plain white bread dough. Resist the urge to bury it in flour. Too much flour can make the finished loaf dry.
Step 5: First Rise
Place the dough in a lightly greased bowl and cover it with a clean kitchen towel or plastic wrap. Let it rise in a warm spot for 60 to 90 minutes, or until doubled in size. The exact time depends on your kitchen temperature. A warm room speeds things up; a chilly kitchen tells the yeast to take a long coffee break.
Step 6: Shape the Loaf
Lightly grease a 9-by-5-inch loaf pan. Gently deflate the dough and turn it onto a lightly floured surface. Shape it into a rectangle, then roll it into a tight log. Pinch the seam closed and place the dough seam-side down in the prepared loaf pan.
Step 7: Second Rise
Cover the pan and let the dough rise for 35 to 60 minutes, until it crowns about 1 inch above the rim of the pan. Do not rush this step. The second rise helps create a lighter loaf and a more even crumb.
Step 8: Brush, Top, and Bake
Preheat the oven to 350°F. Brush the top of the loaf with the honey-water mixture and sprinkle with extra rolled oats. Bake for 35 to 45 minutes, until the bread is deeply golden and sounds hollow when tapped. For extra accuracy, the center of the loaf should register about 190°F to 200°F on an instant-read thermometer.
Step 9: Cool Before Slicing
Let the bread cool in the pan for 10 minutes, then remove it and transfer it to a wire rack. Cool for at least 45 minutes before slicing. Yes, this is difficult. No, tearing into it immediately is not a federal crime. But slicing too soon can make the crumb gummy, and after all that work, the bread deserves its moment to settle.
Tips for the Best Honey Oat Bread
Use Warm Liquid, Not Hot Liquid
Yeast performs best when the liquid is warm, not blazing hot. Aim for 105°F to 110°F. If you do not have a thermometer, the milk should feel warm like bath water, not hot like “oops, I have regrets.”
Do Not Add Too Much Flour
Oat bread dough can feel slightly sticky because oats absorb moisture slowly. Add flour gradually only if needed. A soft, slightly tacky dough usually produces a softer loaf.
Let the Bread Cool Fully
Fresh bread keeps cooking internally after it leaves the oven. Cooling allows steam to redistribute and the crumb to set. This is the difference between clean slices and bread that looks like it lost a wrestling match.
Tent with Foil if Browning Too Fast
Honey encourages browning, which is delicious until the top gets too dark. If the loaf browns quickly during the final 10 to 15 minutes, loosely tent it with aluminum foil.
Flavor Variations
Whole Wheat Honey Oat Bread
For a heartier loaf, increase the whole wheat flour to 2 cups and reduce the all-purpose flour to 1 1/2 cups. You may need an extra tablespoon or two of milk because whole wheat flour absorbs more liquid.
Cinnamon Honey Oat Bread
Add 1 teaspoon of ground cinnamon to the dough for a cozy breakfast-style loaf. This version is excellent toasted with butter, cream cheese, or apple butter.
Seeded Oats and Honey Bread
Add 2 tablespoons sunflower seeds, pumpkin seeds, or flaxseed to the dough. Seeds add crunch, flavor, and a bakery-style look without requiring any fancy techniques.
Dairy-Free Honey Oat Bread
Replace milk with unsweetened oat milk or almond milk, and use olive oil or a plant-based butter instead of dairy butter. The loaf will still be soft and flavorful.
Serving Ideas for Oats and Honey Bread
This homemade oats and honey bread is a multitasker. It makes excellent peanut butter toast, turkey sandwiches, egg breakfast sandwiches, French toast, and grilled cheese. The mild sweetness pairs especially well with salty ingredients, so do not be surprised if a slice with butter and flaky salt becomes your new personality trait.
For breakfast, toast a thick slice and top it with Greek yogurt, sliced banana, and a drizzle of honey. For lunch, use it for chicken salad or roasted vegetable sandwiches. For dinner, serve it beside soup, chili, or a big salad. And for dessert? Toast it, butter it, sprinkle with cinnamon sugar, and pretend you planned that all along.
How to Store Oats and Honey Bread
Store the cooled loaf in an airtight bag or container at room temperature for up to 3 days. For longer storage, slice the bread and freeze it in a freezer-safe bag for up to 3 months. Freezing slices is especially useful because you can toast them straight from frozen.
Avoid refrigerating homemade bread unless absolutely necessary. Refrigeration can make bread stale faster by changing the texture of the starches. The freezer is a better long-term storage option.
Common Mistakes to Avoid
The Bread Did Not Rise
The most common causes are expired yeast, liquid that was too hot, or a kitchen that was too cold. Always check the yeast date and give the dough enough time. Bread follows its own schedule, like a cat with flour on its paws.
The Loaf Is Dense
Dense bread often comes from adding too much flour, under-kneading, or cutting the rise short. The dough should be soft and elastic before the first rise, and visibly puffy before baking.
The Top Got Too Dark
Honey browns quickly. If the loaf is getting dark before the inside is done, tent it loosely with foil and continue baking until the center reaches the right temperature.
The Bread Crumbles When Sliced
This usually means the loaf was sliced too soon or baked a little too long. Let it cool completely and use a serrated bread knife for clean slices.
Nutrition and Wholesome Appeal
Oats are naturally whole grain and bring fiber, texture, and a satisfying nutty flavor to bread. Honey adds sweetness, but because this recipe uses a moderate amount, the loaf stays balanced rather than dessert-like. Whole wheat flour contributes additional grain flavor, while the egg and butter help keep the crumb soft.
This is still bread, not a magic loaf wearing a superhero cape. But compared with plain white sandwich bread, homemade honey oat bread gives you more control over ingredients, sweetness, texture, and freshness. That alone is a pretty strong argument for baking it yourself.
Personal Baking Experience: What This Recipe Teaches You
Making oats and honey bread is one of those kitchen projects that quietly improves your confidence. At first, yeast bread can feel intimidating. There is rising, kneading, shaping, and the occasional fear that the dough is judging you. But this recipe is forgiving. The oats help retain moisture, the honey supports browning, and the dough is sturdy enough for beginners to handle.
One of the most useful lessons is learning how dough should feel. Recipes can give measurements, but flour behaves differently depending on humidity, brand, and how you scoop it. Some days the dough needs an extra spoonful of flour. Other days it needs a splash more milk. Once you understand that bread dough is not supposed to behave like cookie dough or pancake batter, everything gets easier.
The first time you bake honey oat bread, pay attention to the rise instead of the clock. A recipe may say 60 minutes, but your dough may need 75 minutes if the kitchen is cool. In a warm room, it may rise faster. The dough is ready when it has doubled and looks puffy, not when a timer bossily announces its opinion.
Another experience worth mentioning is the aroma. Oats and honey create a warm, slightly nutty smell that feels different from plain sandwich bread. It is softer, deeper, and more comforting. It is the sort of smell that makes people ask what you are making even when the answer is very obviously bread. Apparently, fresh bread turns everyone into a detective.
This loaf also teaches the value of patience. Cutting hot bread is tempting, especially when the crust is glossy and the oats on top look bakery-perfect. But waiting matters. A fully cooled loaf slices better, stores better, and has a cleaner crumb. If you absolutely must eat it warm, tear off one end piece and call it “quality control.” This is not cheating. This is science with butter.
Over time, this recipe becomes easy to personalize. You may discover you like a darker crust, a little more whole wheat flour, or a sprinkle of seeds on top. You may swap milk for oat milk, make smaller rolls, or add cinnamon for breakfast toast. That is the best part of homemade bread: once you understand the basic method, the loaf starts feeling like yours.
Oats and honey bread is especially rewarding because it fits everyday life. It is not too fancy for a lunchbox sandwich and not too plain for weekend brunch. It can sit beside soup, become toast, turn into French toast, or hold a very respectable grilled cheese. A homemade loaf also makes an excellent gift, assuming you can part with it. No judgment if you suddenly “forget” you made two.
In the end, baking this bread is less about perfection and more about rhythm. Mix, knead, rise, shape, bake, cool. The steps are simple, but the result feels generous. You get a loaf that is soft, golden, fragrant, and useful in a dozen ways. That is the kind of recipe worth keeping close, preferably near the butter dish.
Conclusion
This oats and honey bread recipe is soft, lightly sweet, and wonderfully practical. It uses simple pantry ingredients, delivers a tender sandwich-style loaf, and offers enough wholesome flavor to make every slice interesting. Whether you are new to yeast bread or already have flour permanently living on your shirt, this recipe is approachable, reliable, and deeply satisfying.
Use it for breakfast toast, sandwiches, soup night, or weekend baking. The oats bring texture, the honey brings warmth, and the homemade loaf brings the kind of kitchen joy that store-bought bread can only admire from the sidelines.
Note: This article is written in original standard American English and synthesized from reputable U.S. baking, nutrition, and food-safety guidance without inserting source links into the HTML body.














