
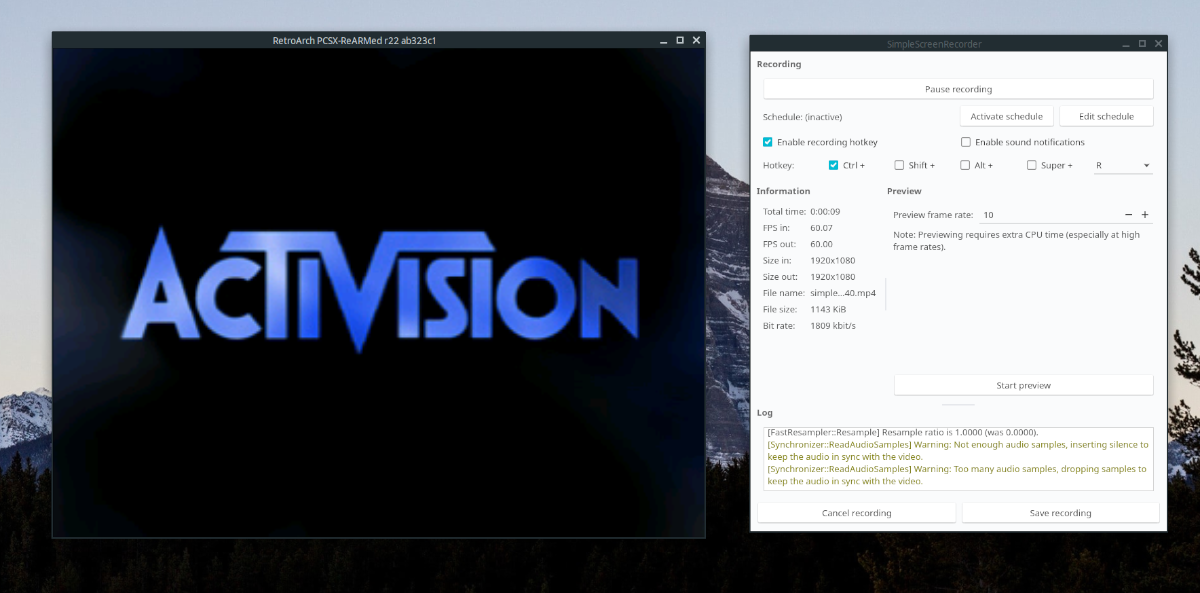
RetroArch is one of the best ways to play classic games on Linux, but sooner or later every player hits the same thought: “That boss fight was incredible. Why was I not recording?” Whether you want to upload a clean clip to YouTube, save a speedrun attempt, make a tutorial, or preserve a ridiculous Mario Kart comeback for future family debates, learning how to record RetroArch gameplay on Linux is a skill worth having.
The good news is that Linux gives you several solid ways to capture RetroArch. The slightly spicy news is that the “best” method depends on your desktop session, graphics driver, recording goals, and tolerance for tweaking settings. You can record directly inside RetroArch, use OBS Studio, capture with FFmpeg from the command line, or rely on hardware encoders such as NVENC, VAAPI, or Quick Sync when available. This guide walks you through each option in plain English, with practical examples and troubleshooting advice that does not require a PhD in terminal sorcery.
Understanding Your Recording Options on Linux
Before clicking every button in sight, it helps to know the three main recording paths. RetroArch can record gameplay internally using FFmpeg/libavcodec support. OBS Studio can capture the RetroArch window, screen, audio, overlays, webcam, and microphone. FFmpeg can record directly from the desktop through command-line capture methods, especially useful for lightweight setups or scripting.
For most users, OBS Studio is the easiest and most flexible option. It works well for YouTube videos, streaming, commentary, overlays, and high-quality local recordings. RetroArch’s built-in recorder is useful when you want capture that stays close to the emulator output. FFmpeg is the minimalist’s toolkit: powerful, fast, scriptable, and occasionally grumpy if your display server is not cooperating.
Method 1: Record RetroArch Gameplay with OBS Studio
OBS Studio is the best starting point for most Linux users because it offers a friendly interface and excellent control over video, audio, scenes, hotkeys, and encoders. If you are creating gaming content, OBS is the recording toolbox you will probably keep using long after this article.
Step 1: Install OBS Studio
On many Linux distributions, OBS Studio can be installed from the software center, official package repositories, Flathub, or the OBS Project’s recommended Linux packages. On Ubuntu-based systems, you may use the official OBS PPA or Flatpak. On Fedora, Arch, openSUSE, Linux Mint, and many others, Flatpak is often the easiest cross-distro route.
If you prefer native packages, use your distribution’s package manager. For example:
After installation, launch OBS Studio and let the auto-configuration wizard run if it appears. Choose “Optimize just for recording” if your main goal is saving RetroArch gameplay locally.
Step 2: Open RetroArch and Start a Game
Launch RetroArch, load your core, and start the game you want to record. For clean capture, switch RetroArch to windowed mode first. Fullscreen can work, but windowed mode makes setup easier, especially on Wayland sessions where screen sharing permissions can be picky.
Inside RetroArch, you can toggle fullscreen with the F key on many setups. You can also go to Settings > Video > Fullscreen Mode and adjust the display behavior.
Step 3: Add a Capture Source in OBS
In OBS, look at the Sources box and click the plus button. The source you choose depends on your Linux session:
- Window Capture (Xcomposite): Often works on X11 sessions and captures only the RetroArch window.
- Screen Capture (XSHM): Captures the full screen on X11.
- Screen Capture (PipeWire): Common for Wayland sessions.
- Window Capture (PipeWire): Available on some Wayland setups, depending on desktop environment, portals, and OBS build.
If you are on GNOME or KDE Wayland, choose a PipeWire capture source and approve the screen-sharing prompt. If OBS shows a black screen, do not panic. Linux has not personally betrayed you; it is usually a portal, permission, package, or session issue.
Step 4: Capture Game Audio
In most modern Linux desktops using PulseAudio or PipeWire-Pulse, OBS should automatically detect desktop audio. Check the Audio Mixer panel while RetroArch is playing. If the meter moves, OBS hears the game. If the meter is as lifeless as a Game Boy with dead batteries, go to Settings > Audio and select your desktop audio device manually.
For commentary, add your microphone under Mic/Auxiliary Audio. If your voice is too quiet, use the gear icon in the Audio Mixer and add filters such as gain, noise suppression, and compressor. A small amount of cleanup can make your video sound much more professional.
Step 5: Choose Recording Settings
Go to Settings > Output. Switch Output Mode to Advanced, then open the Recording tab. For a safe setup, use these beginner-friendly settings:
- Recording Format: MKV
- Encoder: x264, NVENC, VAAPI, or Quick Sync depending on your hardware
- Rate Control: CRF or CQP for local recordings, CBR for streaming
- Quality: CRF 18–22 for x264, or CQP 18–23 for many hardware encoders
- Frame Rate: 60 FPS for smooth gameplay, 30 FPS for smaller files
MKV is recommended because it is safer if OBS or the computer crashes during recording. After recording, you can convert it to MP4 inside OBS by going to File > Remux Recordings. Think of MKV as the responsible adult in the room; MP4 is convenient, but it can be fragile during interrupted recordings.
Step 6: Start Recording
Click Start Recording, play your game, then click Stop Recording when finished. Your video will appear in the folder set under Settings > Output > Recording Path. Do a short test clip before recording a full session. Ten seconds of testing can save you from discovering later that your masterpiece has no audio.
Method 2: Use RetroArch’s Built-In Recording Feature
RetroArch has built-in recording support through FFmpeg/libavcodec. This method can be appealing because it records directly from RetroArch rather than capturing your desktop like a camera pointed at a TV. It can produce clean output, and RetroArch supports both lossless and lossy recording configurations when FFmpeg support is available.
Check Whether Recording Is Available
Open RetroArch and go to Settings > Recording. If you see recording options, your build likely includes the required support. If the recording menu is missing or limited, your RetroArch package may not have been built with FFmpeg recording support. This can happen depending on distribution packages, Flatpak builds, or custom builds.
Basic RetroArch Recording Steps
- Open RetroArch.
- Go to Settings > Recording.
- Set a recording output path, such as
/home/username/Videos/retroarch-test.mkv. - Enable recording.
- Launch your game.
- Play normally and stop recording when finished.
RetroArch also offers options such as GPU recording in some builds, which can help capture shader output. This matters if you use CRT shaders, scanlines, bezels, or other visual effects and want the recording to match what you actually see on screen.
When Built-In Recording Makes Sense
Use RetroArch’s recorder when you want simple gameplay capture without overlays, webcam, or complex audio mixing. It is also useful when you want the emulator output itself, not your whole desktop. However, for tutorials, commentary, live streams, or polished gaming videos, OBS remains more convenient.
Method 3: Record RetroArch with FFmpeg from the Terminal
FFmpeg is the Swiss Army knife of Linux video. It can record, convert, stream, compress, filter, and occasionally make you question whether you typed a dash correctly. If you enjoy terminal workflows, FFmpeg is lightweight and scriptable.
Record on X11 with x11grab
If you are using an X11 session, you can record your screen with a command like this:
This records a 1920×1080 display at 60 FPS and captures default system audio. Adjust -video_size to match your screen resolution. If RetroArch is in a smaller window, you can capture a region by adding an offset such as :0.0+100,200.
Record with GPU Encoding
If your system supports hardware encoding, you can reduce CPU load. NVIDIA users may use NVENC if the driver and FFmpeg build support it:
On Intel or AMD systems, VAAPI may be available:
Hardware encoding is especially helpful on older CPUs or tiny living-room Linux boxes that already work hard running shaders and cores. The tradeoff is that software x264 may produce better quality per bit at slower presets, while hardware encoders often win on speed and smoothness.
What About Wayland?
Wayland is more secure than X11, which is good for privacy but trickier for traditional screen capture. Many FFmpeg desktop-capture examples rely on X11. On Wayland, OBS with PipeWire is usually easier than raw FFmpeg. Some compositors and tools provide Wayland-friendly capture methods, but the exact workflow depends heavily on GNOME, KDE, wlroots-based compositors, portals, and installed packages.
Best OBS Settings for RetroArch Gameplay
Retro games look simple, but they can be surprisingly demanding to encode cleanly. Pixel art has sharp edges. Scrolling backgrounds move quickly. CRT shaders add noise and glow. A low bitrate can turn your beautiful 16-bit adventure into a soup of squares, which is historically accurate only if you are emulating a potato.
Resolution and Scaling
Set OBS canvas and output resolution based on your target platform. For YouTube, 1920×1080 is a safe standard. If your RetroArch window is smaller, OBS can scale it up. Use integer scaling in RetroArch when possible to keep pixel art sharp.
- 720p60: Good for small files and older systems.
- 1080p60: Best balance for most gameplay videos.
- 1440p60: Useful for YouTube quality, but heavier on storage and encoding.
Frame Rate
Many classic systems output near 60 FPS, so recording at 60 FPS keeps scrolling and motion smooth. If your computer struggles, use 30 FPS rather than dropping frames unpredictably. A stable 30 FPS recording looks better than a chaotic 60 FPS recording that stutters like a scratched cartridge.
Bitrate and Quality
For local recording, quality-based settings are usually better than fixed bitrate. Use CRF with x264 or CQP/CQ with hardware encoders. Lower numbers mean higher quality and larger files.
- x264 CRF 18: High quality, larger file.
- x264 CRF 20–22: Good balance.
- NVENC CQP 18–23: Good range for clean gameplay capture.
- CBR 8,000–16,000 Kbps: Useful for 1080p streaming or predictable file size.
Troubleshooting Common Problems
OBS Shows a Black Screen
Black-screen capture is common on Linux, especially under Wayland. First, confirm whether you are using X11 or Wayland. On many systems, run:
If it says wayland, use Screen Capture (PipeWire) or Window Capture (PipeWire) in OBS. Make sure pipewire, wireplumber, and xdg-desktop-portal packages are installed and running. On KDE, you may need xdg-desktop-portal-kde. On GNOME, you may need xdg-desktop-portal-gnome.
No Game Audio in the Recording
Check the OBS Audio Mixer first. If the desktop audio meter does not move, select the correct audio device in Settings > Audio. You can also open your system sound settings while RetroArch is running and confirm that RetroArch is playing through the expected output device.
Recording Is Laggy or Drops Frames
Lag usually comes from asking the computer to do too much at once. Lower the output resolution, reduce FPS from 60 to 30, switch from x264 to a hardware encoder, close background apps, or reduce heavy shaders in RetroArch. Also check whether RetroArch itself is running smoothly before recording. OBS cannot capture smooth footage from a game that is already struggling.
File Size Is Huge
Lossless recording and high-quality CRF settings can create very large files. If your storage drive starts screaming, raise CRF or CQP slightly, use HEVC if your editing software supports it, or record at 1080p instead of 1440p. For quick sharing, transcode the final video after editing rather than crushing the quality during capture.
Shaders Do Not Appear in the Recording
If you record through RetroArch’s internal method, check whether GPU recording is enabled if available. If shader output matters, OBS window capture is often the simplest way to capture exactly what appears on screen, including overlays, bezels, scanlines, and other effects.
Practical Workflow for YouTube or Social Clips
Here is a simple workflow that works well for most creators:
- Open RetroArch and set the game to windowed or borderless fullscreen.
- Open OBS and create a scene named “RetroArch Gameplay.”
- Add a window or screen capture source.
- Add desktop audio and microphone if needed.
- Set recording format to MKV.
- Use 1080p60 output with x264 CRF 18–22 or NVENC/VAAPI CQP around 18–23.
- Record a 20-second test clip.
- Check video, audio, sync, and file location.
- Record the full session.
- Remux to MP4 if your editor or upload platform prefers it.
This workflow is boring in the best way. It gives you predictable results and fewer unpleasant surprises. In video production, boring settings that work are better than exciting settings that produce a silent black rectangle.
Personal Experience: What Actually Works Best When Recording RetroArch on Linux
After testing different Linux recording setups over time, the biggest lesson is simple: choose the method that matches your goal, not the method that sounds most technically impressive. RetroArch’s internal recording is neat, FFmpeg is powerful, and OBS is flexible. But if you are trying to make content quickly, OBS is usually the winner because it lets you see everything before you press record.
For casual gameplay clips, I prefer OBS with a dedicated RetroArch scene. I add a window capture source, set the canvas to 1920×1080, and scale the RetroArch window until the game looks clean. For pixel-art games, I avoid weird stretched scaling. Nothing ruins a nostalgic platformer faster than making the hero look like they got pulled through a pasta machine. Integer scaling in RetroArch helps a lot, especially for older console cores.
Audio testing is the step I never skip anymore. Early on, it is easy to assume the audio is fine because you can hear the game through your speakers. Unfortunately, OBS may be listening to a different output device, especially if you use Bluetooth headphones, HDMI audio, USB headsets, or multiple monitors. A short test recording catches this immediately. I record ten seconds, play it back, and check three things: game audio, microphone level, and sync. If all three are good, then I start the real recording.
On X11, window capture tends to be straightforward. On Wayland, PipeWire capture is much better than it used to be, but the experience still depends on the desktop environment and portal packages. GNOME and KDE usually behave well when everything is installed properly. If OBS cannot see the screen, I check the session type, update OBS, restart the desktop session, and verify the relevant xdg-desktop-portal package. It is not glamorous troubleshooting, but it solves many problems.
For performance, hardware encoding is often worth using. On systems with NVIDIA GPUs, NVENC can record smooth footage while leaving the CPU free for RetroArch cores, shaders, and background tasks. On AMD and Intel systems, VAAPI or Quick Sync can help, though setup varies by distribution and driver. If hardware encoding creates odd quality issues, x264 with a veryfast or faster preset is a reliable fallback. The goal is not to win an encoding beauty contest; the goal is to record smooth gameplay without making the emulator stumble.
Storage is another practical issue. High-quality gameplay recordings can become large quickly, especially at 1080p60 or 1440p60. I like recording to a fast internal SSD when possible, then moving finished clips to a larger drive later. Recording straight to a slow external drive can work, but if the drive pauses or falls behind, your video may stutter. Retro games are small; video files of retro games are not always small. That irony deserves its own achievement badge.
My most reliable setup is OBS, MKV format, 1080p60, quality-based recording, and a quick remux to MP4 afterward. I use RetroArch’s own recording only when I specifically want direct emulator output or when I am testing a minimal setup. I use FFmpeg when I need automation, such as recording from a script or capturing a fixed region without opening a full production app. For everyone else, OBS is the friendly middle ground: powerful enough for serious content, simple enough that you can spend more time playing and less time arguing with command flags.
Conclusion
Recording RetroArch gameplay on Linux is not difficult once you choose the right tool. OBS Studio is the best all-around option for most players because it handles window capture, screen capture, game audio, microphones, overlays, and flexible encoding settings. RetroArch’s built-in recording feature is useful for direct emulator capture when FFmpeg support is available. FFmpeg gives advanced users a fast, scriptable command-line option, especially on X11 systems.
Start simple: install OBS, capture the RetroArch window, record in MKV, test your audio, and use 1080p60 with quality-based encoding. Once that works, experiment with hardware encoders, shader capture, microphone filters, and custom scenes. The perfect setup is the one that lets you press record, play confidently, and end up with footage that looks as good as the victory felt.














