
Runner beans are the overachievers of the vegetable patch. One day you have a polite handful for dinner, and the next day the vines are throwing beans at you like they are trying to win a county fair. The good news? Freezing runner beans is one of the easiest ways to save that garden abundance before it turns into a limp green guilt trip in the crisper drawer.
This guide explains how to freeze runner beans in 13 clear steps, from choosing the freshest pods to blanching, cooling, packing, labeling, and cooking them later. The method is simple, but the little details matter. A three-minute blanch, a proper ice bath, thorough drying, and airtight packaging can mean the difference between bright, tasty beans and freezer-flavored vegetable confetti.
Although runner beans are not exactly the same as American green beans, they freeze beautifully using the same basic home-preservation principles used for snap, green, and wax beans. Follow these steps and your future soups, casseroles, stir-fries, and weeknight side dishes will thank you. Probably not out loud, because beans are modest.
Why Freeze Runner Beans?
Freezing runner beans preserves their color, flavor, and usefulness far better than simply leaving them in the refrigerator and hoping for the best. Fresh runner beans have a short peak window. Once picked, they start losing sweetness and texture. Freezing slows that decline and lets you enjoy your harvest long after the vines have called it a season.
The key is blanching. Blanching means briefly boiling vegetables and then cooling them quickly. It stops enzyme activity that can damage flavor, texture, color, and nutrients during freezer storage. Skipping blanching may save a few minutes today, but it can leave you with beans that taste grassy, feel tough, or look dull later. In other words, blanching is the small chore that prevents future dinner disappointment.
What You Need Before You Start
Before you freeze runner beans, gather your supplies. You do not need fancy equipment, but you do need enough space and a little organization. Beans move fast once the water boils, so having everything ready prevents the classic kitchen panic dance.
- Fresh runner beans
- A sharp knife or kitchen scissors
- A cutting board
- A large pot with a lid
- A blanching basket, colander, or slotted spoon
- A large bowl of ice water
- Clean kitchen towels or paper towels
- Freezer bags or rigid freezer-safe containers
- A permanent marker or freezer labels
How to Freeze Runner Beans: 13 Steps
Step 1: Pick or Buy Fresh, Tender Runner Beans
Start with the best beans you can find. Choose pods that are firm, brightly colored, and free from soft spots, mold, or major blemishes. Younger runner beans freeze better than older, oversized pods because they are less stringy and have a sweeter, cleaner flavor. If a bean bends like a tired shoelace, it is not your freezer’s soulmate.
For homegrown beans, harvest in the morning if possible, when the pods are crisp and hydrated. If buying from a farmers market or grocery store, look for beans that snap when bent. Avoid pods with bulging mature seeds unless you plan to shell them and freeze the beans separately.
Step 2: Freeze Them as Soon as Possible
Runner beans are best frozen soon after harvesting or buying. The longer they sit, the more quality they lose. If you cannot process them immediately, store them unwashed in the refrigerator for a day or two. Keep them in a breathable produce bag or a container lined with a towel to reduce moisture buildup.
Do not wash and trim them far in advance unless you are ready to blanch. Extra moisture can encourage spoilage in the refrigerator, and trimmed ends dry out faster. Treat fresh beans like a guest who arrived early: keep them comfortable, but do not make them wait forever.
Step 3: Wash the Beans Well
Rinse the runner beans under cool running water. Rub them gently with your fingers to remove dirt, dust, and any tiny garden passengers who were not invited to dinner. If your beans came from the garden after rain, they may need a little extra attention around the seams.
Avoid soaking the beans for a long time. A quick, thorough wash is enough. After rinsing, drain them in a colander and give them a light shake. Clean beans freeze better, taste fresher, and will not bring gritty surprises to your future casseroles.
Step 4: Trim the Ends
Place the washed beans on a cutting board and trim off the stem ends. You can also remove the pointed tips if you prefer a neater look. Some runner beans have tough strings along the sides, especially larger or older pods. If you notice strings, pull them away as you trim.
This step is partly about texture and partly about future convenience. When you pull frozen beans from the freezer on a busy weeknight, you will be grateful that the trimming is already done. Future-you deserves small acts of kindness.
Step 5: Slice the Beans Into Useful Pieces
Cut the runner beans into the size and shape you usually cook with. For side dishes, 1- to 2-inch pieces work well. For soups and stews, slightly shorter pieces are convenient. For stir-fries, you can slice them diagonally for more surface area and a nicer look.
Try to keep the pieces fairly similar in size. Even pieces blanch more evenly and cook more predictably later. If you freeze whole long pods, they may be harder to pack and portion. Unless you are saving them for a dramatic bean sculpture, cutting is usually the smarter move.
Step 6: Bring a Large Pot of Water to a Rolling Boil
Use plenty of water so the temperature does not drop too much when you add the beans. A common home-preservation rule is to use about one gallon of water per pound of prepared vegetables. The water should be at a strong rolling boil before the beans go in.
Do not overcrowd the pot. If you have a mountain of runner beans, blanch them in batches. Too many beans at once can cool the water, leading to uneven blanching. That is how you end up with some beans perfectly processed and others still wondering why they were invited.
Step 7: Blanch the Runner Beans for 3 Minutes
Lower the prepared runner beans into the boiling water. Cover the pot and start timing when the water returns to a boil. Blanch the beans for 3 minutes. This timing works well for most sliced runner beans and follows the same general guidance used for green, snap, and wax beans.
Blanching is not the same as fully cooking. The goal is to stop quality-damaging enzymes, brighten the color, and slightly soften the beans for packing. Overblanching can reduce flavor and texture, while underblanching may not properly slow enzyme activity. So yes, this is one of those times when the timer gets to be the boss.
Step 8: Cool the Beans Immediately in Ice Water
As soon as the 3 minutes are up, transfer the beans to a large bowl of ice water. Cooling stops the cooking process quickly, helping the beans keep a better texture and bright green color. Let them chill for about 3 minutes, or until completely cool.
If the ice melts quickly, add more. If you are working in batches, refresh the cold water as needed. Warm “ice water” is just water with a broken promise. The beans should cool fast enough that they do not continue cooking from residual heat.
Step 9: Drain Thoroughly
Drain the cooled beans in a colander. Shake off as much water as possible. Then spread them on clean kitchen towels or paper towels and pat them dry. This step is more important than it looks.
Extra water on the beans becomes ice crystals in the freezer. Ice crystals can lead to clumping and a less pleasant texture. Dry beans are easier to portion, easier to package, and less likely to turn into a solid green brick. Unless you enjoy chiseling vegetables, drain them well.
Step 10: Choose a Packing Method
You can freeze runner beans using either a dry pack or a tray pack. A dry pack means placing the blanched, cooled, and drained beans directly into freezer bags or containers. This is fast and works well if you usually use a whole package at once.
A tray pack takes a little longer but is excellent for convenience. Spread the beans in a single layer on a baking sheet and freeze until firm, usually one to two hours. Then transfer them to freezer bags or containers. Tray-packed beans stay more separate, so you can scoop out a handful instead of wrestling with a frozen block.
Step 11: Pack in Freezer-Safe Bags or Containers
Use freezer bags, vacuum-seal bags, or rigid freezer-safe containers. Remove as much air as possible from bags before sealing. If using containers, leave about 1/2 inch of headspace to allow for slight expansion. Good packaging protects against freezer burn, off flavors, and moisture loss.
Pack in portions your household will actually use. A family of four may like two-cup portions for side dishes. A single cook may prefer one-cup portions for soups or quick meals. Smart portioning saves time later and prevents the sad cycle of thawing too much and pretending you wanted beans three nights in a row.
Step 12: Label and Date Every Package
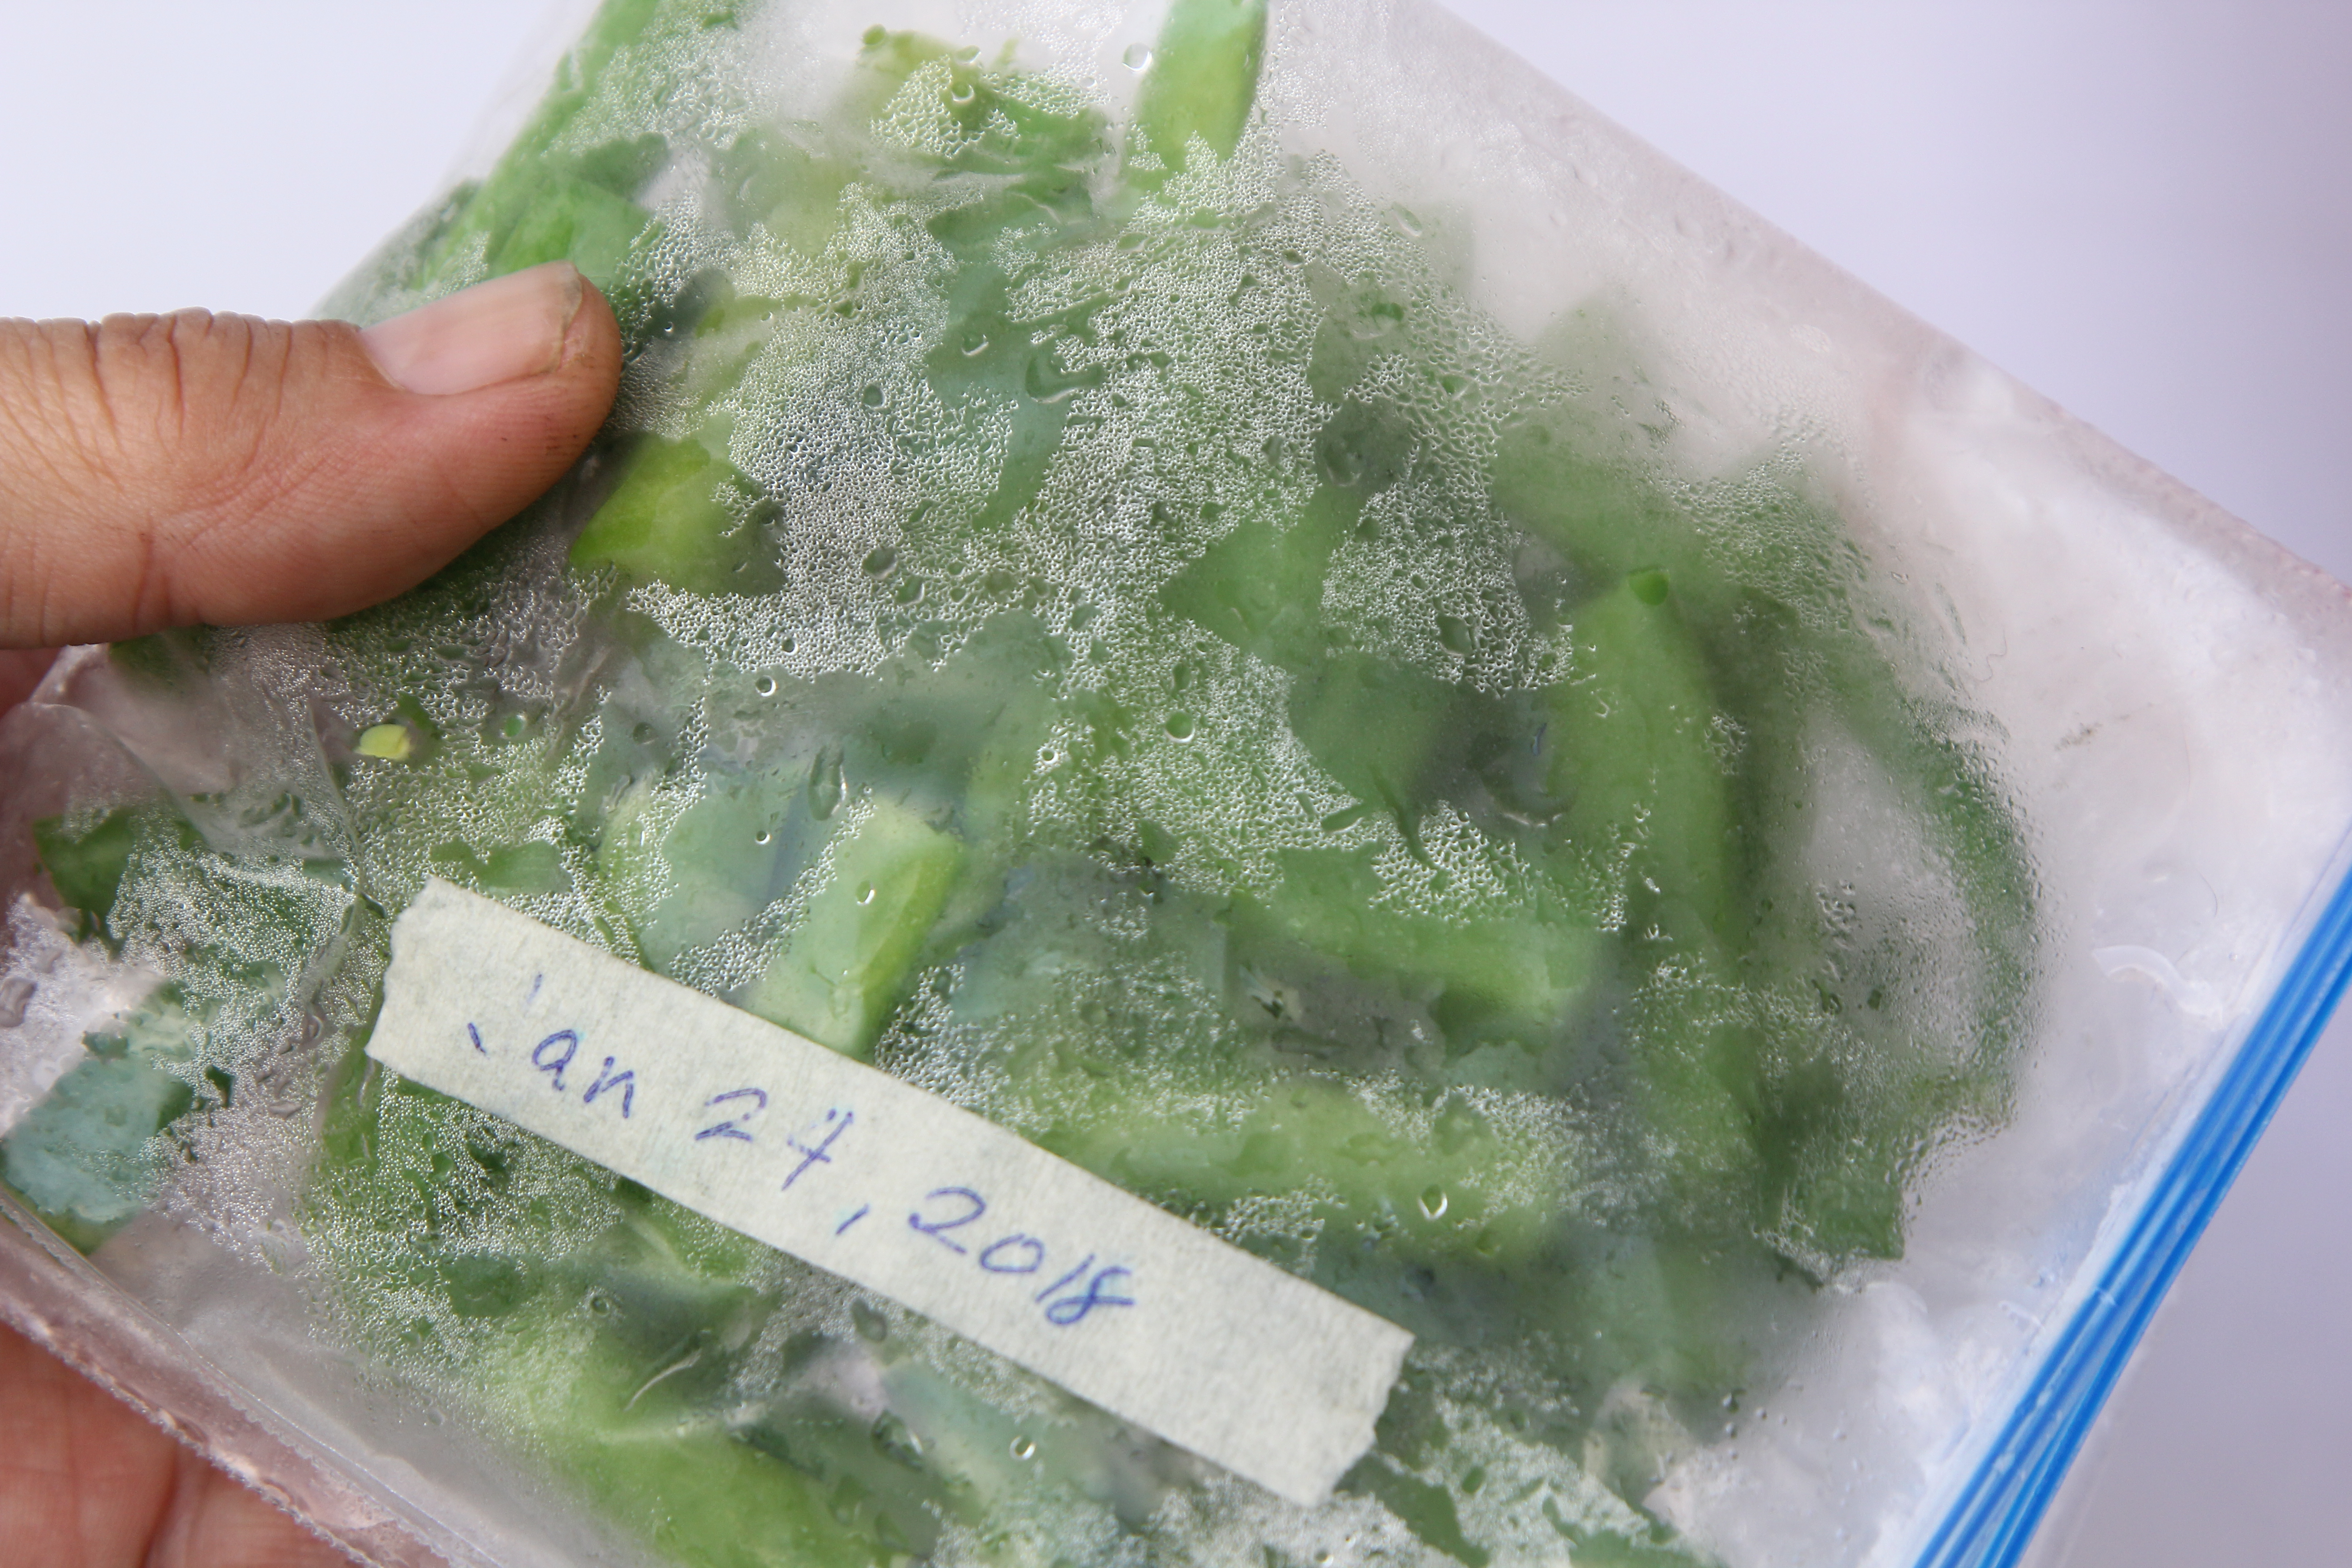
Write the contents and freezing date on every bag or container. “Runner beans, blanched, April 2026” is much more helpful than “green mystery, probably food.” You can also add portion size, such as “2 cups,” if you want to make meal planning easier.
Labeling helps you rotate your freezer stash. Frozen vegetables stored continuously at 0°F remain safe, but quality gradually declines over time. For the best flavor and texture, use frozen runner beans within about 8 to 12 months. They may still be safe after that if kept frozen, but their charm may fade.
Step 13: Freeze Quickly and Store at 0°F
Place the packages in the coldest part of your freezer, ideally at 0°F or below. Lay bags flat until frozen so they stack neatly later. Good airflow helps the beans freeze faster, so do not bury warm packages under a fortress of frozen pizza and optimism.
Once frozen solid, you can rearrange the bags or containers to save space. Keep older packages toward the front so they get used first. A tidy freezer is not just satisfying; it also prevents perfectly good runner beans from disappearing into the Arctic back corner until the next presidential administration.
Can You Freeze Runner Beans Without Blanching?
Technically, yes, you can freeze runner beans without blanching. You could wash, trim, dry, pack, and freeze them raw. However, blanching is strongly recommended for better quality. Unblanched beans may lose color, develop stronger flavors, become tougher, or suffer more texture damage in storage.
If you plan to use the beans within a few weeks, raw freezing may be acceptable in a pinch. But if you are preserving a real harvest for fall and winter meals, blanching is worth the extra few minutes. Think of it as insurance against freezer regret.
How to Cook Frozen Runner Beans
Most of the time, you do not need to thaw frozen runner beans before cooking. Add them straight from the freezer to boiling water, soups, stews, casseroles, skillet meals, or stir-fries. Because they were blanched before freezing, they are partially cooked, so they usually need less cooking time than fresh raw beans.
For a simple side dish, simmer frozen runner beans in lightly salted water for 3 to 5 minutes, then drain and toss with butter, olive oil, garlic, lemon juice, or toasted almonds. For soups, add them near the end of cooking so they stay pleasantly tender instead of turning mushy. For stir-fries, cook them over high heat so extra moisture evaporates quickly.
Common Mistakes to Avoid
Using Old, Tough Beans
Freezing does not magically turn tough beans tender. If the pods are woody or the seeds are oversized, the final result will still be disappointing. Freeze young, tender beans for the best outcome.
Skipping the Ice Bath
Blanching without cooling is just cooking. The ice bath stops the heat quickly and protects texture. Do not skip it unless you enjoy beans with a personality crisis.
Leaving Too Much Air in the Package
Air is the enemy of frozen food quality. Press it out of bags, use airtight containers, or vacuum seal if you have the equipment. Less air means less freezer burn.
Freezing Wet Beans
Wet beans clump and form ice crystals. Drain and dry them well before packing. A few extra minutes with a towel can save months of annoyance.
Best Uses for Frozen Runner Beans
Frozen runner beans are wonderfully flexible. They work in vegetable soups, beef stew, chicken pot pie filling, pasta bakes, casseroles, rice bowls, curries, and quick skillet sides. Their flavor pairs well with garlic, onions, tomatoes, potatoes, bacon, lemon, herbs, and creamy sauces.
For a quick weeknight idea, sauté sliced onions in olive oil, add frozen runner beans, season with salt and pepper, and finish with a squeeze of lemon. For comfort food, stir them into a creamy mushroom casserole. For something lighter, add them to minestrone during the last few minutes of cooking. Frozen runner beans are basically meal prep in green form.
Conclusion
Learning how to freeze runner beans is simple, practical, and deeply satisfying when the garden produces more than you can eat fresh. The best method is to choose young tender beans, wash and trim them, slice them evenly, blanch for 3 minutes, cool immediately in ice water, drain thoroughly, pack airtight, label clearly, and freeze at 0°F.
The process takes a little time, but it pays you back every time you pull a bright, ready-to-cook package from the freezer. Instead of wasting extra beans, you get easy vegetables for future meals. That is the kind of kitchen math everyone can support.
Real-Life Experience: What Freezing Runner Beans Teaches You
The first thing you learn when freezing runner beans is that the harvest never arrives politely. It does not send a calendar invite. It does not say, “Would Tuesday afternoon be convenient?” It simply appears. Suddenly the vines are loaded, the bowl is full, and you are standing at the counter wondering how two seed packets became a vegetable situation.
In my experience, the best freezer sessions start with sorting. I like to divide beans into three piles: perfect young pods for freezing, slightly larger pods for soups, and overgrown pods for shelling or composting. This keeps the freezer stash high quality. It is tempting to freeze everything, but the freezer is not a witness protection program for vegetables past their prime. If a bean is tough going in, it will be tough coming out.
Another lesson is that setup matters. Before the beans touch the boiling water, I make sure the ice bath is ready, towels are spread out, bags are labeled, and the counter is clear. Once blanching begins, everything moves quickly. The timer rings, steam fogs your glasses, someone asks where the scissors are, and the dog suddenly develops a passionate interest in green vegetables. Preparation keeps the whole process calm.
I also prefer tray freezing whenever I have room. It feels like an extra step, but it makes the beans much easier to use later. When beans are frozen loose, you can grab exactly what you need for a soup or skillet meal. When they freeze in one solid block, you either thaw the whole thing or perform freezer archaeology with a spoon. Tray freezing wins.
Portion size is another surprisingly important detail. Large bags look efficient, but smaller portions are more practical. I often pack runner beans in one- or two-cup amounts because those fit real recipes. A two-cup bag can become a quick side dish, bulk up a casserole, or add color to soup. Small bags also freeze faster and stack better.
Finally, frozen runner beans are best when you cook them with confidence. Do not thaw them on the counter and let them get soggy. Add them straight to hot pans, boiling water, or simmering soups. Give them enough heat to wake up, but not so much that they collapse. A little butter, garlic, lemon zest, black pepper, or smoked paprika can make them taste far brighter than “freezer vegetable” has any right to taste.
Freezing runner beans turns a seasonal rush into future convenience. It saves money, reduces waste, and gives you a little taste of summer when the weather is cold and dinner needs help. Also, opening the freezer and seeing neatly labeled bags of home-prepped beans makes you feel like the kind of person who has their life together. Whether or not that is true is none of the freezer’s business.














