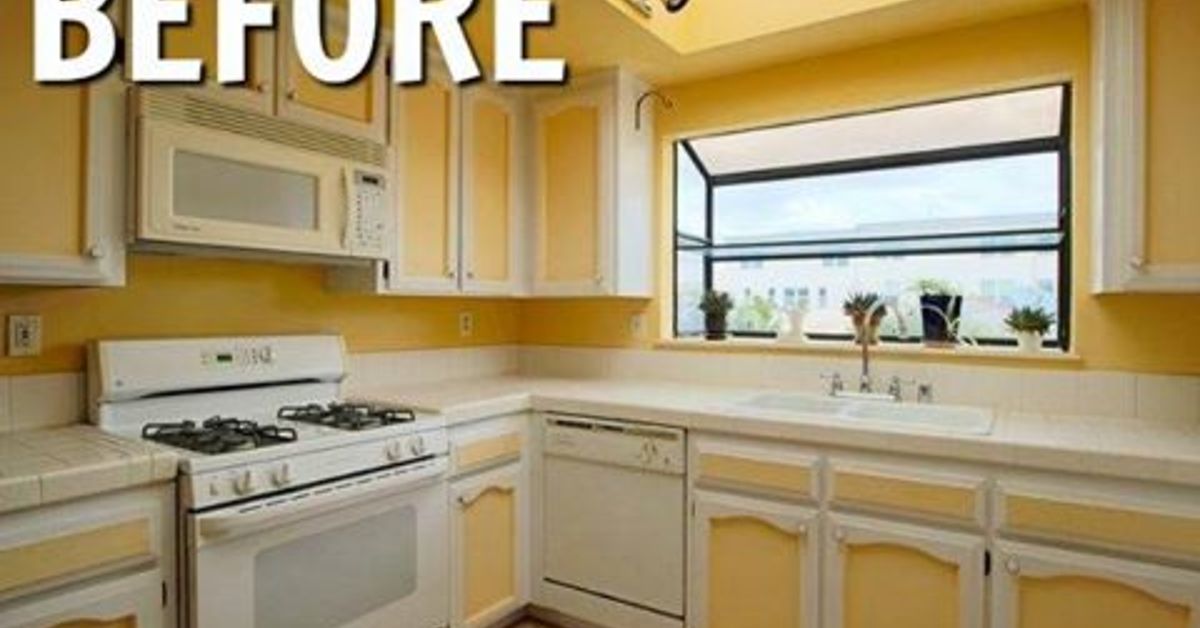
A kitchen remodel has a sneaky reputation. You start by thinking, “Maybe I’ll paint the cabinets,” and two hours later you are pricing imported stone, moving a load-bearing wall, and wondering whether your refrigerator needs Wncial identity crisis.
The best DIY kitchen remodel idea on a budget is not one single trick. It is a strategy: keep what works, improve what people notice, do safe projects yourself, and avoid expensive changes to plumbing, electrical systems, and the basic layout unless they are truly necessary. Budget remodeling guidance consistently points toward preserving the existing footprint, refreshing sound cabinets, choosing practical materials, and planning for unexpected expenses rather than spending every available dollar before demolition begins. r you have a tiny galley kitchen or a builder-grade space that has been beige since dinosaurs roamed the suburbs, the following plan can help you create a fresher, more functional room without turning your savings account into an archaeological site.
Start With a Budget, Not a Sledgehammer
Before buying paint, tile, hardware, or the adorable faucet that suddenly seems essential to human happiness, decide exactly how much you can spend. Professional kitchen remodel costs vary enormously by location, size, labor, materials, and project scope. Recent cost guides show that even relatively modest professional remodels can quickly reach five figures, which is precisely why a focused DIY refresh can be so attractive. three lists: must fix, would improve daily life, and purely decorative. A leaking sink belongs in the first category. Better task lighting may belong in the second. A designer range hood shaped like an Italian sculpture probably belongs in the third, where it can sit quietly and think about what it has done to your budget.
Build in a contingency fund
Do not allocate every dollar to visible finishes. Hidden damage, incorrect measurements, missing tools, delivery charges, and “while we’re at it” purchases can expand the bill. Remodeling guidance commonly recommends reserving additional money for surprises, with suggested cushions varying by project and source. The exact percentage is less important than the habit: keep part of the budget untouched until the difficult work is finished. ample $5,000 DIY kitchen refresh budget
This is an illustrative planning example rather than a universal price estimate:
- Cabinet paint, primer, cleaners, and supplies: $450
- New cabinet hardware: $250
- Budget countertop update: $900
- Backsplash materials: $350
- Lighting improvements: $250
- Sink or faucet update: $450
- DIY-friendly flooring: $900
- Storage and organization upgrades: $250
- Tools, disposal, and miscellaneous supplies: $350
- Contingency reserve: $850
Total: $5,000. Your real numbers will depend on kitchen size, local pricing, product choices, and how much work you can safely perform yourself.
Keep the Existing Kitchen Layout Whenever Possible
One of the most effective ways to control a kitchen remodeling budget is remarkably unglamorous: leave the sink, range, refrigerator, and major walls where they are. Moving plumbing, gas lines, electrical circuits, ventilation, or structural walls can introduce new trades, permits, materials, and labor. Budget remodeling sources repeatedly recommend working with the existing footprint when the current layout is reasonably functional. d of asking, “How can I rebuild this entire room?” ask, “What makes this room feel old or inconvenient?” The answer may be dark cabinets, poor lighting, cluttered counters, worn flooring, or outdated hardware. Those problems can often be attacked directly without relocating the kitchen to another dimension.
Give Existing Cabinets a Second Life
Cabinetry can consume a major share of a kitchen budget, so replacing structurally sound boxes simply because the finish is dated may be unnecessary. Painting, refinishing, refacing, changing hardware, adding trim, replacing selected doors, or converting a small section to open shelving can create a dramatically different look for less than a full replacement. them properly or prepare to paint them twice
Cabinet painting is affordable compared with replacement, but it is not the place for the classic DIY method known as “wipe it with a paper towel and hope.” Kitchen cabinets accumulate grease and residue. A durable finish depends on cleaning, removing doors and hardware, preparing the surface, using the appropriate primer or coating system, sanding when required, and allowing sufficient drying and curing time. Both Benjamin Moore and Sherwin-Williams emphasize careful surface preparation as a central part of cabinet refinishing. every door and hinge location before removal. Put screws in labeled bags. Future You will be very grateful when twelve nearly identical doors are not leaning against the wall playing a game called “Guess Where I Live.”
Upgrade hardware strategically
New knobs and pulls can modernize existing cabinets in an afternoon. To avoid filling and drilling dozens of holes, look for replacements that match the existing hole spacing. A consistent finish across cabinet hardware, lighting details, and the faucet can make inexpensive updates feel intentional rather than random. Hardware replacement is frequently recommended as one of the simplest low-cost cabinet upgrades. e Countertops for Real Life, Not Just Showroom Drama
Replacing countertops can transform a kitchen, but premium materials are not mandatory. Modern laminate offers far more convincing colors and patterns than many homeowners remember, while butcher block can add warmth and may be DIY-friendly for experienced renovators. The right choice depends on moisture exposure, maintenance expectations, cooking habits, installation difficulty, and budget. current countertop is structurally sound, keeping it may be the smartest move of all. A new backsplash, painted cabinets, and updated hardware can change the surrounding visual context so dramatically that the old counter suddenly stops shouting for attention.
For an ultra-low-cost temporary refresh, specialized countertop coating systems are another option for suitable surfaces. They require careful preparation and realistic expectations, but they can postpone a full replacement while the budget recovers from its previous adventures. he Backsplash as Your Affordable Statement Piece
A backsplash covers a relatively small area, which makes it a good place to introduce personality without buying expensive material for an entire room. Classic ceramic or subway tile can be budget-friendly, while beadboard and other appropriately finished wall treatments can work in selected areas. DIY installation can reduce labor costs when the wall is sound and the installer is comfortable with layout, cutting, adhesives, spacing, and grout. timeless result, let one feature be the star. If your backsplash has bold color or pattern, quieter counters and cabinets can keep the room balanced. A kitchen does not need four focal points competing for custody of your eyeballs.
Improve Lighting Before Buying More Décor
Poor lighting can make even an expensive kitchen feel gloomy. A layered approach can include general ceiling illumination, task lighting over work areas, and decorative fixtures where appropriate. Under-cabinet lighting is especially useful because it brightens countertop work surfaces that overhead fixtures may not reach effectively. Budget-friendly puck lights and tape-style lighting are among the accessible options for certain installations. fixture replacement can produce a surprisingly large visual change, but electrical work must be approached seriously. Use qualified professionals for work beyond your competence or where local rules require licensed installation, permits, or inspection. Saving money is excellent. Saving money by creating an exciting new relationship with an electrical fire is not.
Replace Appliances Only When the Upgrade Makes Sense
A budget remodel does not require replacing every functioning appliance merely because the finishes do not match perfectly. Keeping reliable equipment can preserve thousands of dollars for improvements that have a greater effect on daily use.
When replacement is necessary, compare total purchase and operating considerations rather than buying solely for appearance. ENERGY STAR provides efficiency information for certified products, and its current guidance notes that certified electric cooking products are more efficient on average than standard models. Rebates or other incentives may also be available for qualifying products, depending on location and program eligibility. e appliance openings carefully before ordering. “Standard size” is a comforting phrase right up until the new refrigerator arrives and discovers that your cabinets were built during an era when apparently every refrigerator had the dimensions of a carry-on suitcase.
Refresh the Floor Without Automatically Removing Everything
If existing flooring is in acceptable condition, deep cleaning or professional-style restoration may be enough. When replacement is necessary, laminate and other DIY-friendly resilient flooring options can provide the look of more expensive materials at a lower cost, depending on the product and installation conditions. install a new surface blindly over moisture damage, loose material, major unevenness, or structural problems. A beautiful finish placed over a bad foundation is still a bad foundation wearing a nice outfit.
Add Storage Before Adding Square Footage
Many kitchens feel too small because storage is inefficient rather than because the room is genuinely unusable. Pull-out shelves, drawer organizers, hooks, shelf risers, open shelving, and portable islands can improve access without expanding the room. Pull-out cabinet shelves, for example, can make deep base cabinets far easier to use. buying organizers, empty the cabinets. Donate duplicate tools and remove expired pantry items. Otherwise, you may spend $300 organizing seven mystery lids and a bread machine you last used during a brief period of personal optimism.
Shop Slowly and Mix New With Existing Materials
A successful budget remodel is rarely completed by panic-buying everything on one Saturday. Compare prices, request samples, inspect clearance items, consider solid secondhand materials, and wait for major purchases when practical. Recent renovation guidance also supports a slower, phased approach as a way to spread costs and make decisions after living with earlier improvements. hand sinks, lighting, furniture-style islands, hardware, and other durable pieces can sometimes add character while controlling costs, provided they are carefully inspected for condition, compatibility, missing parts, and safety concerns. Used does not automatically mean bargain, of course. Sometimes it means “beautiful vintage object that requires seventeen custom adapters.” Measure first.
Know Which DIY Jobs Should Stay DIYand Which Should Not
Painting, basic demolition, cabinet hardware, shelving, some flooring systems, and straightforward backsplash work can be realistic DIY projects for many homeowners. Structural changes, complicated plumbing, gas work, major electrical changes, and work requiring permits or specialized expertise may belong with qualified professionals.
There is also an important safety issue in older homes. Renovation activities such as sanding, scraping, or disturbing painted surfaces can generate hazardous dust when lead-based paint is present. The EPA treats many activities that disturb painted surfaces as renovation work, so owners of older homes should understand applicable lead-safe requirements and precautions before beginning demolition or surface preparation. ould mean “do it yourself where appropriate,” not “personally attempt every licensed trade after watching six minutes of video.” Paying for professional work in high-risk areas can protect both the house and the budget from far more expensive mistakes.
A Practical Order of Operations for a Budget Kitchen Remodel
- Measure and document the room. Photograph everything and confirm dimensions.
- Set the maximum budget and contingency reserve.
- Repair leaks, damage, or safety problems first.
- Finalize colors and materials before demolition.
- Order long-lead items before removing essentials.
- Complete messy preparation and painting.
- Refinish cabinets and install hardware.
- Update counters and backsplash as planned.
- Complete lighting, plumbing, and appliance work safely.
- Finish flooring, trim, storage, and decorative details.
Planning materials before starting can reduce waste and help prevent the unpleasant moment when half the kitchen is demolished and the required product is unavailable. Home-improvement planning guides similarly emphasize estimating materials and defining the project before purchasing. ience-Based Lessons From Budget DIY Kitchen Remodels
Note: The following section reflects common patterns and practical lessons associated with DIY remodeling projects rather than a claim of personal firsthand renovation experience.
The first experience many budget remodelers encounter is that demolition feels productive while preparation feels slow. Removing a cabinet door takes minutes. Cleaning it, labeling it, repairing dents, sanding correctly, priming, painting, drying, lightly sanding again, and reinstalling it can take days. That difference explains why rushed DIY kitchens often look good in photographs taken from six feet away but become less impressive when viewed next to a sunny window. The lesson is simple: the cheapest step in a remodel is often patience.
A second common lesson is that small decisions multiply. One new faucet may inspire a new sink. The sink may require different plumbing connections. The new finish may make the cabinet hardware look dated. Suddenly a $200 update is holding meetings and hiring staff. Experienced budget-conscious renovators learn to define the scope before shopping and ask one question about every proposed purchase: What else will this force me to change?
Another frequent experience is discovering that the “ugliest” feature is not always the real problem. A dark kitchen may not need white cabinets; it may need better lighting. A cluttered kitchen may not need an addition; it may need accessible storage. A dated countertop may become perfectly acceptable after the backsplash and cabinet color change. Living with the room, identifying daily frustrations, and solving those problems first often produces better results than copying a dramatic before-and-after photo.
Budget DIY projects also teach a humbling lesson about tools. Buying every tool can destroy the savings created by DIY labor, while trying to complete every task with one screwdriver and optimism can destroy the materials. Renting specialty tools, borrowing appropriate equipment, or paying for one professional installation can sometimes be the economical choice. The goal is not to prove that you can personally perform every task. The goal is to finish with a functional kitchen and enough emotional stability to cook dinner in it.
Phased remodeling is another approach that often works well in real life. A homeowner might paint cabinets one month, install hardware the next, then save for counters or flooring later. This “slow renovation” approach can spread costs and give each decision time to prove itself before the next phase begins. It also reduces the temptation to settle for whatever is immediately available simply because the room has been unusable for three weeks. y, many successful budget remodels share one surprisingly unglamorous feature: restraint. The homeowners did not replace every serviceable item. They chose one or two upgrades with strong visual impact and supported them with careful, inexpensive improvements. Freshly painted cabinets, good lighting, simple hardware, clean counters, and organized storage can make a kitchen feel entirely different even when the plumbing remains exactly where it has always been.
That may be the most useful experience-based lesson of all. A budget kitchen remodel succeeds not when nobody can guess that you saved money, but when the room works better, feels more like home, and does not leave you paying for a trendy backsplash long after you have stopped liking it.
Conclusion: Remodel Smarter, Not Bigger
The smartest DIY kitchen remodel idea on a budget is to focus on the features that create the greatest improvement without triggering expensive structural work. Keep a functional layout. Rescue solid cabinets. Prepare surfaces properly. Improve lighting. Choose practical countertops and backsplash materials. Add useful storage. Replace appliances only when there is a real reason, and bring in qualified professionals when safety, codes, or specialized work demand it.
A successful budget kitchen is not defined by the lowest possible price. It is defined by intentional spending. When every dollar solves a problem or adds meaningful enjoyment, even a modest remodel can feel like a major transformationand your bank account will not need its own recovery room.