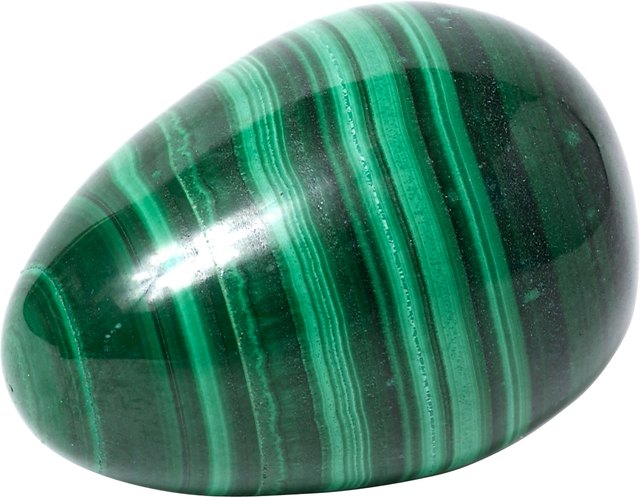
River rocks have an unfair advantage in the decorating world. They look calm, sophisticated, and perfectly at home beside a fluffy towel or a leafy houseplant. Real rocks, however, are famously disappointing in the shower. Striped river rock soap solves that problem by recreating the layered colors and softly rounded shapes of water-smoothed stones in a bar that actually produces bubbles.
This project uses melt-and-pour soap base, making it approachable for beginners and delightfully customizable for experienced crafters. The base has already undergone saponification, so you do not need to measure or handle sodium hydroxide. You will create thin, irregular soap layers, cut the finished loaf into chunky pieces, and carve each piece into a one-of-a-kind pebble.
The result is a collection of handmade stone-shaped soaps with bands of charcoal, cream, clay, moss, taupe, and translucent gray. Arrange them in a wooden bowl and guests may briefly wonder why you are decorating the bathroom with geology. That moment of confusion is part of the fun.
Why Melt-and-Pour Soap Works Well for River Rock Designs
Striped stone soap depends on clearly defined layers. Melt-and-pour soap is especially useful for this design because each colored portion can be poured separately and allowed to form a firm surface before the next band is added.
It also sets much faster than cold-process soap. There is no four- to six-week cure period, and the bars can generally be used once they have cooled, hardened, and been shaped. More importantly for this project, a finished melt-and-pour loaf can be carved with a knife, vegetable peeler, or clay-shaping tool without crumbling like a forgotten cookie at the bottom of a backpack.
The key is temperature control. A new layer that is extremely hot can melt the layer underneath, muddying the stripes. A layer that is too cool may thicken before it reaches the mold. Aim for a fluid but moderately cool pour, usually around 120 to 130 degrees Fahrenheit, while following any instructions supplied with your particular soap base.
Supplies and Ingredients
Soap Ingredients
- 32 ounces of white melt-and-pour soap base
- 8 to 16 ounces of clear melt-and-pour soap base, optional
- Soap-safe mica, oxide, clay, or activated charcoal colorants
- Skin-safe fragrance oil or essential oil, optional
- 91% or 99% isopropyl alcohol in a fine-mist spray bottle
A combination of white and clear base creates greater visual depth. White base produces opaque, mineral-like bands, while clear base can be tinted into smoky, translucent layers that resemble quartz or wet stone.
For a natural river-rock palette, choose four to six colors rather than attempting to recreate the entire paint aisle. Good combinations include cream, warm taupe, charcoal gray, stone green, muted brown, and a small amount of black. Soap-safe mica provides gentle shimmer, oxides create earthy opaque shades, and activated charcoal creates gray or black.
Do not substitute candle dye, food coloring, craft pigment, or mica intended only for resin. A product that is safe for one craft is not automatically suitable for a rinse-off body product. Check the supplier’s documentation and confirm that every colorant and fragrance is approved for soap or cosmetic use.
Equipment
- Silicone loaf mold or rectangular food-safe silicone mold
- Microwave-safe glass measuring cups or heat-resistant pouring pitchers
- Digital kitchen scale
- Infrared or probe thermometer
- Sharp knife or soap cutter
- Vegetable peeler, paring knife, or clay-carving tool
- Small spoons or silicone spatulas
- Cutting board
- Clean towels for tilting the mold
- Plastic wrap, shrink wrap, or airtight bags
Use equipment dedicated to soap and craft projects whenever possible. Fragrance oil has a remarkable talent for lingering in plastic tools and announcing itself in future recipes.
Plan the Striped River Rock Color Palette
Before melting anything, study a few real stones or reference photographs. Natural rocks rarely contain perfectly equal stripes. Their bands change thickness, bend slightly, disappear, and reappear. That irregularity is what makes the finished soap convincing.
A dependable palette might include:
- Base color: soft cream or pale gray
- Primary stripe: charcoal or slate
- Secondary stripe: muted olive or moss
- Warm accent: tan, clay, or brown
- Highlight: translucent white or smoky clear soap
Keep the shades muted. Highly saturated blue, red, and purple can make the bars look more like candy than stone. That is not necessarily a tragedy, but it does change the project from “quiet riverbed” to “intergalactic jawbreaker.”
How to Make Striped River Rock Soap Step by Step
Step 1: Prepare the Workspace
Clean and dry the mold, cutting board, measuring cups, and utensils. Place the silicone loaf mold on a stable tray so you can move it without bending the sides. Set the alcohol spray, thermometer, towels, and colorants within reach.
Although melt-and-pour soap does not require raw lye handling, the melted base can still cause burns. Work carefully, keep children and pets away from hot containers, and use oven mitts when necessary.
Step 2: Cut and Divide the Soap Base
Cut the soap base into small, evenly sized cubes. Smaller cubes melt more consistently and reduce the temptation to overheat the mixture while waiting for one stubborn boulder to surrender.
Divide the cubes among several heat-safe containers according to your color plan. The amounts do not need to be identical. In fact, varied quantities create stripes with more realistic differences in thickness.
For a 40-ounce batch, you might divide the base into approximately:
- 12 ounces cream
- 8 ounces pale gray
- 7 ounces charcoal
- 6 ounces taupe
- 4 ounces moss green
- 3 ounces translucent smoky gray
Step 3: Melt the First Portion
Heat the first container in the microwave in short bursts, stirring gently between each interval. Begin with approximately 20 to 30 seconds, then use shorter bursts as the remaining cubes soften. A double boiler on low heat also works well.
Stop heating when the last small pieces can be dissolved through gentle stirring. Boiling or scorching the base can cause moisture loss, bubbles, discoloration, an unpleasant odor, or a rubbery texture.
Step 4: Add Color and Fragrance
Add a small amount of soap-safe colorant and stir slowly. It is easier to deepen a pale gray than to rescue a batch that suddenly resembles printer toner. Start with a pinch of mica or a small amount of premixed liquid color, then adjust gradually.
If using fragrance, weigh it and follow the supplier’s tested usage rate for the exact product. Divide the total fragrance among the colored portions so the scent remains reasonably consistent throughout the finished soap. Unscented soap is also an excellent option, particularly when the visual design is the main attraction.
Choose fragrances that match the river-rock theme, such as cedar, rain, mineral water, eucalyptus, moss, fir, sage, or a restrained citrus blend. Avoid assuming an essential oil is safe merely because it is natural. Every fragrance material has its own recommended usage limits.
Step 5: Pour the First Layer
Pour the first color into the mold. The layer can be anywhere from one-eighth inch to three-quarters inch thick. Spray the surface lightly with isopropyl alcohol to pop bubbles.
Allow the soap to cool until it develops a firm skin. It should support another layer without breaking, but it does not need to become completely cold. Depending on the room temperature and layer thickness, this may take several minutes.
Step 6: Create Slanted and Uneven Stripes
For diagonal mineral bands, prop one side of the mold on a folded towel before pouring. Once that layer has set, tilt the mold in the opposite direction for the next stripe. Change the angle occasionally and leave some layers level.
This controlled inconsistency is what makes the design look geological. Perfectly parallel bands can be attractive, but irregular bands better imitate sediment, quartz veins, and the strange little lines that make an ordinary rock worthy of being carried home in a pocket.
Step 7: Add the Remaining Layers
Melt, color, and scent the next portion. Let it cool to approximately 120 to 130 degrees Fahrenheit or to the layering temperature recommended by the base manufacturer.
Lightly scratch the surface of a fully hardened layer with a fork or skewer if necessary. Spray it generouslybut not swimming-pool generouslywith isopropyl alcohol. Pour the new soap slowly over the back of a spoon or spatula to soften the impact.
Spray the newly poured surface to remove bubbles. Continue alternating colors and varying the thickness of the layers until the mold is full.
For more natural results, repeat one or two colors. A thin cream stripe between charcoal and brown can create the appearance of a quartz vein. A smoky translucent layer between opaque gray bands gives the soap depth when light passes through the edges.
Step 8: Cool the Layered Loaf Completely
Leave the filled mold undisturbed at room temperature until the soap is completely firm and cool. A medium loaf may need four to six hours, although leaving it overnight is often easier.
Avoid placing the loaf in the freezer. Rapid chilling may make unmolding easier, but it can also encourage surface condensation when the soap returns to room temperature. Patience is less exciting, but it rarely causes moisture droplets.
Step 9: Cut the Loaf Into Rock-Sized Pieces
Remove the loaf from the mold and place it on a clean cutting board. Cut it into irregular blocks measuring approximately two to four inches across. Vary the sizes so the finished collection looks gathered rather than manufactured.
Plan the direction of each cut before lowering the knife. Cutting across the layered loaf reveals bands on the face of the soap. Cutting at a diagonal exposes longer, sweeping stripes. Experiment with both orientations.
Step 10: Carve Each Piece Into a River Rock
Use a vegetable peeler or small paring knife to remove sharp corners. Turn the soap continuously as you work, shaving away thin curls rather than taking deep chunks. The goal is not a perfect oval. Real river rocks have flattened areas, asymmetrical curves, and occasional stubborn corners.
Round the top and bottom edges, then create a few shallow flat planes. A clay-carving tool or the back of a spoon can help soften small ridges. Save the scraps; they can be melted into another batch or chopped into decorative embeds.
Carve over a tray because tiny soap curls are surprisingly adventurous. Without containment, they will migrate across the table, onto the floor, and possibly into rooms where no soap project has ever taken place.
Step 11: Smooth and Polish the Surface
Rub each carved soap with clean, warm hands to soften minor tool marks. For a smoother finish, wipe it briefly with a barely damp lint-free cloth. Use only enough moisture to refine the surface; soaking the bar can make it slippery and erase crisp color boundaries.
A quick, fine mist of alcohol may also help remove smudges. Let the soap dry completely before packaging.
How to Prevent the Soap Layers From Separating
Layer separation is the most common problem in striped melt-and-pour soap. It usually occurs when the previous layer becomes completely cold and smooth, the alcohol spray is skipped, or the next layer is poured at an unsuitable temperature.
Use these preventive steps:
- Allow each lower layer to form a sturdy skin.
- Do not wait several hours between pours unless you roughen the surface.
- Spray isopropyl alcohol immediately before adding the next layer.
- Keep the next pour warm enough to flow but cool enough not to melt the stripe beneath it.
- Pour gently instead of dropping hot soap from several inches above the mold.
- Let the finished loaf cool completely before cutting it.
If a band begins separating during carving, brush or spray a little alcohol between the surfaces and apply a small amount of freshly melted clear soap as adhesive. Press the sections together and allow them to harden before continuing.
Troubleshooting Common River Rock Soap Problems
The Colors Blended Together
The upper layer was probably poured too hot, or the lower layer had not formed a firm skin. Let subsequent portions cool longer and verify the temperature before pouring.
The Soap Contains Many Bubbles
Stirring too vigorously can introduce air. Stir slowly, avoid whisking, and spray the surface with alcohol immediately after each pour.
The Soap Has White Moisture Spots
This is often glycerin dew caused by the soap attracting moisture from humid air. Let the bars dry, then package them tightly. Working in an air-conditioned or dehumidified room can also help.
The Carved Soap Looks Too Perfect
Create a few uneven planes, flatten one side, or remove more material from one end. Nature does not manufacture matching bath sets.
The Soap Feels Rubbery
The base may have been overheated or combined with too much fragrance, oil, or another additive. Melt only until fluid and keep added ingredients within the manufacturer’s recommended limits.
Packaging, Storage, and Gift Ideas
Melt-and-pour soap contains glycerin that can attract atmospheric moisture. Once the carved stones are completely cool and dry, wrap them tightly in plastic wrap, shrink wrap, or another airtight material. Store them in a cool, dry location away from direct sunlight.
For gifts, arrange three stones in a small wooden box with shredded paper, a cotton washcloth, or a draining soap dish. Include a label identifying the product as soap, along with its net weight and ingredient information when appropriate.
If you plan to sell the soaps in the United States, research the rules that apply to your formulation and marketing claims. Whether a product is legally treated as conventional soap or as a cosmetic may depend on its ingredients, intended use, and the claims made on its packaging. Statements about treating acne, eczema, infection, or another medical condition may place the product in a different regulatory category.
My Experience Making Striped River Rock Soap
The first time I made striped river rock soap, I approached the layering process with the confidence of someone who had watched several tutorials and therefore believed temperature was merely a polite suggestion. I poured a dark gray layer over a pale cream band while the gray soap was still extremely hot. Instead of producing a dramatic stripe, it melted a crater into the cream and created a cloudy swirl.
The soap was perfectly usable, but it looked less like a river rock and more like a weather system photographed from space. That batch taught me that an inexpensive thermometer is not an optional accessory for detailed melt-and-pour work. It is the difference between distinct mineral bands and a mold full of decorative fog.
My second lesson involved color. I initially mixed six bold shades because they looked attractive in their containers. Once poured together, the combination was much too bright. The finished pieces resembled polished candy or fantasy gemstones rather than stones found beside a river. They were cheerful, but no reasonable person would have mistaken them for geology.
On later batches, I began mixing tiny amounts of complementary colors into each shade. A trace of brown softened green. A touch of charcoal muted blue. Cream became more believable after a speck of tan was added. These quieter shades worked together and made the thin white bands appear surprisingly realistic.
Carving also required practice. My first instinct was to create symmetrical ovals, carefully trimming each side until every piece looked nearly identical. Unfortunately, identical stones looked mass-produced. The best pieces came from working quickly and allowing the original block to influence the final shape. One bar became flat and wide, another remained thick at one end, and a third developed a curved stripe after being cut diagonally through the loaf.
A vegetable peeler turned out to be my favorite shaping tool. It removed thin, controlled curls and produced smooth transitions between the flat faces. A paring knife was helpful for cutting away larger corners, but it could remove too much material in one enthusiastic motion. Soap carving rewards restraint. You can always take off another sliver; putting one back requires melted soap, alcohol, and a willingness to pretend the repair was intentional.
I also discovered that thin layers usually look more convincing than a loaf made entirely from thick bands. My favorite combination used a broad gray foundation, a narrow cream line, a medium taupe band, another hair-thin cream stripe, and a translucent smoky layer. After carving, the narrow cream lines curved around the sides and looked like mineral veins.
The scraps became useful rather than wasteful. I sorted the larger shavings by color and added them to clear melt-and-pour soap as stone-like chips. Smaller scraps were remelted into a mottled gray base. The recycled batch did not have the clean stripes of the original, but it made excellent “granite” soap.
Packaging mattered more than I expected. I once left several finished stones unwrapped overnight during humid weather. By morning, the surfaces had developed tiny beads of glycerin dew. The bars were not ruined, but the polished finish had disappeared. Since then, I let the stones dry after carving and wrap them as soon as the surface is completely cool.
The most satisfying part of the project is the final arrangement. A group of six or eight soaps in a shallow bowl looks remarkably like a collection of smooth stones. People pick them up, turn them over, and inspect the stripes before realizing what they are. Then they usually smell them, which is not a standard response to ordinary landscaping material.
Every batch improves when I resist perfection. Uneven pours, changing angles, repeated colors, and asymmetrical carving create the strongest illusion. The project succeeds not because every stripe follows a rigid plan, but because each finished bar looks as though water, sediment, and time shaped it instead of a microwave and a silicone mold.
Conclusion
Learning how to make striped river rock soap is an enjoyable way to practice melt-and-pour layering, temperature control, color blending, and hand carving. Begin with a restrained stone-inspired palette, pour layers at controlled temperatures, use alcohol to improve adhesion, and let the loaf cool completely before cutting.
Do not worry about producing matching stones. Irregular bands and asymmetrical shapes are the details that make the collection believable. Once wrapped and stored properly, the finished soaps can become bathroom decor, handmade gifts, craft-fair products, or extremely clean additions to a rock collection.
SEO Information
Note: This tutorial uses pre-saponified melt-and-pour soap for an accessible project without raw lye handling. Always follow the soap-base, fragrance, and colorant suppliers’ safety instructions and tested usage limits.