
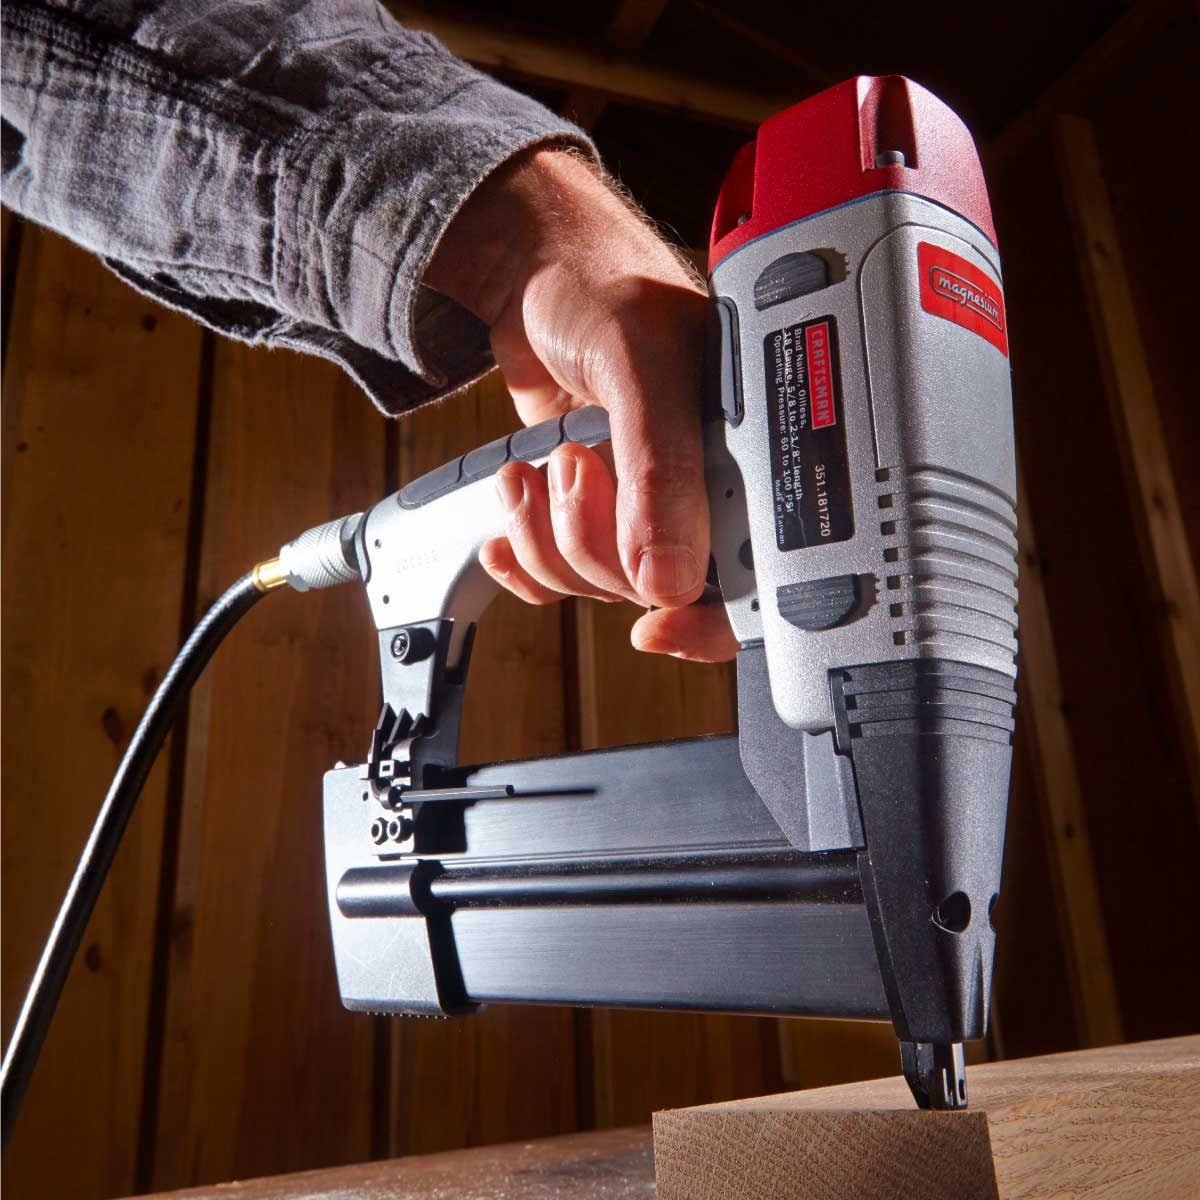
A finish nailer can turn a slow trim project into a satisfying afternoon of rapid-fire progress. Baseboards go up faster, window casing stays aligned, and crown molding stops behaving like it has a personal grudge against you. However, speed is only helpful when the nails land in the correct place, sink to the proper depth, and remain inside the wood instead of unexpectedly appearing through an edge.
Learning a few basic finish nailer tips can dramatically improve both safety and results. The essential skills include selecting the correct nail gauge, adjusting the depth, controlling air pressure, positioning the tool, preventing wood splits, clearing jams safely, and knowing when a finish nailer is not the right tool for the job.
This guide synthesizes safety and operating guidance from OSHA and NIOSH, along with documentation from leading tool manufacturers and practical information from major American home-improvement and woodworking publications.
What Is a Finish Nailer?
A finish nailer is a powered fastening tool designed to drive relatively slim nails into trim, molding, cabinets, furniture components, stair parts, and other finished woodwork. Unlike framing nails, finish nails have smaller heads that can be countersunk and concealed with wood filler.
Finish nailers may be pneumatic, battery-powered, or powered by a combination of fuel and battery technology. Pneumatic models are generally lightweight and fast, although they require an air compressor and hose. Cordless nailers eliminate the compressor and provide excellent mobility, but the battery and internal driving mechanism usually make them heavier.
Modern tools commonly include adjustable drive depth, selectable firing modes, no-mar nose tips, dry-fire lockouts, tool-free jam access, belt hooks, and work lights. These features are not merely decorative additions designed to make the tool look like a small spaceship. Used properly, they help protect the work surface and improve fastener placement.
Choose the Correct Nail Gauge
The first step is matching the nailer and fastener to the material. Nail gauge works backward: a lower gauge number indicates a thicker nail.
15-Gauge Finish Nails
A 15-gauge finish nail is thick and provides strong holding power. These nails are commonly used for heavier casing, substantial baseboards, door jambs, stair components, hardwood trim, and other applications where strength matters more than leaving the smallest possible hole.
Most 15-gauge finish nailers use angled magazines. The angle makes it easier to reach into corners, along walls, and beneath tight trim profiles. The trade-off is a larger nail hole and a greater chance of splitting delicate material.
16-Gauge Finish Nails
A 16-gauge nailer is the all-purpose middleweight of the finish-nailer world. It offers good holding strength while leaving a smaller hole than a 15-gauge nail. It is a practical choice for baseboards, window and door casing, crown molding, chair rail, cabinet assembly, and general interior trim.
Many 16-gauge tools accept nails from approximately 1 inch to 2-1/2 inches long, although the exact range depends on the model. Straight magazines are common, while angled versions provide easier access in confined areas.
18-Gauge Brad Nails
An 18-gauge brad nailer is technically different from a heavier finish nailer, but the two tools are frequently compared. Brad nails are thinner and leave smaller holes, making them suitable for narrow molding, decorative trim, cabinet details, crafts, and pieces that might split under a larger fastener.
The downside is reduced holding power. For structural support or thick, heavy trim, an 18-gauge brad may be too polite for the assignment. It may hold the work temporarily while adhesive cures, but it should not automatically replace a 15- or 16-gauge finish nail where greater strength is required.
Select the Right Nail Length
The nail must pass through the trim and penetrate deeply enough into solid wood to hold it securely. Before loading the nailer, consider the thickness of the trim, drywall, paneling, and any gap between the trim and framing.
For example, a short brad may adequately fasten thin decorative molding directly to a wood cabinet. The same fastener may be ineffective when attaching a thick baseboard through 1/2-inch drywall. In that situation, a longer finish nail is needed to reach the wall stud or bottom plate.
Longer is not always better. An unnecessarily long nail can strike hidden plumbing, electrical wiring, metal protection plates, masonry, or another fastener. It can also curve with the wood grain and exit through the face or edge of the workpiece. Check the wall, floor, cabinet, or assembly before firing, especially in renovation work.
Read the Manual Before Loading the Tool
Finish nailers look similar, but operating procedures vary. The manual identifies the approved nail gauge, collation angle, fastener length, air-pressure range, battery requirements, lubrication instructions, trigger modes, and correct jam-clearing process.
Never assume that nails fitting inside the magazine are automatically compatible. The wrong collation style or angle can create feeding problems, jams, damage, and inconsistent driving.
The manual also explains whether a pneumatic tool requires oil. Some nailers need a few drops of manufacturer-approved pneumatic oil, while others are specifically designed to operate without routine lubrication. Adding random oil to an oil-free tool may stain finished wood or damage internal components.
Wear Appropriate Safety Equipment
At a minimum, wear safety glasses with side protection. A finish nail can strike a knot, another fastener, metal hardware, or dense grain and deflect in an unpredictable direction. Wood fragments and airborne debris can also be launched by the tool or pneumatic exhaust.
Hearing protection is sensible during repeated fastening, especially indoors where sharp tool noise reflects from walls. Keep other people out of the immediate work area, and never allow anyone to stand behind or beside the material where a nail could emerge.
OSHA and NIOSH warn that nail guns can cause severe injuries. Their guidance favors a full sequential trigger because it reduces unintended discharge and double firing compared with contact-actuation operation.
Use Sequential Firing for Controlled Work
Many finish nailers provide sequential and contact-actuation modes. In sequential mode, the nose must contact the workpiece before the trigger is pulled for each nail. This encourages deliberate placement and is the preferred mode for most trim work.
Contact actuation, often called bump firing, allows the operator to hold the trigger and fire whenever the contact tip touches the work. It can increase speed, but it also raises the possibility of double firing or discharging a nail when the tool bumps against an unintended surface.
Finish carpentry rewards precision more than raw speed. A nail placed half an inch from its target creates more work than the fraction of a second saved by rushing.
Test the Nailer on Scrap Material
Before touching the finished trim, make several test shots into scrap pieces that match the actual project materials. Stack the scrap over a similar backing material when possible. Testing only on a soft pine offcut may provide misleading results if the real installation involves oak, maple, MDF, or layered drywall.
Evaluate three things:
- Does the nail head sit slightly below the surface?
- Does the nail penetrate deeply enough to hold?
- Does the tool leave dents, cracks, or excessive marks?
If the head stands above the surface, increase the drive depth gradually. If it disappears into a crater, reduce the depth. The goal is a small, clean recess that accepts filler without crushing the surrounding fibers.
Adjust Depth Before Raising Air Pressure
On a pneumatic finish nailer, air pressure and the tool’s depth adjustment both influence nail depth. Begin near the lower end of the manufacturer’s approved pressure range and use the depth control for fine adjustments.
Increase compressor pressure only when the nailer cannot consistently drive the approved fastener into the material. Never exceed the tool’s rated pressure. Excessive pressure can increase recoil, damage seals, dent trim, and drive nails much deeper than necessary.
Different woods require different settings. A setting that works beautifully in soft pine may leave proud nail heads in dense hardwood. Recheck the setup whenever the material, nail length, compressor, battery charge, or backing changes. Manufacturer specifications vary; for example, one pneumatic 16-gauge model lists an operating range of 70 to 120 PSI, demonstrating why the tool-specific manual should be the final authority.
Keep the Nailer Square to the Surface
Place the contact tip firmly and squarely against the work before firing. Tilting the tool can cause the nail head to remain exposed, create an elongated dent, or send the fastener toward the edge of the board.
Grip the handle securely, but do not lean on the tool with your entire body weight. Excessive pressure can compress or dent soft molding. Allow the contact mechanism to engage, keep the nose steady, and pull the trigger once.
When working close to an edge, orient the nailer so a possible deflection is directed toward the thicker portion of the material rather than toward the visible edge. Wood grain can redirect a nail, so keep hands away from the expected path and never hold a small piece directly behind the fastening point.
Plan Nail Placement Before Firing
Identify studs, framing, cabinet sides, cleats, or other solid backing before installing the trim. Marking stud locations with small pieces of painter’s tape can prevent the familiar renovation mystery of firing six nails and discovering that all six entered nothing but drywall.
Place nails where they will provide support without attracting attention. On baseboards, nails are often positioned near the upper portion of the board and lower areas where solid backing is available. On casing, place fasteners where they can enter the jamb or wall framing without landing too close to a mitered corner.
Keep nails away from board ends whenever possible. If fastening near an end is unavoidable, use a thinner fastener, move slightly farther from the edge, or predrill a small pilot hole for a hand-driven finish nail.
Use a No-Mar Tip on Finished Surfaces
A no-mar tip is a small protective cover fitted over the nailer’s contact nose. It reduces scratches and dents on painted trim, stained wood, cabinets, and other visible surfaces.
Inspect the tip regularly. A worn, dirty, or damaged pad can trap grit and drag it across the finish. Keep spare tips available because these tiny accessories have a remarkable talent for disappearing into the same alternate dimension that collects pencils and tape measures.
Some nailers store replacement tips directly on the magazine, making them easier to keep nearby.
Clamp or Support Loose Workpieces
Do not rely on one hand to hold a small or unstable part while the other hand operates the nailer. Clamp the workpiece or secure it on a bench. A nail can pass through thin stock, follow the grain, or exit from an unexpected location.
When installing long molding, use temporary support blocks, clamps, or a helper to maintain alignment. Apply adhesive where appropriate, position the trim, press it firmly into place, and then fasten it. The nail should secure the joint, not pull a badly bowed board across a large gap through sheer optimism.
Avoid Knots, Metal, and Existing Fasteners
Do not intentionally fire into knots, screws, metal brackets, nail plates, masonry, or existing nails. A fastener may bend, ricochet, jam, or redirect through the material. Paslode’s operating guidance specifically warns against driving fasteners into knots or on top of other fasteners.
When fastening reclaimed lumber, inspect it carefully for embedded metal. A handheld detector can be useful when old nails or screws may be hidden below the surface.
Clear Jams Safely
Stop immediately if the tool makes an unusual sound, fails to drive, or leaves a fastener partly exposed. Do not repeatedly pull the trigger in the hope that the machine will reconsider its life choices.
- Remove your finger from the trigger.
- Disconnect the air hose, remove the battery, or disable the power source according to the manual.
- Remove remaining fasteners from the magazine when instructed.
- Open the jam-clearing latch or nose assembly.
- Remove the bent fastener using the recommended procedure.
- Inspect the driver, contact tip, magazine, and fasteners before reconnecting power.
Never place your face over the nose while clearing a jam. Do not pry against delicate components or operate the tool with a damaged trigger, contact element, magazine, or guard. Tool-free jam latches simplify the process, but they do not eliminate the need to disconnect power first.
Maintain the Tool Properly
Wipe dust and adhesive residue from the nailer after use. Inspect the magazine, nose, trigger, safety contact, air fitting, cord, battery connection, and fasteners. Replace damaged no-mar pads, seals, hoses, fittings, or other components with approved parts.
For pneumatic models, drain moisture from the compressor tank according to the compressor instructions. Water in the air system can contribute to corrosion and unreliable performance. Check hoses for abrasion, cuts, bubbles, and damaged couplers.
Store the nailer unloaded in a dry case or cabinet. Remove the battery from cordless models when storing them for an extended period, following the manufacturer’s battery guidance. Never carry or hang a powered nailer with a finger resting on the trigger.
Common Finish Nailer Mistakes
Using Too Much Power
More pressure does not automatically produce better fastening. Excessive force creates deep holes, crushed fibers, larger filler patches, and unnecessary wear.
Using the Wrong Fastener
A nail may appear to fit but still have the wrong angle, head, coating, gauge, or collation style. Use only fasteners approved for the specific nailer.
Nailing Without Solid Backing
Drywall does not provide meaningful holding strength for trim. Locate framing, jambs, blocking, cabinet panels, or other appropriate backing.
Ignoring Material Movement
Long trim pieces expand, contract, bow, and twist. Dry-fit the material, correct serious warping, and use adhesive or proper joinery where needed rather than attempting to solve every problem with additional nails.
Filling Holes Too Early
Inspect alignment and joint fit before filling nail holes. Adjustments are easier before the fasteners disappear beneath putty, primer, and two confident coats of paint.
Practical Experience: Lessons Learned From Using a Finish Nailer
The most useful finish nailer lessons often appear during ordinary projects rather than in dramatic workshop emergencies. One of the first lessons is that a test shot is never wasted. During a baseboard installation, a nailer may work perfectly on a pine offcut but behave differently when the trim is pressed against drywall and a framing stud. Testing the complete material stack reveals whether the nail is long enough and whether the depth setting is realistic.
Another lesson is to slow down near corners. Long, straight runs create confidence, and confidence can quickly turn into carelessness. Inside corners, outside miters, and narrow casing legs require deliberate positioning. A misplaced nail near a miter can split the tip, open the joint, or emerge through the side. Holding the joint with a clamp or painter’s tape before fastening often produces a cleaner result than trying to squeeze two moving pieces together while balancing a nailer.
It is also worth keeping several nail lengths nearby. Using one length for an entire room may seem efficient, but trim conditions change. A short fastener may be suitable for attaching a small return or decorative detail, while a longer nail may be required to pass through thick molding and drywall into framing. Labeling the boxes clearly prevents accidentally loading a magazine with the wrong length.
Good lighting makes a surprising difference. Under weak light, it is easy to miss a pencil mark, place a nail into a shadow line, or overlook a small gap between the trim and wall. A built-in LED helps, but a portable work light provides a broader view and exposes uneven joints before they become permanent.
Hose management deserves attention when using a pneumatic nailer. A hose dragged around a corner can pull the tool sideways at the exact moment the trigger is pressed. Running the hose over a shoulder may keep it away from the work, but it should never wrap around the body or create a trip hazard. Cordless tools eliminate the hose, although their greater weight becomes noticeable during overhead crown-molding work. Switching hands, taking short breaks, and using a platform at the correct height can improve control.
Cleanliness also affects finished work. Dust trapped beneath the no-mar tip can scratch a painted board. Oily exhaust from an incorrectly lubricated pneumatic tool can stain unfinished wood. Adhesive on the contact tip can transfer from one piece to another. A quick inspection between rooms is faster than repairing a visible blemish later.
Finally, a finish nailer should not replace proper fitting. A tight cope, clean miter, straight cut, and well-supported board will still look good with only a few carefully positioned nails. A poorly fitted joint usually remains poor even after being surrounded by fasteners. The nailer is excellent at holding accurate work in place, but it is not a magic wand with an air fitting.
Conclusion
The best basic finish nailer tips are straightforward: match the nail gauge and length to the material, locate solid backing, test every setup on scrap, adjust depth carefully, keep the tool square, and use sequential firing for controlled placement. Protect finished surfaces with a clean no-mar tip, support loose workpieces, avoid knots and hidden metal, and disconnect the power source before clearing a jam.
When used with patience, a finish nailer provides fast, clean, professional-looking results. The goal is not to fire the greatest number of nails in the shortest possible time. The goal is to install trim securely while leaving as little evidence of the fastening process as possible.
Note: Operating procedures, approved fasteners, pressure limits, maintenance requirements, and safety features vary by model. Always follow the instructions supplied with your specific finish nailer and air compressor.











