
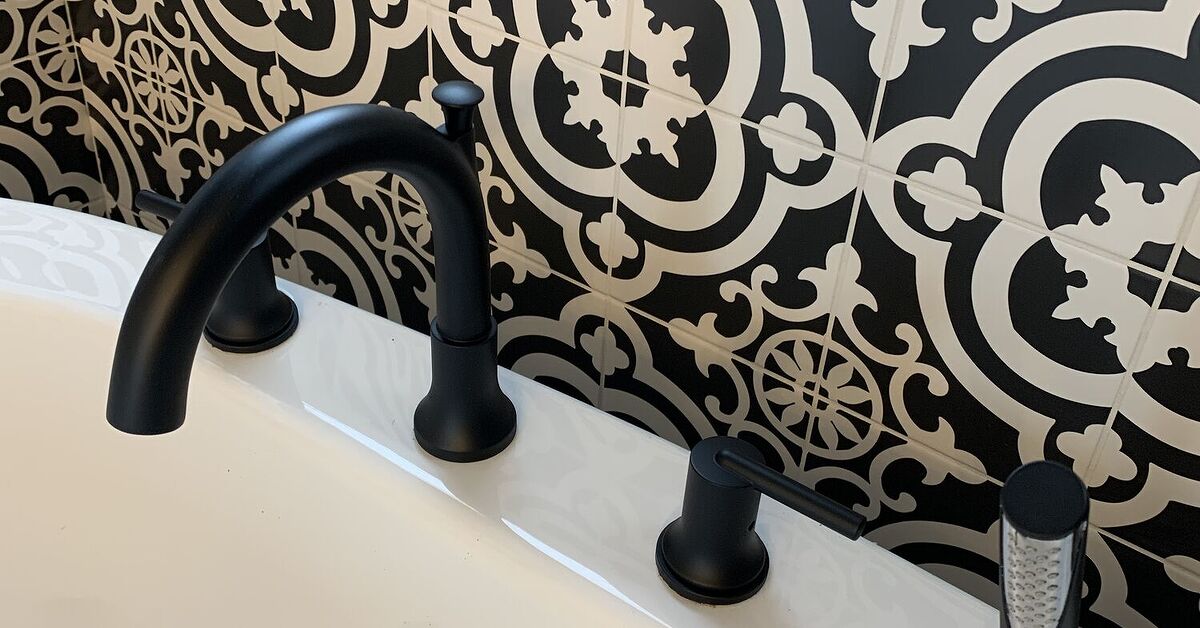
A bathtub tap can make a bathroom look polished, dated, expensive, neglected, or suspiciously “landlord special” in about three seconds. It is a tiny fixture with a surprisingly loud design voice. When the finish is clean and coordinated, the whole tub area feels fresher. When it is spotted, scratched, corroded, or wearing the ghost of 1998 brass, the bathroom starts whispering, “Please help me.”
The good news is that a bathtub tap refresh does not always require a full remodel, a plumber on speed dial, or a dramatic goodbye scene with your savings account. Sometimes, the right cleaning method, a smarter finish choice, a replacement trim kit, or carefully selected spray paint can update the look beautifully. The bad news? The wrong paint can turn your tub faucet into a peeling, sticky, flaky little art project that looks worse than when you started.
This guide walks through practical ways to refresh a bathtub tap, when painting makes sense, when replacement is smarter, and exactly what paint to avoid. Because in a wet bathroom, paint is not just decoration. It is either a durable finishor future confetti.
Why a Bathtub Tap Refresh Makes Such a Big Difference
Bathroom updates are often judged by big-ticket items: the tub, tile, vanity, lighting, and mirror. But hardware is the jewelry of the room. A bathtub faucet, shower trim, drain cover, overflow plate, and handles create the finishing layer that tells the eye whether the space is intentional or accidentally trapped in a renovation time capsule.
A refreshed bathtub tap can help tie together a bathroom color scheme, modernize old tile, reduce the visual clutter of mixed finishes, and make a basic tub area look more custom. For example, swapping tired chrome for matte black can create contrast against white tile. Brushed nickel softens cool gray bathrooms. Warm brass can make a plain white tub feel more boutique hotel and less “apartment inspection checklist.”
However, bathtub taps live a hard life. They face constant moisture, soap residue, hard-water minerals, cleaning sprays, fingerprints, and daily handling. That means any refresh must be chosen for durability, not just looks. A pretty finish that cannot handle water is like wearing paper shoes in a thunderstorm: bold, but not wise.
Start With Cleaning Before You Reach for Paint
Before assuming your bathtub tap needs paint, give it a serious cleaning. Many “ugly” faucets are not actually ruined; they are covered in mineral deposits, soap scum, body oil, toothpaste mist, and the mysterious bathroom film that appears even when everyone claims they “barely use that tub.”
Use gentle soap first
For most faucet finishes, the safest first step is warm water, mild dish soap, and a soft microfiber cloth. Clean the surface, rinse thoroughly, and dry it immediately. Drying matters because water left to evaporate can leave mineral spots, especially in hard-water areas.
Be careful with vinegar
White vinegar can help dissolve mineral buildup on some chrome and stainless finishes, but it should be used carefully. Test a small hidden area first, dilute it with water, and do not let it sit too long. Vinegar can damage certain finishes, including some nickel, bronze, brass, stone, and specialty coatings. The internet loves vinegar like it personally invented cleanliness, but vinegar is still an acid. Acids can misbehave.
Avoid harsh scrubbing
Never attack a faucet with steel wool, gritty scouring pads, abrasive powders, or aggressive brushes. They can scratch the finish, remove protective coatings, and create dull patches that no amount of enthusiastic polishing will fix. Once a finish is scratched, it tends to collect grime faster, which is deeply unfair but very bathroom-like.
Refresh Option 1: Polish and Re-Caulk the Tub Area
Sometimes the tap is not the only problem. Old caulk, stained grout, rusty drain trim, and cloudy glass can make even a decent faucet look tired. A low-cost bathtub tap refresh often starts around the tap, not on it.
Remove old, cracked caulk around the tub and replace it with fresh, mildew-resistant bathroom caulk. Clean the overflow plate and drain cover. Replace missing screw caps. Scrub the tile or tub surround with the correct cleaner for the material. These small steps make the tap look more intentional because the surrounding area no longer looks like it gave up during spring cleaning of 2017.
This is also the safest refresh route for renters or homeowners who do not want to risk damaging a working fixture. Clean, dry, polish, re-caulk, and reassess. Many bathrooms look dramatically better after this “boring” prep work. Boring often wins in home improvement.
Refresh Option 2: Replace the Bathtub Tap Trim
If your bathtub tap is heavily corroded, peeling, leaking, or mechanically worn out, replacement is usually better than paint. Paint does not fix leaks. Paint does not repair a failing cartridge. Paint does not turn a loose handle into quality plumbing. Paint is cosmetic; plumbing problems are not impressed by cosmetics.
For tub-and-shower combinations, you may be able to replace the trim kit while keeping the existing valve inside the wall, but compatibility is critical. Different brands and valve models are not universally interchangeable. A new handle that “almost fits” is not a renovation strategy; it is a future emergency.
Before buying new trim, identify the faucet brand and valve type. Check the manufacturer’s model information, compare screw placement, and look at the shape of the cartridge or stem. When in doubt, ask a plumbing professional or bring the old part to a reputable hardware store. Replacing compatible trim can deliver a cleaner, longer-lasting result than painting, especially in busy family bathrooms.
Refresh Option 3: Spray Paint the Bathtub Tap Carefully
Painting a bathtub tap can work as a budget-friendly cosmetic update, especially for a guest bathroom, low-use tub, photo-ready makeover, or temporary refresh before a larger renovation. But it is not magic. The finish depends heavily on prep, paint choice, curing time, and how gently the fixture is used afterward.
The best candidates for paint are fixtures that are structurally sound, not actively leaking, and not deeply pitted. Chrome, nickel, and brass-toned surfaces can be painted, but they must be cleaned and scuffed so the coating has something to grip. A glossy faucet surface is like a skating rink for paint. Without sanding or primer, the paint may slide, chip, or peel.
Basic steps for painting a bathtub tap
First, clean the tap thoroughly to remove soap scum, oil, and mineral buildup. Next, remove the fixture if possible. Painting a removed faucet is usually cleaner and easier than painting in place. If removal is not practical, tape aggressively. Cover the tub, tile, wall, drain, showerhead, and anything else that does not want to become “accidentally matte black.” Overspray travels. It has ambition.
Lightly sand the faucet with fine-grit sandpaper or a sanding sponge to dull the shine. Wipe away dust with a clean cloth. Apply a metal primer or bonding primer suitable for the faucet material. After the primer dries, apply several thin coats of spray paint designed for metal or multi-surface use. Keep the can moving and avoid heavy coats. One thick coat is how drips are born.
Some DIYers add a clear protective topcoat for extra durability, but the products must be compatible. Mixing random primer, paint, and clear coat can cause wrinkling, tackiness, or poor adhesion. Always follow the product label for recoat windows, drying time, temperature, humidity, and cure time.
What Paint to Avoid on a Bathtub Tap
This is the section that saves you from a faucet that looks good for exactly one Instagram photo and then starts molting. Not all paint belongs on bathroom fixtures. Some paint is wonderful on walls, furniture, or crafts but absolutely wrong for a bathtub tap.
Avoid regular wall paint
Interior latex wall paint is not designed for metal faucets, constant water contact, or repeated handling. Even bathroom wall paint with mildew resistance is still wall paint. It may be washable on drywall, but that does not mean it can survive on a wet metal tap. On a faucet, it can peel, bubble, soften, or scratch off easily.
Avoid craft acrylic paint
Acrylic craft paint is fun for pumpkins, picture frames, and school projects that somehow require glitter at midnight. It is not a reliable bathtub tap finish. It lacks the bonding strength and moisture resistance needed for high-touch plumbing hardware. Even with a clear coat, it is usually too fragile for daily bathroom use.
Avoid chalk paint
Chalk paint looks charming on furniture, but it is a poor choice for a faucet. It is porous, soft compared with enamel coatings, and usually needs wax or sealer. Wax and wet bathtub hardware are not best friends. A chalk-painted tap may look velvety for a moment, then collect water marks, soap residue, and regret.
Avoid basic decorative metallic paint
Some metallic paints are made for décor, not functional fixtures. They may create a shiny gold, brass, or chrome-like effect on a vase or mirror frame, but many are not tough enough for running water, cleaning, and fingerprints. If the label says it is for decorative indoor accents, treat that as a warning, not a challenge.
Avoid paint not rated for metal
A bathtub tap is commonly made from brass, zinc alloy, stainless steel, or plated metal. Paint that is not designed to bond to metal will struggle. Look for spray paint labeled for metal, all-surface use, automotive trim, appliance-style enamel, or protective enamel, depending on the specific product and project. The words on the can matter more than the color on the cap.
Avoid paint that cannot handle moisture
A bathroom is a humid room. A bathtub tap also gets splashed directly. Avoid paints that are not moisture-resistant or that require dry, decorative-only conditions. If the product label warns against wet areas or frequent handling, believe it. Paint labels are not poetry; they are instructions.
Best Paint Types for a Bathtub Tap Refresh
For a DIY bathtub faucet makeover, the most practical choices are usually metal-rated spray paints, bonding primers, self-etching primers for certain bare metals, protective enamels, automotive spray paints, or specialty all-surface coatings. These products are designed to create a harder finish than ordinary wall paint.
Matte black, satin nickel, oil-rubbed bronze, and gunmetal finishes are popular because they hide small imperfections better than mirror-bright chrome effects. A painted “chrome” finish rarely looks like real chrome on close inspection. It often looks like a robot tried to become a spoon. Darker or satin finishes tend to be more forgiving.
For the strongest result, use a system: clean, sand, prime, paint, cure. Do not skip the cure time. Dry to the touch does not mean ready for bath night, toddler splashes, shampoo bottles, and vigorous cleaning. Many coatings continue hardening for days. Treat the faucet gently during that period.
When You Should Not Paint a Bathtub Tap
Painting is not always the best answer. You should avoid painting if the faucet leaks, the handles are loose, the finish is badly corroded, the metal is flaking, or the fixture is used multiple times a day. Paint also may not be the best choice for rental units unless you have permission. A landlord may not admire your “custom satin espresso faucet journey.”
Do not paint inside the spout, aerator, valve openings, threads, diverter mechanism, or any part that contacts potable water flow. Keep paint on the exterior decorative surfaces only. Also avoid painting moving joints too thickly, because paint buildup can interfere with operation or chip where parts rub together.
If you want a long-term, professional finish, replacement or professional refinishing is better. Factory finishes are generally more durable than DIY spray coatings because they are applied under controlled conditions. A spray-painted tap can be a clever refresh, but it should be understood as a budget makeover, not a lifetime finish.
How to Make a Painted Bathtub Tap Last Longer
After painting, maintenance becomes gentle and consistent. Clean with mild soap and water. Dry the tap after use. Avoid abrasive cleaners, bleach, ammonia, harsh solvents, lime removers, and scrub pads. Do not let shampoo, conditioner, toothpaste, bath oils, or cleaning chemicals sit on the painted surface. These products can soften or stain coatings over time.
Keep a microfiber cloth nearby and wipe the faucet after baths or showers. This small habit prevents mineral spots and reduces the need for aggressive cleaning. The less you scrub, the longer the paint survives. Think of the finish as a nice manicure: durable enough for life, not durable enough for sanding a deck with your bare hands.
Design Ideas for a Bathtub Tap Refresh
A bathtub tap refresh works best when it connects with the rest of the bathroom. Do not paint the faucet black if every other visible metal in the room is shiny brass unless you plan to coordinate the towel bar, shower trim, drain, cabinet pulls, and mirror frame. Mixed metals can look beautiful, but accidental metal chaos can look like the clearance aisle had a meeting.
For a modern look, pair matte black taps with white tile, warm wood, and simple accessories. For a softer traditional bathroom, brushed nickel or satin stainless finishes are easy to live with. For vintage-inspired spaces, warm brass or bronze can look charming, especially with cream walls, patterned tile, or a clawfoot tub. In small bathrooms, chrome remains useful because it reflects light and feels clean.
Also consider the tub drain and overflow plate. If the faucet is refreshed but the drain remains rusty or mismatched, the eye will notice. Coordinating these pieces creates a more complete update, even if the project is inexpensive.
Common Mistakes to Avoid
The first mistake is rushing. Painting a bathtub tap is mostly prep and patience. The actual spraying is the short part. Skipping sanding, cleaning, primer, or cure time can ruin the finish quickly.
The second mistake is painting in a poorly ventilated bathroom. Spray paint fumes are serious, and bathrooms are often small. Use ventilation, protect surrounding surfaces, and wear appropriate safety gear according to the product label.
The third mistake is applying heavy coats. Thick paint looks uneven, drips into crevices, and may stay tacky. Thin coats create a smoother, harder finish.
The fourth mistake is expecting paint to behave like a factory finish. DIY paint can look great, but it needs gentle care. If you want a finish that survives years of daily scrubbing, splashing, and cleaning chemicals, buy a new fixture in the finish you want.
Experience Section: What a Real Bathtub Tap Refresh Teaches You
The first thing a bathtub tap refresh teaches you is humility. From across the room, the project looks tiny. It is just a faucet, right? A few inches of metal, a can of paint, maybe some painter’s tape. Then you get close and discover curves, seams, tiny gaps, hidden mineral crust, suspicious old caulk, and a spout shape specifically designed to make sanding annoying.
In real-life DIY experience, the cleaning step often takes longer than expected. A faucet that looks “a little spotted” can be wearing layers of hard-water minerals that behave like they signed a long-term lease. Gentle cleaning first is worth it. Sometimes, after soap, a soft cloth, careful mineral removal, and a proper dry buff, the tap looks good enough that painting no longer feels necessary. That is the cheapest victory: realizing the project was a cleaning problem wearing a renovation costume.
If painting is still the plan, taping is where patience pays off. Overspray is sneaky. It can float beyond the target area and settle on tile, grout, tub ledges, shampoo niches, and even the floor. A smart DIYer covers more than seems necessary. The bathroom may look like a plastic-wrapped crime scene for an afternoon, but that is better than discovering a fine mist of black paint on a white tub. Nobody wants a bathtub that looks lightly peppered.
Sanding also feels wrong the first time. You are intentionally dulling a shiny faucet, and your brain may object. But that dullness is the point. Paint needs grip. A glossy surface gives paint very little to hold onto. The best results usually come from sanding evenly, wiping away every bit of dust, using a proper primer, and resisting the urge to rush straight to the pretty color.
The most common emotional trap is the first coat. It may look thin, uneven, and slightly disappointing. That is normal. The first coat is not supposed to be glamorous. It is the foundation. The second and third light coats build the finish. Heavy spraying to “fix” coverage usually creates drips, and drips on a curved faucet are extremely dramatic. They run, gather, and announce themselves like tiny paint waterfalls.
Curing time is the final test of discipline. A painted tap may feel dry within hours, but using it too soon can leave fingerprints, dents, or water marks. Waiting several days before heavy use can make a big difference. During that time, it helps to tell everyone in the house that the tub is temporarily off-limits. Someone will still ask if they can “just rinse something quickly.” The answer is no. Protect the tap. Protect your sanity.
Long term, a painted bathtub tap is best treated gently. Wipe it dry, clean with mild soap, and avoid harsh sprays. If the bathroom is used daily by kids, guests, pets, or adults who clean like they are power-washing a driveway, expect touch-ups eventually. For a lightly used bathroom, though, a careful bathtub tap refresh can be surprisingly satisfying. It gives the room a sharper look without demolition, dust, or the thrilling sound of a contractor saying, “We found something behind the wall.”
The biggest lesson is simple: choose the refresh that matches the fixture’s condition. Clean if it is dirty. Replace if it is broken. Paint only if it is sound, prepped well, and you understand the limits. That is how a bathtub tap refresh becomes a smart upgrade instead of a cautionary tale told in peeling matte black.
Conclusion
A bathtub tap refresh can be one of the quickest ways to modernize a bathroom without committing to a full renovation. The secret is choosing the right approach. Cleaning and polishing may be enough for a fixture with mineral buildup. Replacing trim may be best for outdated or worn hardware. Spray painting can work for a budget-friendly style update, but only when the tap is properly cleaned, sanded, primed, painted in thin coats, and allowed to cure.
The paint to avoid is just as important as the paint to use. Skip regular wall paint, craft acrylic paint, chalk paint, decorative-only metallic paint, and any coating not rated for metal, moisture, or frequent handling. A bathtub faucet is a wet, high-touch surface, not a picture frame. Treat it accordingly, and your refresh has a much better chance of looking intentional, stylish, and durable.













