
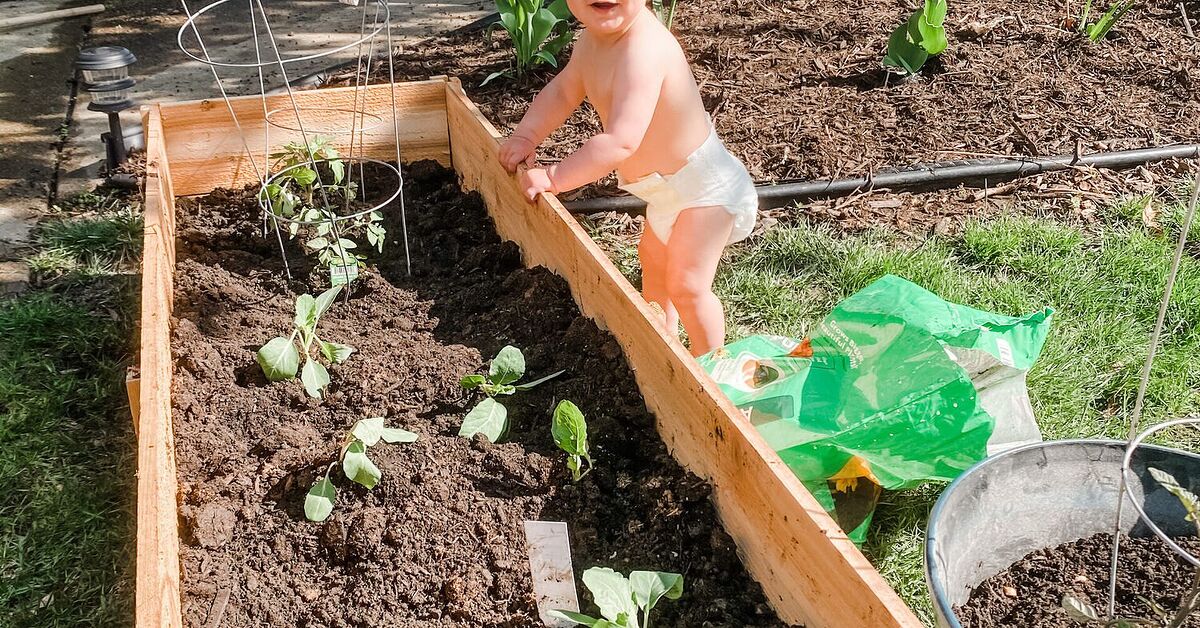
There is a special kind of joy in walking outside, snipping your own basil, pulling a carrot that looks like it has been doing yoga underground, and announcing, “Dinner is from the garden.” Building your own cedar garden beds is one of the smartest ways to get there. Cedar is naturally attractive, pleasantly aromatic, and more rot-resistant than many common softwoods, which makes it a favorite for DIY raised garden beds. It also looks good enough that your yard will appear intentional, even if your gardening outfit is old sneakers, sunscreen, and quiet panic.
A cedar raised garden bed gives you control over soil quality, drainage, layout, and growing space. It can turn a patch of hard clay, rocky ground, or tired lawn into a productive mini-farm. Better yet, you do not need to be a master carpenter. If you can measure, cut, drill, and resist the urge to say “good enough” before the corners are square, you can build a sturdy bed in an afternoon.
Why Cedar Garden Beds Are Worth Building
Cedar is popular for raised bed gardening because it naturally resists decay better than many untreated woods. That matters because garden beds spend their lives holding damp soil, catching rain, and quietly battling fungi, insects, and weather. Untreated cedar is also a smart choice for edible gardens because it avoids the worry that comes with old railroad ties, unknown salvaged lumber, or questionable treated wood.
Raised beds themselves offer several advantages. They drain better than many in-ground gardens, warm up earlier in spring, reduce soil compaction, and make planting, weeding, and harvesting easier. They also help define your garden space, which is useful if your backyard currently has the personality of “miscellaneous grass.”
Choosing the Right Size for a Cedar Raised Garden Bed
The best cedar garden bed is not the biggest one you can squeeze into your yard. It is the one you can comfortably use. A classic beginner-friendly size is 4 feet wide by 8 feet long. Four feet is important because most gardeners can reach the center from either side without stepping into the bed. Step into the bed often, and you compact the soil. Compact the soil, and plant roots begin filing complaints.
For smaller spaces, a 3-by-6-foot bed works beautifully. For patios or narrow side yards, a 2-by-8-foot bed may be easier to manage. Length is flexible, but beds longer than 8 or 10 feet may need extra bracing to keep the sides from bowing outward under the weight of wet soil.
How Deep Should Cedar Garden Beds Be?
Most vegetables grow well with about 10 to 12 inches of good soil, especially if the native soil underneath is loosened. Leafy greens, herbs, radishes, and strawberries can do well in shallower beds. Tomatoes, peppers, carrots, potatoes, squash, and deeper-rooted crops appreciate more room. If you are building over concrete, contaminated soil, or a hard surface, plan for a deeper bed, often 18 inches or more, because plant roots cannot continue downward into the ground.
Materials You Need
For a simple 4-by-8-foot cedar raised garden bed about 11 inches high, use two stacked rows of cedar boards. You can adjust the dimensions based on your space.
Suggested Lumber and Hardware
- Six cedar boards, 2 inches by 6 inches by 8 feet
- One cedar or rot-resistant 4-by-4 post for corner blocks, cut into four 11-inch pieces
- Optional middle support stakes or blocks for long sides
- Exterior-grade deck screws, galvanized or stainless steel, 2 1/2 to 3 1/2 inches long
- Plain cardboard or several layers of newspaper for the base
- Raised bed soil mix, topsoil, and finished compost
- Mulch, such as straw, shredded leaves, or untreated wood chips for paths
Tools
- Tape measure
- Pencil
- Speed square or carpenter’s square
- Circular saw or miter saw
- Drill and bits
- Level
- Shovel or garden fork
- Work gloves and eye protection
If you buy boards at a home improvement store, ask whether they can cut the lumber for you. This is especially helpful if your vehicle is not emotionally prepared to carry 8-foot boards.
Where to Place Your Cedar Garden Bed
Vegetables love sun. For tomatoes, peppers, cucumbers, beans, squash, and most herbs, choose a location that receives at least 6 to 8 hours of direct sunlight per day. Leafy greens such as lettuce, spinach, arugula, and kale can tolerate a little more shade, especially in hot climates.
Also think about water access. A bed placed near a hose, rain barrel, or irrigation line will get watered more consistently than one placed in the far corner of the yard like a forgotten side quest. Avoid low spots where water puddles after rain. Raised beds improve drainage, but they are not magic boats.
Step-by-Step: How to Build Your Own Cedar Garden Beds
Step 1: Mark the Location
Place the bed outline where you want it. Use stakes, string, flour, or a garden hose to mark the shape. Check that you have room to walk around all sides. A path of 2 to 3 feet between beds is comfortable for wheelbarrows, kneeling pads, and dramatic garden inspections.
Step 2: Prepare the Ground
You do not always need to remove the grass. For many gardens, you can mow the area short, loosen the soil with a garden fork, and lay down plain cardboard or newspaper to smother weeds. Overlap the edges so grass does not sneak through like an uninvited party guest. Avoid glossy cardboard, plastic-coated paper, and tape.
If your soil is compacted, rocky, or heavy clay, loosen the top 6 to 8 inches before setting the bed in place. This gives roots extra room and improves drainage. If you are building over contaminated soil or hardscape, do not mix into the ground below. Use a deeper bed and a safe liner strategy that allows drainage.
Step 3: Cut the Boards
For a 4-by-8-foot bed, cut two 8-foot boards in half to create four 4-foot end boards. Keep four 8-foot boards for the long sides. Cut the 4-by-4 cedar post into four 11-inch corner blocks if you are using two stacked 2-by-6 boards. These blocks help anchor the corners and make assembly easier.
Step 4: Assemble the First Layer
Lay two long boards and two short boards into a rectangle. Set a corner block inside each corner. Pre-drill holes to reduce splitting, then drive screws through the side boards into the corner blocks. Check for square by measuring diagonally from corner to corner. If both diagonal measurements match, the bed is square. If not, gently nudge the frame until it behaves.
Step 5: Add the Second Layer
Stack the second row of cedar boards on top of the first. Fasten them to the same corner blocks. For extra strength, add a center stake or support block halfway along each 8-foot side. This helps prevent bowing when the bed is filled with soil, water, roots, and the ambitions of summer squash.
Step 6: Level the Bed
Use a level to check the frame. A slight slope is not a disaster, but a badly tilted bed can cause uneven watering and soil movement. Remove soil from the high side or add soil under the low side until the frame sits evenly.
Step 7: Fill with the Right Soil Mix
Do not fill your cedar garden bed with pure compost, pure potting mix, or random dirt from a mystery pile behind the shed. A productive raised garden bed soil mix should hold moisture, drain well, and provide nutrients. A practical blend is:
- 60% quality topsoil for mineral structure
- 30% finished compost for organic matter and nutrients
- 10% aeration material, such as coarse sand, pine bark fines, or perlite, if drainage needs improvement
Another reliable approach is roughly 70% soil and 30% compost. The exact mix depends on your local materials, but the goal is the same: rich, crumbly soil that stays moist without becoming soup. If possible, get a soil test before adding lime, fertilizer, or major amendments. Most vegetables prefer slightly acidic to neutral soil, often around pH 6.0 to 6.8.
Planting Your Cedar Raised Garden Bed
Once the bed is built and filled, the fun begins. Start with crops you actually eat. This sounds obvious, but many gardeners have grown seven pounds of radishes in a household where everyone secretly dislikes radishes. Choose a mix of quick crops, long-season crops, and herbs.
Easy Crops for Beginners
- Lettuce, spinach, and arugula
- Basil, parsley, cilantro, thyme, and chives
- Cherry tomatoes
- Bush beans
- Radishes and carrots
- Peppers
- Swiss chard and kale
Use spacing recommendations from seed packets or plant tags. Raised beds can be planted more intensively than traditional rows, but crowded plants compete for light, water, and airflow. Crowding also encourages disease. Give tomatoes cages or stakes early, before they become leafy monsters with opinions.
Watering and Mulching for Better Results
Raised beds often drain faster than in-ground beds, which is great during rainy weeks and less great during blazing summer afternoons. Water deeply rather than sprinkling lightly every day. The goal is to moisten the root zone, not just give the soil surface a spa mist.
Drip irrigation or soaker hoses are excellent for cedar raised garden beds because they deliver water slowly and evenly. Watering in the morning helps reduce leaf disease and gives plants moisture before heat peaks. Add mulch around plants once seedlings are established. Mulch helps conserve moisture, reduce weeds, and keep soil temperature more stable.
How to Keep Cedar Garden Beds Productive Year After Year
A raised bed is not a one-and-done project. It is more like a sourdough starter with tomatoes: feed it, protect it, and it rewards you. Each season, add compost to replace organic matter that breaks down. In spring or fall, top-dress the bed with 1 to 2 inches of finished compost and gently mix it into the upper layer without disturbing deep roots or soil structure too aggressively.
Rotate crops when possible. Avoid planting tomatoes, peppers, eggplants, and potatoes in the same bed year after year because they are related and can share pest and disease problems. Follow heavy feeders such as tomatoes and squash with lighter feeders or legumes. Remove diseased plant material, clean up at the end of the season, and keep paths mulched to reduce weeds.
Common Mistakes to Avoid
Building Beds Too Wide
If you cannot reach the middle, you will step into the soil. Once that happens, the raised bed loses one of its biggest benefits: loose, uncompacted growing space. Keep most beds 4 feet wide or less.
Using Unsafe Materials
Old railroad ties, painted scrap wood, and mystery-treated lumber are risky choices for edible gardens. Untreated cedar, redwood, stone, brick, and food-safe materials are safer options. If you use any liner, avoid sealing the bottom with plastic because trapped water can damage roots.
Filling with the Wrong Soil
Pure compost can be too rich and may shrink significantly. Cheap fill dirt may compact badly. Lightweight potting mix can drain too quickly and become expensive in large beds. Blend mineral soil with finished compost for a balanced raised garden bed soil mix.
Forgetting Support on Long Sides
Wet soil is heavy. Long cedar boards can bow outward over time. Add internal stakes, corner posts, or cross-bracing for beds longer than 6 to 8 feet.
Planting Everything at Once
Stagger plantings of lettuce, beans, radishes, and herbs so you harvest over weeks instead of accidentally creating a one-day vegetable avalanche. Succession planting keeps the garden productive and the refrigerator less terrifying.
Design Ideas for a Better-Looking Garden
Cedar garden beds already look warm and natural, but a few design choices can make them shine. Arrange multiple beds symmetrically for a clean kitchen-garden feel. Add wood chip or gravel paths between beds for easier access. Install a simple trellis on the north side of a bed for peas, cucumbers, or pole beans so tall plants do not shade shorter crops.
You can also add a cap rail around the top edge of the bed. It gives the frame a finished look and creates a convenient place to rest tools, seed packets, or your coffee cup while you admire the three basil leaves you are calling “the harvest.”
Budget Tips for DIY Cedar Raised Garden Beds
Cedar costs more than basic pine, but it often lasts longer outdoors. To manage costs, build one or two beds first instead of transforming the whole yard at once. Start with a practical size, then expand after you learn how much food your household actually wants to grow.
Cedar fence pickets can be a budget-friendly option for smaller or lighter beds, though they are thinner than standard boards and may not last as long. If you use thinner boards, add more supports. Buying soil in bulk may be cheaper than buying dozens of bags, especially for multiple beds. Just make sure the mix comes from a reputable supplier and is appropriate for vegetable gardening.
What to Grow for Your Best Garden Yet
For a highly productive first cedar raised bed, try this simple layout: place a trellis along the back for cucumbers or pole beans, plant two compact tomato plants with cages, add basil near the tomatoes, tuck peppers along the sunny edge, and fill gaps with lettuce or herbs. In early spring, grow spinach, radishes, and peas. In summer, switch to tomatoes, beans, cucumbers, and basil. In fall, return to kale, lettuce, carrots, and cilantro.
This seasonal rhythm makes the most of a small space. Instead of one planting and one harvest, your raised bed becomes a living pantry that changes through the year.
Extra Experience: What Building Cedar Garden Beds Teaches You
The first thing you learn when building cedar garden beds is that straight boards are a gift from the universe. At the lumber aisle, take a minute to sight down each board. A slightly bowed board can still work, but a wildly twisted one will test your patience, your drill battery, and possibly your vocabulary. Choose boards that are as straight as possible, with fewer cracks and knots near the ends where screws will go.
The second lesson is that soil volume is always more than you think. A 4-by-8-foot bed that is about 12 inches deep holds roughly 32 cubic feet of soil. That is a lot of bags. If you are building more than one bed, bulk delivery can save money and back strain. Put a tarp where the soil will be dumped, and place it as close to the beds as possible. Future you will be grateful. Future you may even forgive present you for starting this project on a hot day.
Another real-world tip: assemble the bed near its final location. A cedar frame may look light when it is just boards, but once it is assembled, it becomes awkward to move. It is basically a wooden rectangle with a strong desire to bump into your knees. Build it close to where it will live, then make small adjustments before filling.
When filling the bed, water the soil lightly in layers. This helps settle air pockets before planting. Do not stomp on the soil to compact it. Your goal is a fluffy, living root zone, not a vegetable parking lot. After the soil settles, top it off as needed. Raised bed soil often drops a few inches during the first season as compost breaks down and particles settle.
Plant labels are not optional unless you enjoy playing “Is this a weed or dinner?” Young carrots, cilantro, parsley, and many weeds can look suspiciously similar. Use wooden tags, stones, or weatherproof labels. Also keep a simple garden notebook. Write down what you planted, when you planted it, what worked, what failed, and which tomato variety tasted so good you briefly considered becoming a tomato influencer.
Expect a few failures. Seeds may not sprout. A cucumber may collapse dramatically. Lettuce may bolt in hot weather. This is normal. Gardening is not about perfection; it is about observation. Cedar raised beds make that learning easier because the garden is contained, organized, and accessible. You can notice moisture changes, pest damage, nutrient issues, and plant growth more quickly than in a sprawling in-ground plot.
One of the best experiences is how quickly a cedar bed becomes part of your daily routine. You step outside to check the soil and suddenly notice new bean flowers. You water the basil and spot a ripe tomato. You pull one weed and somehow spend 20 peaceful minutes outside. The bed becomes more than a box of soil. It becomes a small, productive corner of calm.
Over time, your cedar garden beds will weather from warm reddish-brown to a soft gray. That is normal and part of cedar’s charm. If you prefer the fresh cedar color, you can use a food-safe exterior wood finish on the outside only, following product directions carefully. Many gardeners simply let cedar age naturally. The plants do not mind. Tomatoes are famously unconcerned with exterior design trends.
Building your own cedar garden beds also gives you confidence. After the first one, you may start imagining trellises, hoop covers, drip irrigation, compost bins, and a full backyard food garden. This is how it begins: one cedar rectangle, one bag of compost, one hopeful packet of seeds. Next thing you know, you are explaining soil structure at dinner parties. Lean into it. Your best garden yet may start with four boards and a Saturday afternoon.
Conclusion
Building your own cedar garden beds is one of the most rewarding upgrades you can make to a home garden. Cedar is durable, attractive, and well suited for edible growing spaces when used untreated. A well-designed raised bed gives you better control over soil, drainage, spacing, and maintenance. Keep the width reachable, choose a sunny location, fill the bed with a balanced soil and compost mix, water consistently, and refresh the soil each season.
You do not need a perfect yard or professional tools to grow a productive garden. You need a smart plan, safe materials, good soil, and a willingness to learn from every sprout, harvest, and slightly weird carrot. Build the bed, plant what you love, and let your garden become the most delicious part of your home.
SEO Tags
Note: This article was written from synthesized, real-world gardening and DIY guidance, with publication-ready HTML only and no inserted source links.













