
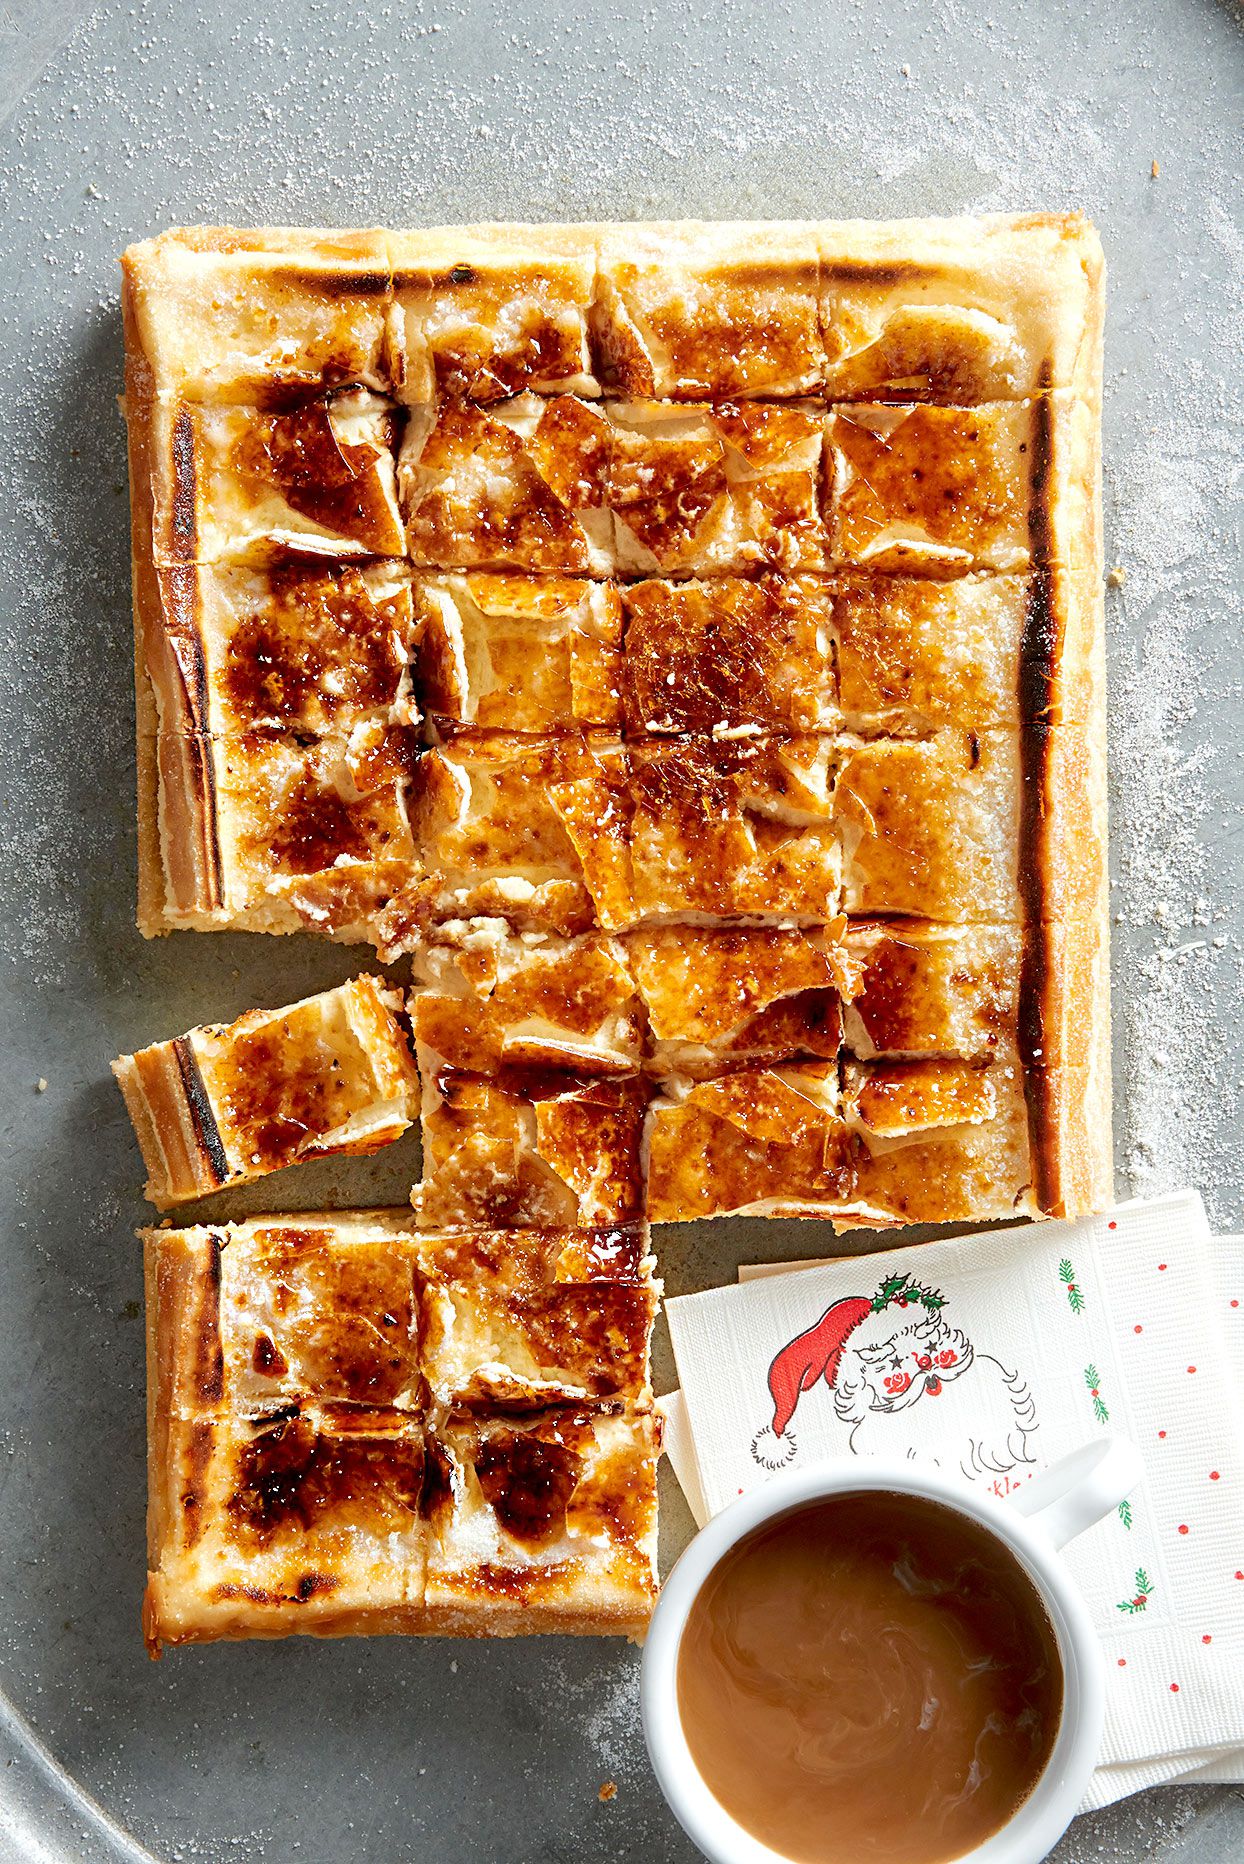
There are desserts that politely sit on the table and wait to be noticed. Then there are creme brulee cheesecake bars, which arrive wearing a golden sugar crown, making a tiny “crack” sound when your fork taps the top. Drama? Yes. Worth it? Absolutely.
This recipe combines two dessert legends: the silky richness of classic cheesecake and the crisp caramelized topping of crème brûlée. Instead of making individual custards or wrestling a full cheesecake out of a springform pan, these bars bake neatly in a square pan, chill beautifully, slice cleanly, and look far fancier than the effort required. In other words, they are the dessert equivalent of showing up in sweatpants and somehow looking red-carpet ready.
The goal is simple: a buttery graham cracker crust, a creamy vanilla cheesecake filling, and a thin layer of sugar torched until it becomes glassy, golden, and wonderfully crisp. This in-depth guide walks you through ingredients, technique, baking cues, chilling time, slicing tips, storage, and real-life experience so your bars turn out smooth, crackly, and party-worthy.
Why You’ll Love These Creme Brulee Cheesecake Bars
These bars are ideal when you want a make-ahead dessert that feels elegant but does not require pastry-school confidence. The cheesecake layer is rich without being heavy, the graham cracker crust adds buttery crunch, and the brûléed sugar top gives every bite that signature caramel snap.
They are also easier to serve than traditional crème brûlée. No ramekins. No water bath anxiety. No wondering whether your custard is jiggly in a mysterious French way or simply not done. Cheesecake bars are more forgiving, especially when baked low and slow, chilled fully, and topped with sugar right before serving.
Recipe Overview
- Recipe name: Creme Brulee Cheesecake Bars
- Prep time: 25 minutes
- Bake time: 38 to 45 minutes
- Chill time: At least 4 hours, preferably overnight
- Total time: About 5 hours, mostly hands-off
- Yield: 16 bars
- Skill level: Easy to moderate
Ingredients You’ll Need
For the Graham Cracker Crust
- 1 1/2 cups graham cracker crumbs
- 2 tablespoons granulated sugar
- 1/4 teaspoon fine sea salt
- 6 tablespoons unsalted butter, melted
For the Cheesecake Filling
- 16 ounces full-fat brick-style cream cheese, softened
- 3/4 cup granulated sugar
- 1/3 cup sour cream, room temperature
- 2 large eggs, room temperature
- 1 large egg yolk, room temperature
- 2 teaspoons pure vanilla extract
- 1 teaspoon vanilla bean paste, optional but highly recommended
- 1 tablespoon all-purpose flour
- 1/4 teaspoon fine sea salt
For the Brulee Topping
- 3 to 4 tablespoons superfine sugar or regular granulated sugar
Equipment Needed
- 8×8-inch baking pan
- Parchment paper
- Mixing bowls
- Hand mixer or stand mixer
- Rubber spatula
- Measuring cups and spoons
- Kitchen torch for caramelizing the sugar
- Sharp knife for slicing
A kitchen torch gives the best brûlée finish. A broiler can work in a pinch, but it may warm the cheesecake too much and melt the filling before the sugar caramelizes evenly. If using a torch, follow the manufacturer’s safety directions and have adult supervision when needed. Dessert should be exciting, not a small kitchen emergency.
How to Make Creme Brulee Cheesecake Bars
Step 1: Prepare the Pan
Preheat the oven to 325°F. Line an 8×8-inch baking pan with parchment paper, leaving extra overhang on two sides. This parchment “sling” makes it much easier to lift the chilled cheesecake out of the pan later. Lightly grease the parchment so the crust does not cling like it signed a long-term lease.
Step 2: Make the Graham Cracker Crust
In a medium bowl, stir together the graham cracker crumbs, sugar, salt, and melted butter until the mixture looks like damp sand. Press it firmly and evenly into the bottom of the prepared pan. Use the bottom of a measuring cup to compact the crust, especially around the corners.
Bake the crust for 8 to 10 minutes, just until lightly fragrant and set. Remove it from the oven and let it cool slightly while you make the filling. A short pre-bake helps the crust stay sturdy once the creamy cheesecake layer goes on top.
Step 3: Beat the Cream Cheese Smooth
Place the softened cream cheese in a large mixing bowl. Beat on medium-low speed until smooth and creamy, about 1 to 2 minutes. Scrape down the sides and bottom of the bowl. This step matters because cold cream cheese creates lumps, and cheesecake lumps are not charming little surprises.
Add the sugar and beat again until blended. Keep the mixer speed moderate. Overbeating can whip too much air into the filling, which may cause puffing, sinking, or cracks during baking.
Step 4: Add the Creamy Ingredients
Mix in the sour cream, vanilla extract, vanilla bean paste, flour, and salt. Sour cream gives the cheesecake a gentle tang and helps balance the sweetness of the brûléed sugar topping. Vanilla bean paste adds tiny specks and a bakery-style aroma, but pure vanilla extract alone will still create a delicious result.
Step 5: Add Eggs Gently
Add the eggs one at a time, mixing on low speed just until each egg disappears into the batter. Add the egg yolk last. Scrape the bowl once more and fold the batter gently with a spatula to make sure everything is evenly combined.
The extra yolk gives the filling a custardy richness, nodding toward classic crème brûlée without turning the bars into full custard. It is a small ingredient move with a big flavor payoff.
Step 6: Bake the Cheesecake Bars
Pour the filling over the warm crust and smooth the top. Tap the pan gently on the counter once or twice to release large air bubbles. Bake at 325°F for 38 to 45 minutes, or until the edges are set and the center has a slight wobble when the pan is gently nudged.
Do not wait until the center looks completely firm. Cheesecake continues to set as it cools, and overbaking can make the texture dry. Think “soft wobble,” not “liquid wave.” The center should move slightly, like it is politely saying hello.
Step 7: Cool Slowly
Turn off the oven, crack the oven door, and let the bars sit inside for 15 minutes. Then transfer the pan to a wire rack and cool to room temperature. This gradual cooling helps protect the smooth surface and prevents sudden temperature shock.
Step 8: Chill Completely
Cover the pan and refrigerate for at least 4 hours, though overnight is best. Fully chilled cheesecake bars slice cleaner, taste richer, and hold up better when the sugar topping is torched. This is the part where patience becomes an ingredient. Annoying? Slightly. Effective? Very.
Step 9: Add the Brulee Sugar Topping
Once chilled, lift the cheesecake out of the pan using the parchment overhang. Place it on a cutting board. Sprinkle a thin, even layer of sugar over the top. Do not pile it on too thick; a heavy sugar layer can burn in spots while staying grainy in others.
Use a kitchen torch to caramelize the sugar until golden and glassy. Move the flame steadily across the surface, letting the sugar melt and bubble. The topping should become amber in patches, not blackened. Let it sit for 1 to 2 minutes so the sugar hardens before slicing.
Step 10: Slice and Serve
Use a sharp knife to cut the cheesecake into 16 bars. For the cleanest slices, wipe the knife with a warm damp towel between cuts. Serve immediately after brûléeing for the crispest topping. The contrast between cold creamy cheesecake and warm crackly caramel is the whole point, and frankly, it deserves a tiny round of applause.
Tips for the Best Texture
Use Brick-Style Cream Cheese
For the creamiest cheesecake bars, use full-fat cream cheese sold in blocks, not the spreadable kind in tubs. Tub-style cream cheese contains more moisture and may make the filling softer than intended.
Bring Ingredients to Room Temperature
Softened cream cheese, room-temperature eggs, and room-temperature sour cream blend more smoothly. This reduces lumps and helps create a silky filling. If your cream cheese is still chilly, give it more time. Cheesecake is not a race; it is a creamy negotiation.
Do Not Overmix After Adding Eggs
Eggs trap air when beaten. Too much air can cause the cheesecake to rise dramatically in the oven and fall as it cools. Mix slowly and stop as soon as the batter looks combined.
Chill Before Torching
The cheesecake must be cold before adding the brûlée topping. A chilled surface helps the sugar caramelize without softening the filling too quickly. If the bars are warm, the topping may turn sticky instead of crisp.
Flavor Variations
Vanilla Bean Creme Brulee Cheesecake Bars
For a more luxurious flavor, use vanilla bean paste or scrape the seeds from half a vanilla bean into the filling. The speckled look gives the bars a classic bakery finish.
Salted Caramel Brulee Bars
Add a tiny pinch of flaky sea salt after torching the sugar. The salt makes the caramel flavor pop and keeps the dessert from tasting overly sweet.
Chocolate Crust Version
Replace the graham cracker crumbs with chocolate cookie crumbs. The darker crust pairs beautifully with the vanilla cheesecake and caramelized sugar top.
Citrus Vanilla Bars
Add 1 teaspoon of finely grated orange zest or lemon zest to the cheesecake filling. Citrus brightens the richness and makes the bars feel lighter after a big meal.
Storage Instructions
Store untorched cheesecake bars in an airtight container in the refrigerator for up to 4 days. For best results, add the sugar and torch the topping shortly before serving. Once caramelized, the sugar crust is at its crispest for the first hour. After that, moisture from the refrigerator can soften the topping.
You can freeze the cheesecake bars before adding the sugar topping. Wrap the chilled, unsliced slab tightly in plastic wrap and foil, then freeze for up to 2 months. Thaw overnight in the refrigerator, then sprinkle with sugar and torch before serving.
Common Mistakes to Avoid
Using Too Much Sugar on Top
A thin layer caramelizes better than a thick one. If you want extra crunch, torch one thin layer, let it harden, then add a second very thin layer and torch again.
Skipping the Chill Time
Warm cheesecake will not slice cleanly and may become too soft under the torch. Chill thoroughly before finishing the bars.
Baking Until Fully Firm
If the bars look completely set in the oven, they may be overbaked. Pull them when the edges are set and the center still has a gentle jiggle.
Torched Too Early
The brûlée topping is best made close to serving time. If you torch the bars hours ahead, the sugar crust can absorb moisture and lose its dramatic crunch.
What to Serve With Creme Brulee Cheesecake Bars
These bars are rich, so they pair well with simple sides. Fresh raspberries, sliced strawberries, blueberries, or a spoonful of lightly whipped cream all work beautifully. Coffee is another excellent match because its bitterness balances the creamy sweetness. For a dinner party, serve each bar on a small plate with a few berries and a dusting of powdered sugar around the edge. Suddenly everyone thinks you own tweezers for plating food. You do not have to correct them.
Frequently Asked Questions
Can I make these cheesecake bars without a kitchen torch?
Yes, but a torch gives the best result. You can try using a broiler, but watch closely because sugar can go from golden to burnt very quickly. Also, the broiler may warm the cheesecake layer more than desired.
Can I use brown sugar for the brûlée topping?
Granulated white sugar is the better choice because it melts evenly and gives you clearer visual cues as it caramelizes. Brown sugar contains more moisture and can clump or burn unevenly.
Why did my cheesecake bars crack?
Cracks usually come from overmixing, overbaking, or cooling too quickly. The good news is that the brûlée topping hides minor surface cracks like a delicious little magic trick.
Can I double this recipe?
Yes. Double the ingredients and bake in a 9×13-inch pan. The bake time may increase slightly, so check for set edges and a slightly wobbly center.
Can I make the bars ahead of time?
Definitely. In fact, these bars are better when made ahead because the cheesecake needs time to chill. Bake the bars the day before, refrigerate overnight, and torch the sugar topping shortly before serving.
Extra Experience Notes: What I Learned Making Creme Brulee Cheesecake Bars
The first thing you learn when making creme brulee cheesecake bars is that timing matters more than fancy ingredients. The recipe itself is not difficult, but every stage has a personality. The crust wants firmness. The filling wants gentleness. The topping wants confidence. Put them together correctly and you get a dessert that tastes like it came from a boutique bakery where everything costs just enough to make you whisper, “Maybe I should have learned accounting.”
One useful experience is pressing the crust more firmly than you think you need to. A loose graham cracker crust tastes fine, but it crumbles when sliced. For bars, structure is important. Using the bottom of a measuring cup makes a big difference because it compacts the crumbs evenly. Pay special attention to the corners, which are often neglected. Corners deserve love too, especially because somebody always wants the corner piece.
Another lesson is that room-temperature ingredients are not just a polite suggestion. Cold cream cheese can leave tiny lumps that refuse to disappear, no matter how much you mix. Then, if you keep beating to remove the lumps, you add too much air. That air expands during baking, and the cheesecake may puff, crack, or sink. Letting the cream cheese soften properly saves you from a whole chain of dessert drama.
The baking stage also teaches patience. Cheesecake bars do not look “done” in the way cookies or brownies do. You are looking for set edges and a softly jiggling center. The first time, it may feel wrong to remove the pan while the middle still moves. Trust the process. The residual heat finishes the job, and the refrigerator completes the texture. If you bake until the center is completely firm, the final bars may taste dense instead of creamy.
The brûlée topping is the most fun part, but it is also where restraint helps. A heavy blanket of sugar sounds tempting, but a thin even layer creates the best crackle. Too much sugar can melt unevenly, leaving burnt spots beside sandy patches. I like to sprinkle the sugar from a spoon and gently tilt the slab so it spreads across the top. It feels oddly satisfying, like giving the cheesecake a tiny sugar spa treatment before introducing it to fire.
Serving timing is another practical detail. These bars are best when the cheesecake is cold and the sugar shell is freshly torched. If you brûlée them too early and put them back in the refrigerator, the topping gradually softens. The flavor is still good, but the magical crack disappears. For guests, keep the chilled bars ready, then torch the tops shortly before dessert. It becomes part of the show, and people love a dessert with sound effects.
Finally, do not panic if your first batch is not perfectly smooth on top. The caramelized sugar layer is incredibly forgiving. Small cracks, uneven spots, or tiny bubbles get covered under a shiny amber shell. Once sliced, the contrast between the crisp top, creamy center, and buttery crust steals the attention anyway. That is the charm of this recipe: it looks impressive, tastes luxurious, and still gives home bakers plenty of room to be human.
Conclusion
Creme brulee cheesecake bars are the perfect dessert when you want something creamy, crunchy, elegant, and surprisingly manageable. They deliver the rich vanilla flavor of cheesecake, the dramatic caramelized sugar crust of crème brûlée, and the convenience of sliceable bars. The key is simple technique: use softened full-fat cream cheese, mix gently, bake until just set, chill completely, and torch the sugar topping right before serving.
Whether you are baking for a holiday table, birthday party, weekend treat, or a “just because I own a kitchen torch now” moment, this recipe gives you a dessert that feels special without being fussy. One bite through that crisp sugar top into the smooth cheesecake filling, and you may wonder why all cheesecake does not come with a caramelized crown.











