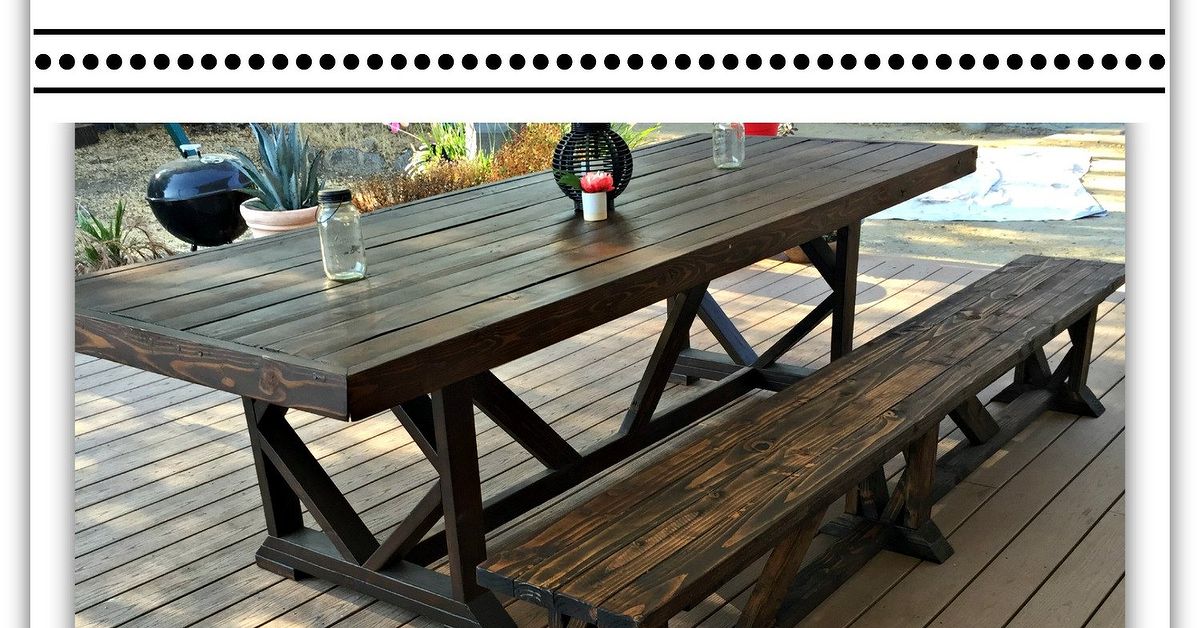
An extra long outdoor wood bench is the backyard equivalent of a friendly neighbor: useful, welcoming, and always ready to hold a plate of barbecue, a sleepy dog, three kids, or one adult who said, “I’ll only sit for a minute” and then disappeared for an hour. The best part? You do not need to be a master carpenter with a workshop full of mysterious tools and sawdust in your eyebrows. With smart planning, sturdy lumber, outdoor-rated hardware, and a patient measuring tape, you can build a beautiful DIY extra long outdoor wood bench that looks custom without draining your patio budget.
This guide walks through the full process: choosing wood, sizing the bench, building a strong frame, adding comfortable seating, finishing the surface, and keeping it looking good through sun, rain, muddy shoes, and the occasional spilled lemonade. Whether you want a 6-foot garden bench, an 8-foot patio bench, or a statement piece long enough for the whole family reunion photo, the same principles apply: build it straight, support it well, protect it from weather, and never underestimate the emotional power of sanding.
Why Build an Extra Long Outdoor Wood Bench?
Store-bought outdoor benches are convenient, but many are too short, too lightweight, or oddly designed for people who apparently sit like decorative flamingos. A DIY extra long outdoor wood bench lets you customize the length, height, depth, color, finish, and overall style. You can build it to fit a patio wall, fire pit area, deck edge, garden path, outdoor dining table, or front porch.
An extra long bench is especially practical because it creates flexible seating. Instead of moving several chairs around every time guests arrive, one long bench can seat multiple people without cluttering the space. It also works as a visual anchor. Placed under a pergola, against a fence, or beside a raised garden bed, it gives the outdoor area a finished, intentional look.
Planning the Size: How Long, Tall, and Deep Should It Be?
Before buying lumber, decide where the bench will live. Measure the space carefully and leave breathing room at both ends. A bench that fits “perfectly” on paper may feel cramped if it blocks a walkway, door swing, grill area, or garden hose path. Outdoor furniture should make life easier, not create an obstacle course.
Recommended Bench Dimensions
For most outdoor benches, a comfortable seat height is about 17 to 19 inches from the ground. A seat depth of 16 to 20 inches works well for adults. For an extra long outdoor bench, common lengths include 72 inches, 84 inches, 96 inches, or even 120 inches. Once you go beyond 6 feet, the key is adding enough support underneath so the seat does not sag in the middle like a tired hammock.
A practical beginner-friendly size is 96 inches long, 18 inches high, and 17 to 18 inches deep. This size can seat four adults comfortably, five if everyone is feeling friendly, and at least one person who will absolutely claim they are “saving space” while taking up half the bench.
Best Wood for an Outdoor Bench
The wood you choose matters because outdoor furniture faces moisture, sunlight, insects, temperature changes, and dirt. Indoor pine may be cheap and easy to find, but without proper protection, it can warp, crack, or decay outdoors. For a DIY outdoor wood bench, look for lumber that can handle weather or be properly sealed for exterior use.
Cedar
Cedar is a favorite for outdoor furniture because it is naturally resistant to decay and insects. It is lightweight, attractive, and pleasant to work with. Cedar also has a warm color that looks great with clear sealers or semi-transparent stains. The downside is cost. Cedar is usually more expensive than standard construction lumber, but for a bench that will be visible in your outdoor living space, it is often worth the upgrade.
Pressure-Treated Lumber
Pressure-treated wood is budget-friendly and designed for outdoor exposure. It is commonly used for decks, fences, raised structures, and exterior projects. If you use pressure-treated lumber, choose boards that are straight, dry enough to work with, and rated for above-ground use unless the bench legs will contact soil. Always use hardware approved for pressure-treated wood, because some treatments can corrode the wrong fasteners over time.
Redwood, Cypress, Teak, and Other Outdoor Woods
Redwood and cypress are beautiful, naturally durable options, though availability varies by region. Teak is excellent for outdoor furniture but usually costs much more. If you want a high-end outdoor bench that will age gracefully, hardwoods can be stunning. For most DIY builders, cedar or pressure-treated lumber offers the best balance of durability, cost, and accessibility.
Tools and Materials You Will Need
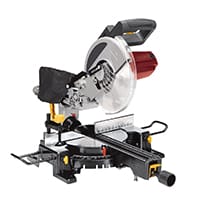
You can build a simple extra long bench with basic tools. A miter saw makes cuts easier, but a circular saw and speed square can also do the job. The goal is accuracy, not tool bragging rights.
Tools
- Measuring tape
- Pencil
- Speed square
- Miter saw or circular saw
- Drill/driver
- Clamps
- Random orbital sander or sanding block
- Level
- Safety glasses, hearing protection, and work gloves
Materials for a 96-Inch Bench
- Three 2×6 boards, 8 feet long, for the seat
- Four 4×4 posts or doubled 2x4s for legs
- Two 2×4 boards, 8 feet long, for front and back rails
- Three or four 2×4 cross supports
- Exterior-rated screws, such as deck screws or structural wood screws
- Exterior wood glue, optional but helpful
- Wood filler rated for exterior use
- Sandpaper in 80-, 120-, and 180-grit
- Exterior stain, paint, penetrating oil, or spar urethane
This material list can be adjusted depending on your design. If you want a chunkier farmhouse-style bench, use 4×4 legs and 2×6 seating. If you prefer a sleeker modern bench, use clean-lined 2×4 framing and carefully spaced seat boards.
Step-by-Step Guide: How to Build a DIY Extra Long Outdoor Wood Bench
Step 1: Choose Straight Boards
The first construction step happens at the lumber rack. Sight down each board to check for twisting, bowing, cupping, or large cracks. For an extra long bench, straight boards are especially important because small bends become very noticeable over 8 feet. Do not be shy about sorting through the pile. Consider it a first date with your lumber. You are allowed to be picky.
Step 2: Cut the Seat Boards
Cut three 2×6 boards to 96 inches, or keep them at full 8-foot length if they are already clean and square. These boards will form the seat. Lightly sand the edges now so they are easier to handle. If you want a softer look, round over the top edges with sandpaper or a router. Rounded edges are more comfortable and less likely to splinter.
Step 3: Build the Long Support Frame
Cut two 2×4 rails to 90 inches. These will run under the seat, set in from the bench ends by about 3 inches. Cut three or four shorter 2×4 cross supports to fit between the rails. For a 17- to 18-inch-deep bench, cross supports around 14 inches long usually work, depending on your exact seat board layout.
Assemble the frame as a long rectangle with cross supports placed near each end and at regular intervals through the middle. For an 8-foot bench, use at least one center support; two center supports are even better. The longer the span, the more important the middle support becomes. Nobody wants to host a garden party where the bench performs an unexpected magic trick and folds inward.
Step 4: Add the Legs
Cut four 4×4 legs to your desired height, usually around 15 inches if your 2×6 seat boards will add another 1 1/2 inches on top. Attach the legs inside the frame corners using exterior-rated structural screws. For a longer bench, consider adding a fifth and sixth leg near the center. Center legs greatly reduce bounce and help the bench feel solid.
If the bench will sit on soil or grass, use wider foot pads, pavers, or gravel under the legs to prevent the wood from sitting in constant moisture. Wood lasts longer when it can dry out between rains. The bench may enjoy nature, but it does not want wet feet forever.
Step 5: Attach the Seat Boards
Lay the three 2×6 seat boards across the frame. Use spacers, such as paint sticks or 1/4-inch scrap pieces, to create even gaps between boards. These gaps allow water to drain and give the wood room to expand and contract. Fasten each seat board to every support with exterior screws. Pre-drilling helps reduce splitting, especially near board ends.
For a cleaner finish, align screw heads neatly and drive them slightly below the surface without burying them too deeply. If you plan to paint, you can fill screw holes with exterior wood filler. If you prefer a natural stained look, neat screw placement becomes part of the design.
Step 6: Reinforce the Bench
An extra long outdoor bench needs stiffness. Add diagonal braces between the legs and frame if the bench wiggles side to side. You can also install a long lower stretcher between the leg pairs. A stretcher not only improves stability but also gives the bench a more finished, furniture-like appearance.
Test the bench before finishing. Sit on different areas, especially the center. If there is noticeable flex, add another support underneath. Fixing structure now is much easier than after staining, decorating, and proudly inviting people to “try the bench I built.”
Sanding: The Step Everyone Wants to Skip But Should Not
Sanding turns a rough project into furniture. Start with 80-grit sandpaper to smooth saw marks and sharp edges. Move to 120-grit for general smoothing, then finish with 180-grit if you want a softer surface. Pay extra attention to seat edges, corners, and anywhere legs might brush against the wood.
Do not over-sand pressure-treated lumber if it is still damp. Let it dry properly before applying stain or paint. Cedar sands beautifully, but it is softer than many woods, so avoid pressing too hard with a power sander. The goal is smooth, not “accidentally carved by a raccoon.”
Finishing Options for Outdoor Wood Benches
The right finish depends on the look you want and how much maintenance you are willing to do. Outdoor wood needs protection from moisture and UV rays. Even naturally resistant woods last longer with a suitable finish.
Exterior Stain
Exterior stain is a strong choice for a DIY outdoor bench. Semi-transparent stains show the wood grain while adding color and protection. Solid stains provide more coverage and can hide mismatched boards. Choose a product made for exterior wood, and follow the manufacturer’s drying and recoat instructions.
Exterior Paint
Paint gives the boldest color options and can make a bench match shutters, trim, planters, or patio furniture. Use exterior primer and exterior paint. Painted benches may need touch-ups over time, especially on horizontal surfaces where water and sunlight hit hardest.
Penetrating Oil
Oils can enhance the natural look of cedar, teak, and other attractive woods. They are easy to refresh, but they usually require more frequent maintenance than paint or heavy film finishes. If you enjoy the natural weathered look, oil can be a great option.
Spar Urethane or Marine Varnish
Spar urethane creates a protective film and is often used for outdoor wood exposed to moisture and sunlight. It can look beautiful, especially on hardwoods, but film finishes may peel or crack if neglected. They also require careful surface preparation. Use this option when you want a polished look and are willing to maintain it.
Where to Place Your Extra Long Outdoor Bench
Placement affects both comfort and durability. A bench under partial shade will usually last longer than one baking in full sun all day. A covered porch or pergola is ideal, but a garden bench can also work beautifully under a tree, along a fence, or near a fire pit.
Avoid placing wood furniture directly where sprinklers hit it every morning. Constant moisture shortens the life of outdoor wood. If the bench sits on a deck, make sure it does not trap leaves and debris underneath. If it sits on grass, place stone pavers under the legs to reduce ground contact.
Design Ideas to Make the Bench Look Custom
Add a Backrest
A backrest makes the bench more comfortable for long conversations, reading, or watching kids play outside. Use angled supports for better comfort. A slightly reclined back feels more natural than a straight vertical board.
Build Around a Tree
If you have a large shade tree, an extra long bench can become part of a wraparound seating area. Leave enough space for tree growth and avoid damaging roots. A tree bench feels charming, classic, and slightly cinematic, as if someone should be reading poetry nearby.
Add Storage Underneath
For patios and decks, consider building a storage shelf beneath the seat. It can hold garden shoes, outdoor cushions, small planters, or firewood. Keep storage open enough for airflow so moisture does not collect.
Use Contrasting Colors
Try a natural wood seat with black-painted legs for a modern farmhouse look. A white bench with cedar accents feels coastal. A deep green or charcoal finish blends beautifully into garden spaces. The bench is simple, but color can make it feel designed instead of merely assembled.
Common Mistakes to Avoid
The biggest mistake is underbuilding the frame. Extra length needs extra support. If you stretch boards too far without middle legs or cross braces, the bench may sag. Another common mistake is using indoor screws outdoors. Regular screws can rust, stain the wood, or fail over time. Always use exterior-rated fasteners.
Do not forget drainage gaps between seat boards. Outdoor furniture should shed water, not hold it. Also avoid sealing only the visible surfaces. Coat the underside, ends, legs, and cut edges too. End grain absorbs moisture quickly, so it needs special attention.
Maintenance Tips for a Long-Lasting Outdoor Bench
Clean the bench a few times a year with mild soap and water. Remove leaves, pollen, dirt, and bird-related insults as soon as possible. Check screws annually and tighten any that loosen. Inspect the finish every spring. If water no longer beads on the surface or the color looks faded, it may be time to clean and recoat.
During harsh winters or long rainy seasons, cover the bench or move it to a protected area if possible. Even durable outdoor wood benefits from a little shelter. Think of maintenance as a small thank-you note to the bench for holding everyone up without complaint.
Cost Estimate: Is a DIY Bench Cheaper?
A DIY extra long outdoor wood bench can be very cost-effective, especially if you use pressure-treated lumber. Depending on wood type, length, fasteners, and finish, a simple 8-foot bench may cost far less than a comparable custom-size outdoor bench from a retailer. Cedar raises the price but also improves appearance and natural durability.
The real value is customization. You get the exact length, height, finish, and style you want. You also get the satisfaction of pointing at it during every backyard gathering and saying, “I built that,” which is technically free but emotionally priceless.
Safety Notes Before You Start
Wear eye and ear protection when cutting wood. Clamp boards securely before cutting or drilling. Use a dust mask when sanding, especially with treated lumber. Follow all tool manuals and work on a stable surface. If you are new to power tools, practice on scrap wood first.
If using pressure-treated lumber, check the product guidance before sanding or finishing. Let wet treated boards dry before staining. Dispose of scraps properly and avoid burning treated wood. Safety may not be glamorous, but neither is explaining to urgent care that you were “just making a bench.”
Extra Experience Section: Lessons Learned from Building a DIY Extra Long Outdoor Wood Bench
After building or helping with several outdoor bench projects, one lesson becomes obvious: long benches reveal tiny mistakes loudly. On a short bench, a slightly crooked board may hide. On an 8-foot or 10-foot bench, that same crooked board waves at you from across the yard. The best habit is to measure twice, dry-fit everything, and step back before fastening. Looking from a distance helps you catch alignment issues that are hard to see when your face is six inches from the lumber.
Another useful experience is to build the bench near its final location if possible. An extra long wood bench can become surprisingly heavy, especially with 4×4 legs and thick seat boards. It may look innocent in the driveway, but once assembled, it develops the personality of a small wooden boat. If you must move it, recruit help before you finish the project. Dragging it alone can rack the frame or scratch the finish.
Comfort also matters more than many first-time builders expect. A bench can be structurally perfect and still feel awkward if the seat is too high, too narrow, or too sharp at the front edge. Before final sanding and finishing, sit on the unfinished bench for a few minutes. Try it with shoes on, without shoes, leaning forward, and sitting back. If the front edge presses into your legs, round it more. If the bench feels too deep, adjust the seat board layout. A five-minute comfort test can prevent years of “nice bench, but why does it attack my knees?”
Finishing is another area where patience pays off. Rushing stain or paint usually leads to sticky spots, uneven color, or early peeling. Outdoor wood should be dry, clean, and sanded before finishing. Apply thin, even coats and let each coat cure properly. It is tempting to finish the bench quickly because the project already looks done, but the finish is what helps it survive real weather. Think of it as sunscreen for lumber.
One practical trick is to finish the bottom of the legs extra carefully. The leg ends are closest to moisture, dirt, and splashback from rain. Brush stain, sealer, or paint onto the end grain until it stops soaking in quickly. If the bench will sit on concrete, add rubber feet or small spacers to keep the wood from absorbing water. If it will sit in a garden, place pavers under the legs. This small detail can add years to the bench’s life.
Finally, do not chase perfection so aggressively that the project stops being fun. Outdoor furniture is meant to live outside. It will collect dust, leaves, scratches, and memories. A small knot, a visible screw, or a slightly imperfect brush mark will not ruin the bench. In fact, handmade details often make DIY outdoor furniture feel warmer and more personal. Build it strong, finish it well, and let it become part of the yard. The best bench is not the one that looks untouched forever; it is the one people actually use.
Conclusion
A DIY extra long outdoor wood bench is one of those projects that delivers more than seating. It adds structure to your patio, comfort to your garden, and a handcrafted focal point to your outdoor living space. With durable wood, proper support, exterior-rated hardware, and a weather-resistant finish, you can build a bench that looks good and works hard season after season.
The project is flexible enough for beginners but satisfying enough for experienced DIYers. Start with a simple 8-foot design, add center supports, sand generously, finish patiently, and place it where people naturally gather. Before long, your new bench will become the unofficial headquarters for morning coffee, sunset chats, muddy gardening breaks, and every guest who says, “Wow, where did you buy this?” That is your cue to smile modestly and pretend you were not covered in sawdust two days ago.
Note: This article is written for web publishing and synthesizes practical guidance from reputable U.S. home improvement, woodworking, outdoor furniture, and lumber resources. Always follow local building guidance, product labels, and tool safety instructions for your specific materials and location.