
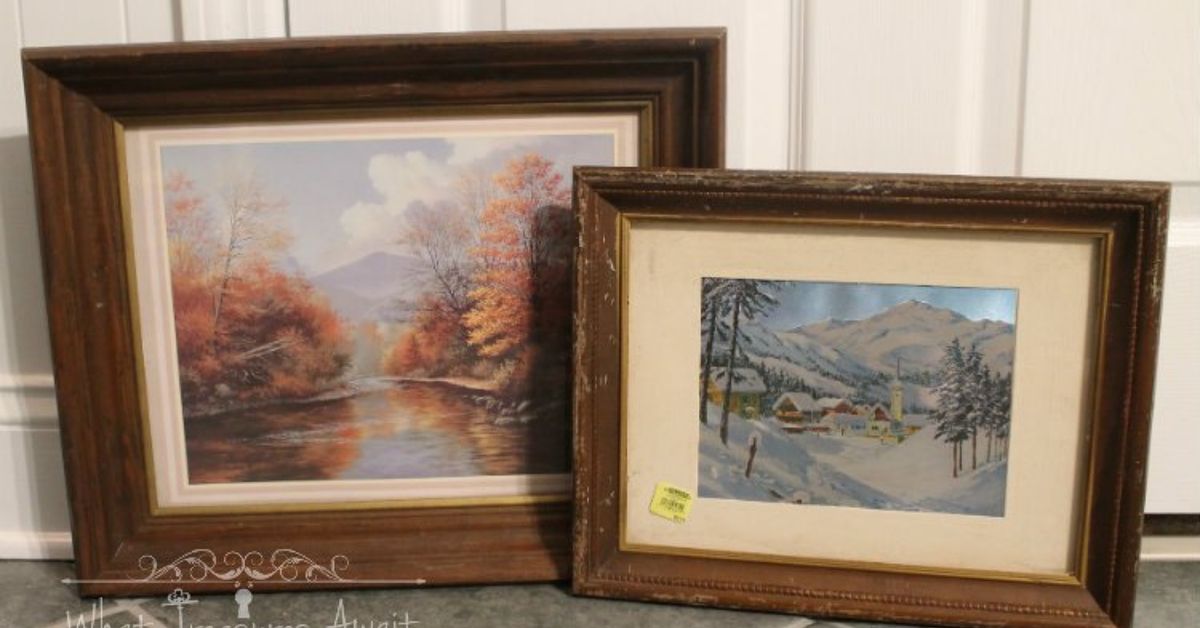
A DIY tiered tray from frames is one of those craft projects that looks suspiciously expensive when finished, even though it can start with thrift-store picture frames, scrap wood, candle holders, drawer knobs, and a little paint. In other words, it is the home-decor equivalent of showing up to brunch in a designer-looking outfit you secretly bought on clearance. No one has to know. We support mystery.
Tiered trays are popular because they solve a very real decorating problem: small items look adorable in theory, but scattered across a counter, they can quickly turn into “why is there a tiny pumpkin next to my coffee filters?” A tiered tray gathers those pieces into a styled display. It adds height, creates zones, and makes seasonal decorating easier without requiring you to redecorate an entire room every time fall, spring, Halloween, or “I suddenly love lemons” season arrives.
This guide shows you how to turn picture frames into a two-tier or three-tier tray that works beautifully for farmhouse decor, coffee bar styling, bathroom organization, holiday vignettes, craft-room storage, or a cute centerpiece. The project is beginner-friendly, budget-conscious, and highly customizable. Whether your style is rustic farmhouse, cottagecore, vintage glam, modern neutral, or “I found these frames in a drawer and now they are my personality,” this DIY can be adapted to fit your home.
What Is a DIY Tiered Tray From Frames?
A DIY tiered tray from frames is a decorative stand made by converting picture frames into shallow tray platforms, then stacking them vertically with center supports. Instead of using traditional plates or wooden rounds, you use frames as the base of each level. The frame edges naturally create raised borders, which help small decor pieces stay in place. The glass or backing can be replaced with wood, cardboard, foam board, patterned paper, fabric, tile, or a painted insert.
The result is a tiered display tray with personality. Picture frames bring detail that plain boards often lack. Ornate frames look vintage and romantic. Simple square frames feel clean and modern. Chunky wooden frames create a farmhouse look. Gold frames can lean elegant, while distressed white frames say, “Yes, I own a candle that smells like linen and good decisions.”
Most DIY tiered tray projects use two or three levels. A two-tier tray is easier to balance and works well on kitchen counters, bathroom vanities, entryway tables, and desks. A three-tier tray offers more vertical drama, but it needs careful alignment and sturdy materials. For a first project, a two-tier version is usually the sweet spot: attractive, practical, and less likely to wobble like a baby giraffe in a wind tunnel.
Why Use Picture Frames Instead of Regular Trays?
Picture frames are affordable, easy to find, and available in endless styles. You can buy them from thrift stores, dollar stores, craft stores, yard sales, or your own closet. Using frames also makes the tray feel more custom because the edges already have shape, texture, and visual interest.
Another benefit is flexibility. Frames come in square, rectangular, oval, and ornate styles. You can build a tray that matches your space instead of settling for the same mass-produced stand everyone else has. A rectangular frame tiered tray is excellent for narrow counters or coffee stations. Square frames create a balanced farmhouse look. Round or oval frames can feel softer and more romantic if you can find them in graduated sizes.
Frames also make upcycling easy. That old frame with a scratched finish or outdated color may not be right for a family photo anymore, but it can become a charming tray level with paint, decorative paper, and a little patience. It is a satisfying way to reuse materials instead of tossing them. Your junk drawer finally gets a redemption arc.
Best Frame Sizes for a Tiered Tray
The most important rule is simple: each tier should be smaller than the one below it. This creates stability and gives the tray a classic stacked shape. For a two-tier tray, a good size combination is an 8-by-10-inch frame on the bottom and a 5-by-7-inch frame on top. For a three-tier tray, try 11-by-14 inches, 8-by-10 inches, and 5-by-7 inches.
If you prefer a compact tray, use 5-by-7 inches on the bottom and 4-by-6 inches on top. This works well for small bathrooms, desks, nightstands, or coffee bars with limited space. For a wide centerpiece, use larger frames, but remember that bigger frames need stronger supports and a more secure base.
Recommended Frame Combinations
- Small tray: 5-by-7-inch bottom frame and 4-by-6-inch top frame
- Medium tray: 8-by-10-inch bottom frame and 5-by-7-inch top frame
- Large tray: 11-by-14-inch bottom frame and 8-by-10-inch top frame
- Three-tier tray: 11-by-14-inch, 8-by-10-inch, and 5-by-7-inch frames
Choose frames with enough edge width to support the insert and hold glue or small fasteners. Very thin plastic frames may work for lightweight decor, but wood frames are usually stronger and easier to paint, sand, and attach securely.
Materials You Will Need
You do not need a professional workshop to make a DIY tiered tray from frames. Most supplies are easy to find and inexpensive. The exact materials depend on your design, but the following list covers the basics.
Basic Supplies
- Two or three picture frames in graduated sizes
- Wood, foam board, cardboard, or hardboard inserts for each frame
- One or two center supports, such as candlesticks, wooden spindles, small vases, or sturdy finials
- Strong craft adhesive or wood glue
- Paint, stain, or spray paint
- Sandpaper or sanding block
- Decorative paper, fabric, peel-and-stick wallpaper, or scrapbook paper
- Optional drawer knob, small finial, or decorative handle for the top
- Optional felt pads for the bottom
- Ruler or measuring tape
- Pencil
- Clamps or heavy books for holding glued pieces while drying
If you plan to use your tray around food, do not place unwrapped food directly on painted, glued, or decorative-paper surfaces unless you add a food-safe liner, plate, napkin, parchment sheet, or removable dish. This tray is best treated as decorative unless you intentionally build it with food-safe materials.
Step-by-Step: How to Make a DIY Tiered Tray From Frames
Step 1: Choose and Clean Your Frames
Start with frames that feel sturdy. Remove the glass, backing, hanging hardware, tabs, and any loose paper. Wipe the frames with a damp cloth to remove dust, sticker residue, and mysterious thrift-store glitter. If the frames are greasy or glossy, clean them thoroughly so paint and glue can stick.
Check the corners. If a frame is loose, add a little wood glue to the joint and clamp it until dry. A tiered tray depends on stable tiers, so do not ignore wobbly frames. Wobbly frame today, dramatic decor collapse tomorrow.
Step 2: Replace the Frame Insert
Many picture frames come with glass, but glass is not always the best tray surface. It can be slippery, fragile, and difficult to attach securely. For a decorative tray, a thin wood panel, hardboard, foam board, or sturdy cardboard insert is often easier to use.
Trace the original glass or backing onto your insert material, then cut it to size. Place the insert into the frame and make sure it sits flat. If the frame tabs are strong enough, they may hold the insert in place. For more durability, use small finishing nails, brads, glue, or a bead of adhesive around the back edge.
For a polished look, cover the insert with peel-and-stick wallpaper, fabric, contact paper, scrapbook paper, or paint. A faux marble insert gives a modern touch. Buffalo check paper feels farmhouse. Floral fabric adds cottage charm. A stained wood insert creates a rustic, handmade look.
Step 3: Paint or Stain the Frames
Paint can completely change the personality of the tray. White chalk-style paint creates a classic farmhouse finish. Matte black looks bold and modern. Soft sage green feels fresh and cozy. Natural stain highlights wood grain. Antique gold or champagne paint can make inexpensive frames look surprisingly elegant.
Lightly sand glossy frames before painting. Apply thin coats rather than one thick coat. Thick paint loves to collect in frame details and dry with lumpy texture, which is not the luxurious finish we are going for. Let each coat dry fully before adding the next.
If you want a distressed look, paint the frame, let it dry, then lightly sand raised edges and corners. This gives the piece an aged, lived-in appearance. A dry-brush technique also works well: dip the brush lightly in paint, wipe most of it off, then sweep it over the edges to highlight texture.
Step 4: Find the Center of Each Frame
Centering is the difference between “handmade charm” and “why is my tray leaning like it heard bad news?” Use a ruler to mark the center of each frame insert. Measure both length and width, then mark where the lines meet.
Do this for every tier. When stacking, the center support should align with these marks. If your tray is rectangular, center placement is especially important because uneven weight can make the tray look crooked. For large rectangular frames, you may also use two supports instead of one for extra stability, especially if the tray will hold heavier decor.
Step 5: Attach the Bottom Support
Choose a center support that looks proportional. Wooden candlesticks, short table legs, sturdy spindles, small ceramic candle holders, or chunky wooden beads can all work. The support should be wide enough to hold the upper tier securely.
Apply strong adhesive to the bottom of the support and press it onto the center mark of the lower frame. Make sure it is straight. Use a level if you have one, or step back and view it from several angles. Let the glue set according to the product instructions. Rushing this step is how trays develop a personality known as “tilt.”
Step 6: Add the Top Tier
Apply adhesive to the top of the support, then place the smaller frame on top, lining up its center mark. Press gently but firmly. Do not slide it around too much, or the glue may smear and weaken the bond. Place a book or light weight on top if needed, but avoid crushing delicate frames.
Let the tray dry completely. Many adhesives feel stable quickly but need more time to fully cure. This matters because tiered trays are vertical projects; weak glue joints can fail when weight is added.
Step 7: Add a Top Handle or Finial
A small drawer knob, cabinet pull, wooden finial, or decorative bead can make the tray look finished. Attach it to the center of the top tier. If your frame insert is thin, glue may be enough for a decorative knob. If the knob has a screw, you can drill a small hole and attach it more securely.
The top handle is mostly decorative. Do not use it to carry a fully loaded tray unless you have built the structure with screws, washers, and reinforced supports. It may look like a handle, but unless properly engineered, it is basically a tiny crown.
Step 8: Finish the Bottom
Add felt pads to the bottom corners to protect countertops and tabletops. This small step makes the project feel more professional and prevents scratches. You can also cover the underside with fabric, kraft paper, or felt if you want a cleaner finish.
Once everything is dry, place the tray on a flat surface and test it gently. Add lightweight items first. If it wobbles, check whether the frame, support, or surface is uneven. Small felt pads can help correct slight imbalance.
Design Ideas for Your DIY Tiered Tray
Farmhouse Tiered Tray
Use white or cream paint, a lightly distressed finish, wood inserts, and a simple spindle support. Style it with mini signs, faux greenery, ceramic pitchers, wooden beads, tiny cutting boards, and neutral mugs. This version works beautifully on a kitchen island or coffee bar.
Vintage Cottage Tray
Choose ornate frames, soft pastel paint, floral paper, and an antique-style knob. Decorate with teacups, lace, faux flowers, small books, and vintage salt shakers. This look feels sweet without being too precious, as long as you do not add so many tiny objects that the tray begins to resemble a dollhouse estate sale.
Modern Minimal Tray
Paint the frames matte black, warm beige, or deep green. Use clean-lined supports and simple inserts such as faux marble, linen-textured paper, or stained wood. Style with candles, small planters, rolled towels, or minimal ceramic pieces.
Holiday Tiered Tray
One of the best things about a tiered tray is how easy it is to restyle. For fall, use mini pumpkins, acorns, cinnamon sticks, and amber glass. For Christmas, add bottle-brush trees, ornaments, bells, and tiny wrapped boxes. For spring, try faux tulips, moss, bunnies, and pastel eggs. For summer, use lemons, shells, greenery, or patriotic accents.
Where to Use a Tiered Tray Made From Frames
A DIY tiered tray from frames is not limited to the kitchen. In a bathroom, it can hold cotton rounds, small jars, perfume, hand towels, and a candle. On a desk, it can organize sticky notes, clips, washi tape, and small office supplies. In a craft room, it becomes a rotating display for ribbons, stamps, buttons, and paint bottles.
On an entryway table, it can hold keys, sunglasses, seasonal decor, and a small dish for coins. On a coffee bar, it can organize mugs, coffee pods, stir sticks, sugar packets, napkins, and tiny signs that remind everyone that caffeine is not a hobby; it is infrastructure.
Common Mistakes to Avoid
Using Frames That Are Too Weak
Lightweight plastic frames can work for small decorative trays, but they may flex under weight. Wood or resin frames usually provide better structure. If a frame bends easily in your hands, it is probably not the best choice for the bottom tier.
Skipping the Center Marks
Guessing the center may seem harmless, but even a small offset can make the tray look unbalanced. Always measure. Your future self, holding a cup of coffee and admiring a level tray, will be grateful.
Overloading the Tray
This project is meant for decor and light organization, not for storing cast-iron pans or a family-size watermelon. Keep heavier items on the lower tier and lighter pieces on top. Balance weight around the center support.
Not Allowing Glue to Cure
Dry to the touch does not always mean fully cured. Follow the adhesive label and give the structure enough time before styling. A little patience can prevent a lot of dramatic tumbling.
How to Style a Tiered Tray Like a Designer
Start with one larger anchor item on the bottom tier. This could be a mug, small plant, candle, jar, or mini pitcher. Then add medium pieces around it and finish with small accents. Vary height, texture, and shape. A good tray usually includes a mix of hard surfaces, soft greenery, something with text, and one or two seasonal touches.
Leave breathing room. A tray packed edge to edge can look cluttered, even if every individual item is cute. Think of styling like a conversation: not every tiny ceramic bunny needs to speak at once.
Use repetition to make the design feel intentional. Repeat a color, material, or shape across both tiers. For example, if you use black lettering on a mini sign, repeat black with a small handle, ribbon, or candle holder. If you use greenery on the top tier, add a small sprig on the bottom tier too.
Finally, rotate decor seasonally instead of rebuilding the whole tray. Keep the base neutral, then swap accents. A white frame tray with wood details can work for every season by changing the accessories.
Budget-Friendly Tips
Shop your home before buying anything. Old frames, leftover paint, unused drawer knobs, candle holders, fabric scraps, and wallpaper samples can all become part of the project. Thrift stores are excellent for frames and candlesticks, especially if you are willing to look beyond the current color. Paint is a powerful little wizard.
Dollar stores often carry frames, foam board, peel-and-stick paper, small wood pieces, and seasonal mini decor. Craft stores are useful for knobs, finials, scrapbook paper, chalk paint, and wood shapes. Hardware stores can provide small screws, felt pads, wood glue, and sample paint containers.
To make the project look more expensive, choose a limited color palette. Three colors are usually enough: one main color, one accent color, and one natural texture such as wood, greenery, metal, or fabric. Restraint is the secret ingredient in many high-end-looking DIY projects.
of Real-World Experience: What This Project Teaches You
The first thing you learn when making a DIY tiered tray from frames is that picture frames are not as innocent as they look. Some are perfectly square and cooperative. Others have warped corners, sneaky staples, flimsy backs, or glass that refuses to leave quietly. Before painting anything, lay the frames flat on a table and press gently on each corner. If the frame rocks, shifts, or twists, fix that problem first. A pretty finish will not rescue a weak structure.
Another useful lesson is that the insert matters more than people expect. At first, it is tempting to keep the original glass because it is already cut to size. Glass can look beautiful, but it is slippery and fragile. For everyday decorating, a wood or hardboard insert feels more reliable. It also accepts paint, paper, and fabric better. If you want the glass look, consider placing decorative paper beneath the glass and using the tray only for very light items. For anything practical, a solid insert is usually easier to live with.
Paint choice also changes the experience. Chalk-style paint is forgiving and gives that soft farmhouse look, but it may need sealing if the tray will be handled often. Spray paint is fast and smooth, but it requires careful, light coats and good ventilation. Regular craft paint works well for small projects, especially if you prime glossy frames first. The biggest mistake is painting too heavily. Thin coats look cleaner, dry better, and keep ornate frame details from turning into blobs.
Center supports deserve more attention than they usually get. A tall, narrow candlestick may look elegant, but a wider support creates better stability. If your top tier feels shaky, the problem is often not the frame; it is the support. Shorter supports feel sturdier, while taller supports create more room for decor but require better balance. For a beginner-friendly build, choose a chunky wooden candlestick or a small turned spindle with flat ends.
Styling the finished tray is its own mini adventure. The tray may look empty at first, then suddenly overcrowded after five minutes of adding cute things. The best method is to style in layers. Place the tallest item first, then add medium pieces, then fill small gaps with greenery, beads, tiny signs, or seasonal accents. Step back often. Photos help too, because a camera quickly reveals whether the tray looks balanced or chaotic.
The most satisfying part of this project is how personal it becomes. Two people can follow the same basic steps and end up with completely different trays. One tray may look like a cozy farmhouse coffee station; another may look like a romantic vintage vanity display. That is the charm of using frames. They bring built-in character, and every scratch, curve, and painted edge adds to the story.
In the end, a DIY tiered tray from frames is not just a cheap decor hack. It is a practical lesson in proportion, balance, texture, and creative reuse. It teaches you to see ordinary objects differently. A dusty frame is no longer just a frame. It is a future tray, a seasonal centerpiece, a coffee-bar organizer, or possibly the start of a dangerous new habit where every thrift-store aisle whispers, “You could totally make something with this.”
Conclusion
A DIY tiered tray from frames is affordable, stylish, and surprisingly versatile. With a few picture frames, sturdy inserts, center supports, paint, and creativity, you can build a custom tray that fits your kitchen, bathroom, desk, entryway, or seasonal display. The secret is choosing strong frames, measuring carefully, letting adhesive cure fully, and styling with balance instead of clutter.
This project is perfect for anyone who loves budget-friendly home decor, farmhouse crafts, thrift-store makeovers, or creative upcycling. It gives old frames a new purpose and turns small decor pieces into a display that feels intentional. Best of all, it proves that you do not need a huge budget to make something charming. Sometimes all you need is a frame, a candlestick, a little paint, and the confidence to tell your family, “Yes, this is decor now.”












