
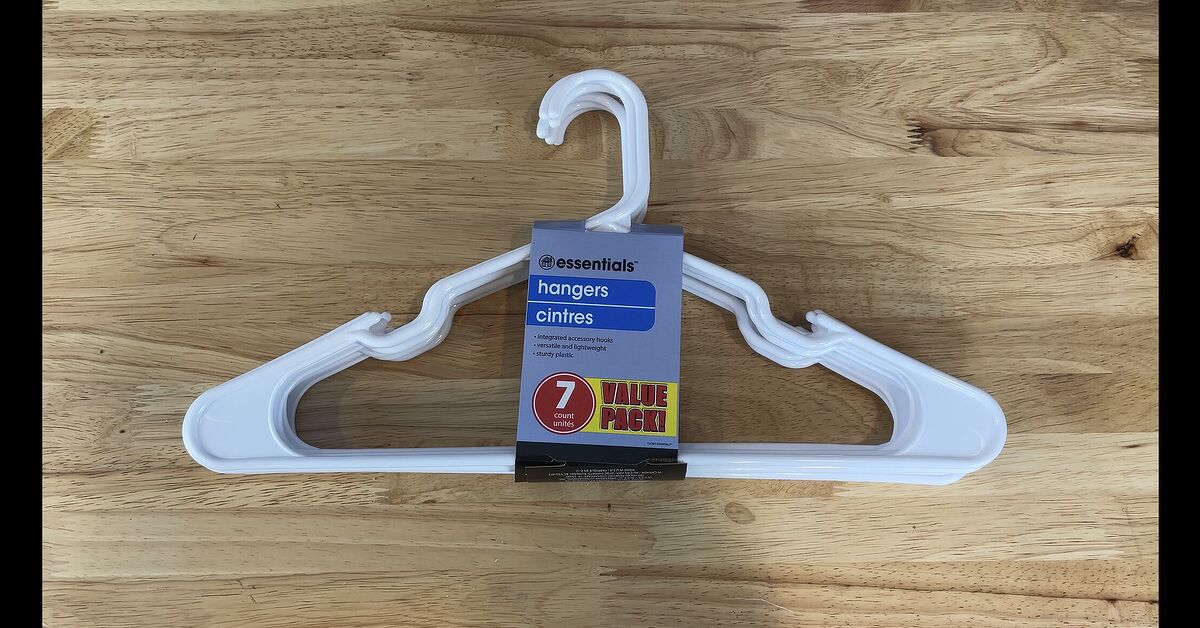
Some Christmas decorations require specialized tools, expensive supplies, and the patience of an elf aem. An easy dollar store hanger Christmas snowflake transforms ordinary plastic clothes hangers into an oversized holiday decoration that looks surprisingly impressive on a porch, wall, fence, garage door, or large window.
The basic project uses 16 matching plastic hangers and a handful of zip ties. Arrange the hangers in two overlapping layers, fasten the connection points, and suddenly your laundry supplies have become winter décor. It is inexpensive, beginner-friendly, customizable, and large enough to be noticed from the street. Dollar stores commonly carry affordable seasonal decorations and basic household supplies, making this an accessible alternative to buying a finished oversized ornament. a Plastic Hanger Snowflake Works So Well
A clothes hanger already has the angular lines needed to suggest one arm of a snowflake. When several identical hangers are arranged around a center point, their triangular bodies create repeating geometric patterns. The hooks add decorative curls around the outer edge or near the center, depending on which direction you face them.
Established hanger snowflake tutorials generally use 16 plastic hangers arranged as eight matching pairs. One eight-hanger layer forms the first set of points, while a second layer is rotated to fill the spaces between them. Keeping every hook pointed in the same direction is important because mixed orientations can make the design look uneven. finished decoration is also highly adaptable. It can remain plain white for a crisp winter look, or it can be dressed with ribbon, ornaments, greenery, garland, bells, battery-powered lights, or a dramatic bow. DIY holiday decorating guides regularly encourage repurposing simple materials and personalizing projects instead of relying entirely on ready-made décor. plies for an Easy Dollar Store Hanger Christmas Snowflake
- 16 matching plastic clothes hangers
- 20 to 30 small or medium zip ties
- Scissors, diagonal cutters, or flush cutters
- A flat work surface
- Ribbon, twine, or wire for hanging
- Optional battery-operated LED lights
- Optional ornaments, bows, greenery, bells, or garland
- Optional outdoor-rated hook or wreath hanger
Choosing the Best Hangers
Matching hangers produce the cleanest snowflake. Even small differences in width, hook shape, or shoulder angle can disturb the symmetry. White hangers naturally resemble snow, but clear, blue, silver, red, green, or black hangers can create equally attractive designs.
Standard adult-size hangers make a bold statement piece. Child-size plastic hangers produce a smaller version that may be easier to display on an interior door or narrow wall. One well-known version of the project specifically recommends child-size hangers for a compact snowflake. osing Zip Ties
Use ties that blend with the hanger color whenever possible. White ties nearly disappear against white plastic, while clear ties work with almost any palette. Do not begin by pulling every tie as tight as humanly possible. Loose connections allow you to adjust spacing before the snowflake becomes permanently committed to a lopsided career.
How to Make a Hanger Christmas Snowflake
Step 1: Prepare a Large, Flat Workspace
Build the snowflake on the floor, a large table, or a clean driveway. You need enough room to view the entire design from above. Remove labels and stickers from the hangers, then place all 16 side by side to confirm that they match.
Separate the hangers into eight pairs. Each pair will become one repeated section of the snowflake.
Step 2: Arrange the First Hanger Pair
Place two hangers together so their long bottom bars touch or sit parallel. Align their hooks in the same direction. Depending on the hanger style, the hooks can face inward toward the snowflake’s center or outward around the perimeter. Both layouts work, but consistency is essential.
Loop a zip tie around the two hangers near the hook area and another around the lower bars where they meet. Fasten the ties loosely. Repeat until you have four identical double-hanger sections for the first layer.
Step 3: Form the First Layer
Arrange the four paired sections in a circle. The narrow hook ends should point toward or away from the middle according to your chosen layout. Space the pairs evenly at approximately 90-degree intervals.
Connect neighboring sections with zip ties at the points where their plastic bars touch. Keep the ties slightly loose. Step back, look at the overall shape, and adjust the pairs until the four main points are balanced.
Step 4: Build the Second Layer
Make four more double-hanger sections with the remaining eight hangers. Lay this second group over the first layer, rotating it so its points sit between the existing points. This offset placement creates the full eight-point snowflake pattern described in common plastic hanger snowflake tutorials. re the second layer to itself first. Then add zip ties wherever the upper and lower layers cross. Start near the center and work outward so the structure stays aligned.
Step 5: Check the Symmetry
Before tightening anything completely, stand directly above the snowflake. Compare the distance between each point. Confirm that all hanger hooks follow the same direction and that the center opening looks reasonably even.
Rotate or slide individual sections as needed. A perfectly mathematical snowflake is not required, but obvious gaps are much easier to fix now than after every connection has been cinched tight.
Step 6: Tighten and Trim
Once the arrangement looks balanced, tighten each zip tie gradually. Alternate between opposite sides instead of tightening one entire section at once. This reduces the chance of pulling the design out of alignment.
Trim the excess zip-tie tails with cutters or sturdy scissors. Cut close to the locking head, but avoid leaving sharp plastic edges. Turn the locking heads toward the back of the decoration for a cleaner front view.
Decorating Your Dollar Store Hanger Snowflake
Keep It Simple and Snowy
A plain white hanger snowflake has a clean, graphic appearance that works with modern, farmhouse, Scandinavian, and traditional holiday décor. Add a white satin bow, silver ribbon, or a small cluster of snowflake ornaments at the center if the design needs one finishing detail.
Create an Icy Blue-and-Silver Theme
Wrap selected sections with blue ribbon or silver garland, then attach lightweight ornaments near the center. Blue and silver are frequently used together to create an icy, elegant holiday palette. Michaels, for example, features the combination in an easy holiday wreath project using ornaments and foil garland ribbon. Traditional Christmas Color
Attach a red velvet bow at the top, thread faux evergreen sprigs through the center, or add red berry picks around several points. Holiday design collections often combine wreath forms with ribbon, pinecones, berries, greenery, and ornaments to turn simple foundations into personalized displays. e a Lighted Hanger Snowflake
Wrap a short strand of battery-operated LED fairy lights around the hanger framework. Small zip ties or clear decorating clips can hold the wire in place. One hanger snowflake tutorial highlights a maker who connected two snowflakes and wrapped lights around the finished structure. ery-powered lights are often the simplest option because there is no visible extension cord. For plug-in lighting, use only products marked for the intended indoor or outdoor location. Inspect wires and sockets for damage before installation. Outdoor electrical decorations should use GFCI-protected outlets, and lights should be turned off before leaving home or going to sleep. lights are a practical choice because they generally use less energy and operate cooler than traditional incandescent holiday lights. to Hang the Finished Snowflake
Before selecting a hook, estimate the total weight of the completed decoration, including lights and ornaments. Choose a hanging product rated above that weight and suitable for the mounting surface.
For a front door, use an over-the-door wreath hanger, a properly rated outdoor adhesive hook, or a strong ribbon secured over the top of the door. For a window, consider a rated suction hook or outdoor adhesive hook applied according to the manufacturer’s instructions. For fences and railings, coated wire or reusable outdoor ties may be appropriate.
Outdoor hooks and light clips should be chosen for weather resistance, surface compatibility, and load capacity. Lowe’s recommends considering decoration weight, indoor or outdoor use, and the intended mounting surface. Command outdoor clips are designed for smooth, sealed exterior surfaces and are made to resist water, ultraviolet exposure, and seasonal weather. d improvising with nails around electrical wires. Purpose-made plastic light clips and removable hanging systems can secure decorations without unnecessary holes or surface damage. mon Problems and Easy Fixes
The Snowflake Looks Crooked
Loosen the ties closest to the uneven area and rotate the hanger pair slightly. Measure from the center to each outer point if visual adjustment is not enough. Tighten connections in opposite pairs to preserve balance.
The Hangers Keep Sliding
Add a second zip tie at major intersections. Two ties placed at slightly different angles are often more stable than one extremely tight tie. A tiny hidden dot of adhesive can help indoor decorations, but mechanical connections are generally easier to adjust and repair.
The Zip Ties Are Too Visible
Turn the locking heads toward the back, use matching ties, or cover prominent joints with narrow ribbon. Small ornaments can also conceal the center connections without overwhelming the design.
The Snowflake Moves in the Wind
Add a second anchor point at the bottom or side. Clear line, ribbon, or coated wire can reduce swinging. Outdoor wreath-hanging guidance also recommends selecting a sheltered position and using extra wire or ribbon when wind exposure is a concern. ative Variations
- Double snowflake: Connect two finished snowflakes back to back for greater depth.
- Mini version: Use child-size hangers for doors, apartments, classrooms, or small windows.
- Giant wall display: Hang three snowflakes at different heights to create a winter feature wall.
- Candy-cane design: Alternate red and white hangers or wrap sections with striped ribbon.
- Rustic snowflake: Add burlap, pinecones, jute, and faux cedar sprigs.
- Glam snowflake: Use metallic ornaments, mirrored accents, glitter ribbon, and cool-white lights.
- Kid-friendly version: Let children choose lightweight bows and plastic ornaments after an adult assembles and trims the structure.
Storage and Reuse
Remove fragile ornaments and batteries before storage. Hang the snowflake from a garage wall hook or place it flat in a large plastic storage bag. Avoid stacking heavy boxes on top of it because plastic hangers can bend under prolonged pressure.
Label the bag with the hanging hardware and decorative accessories used for the project. Next Christmas, the entire display can return without a household investigation into where the correct hook disappeared.
What Making a Hanger Snowflake Is Really Like
In practice, the most satisfying part of this project is the moment when a random pile of clothes hangers begins to resemble an intentional snowflake. During the first few minutes, the arrangement may look less like Christmas décor and more like a closet experiencing a minor emergency. Once the first four pairs are connected, however, the repeating geometry becomes obvious.
The biggest lesson reported across hanger snowflake projects is that loose assembly is better than immediate commitment. It is tempting to tighten the first zip tie with heroic enthusiasm, but doing so can lock the hangers into an awkward angle. Makers generally get a cleaner result by fastening every major intersection loosely, adjusting the complete shape, and tightening only after viewing it from several feet away.
A large floor is also more useful than a small craft table. Standard hangers create a surprisingly wide decoration, and working in a cramped area makes it difficult to compare opposite points. Building on a clean floor allows the maker to walk around the snowflake and see whether one section is drifting out of position. Taking a quick overhead photograph can be even more revealing. Uneven spacing that hides from the eye often becomes obvious in a photo.
Another practical discovery is that hanger shape matters more than hanger price. Inexpensive hangers perform perfectly well when all 16 come from the same package or product line. Problems usually appear when several hanger styles are mixed. One may have broader shoulders, another may have a deeper hook, and a third may be slightly shorter. Individually, those differences seem trivial. Repeated around an eight-point design, they become surprisingly visible.
Decoration restraint usually produces a better result. The hanger framework already creates a detailed pattern, so covering every inch with ornaments can make the snowflake look crowded. A bow, a central ornament cluster, or one evenly wrapped strand of lights is often enough. The open spaces are part of the design and help the snowflake remain recognizable from a distance.
Lighting changes the character of the project dramatically. During the day, the snowflake reads as a clever geometric craft. At night, evenly spaced LEDs transform it into a much more polished outdoor display. The easiest wrapping method is to begin near the battery box or plug, follow the inner framework, and then move around the outer points. Temporarily securing the wire before adding permanent ties prevents one side from receiving half the lights while the final point sits in darkness like it missed the decorating meeting.
Outdoor display introduces one additional challenge: movement. A lightweight hanger snowflake can rotate or knock against a door during strong wind. A discreet lower tie solves much of the problem. Positioning the decoration beneath a covered porch also protects ribbons and added ornaments from rain and snow.
The project is especially enjoyable as a group activity because the work can be divided easily. One person can arrange hanger pairs, another can add loose ties, and someone else can check symmetry. Children can select lightweight embellishments while adults handle cutters, tight zip ties, ladders, and electrical connections.
Most importantly, the finished snowflake rarely looks like it came from such ordinary materials. That transformation is the appeal. It is inexpensive without appearing apologetically cheap, simple without being boring, and large enough to deliver real visual impact. It also provides the deeply satisfying experience of turning something associated with laundry into something associated with holiday compliments.
Conclusion
An easy dollar store hanger Christmas snowflake proves that memorable holiday décor does not need a memorable price tag. With 16 matching plastic hangers, a few zip ties, and careful attention to symmetry, you can build an oversized snowflake suitable for an indoor wall, front door, window, porch, fence, or yard display.
Start with a plain version, then personalize it with ribbon, greenery, ornaments, or LED lights. Keep electrical products appropriate for their location, use properly rated hanging hardware, and secure outdoor displays against wind. The result is a reusable Christmas decoration that is inexpensive, cheerful, and just unusual enough to make visitors ask, “Waitare those clothes hangers?”














